You can create a new Heat Press price matrix from the Price Lists page.
In this article are will be taking you through the process of creating a Heat Press price matrix and how to Assign it to an Imprint.
Create A Heat Press Price Matrix
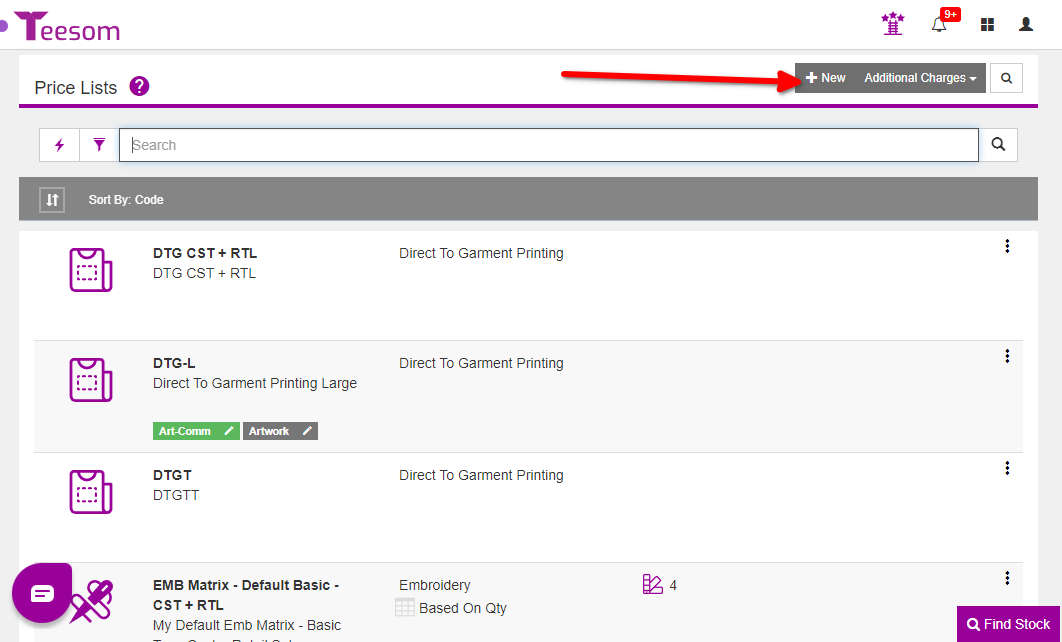
On the Price Lists screen click on “+New”
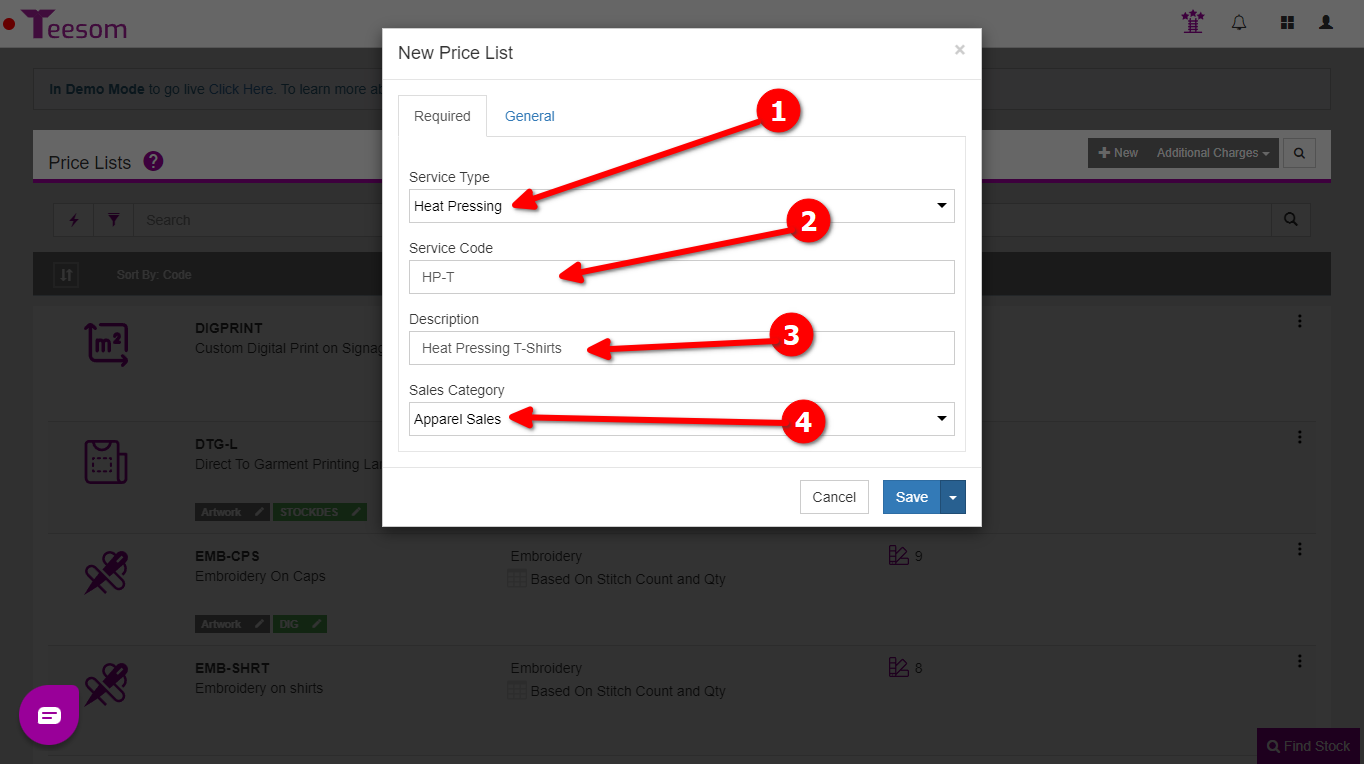
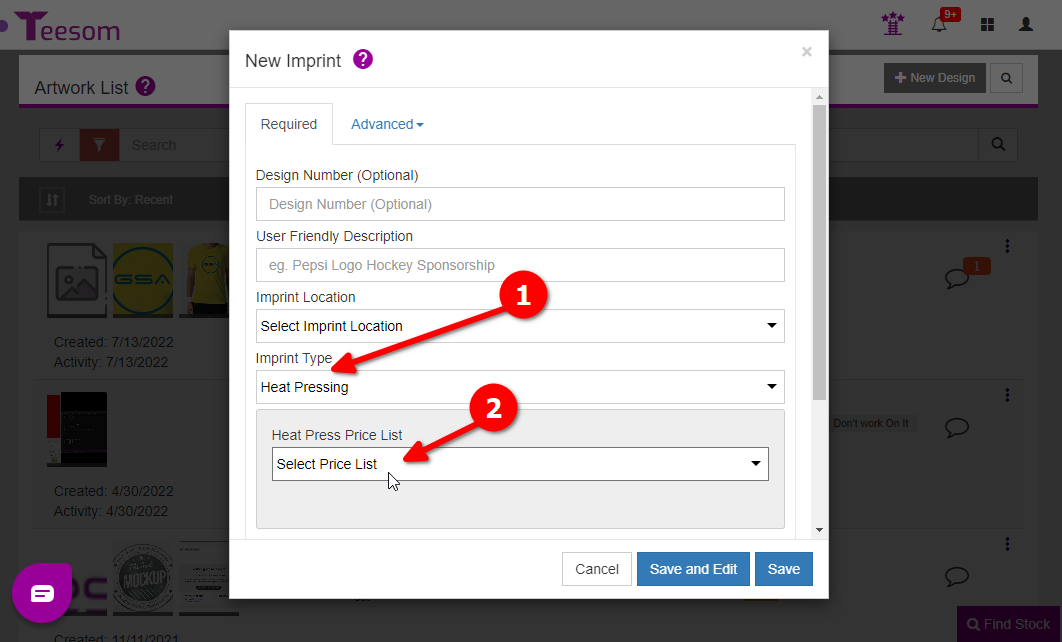
On the “New Price List” screen under the ‘Required‘ tab:
Set the Service Type as Heat Press.
Enter a Service Code, ex: HP-T
Enter a description of the imprint price matrix, ex: Heat Press T-shirts
Select a Sales Category.
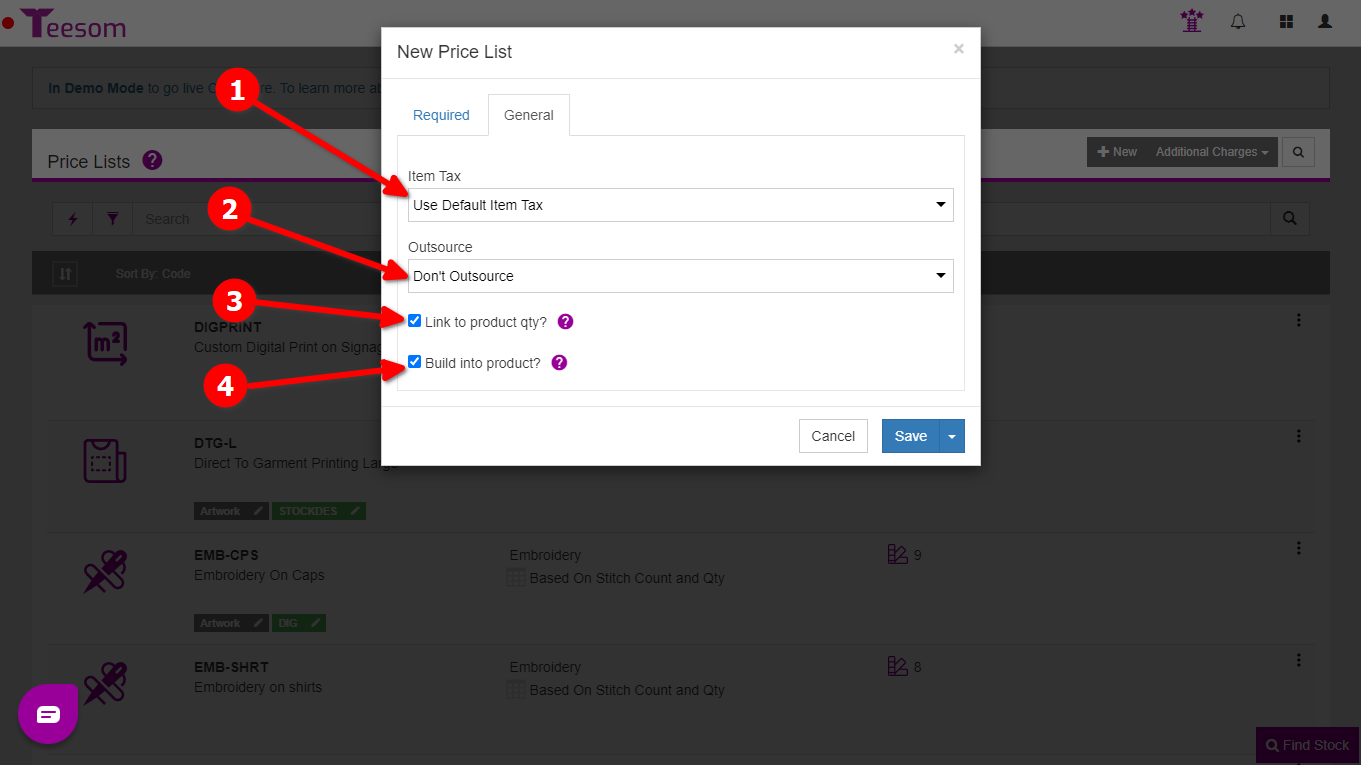
Click on the ‘General‘ tab to:
Set the item tax to use.
Choose whether or not the service is outsourced.
Set the imprint quantity to link to the product quantity in an order by default.
Set the imprint price to be ‘Built into’ the product it is being printed on by default.
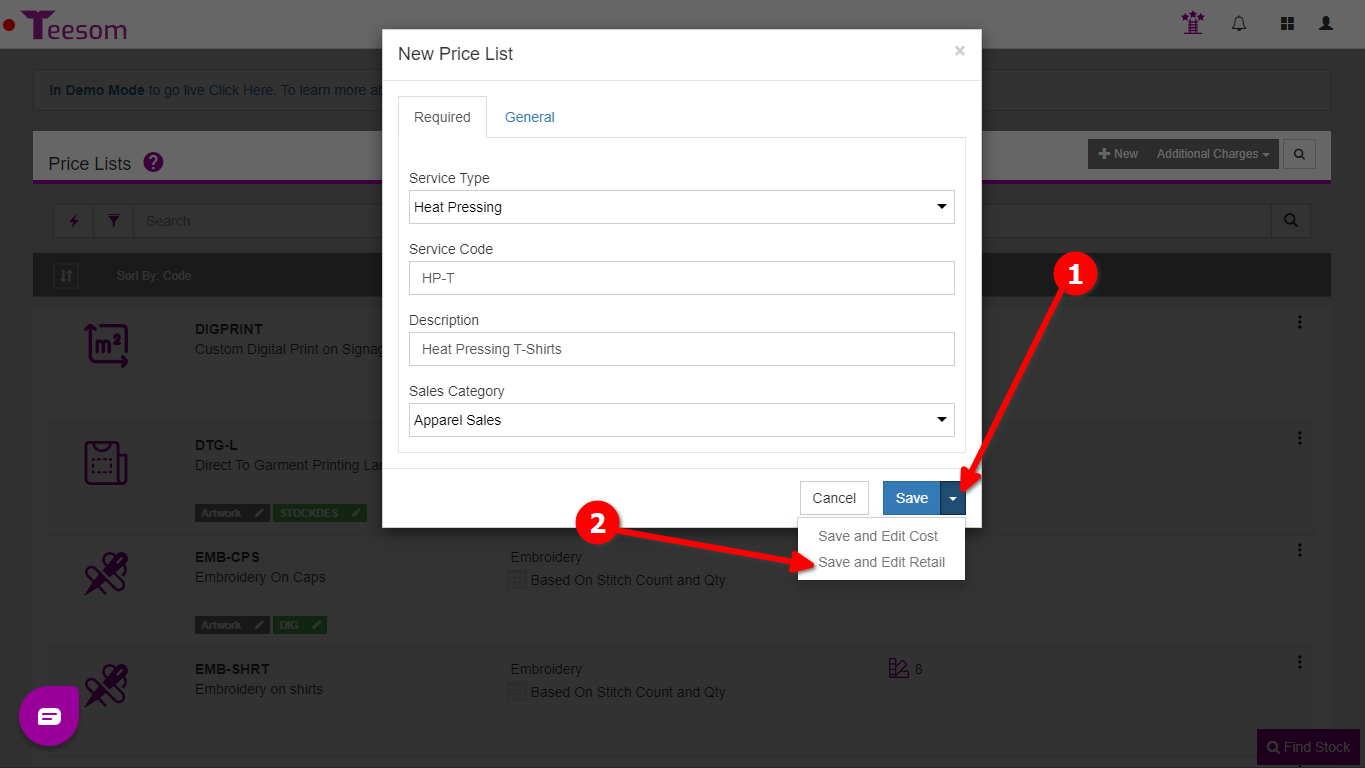
When you are done click the dropdown arrow next to ‘Save‘ and select ‘Save and Edit Retail‘ to go straight to the retail price matrix setup:
Create/Edit The Retail Price Matrix
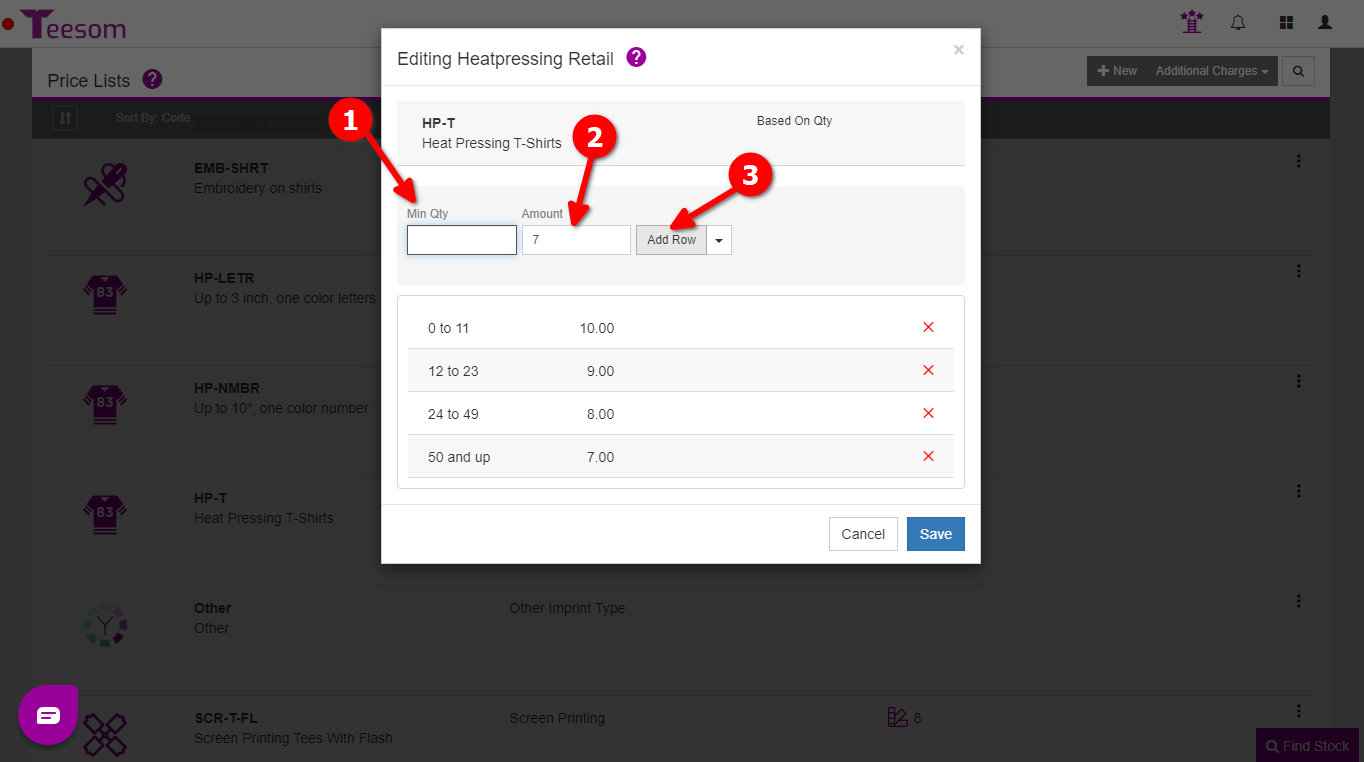
The Heat Press Price matrix uses a quantity break system. We will show you how to create it and explain how it works:
Enter the Min Qty – (The starting row of the Price Matrix should be 0.)
Enter the Amount / Retail value.
Click “Add Row”.
Repeat until you have all the quantity breaks you want.
Click “Save” when you are done.
You can remove Rows by clicking on the red "X".
To edit the Amount of a Row click on the "Amount" on the Row and it will bring up an Input Field where you can then change it.
Using the price matrix in the image above as an example: An order with 11 or fewer products will receive a cost of $10 per imprint. An order with at least 12 products, but fewer than 24 products, will have a cost of $9 per imprint. An order with at least 24 products, but fewer than 50, will have a cost of $8 per imprint. Any order with 50 or more products will have a cost of $7 per imprint.
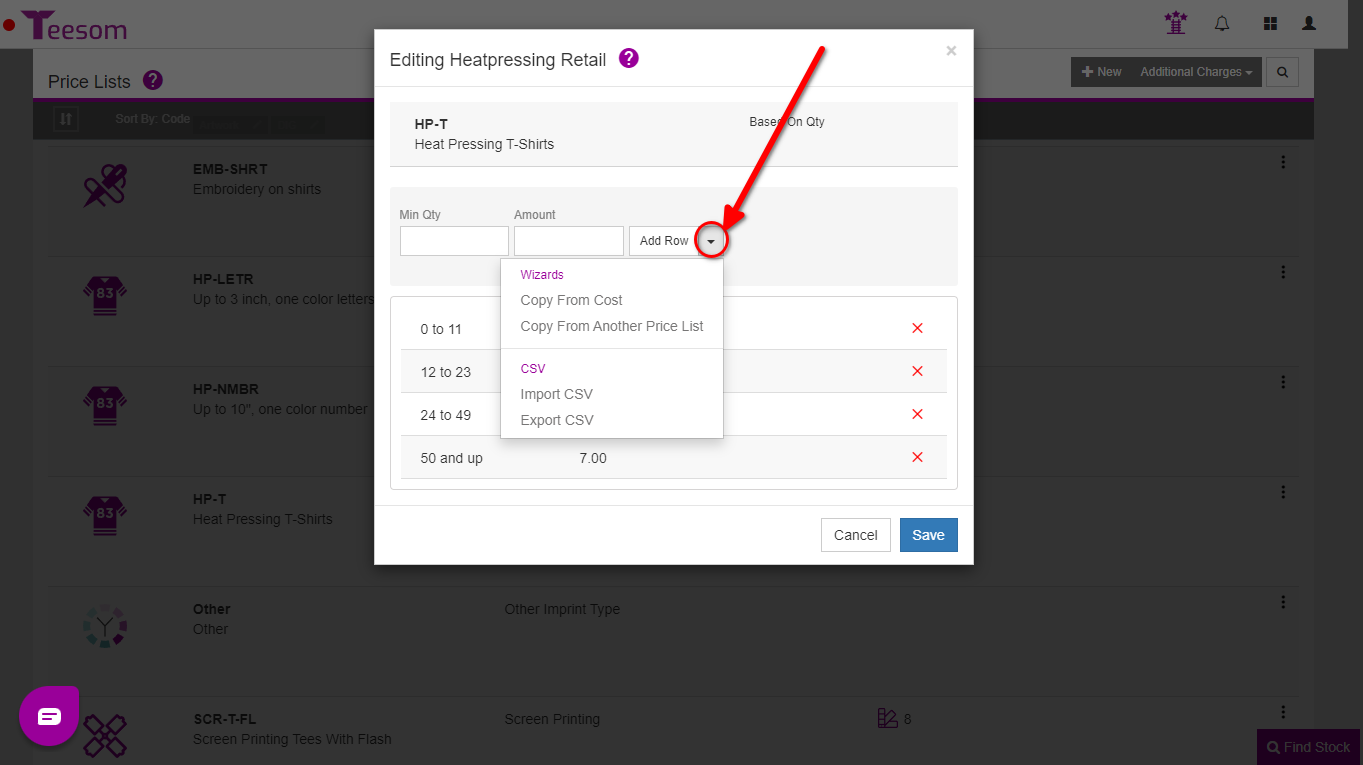
The 'Add Row' Dropdown Menu - Bulk Add
To the right of the ‘Add Row’ button there is a dropdown arrow. Click the arrow to see additional options:
Copy From Cost: If you have set up a cost price matrix you can simply copy the price rows from that directly into your retail price matrix. (You can also copy from retail on the Cost Price Matrix screen.)
Copy From Another Pricelist: If you already have a price matrix setup and simply want to duplicate it, you can use this option to copy the price matrix setup from that one into this one. (Only for same service type i.e. screen printing, embroidery, etc.)
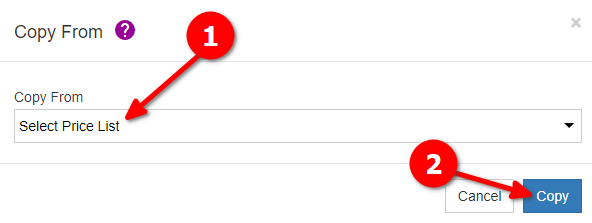
Select the pricelist to copy from.
Click on “Copy” to apply the changes.
Export/Import CSV: Click on “Import CSV” to import a price CSV if you have one. Click on “Export CSV” to export the price matrix as a CSV. Using this functionality can help speed up the uploading of your prices but you will need to follow the same format as Teesom for the CSV file.
You can assign the Price Matrix to an Existing Imprint and/or when you create a New Imprint. First open the ‘Artwork’ page via the main menu.
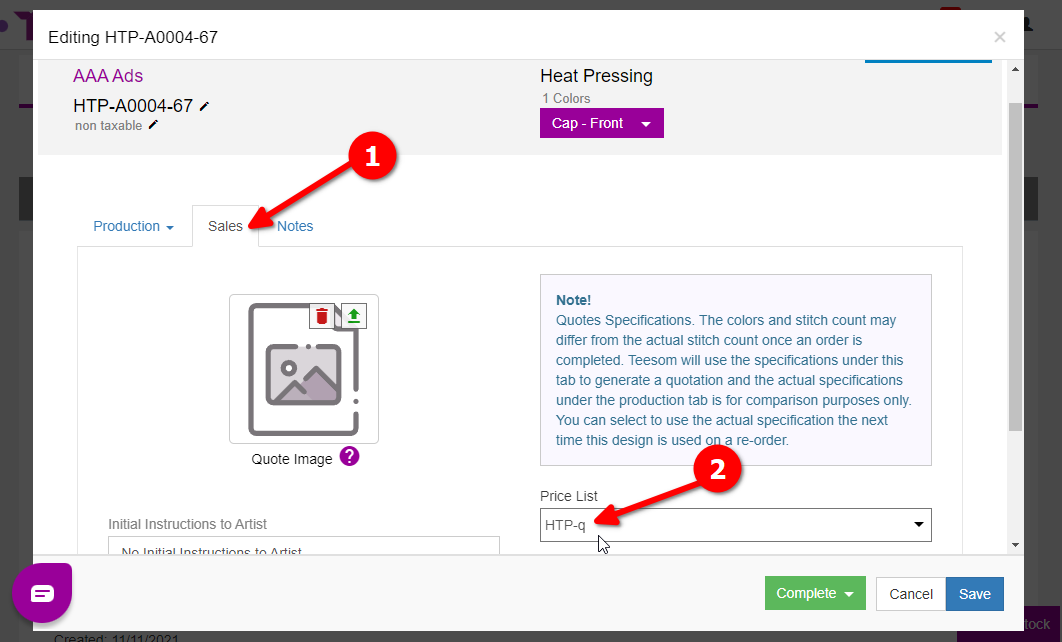
To assign the Price Matrix to an existing Imprint, of the same imprint/service type, click on the “3 Dot” menu next to the relevant artwork and click ‘Edit’ to open the artwork editing screen.
Go to the Sales tab.
Select the price list/matrix from the dropdown.
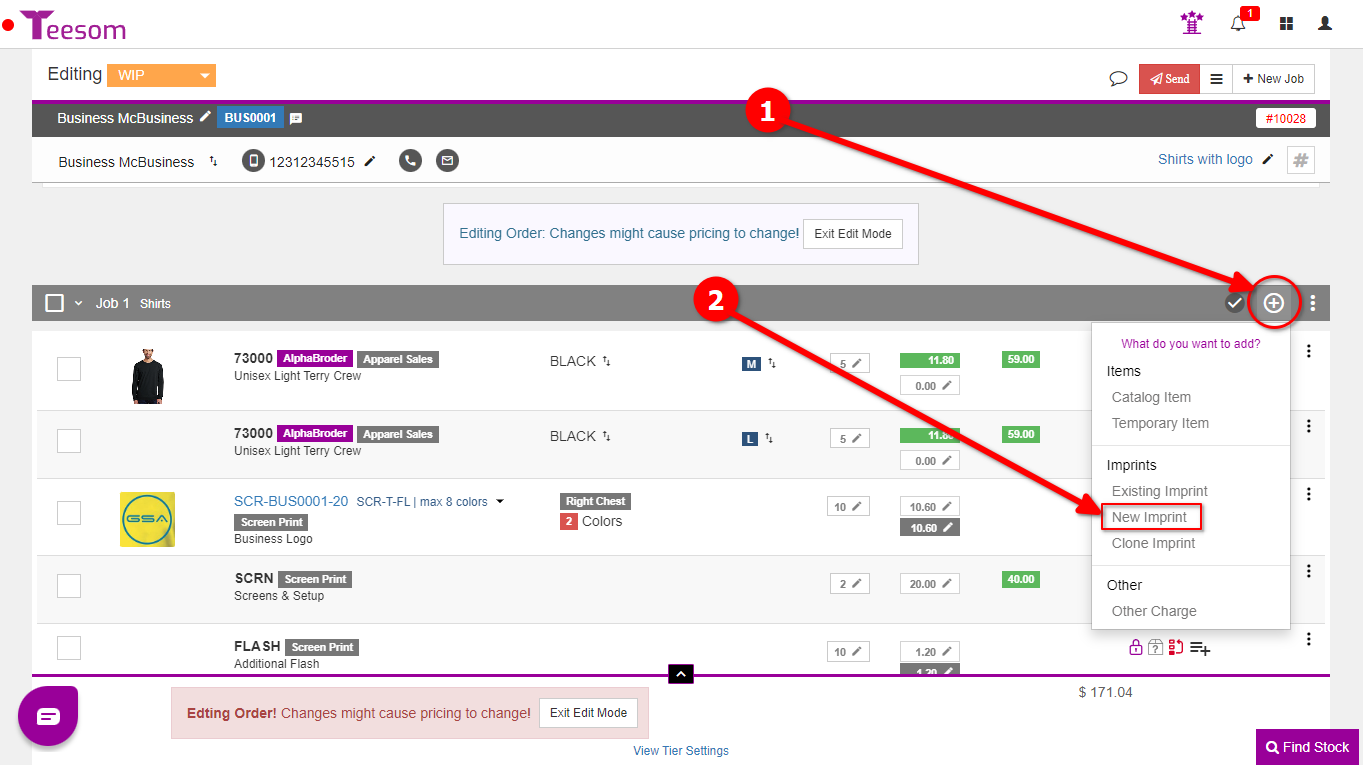
To assign the Price matrix to a New Imprint click ‘+ New Design’ on the Artwork page OR you can add it directly on the order with the ‘+’ button on the relevant job as shown below: