The PO Wizard is the tool you will use to create purchase orders to various vendors for all the goods that are required for current WIP Invoices.
The 'PO Wizard' is not a purchase order it is only a list of all the goods that need to be ordered.
You will use the PO Wizard to create your purchase orders.
Consolidated vs Single Order Purchasing
In Teesom you are able to create a PO for all the goods you need, all at once (for a single vendor). This is called “consolidated” purchasing.
You can also create a PO for the goods required on a single order only. We call this “single order” purchasing.
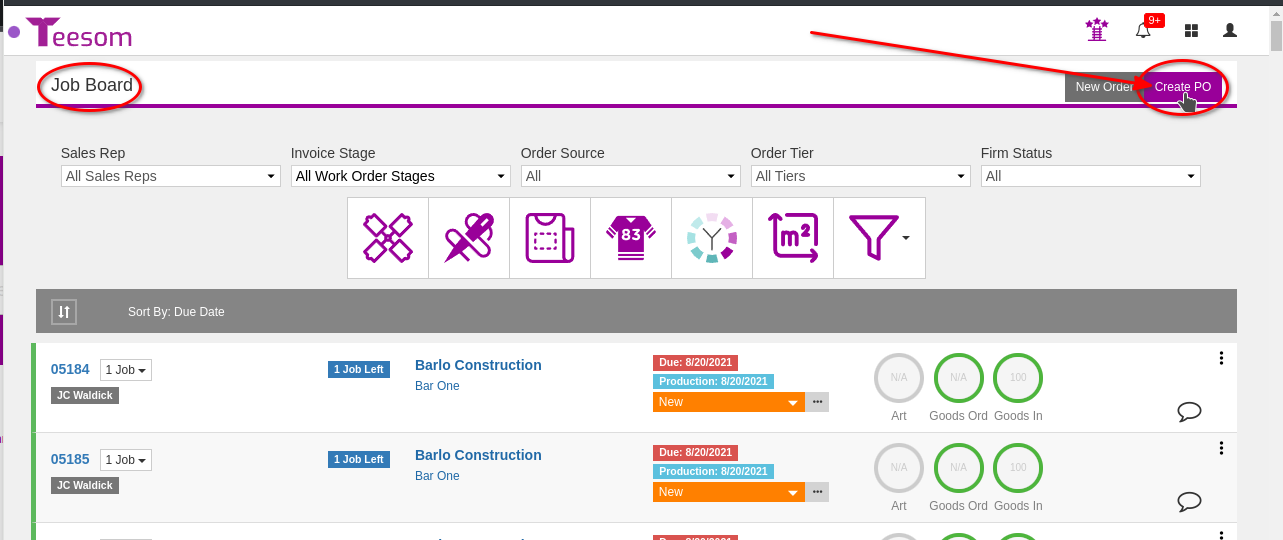
To create a "Consolidated" purchase order, click on the 'Create PO' button on the Job Board =>
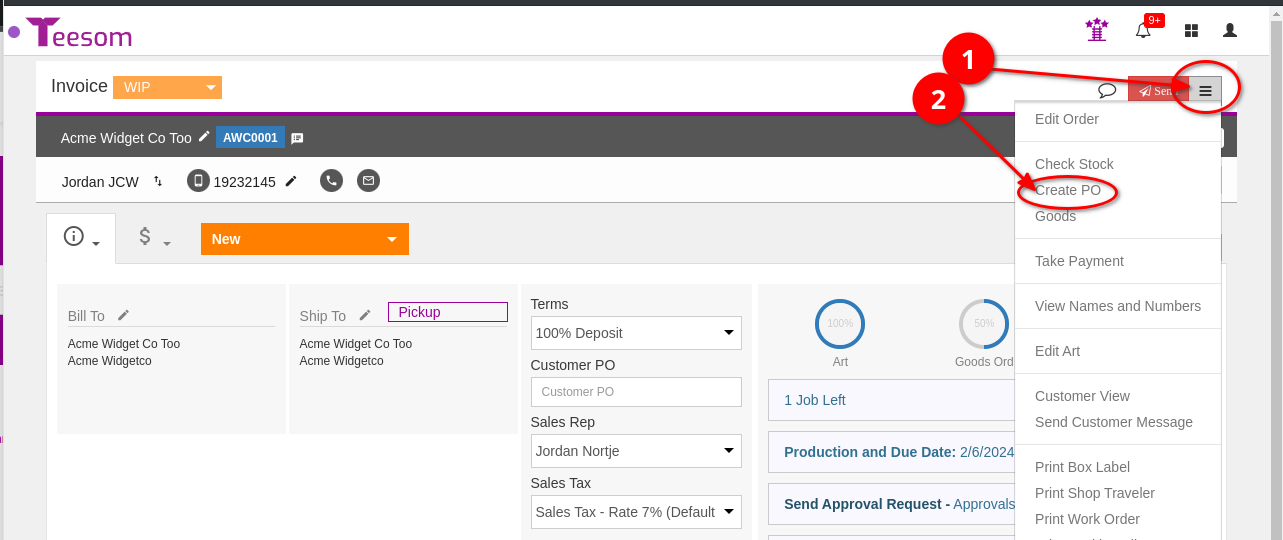
To create a "Single Order" PO, click on 'Create PO' from the hamburger menu on an open order =>
Navigating the PO Wizard screen
On the PO wizard you will have access to various different options related to goods on your active orders.
We will go over them all Below:
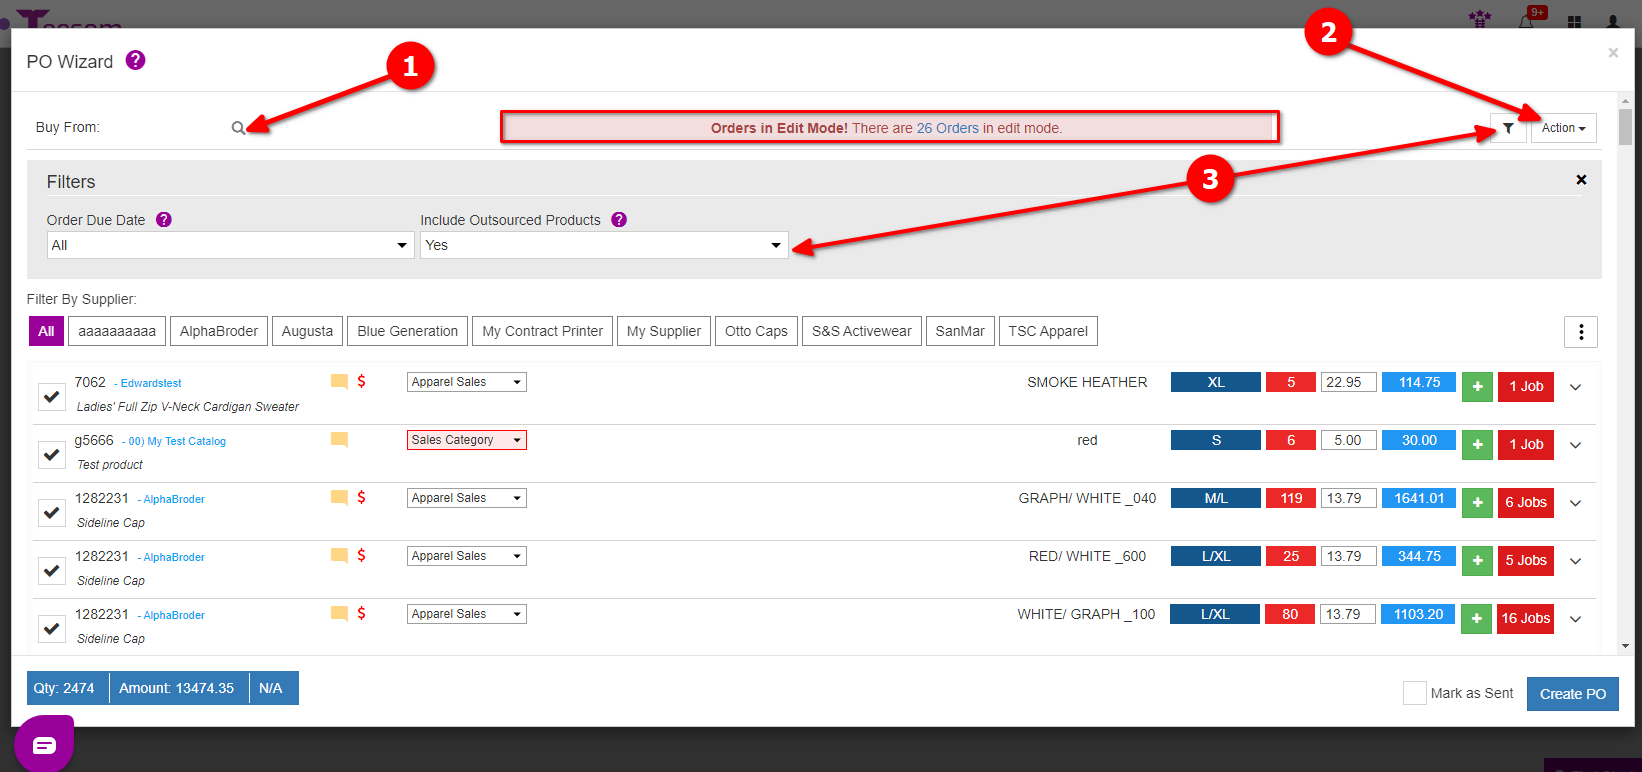
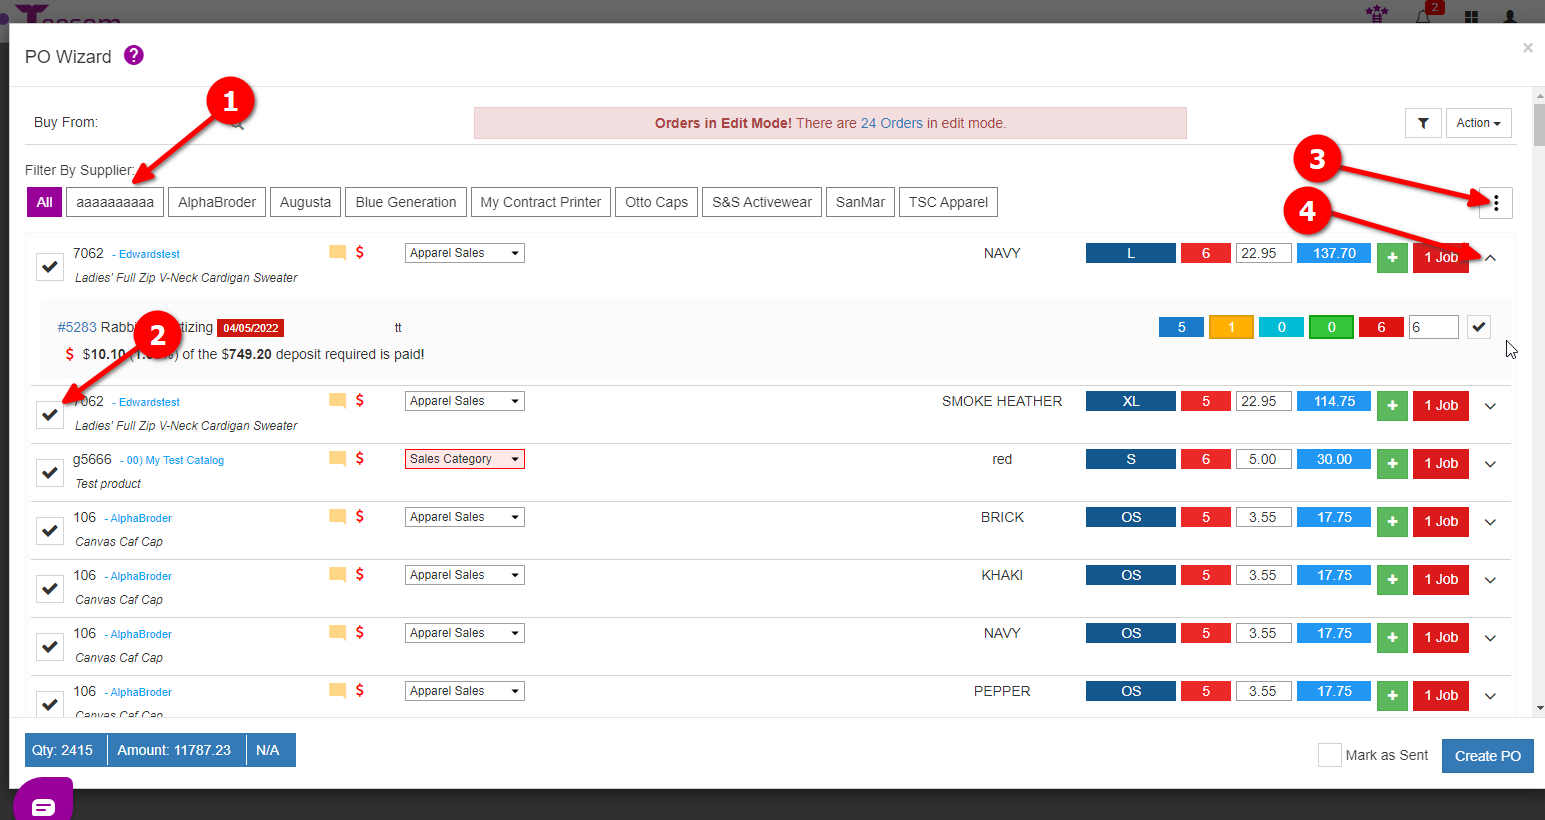
Click on the “Buy From” magnifying glass icon to open a search box where you can enter the name of the supplier you want to purchase from.
The “Action” menu provides a few extra options for creating PO’s.
Click on the filter icon to show some additional filtering options.
Take note of the red box that says "Orders In Edit Mode" this means that those orders' goods will not be ordered. If you want to order the goods for those orders you will have to finish editing them.
NOTE: The "Filter By Supplier" option does NOT select which supplier you're creating a PO for - all it does is filter the products in the list below to include only those from that vendor's catalog
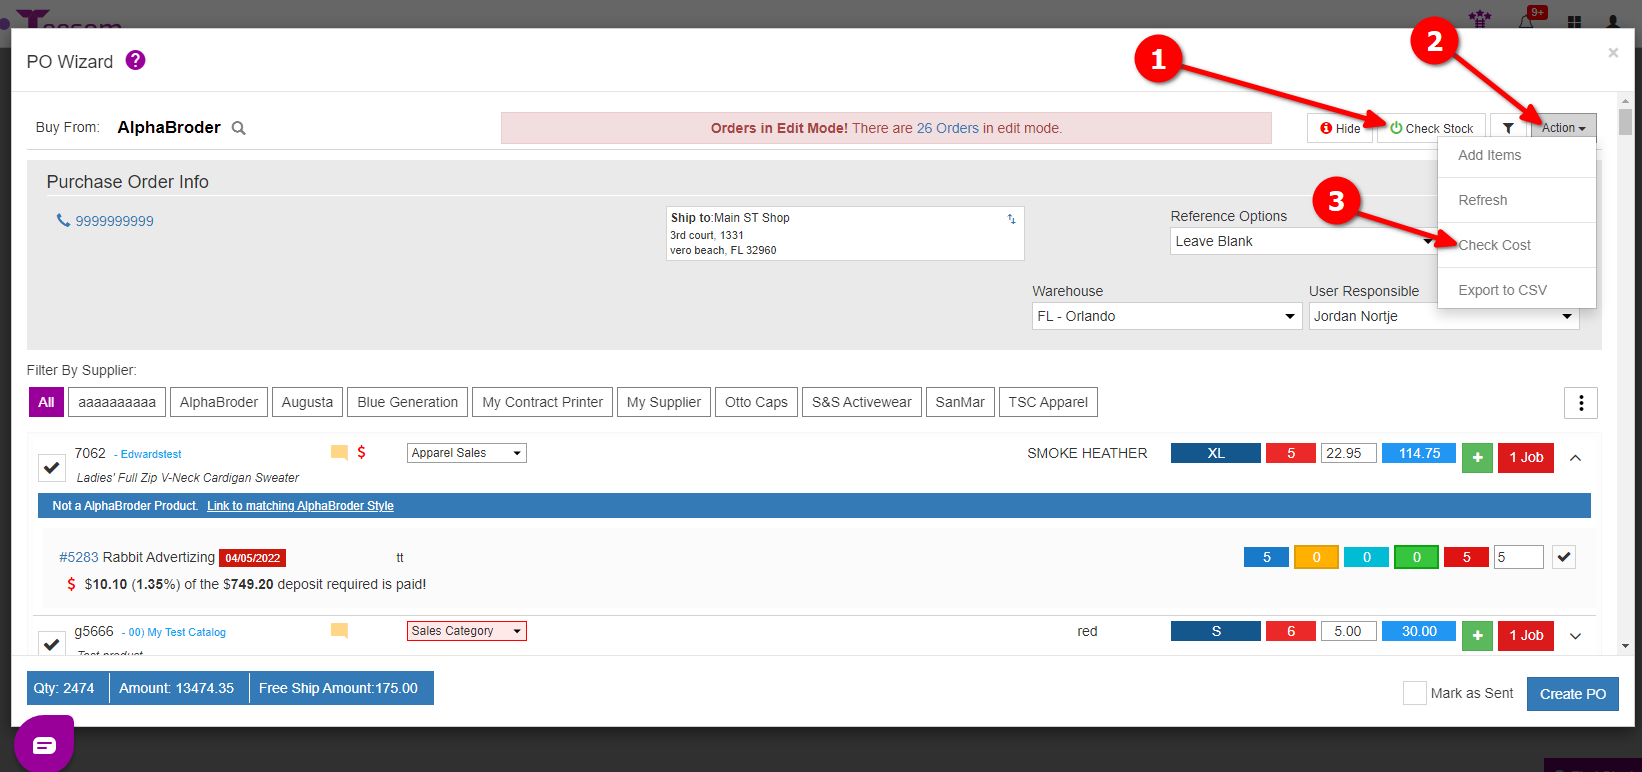
After searching for and selecting a supplier:
You can toggle “Check Stock” on/off this will check the stock of all the goods on the order.
If you click on the “Action” dropdown you will be able to check the cost of the goods on the PO wizard.
Please note that the Check Stock and Check Cost functionalities only work with integrated vendors.For help with integrating vendors go here => Vendor Integration
Filter the goods by their catalog vendor.
Check/Uncheck goods.
Extra options for managing goods on the PO wizard.
Click on the dropdown arrow for extra information for that item.
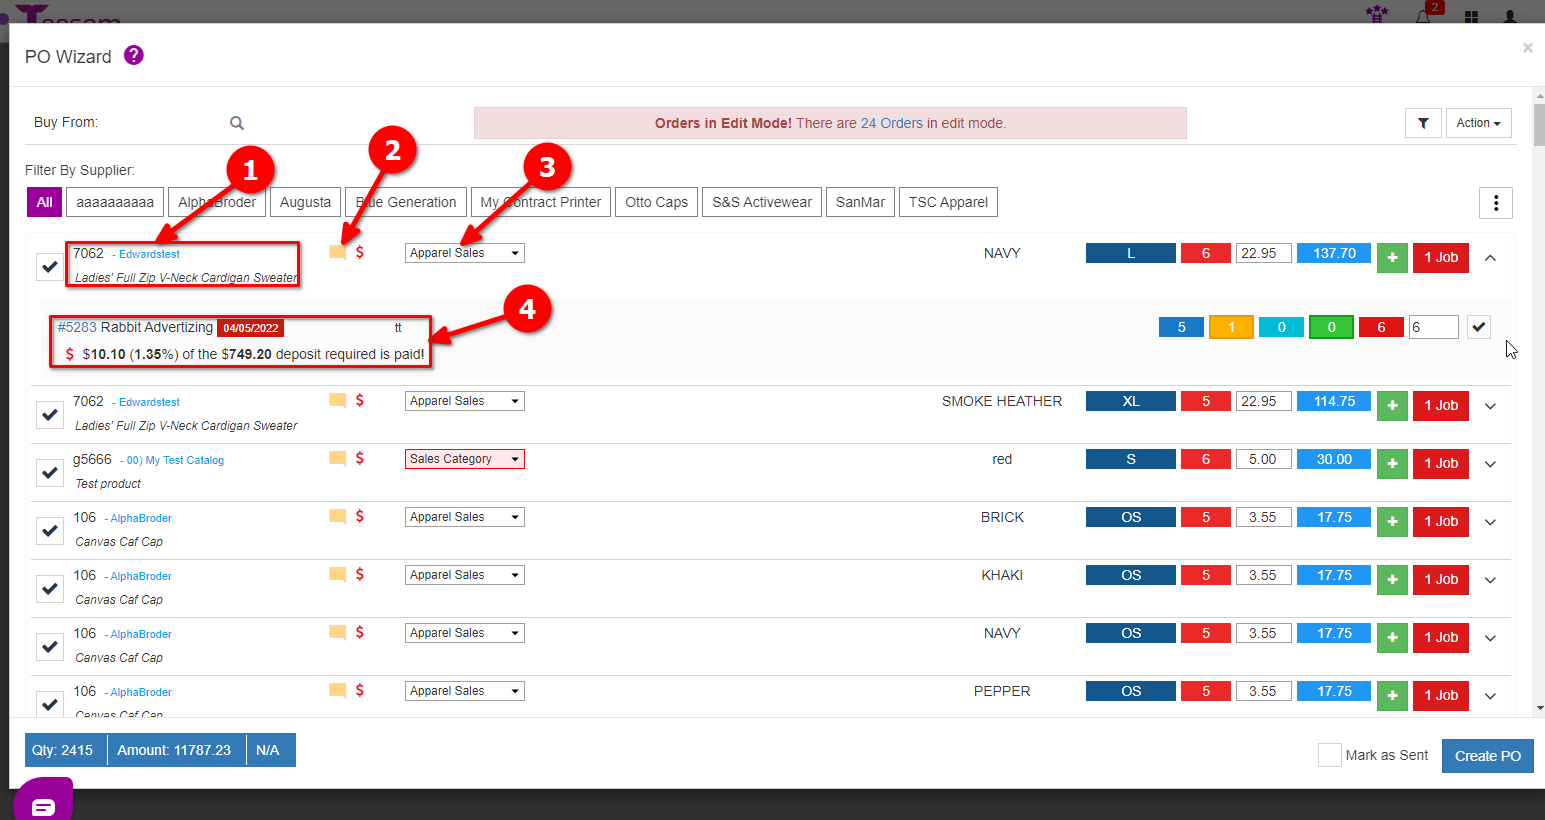
View the style number of the item, the catalog the item is linked to, and the name of the item
Click on the yellow chat box icon to open a text box, where you can enter notes for the supplier.
The red dollar sign means that the deposit has not been paid on the order (So purchase at own risk).
View the order number, the customer on the order, order due date, and the total amount of the deposit still needed to be paid.
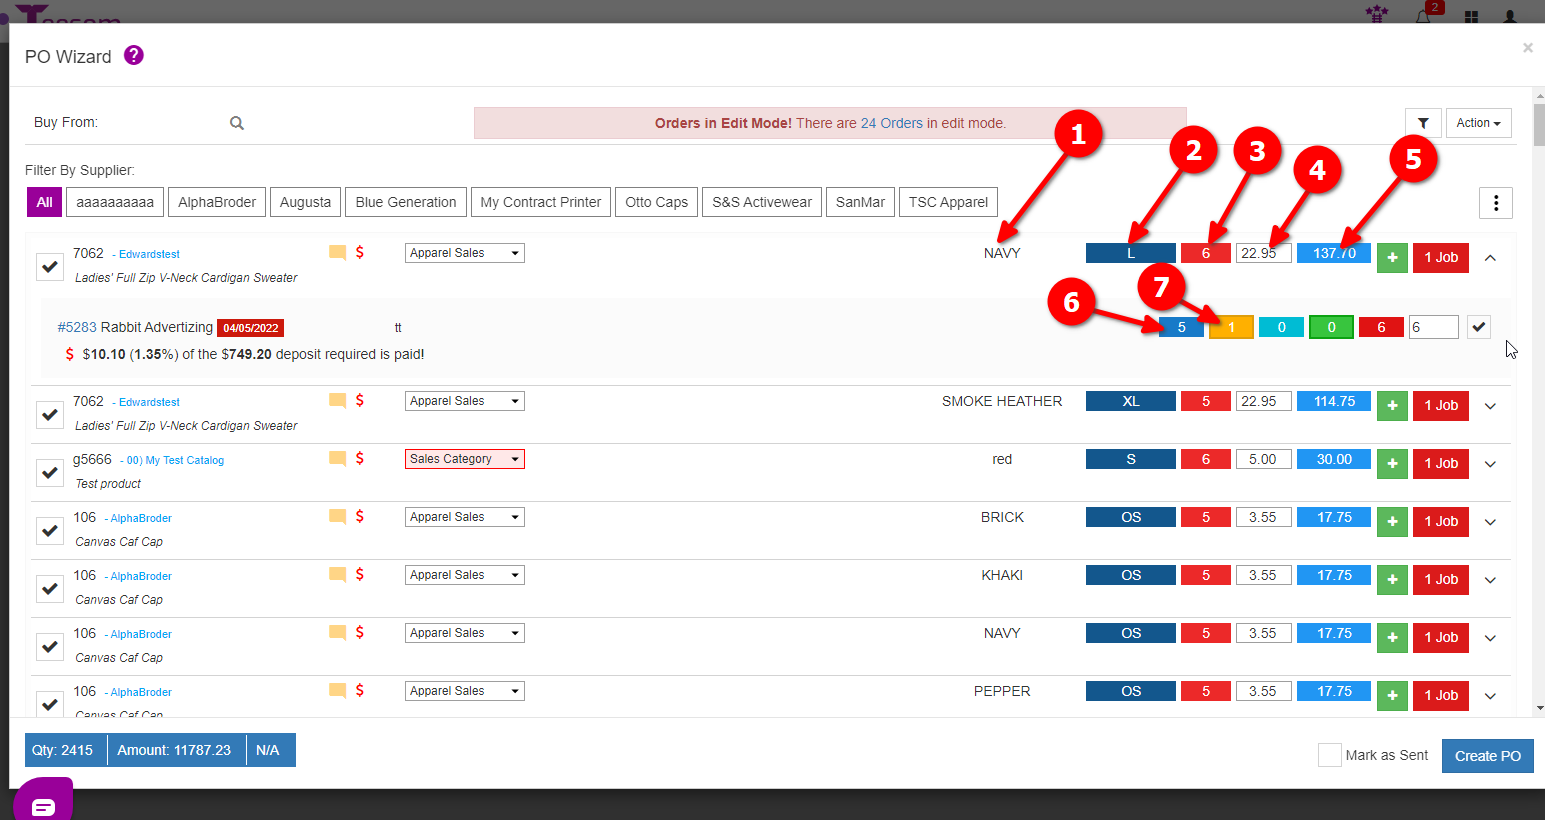
The item color
Size of the item
Total quantity of items
Individual price of the item
Total price of all items on this row
Qty of goods being ordered (these are goods which are assigned to open Work Orders)
Qty of “extra” goods being ordered (these are goods that are NOT currently allocated to any open Work Orders)
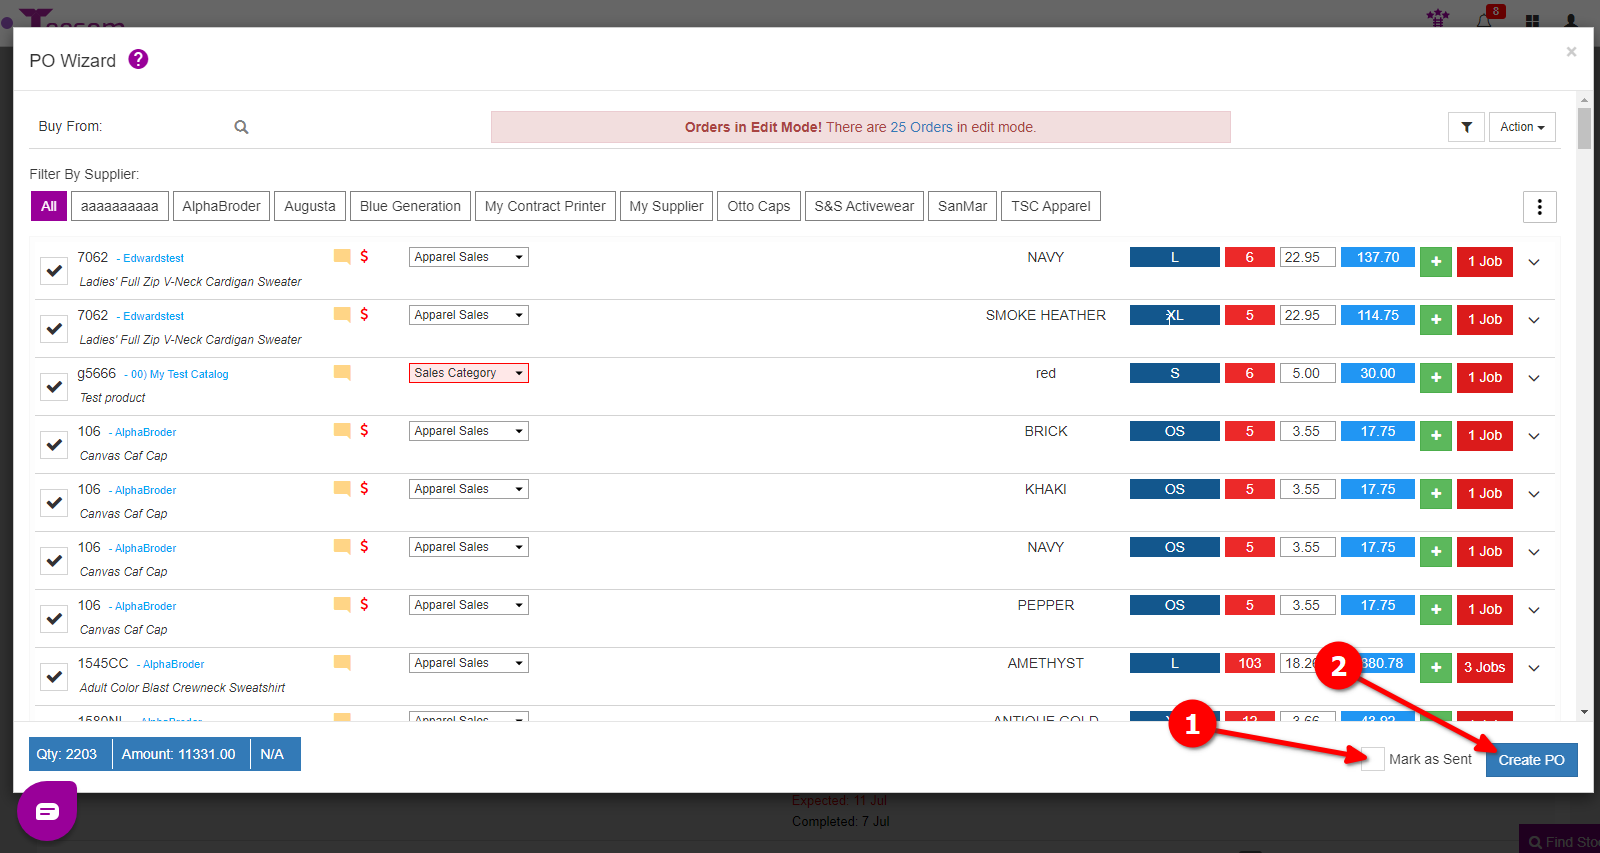
If you check the box “Mark as Sent” when you create a PO it will not be sent to the supplier but will be marked as if it were.
Click “Create PO“.
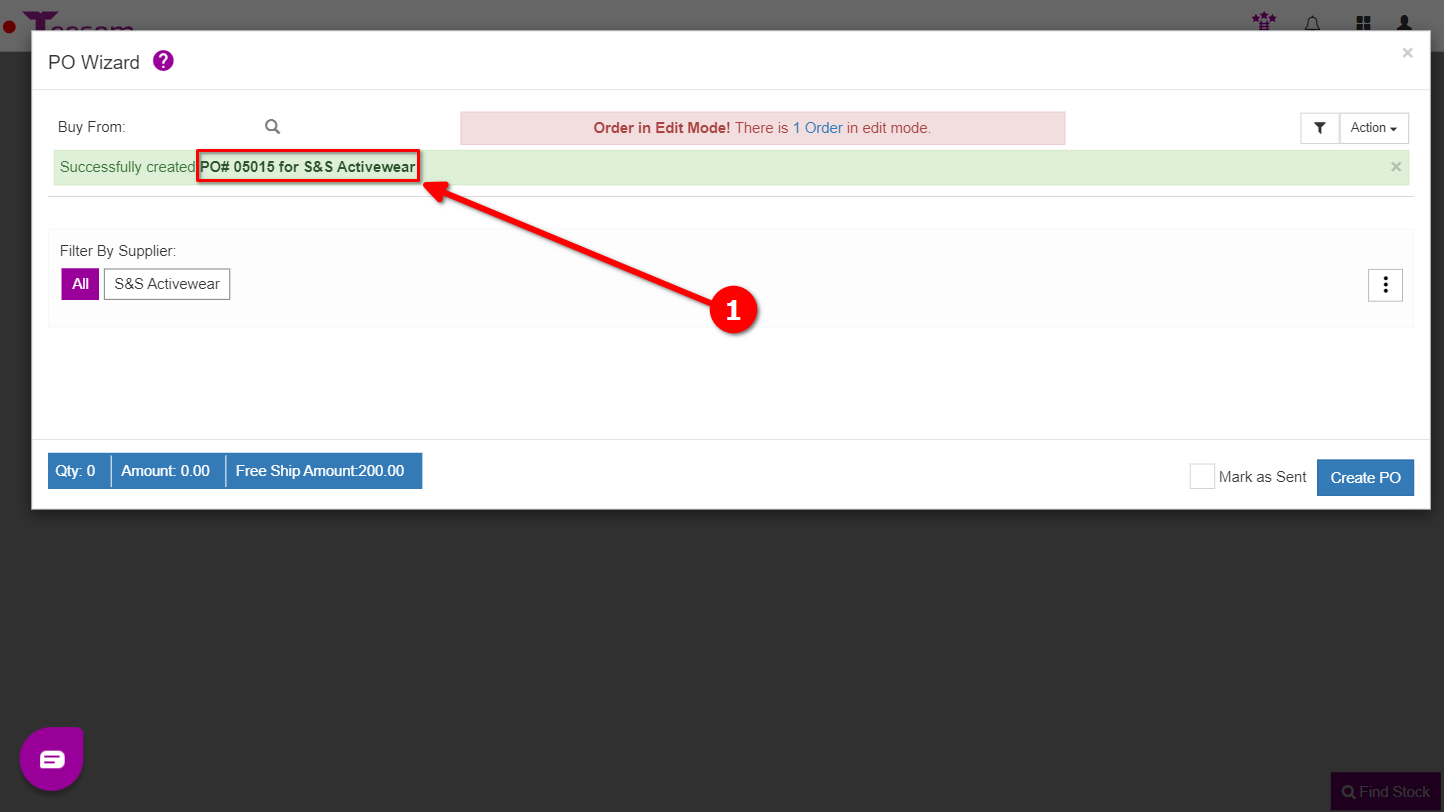
After clicking on “Create PO” the “PO wizard” will remain open. Navigate to the new PO by clicking on the PO number.
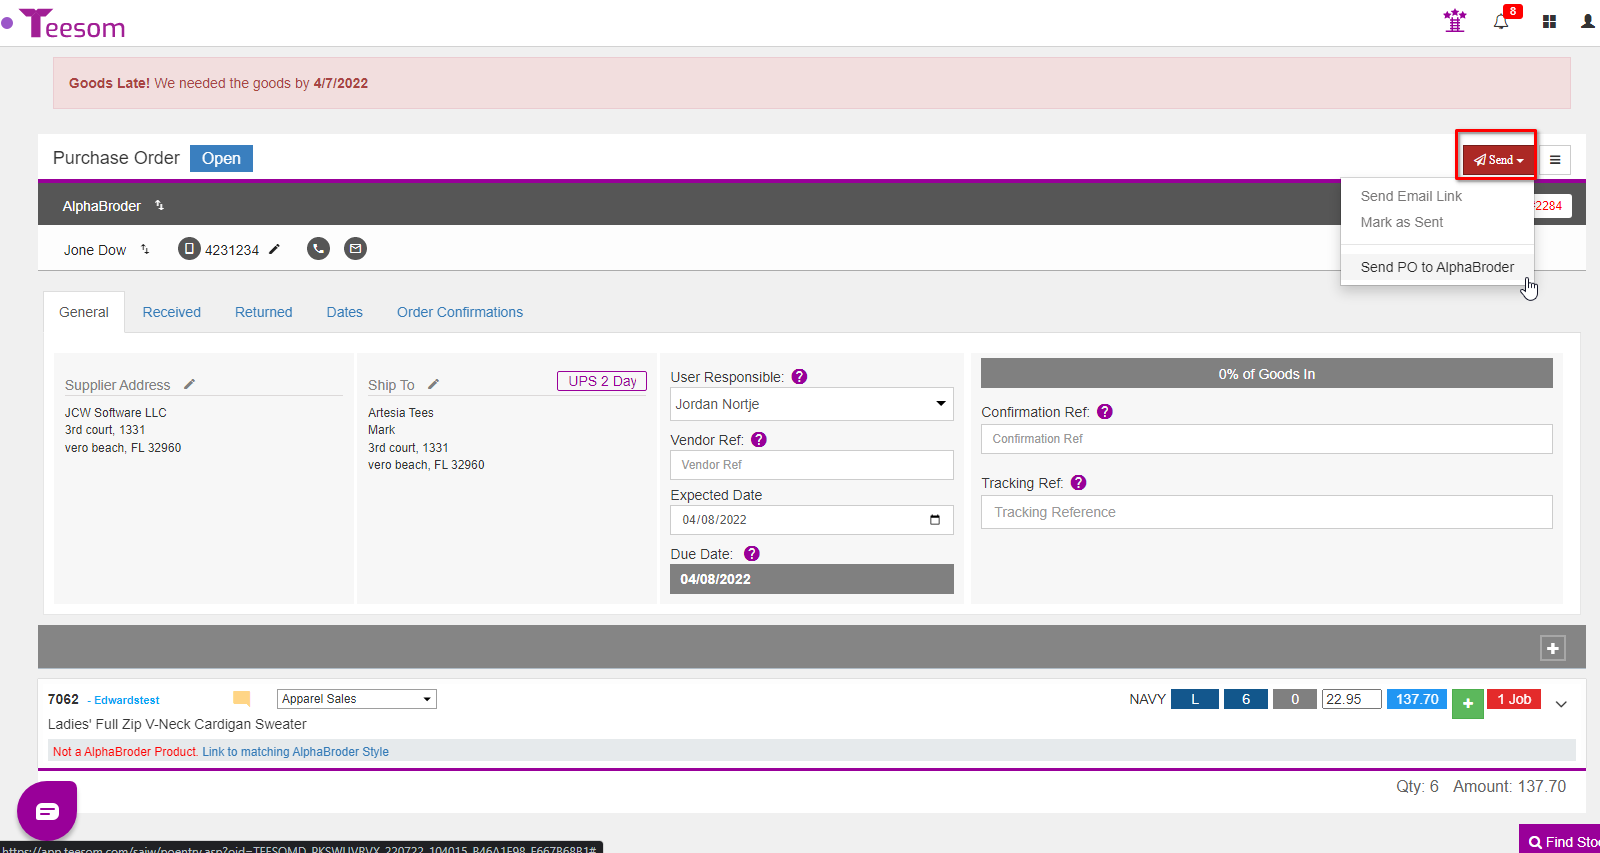
You will then be able to send it to the supplier or mark it as sent from the “Send” dropdown menu.