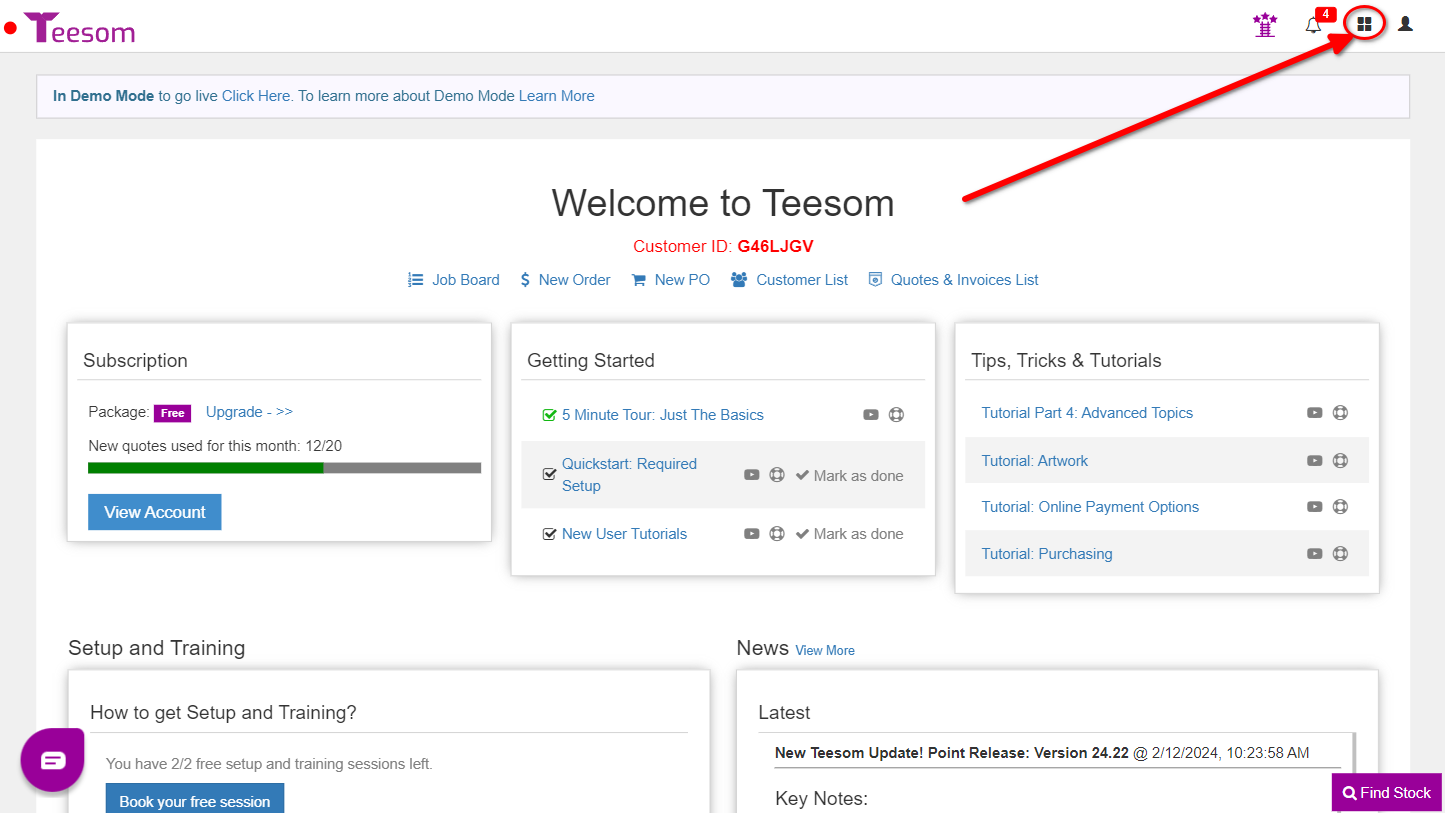
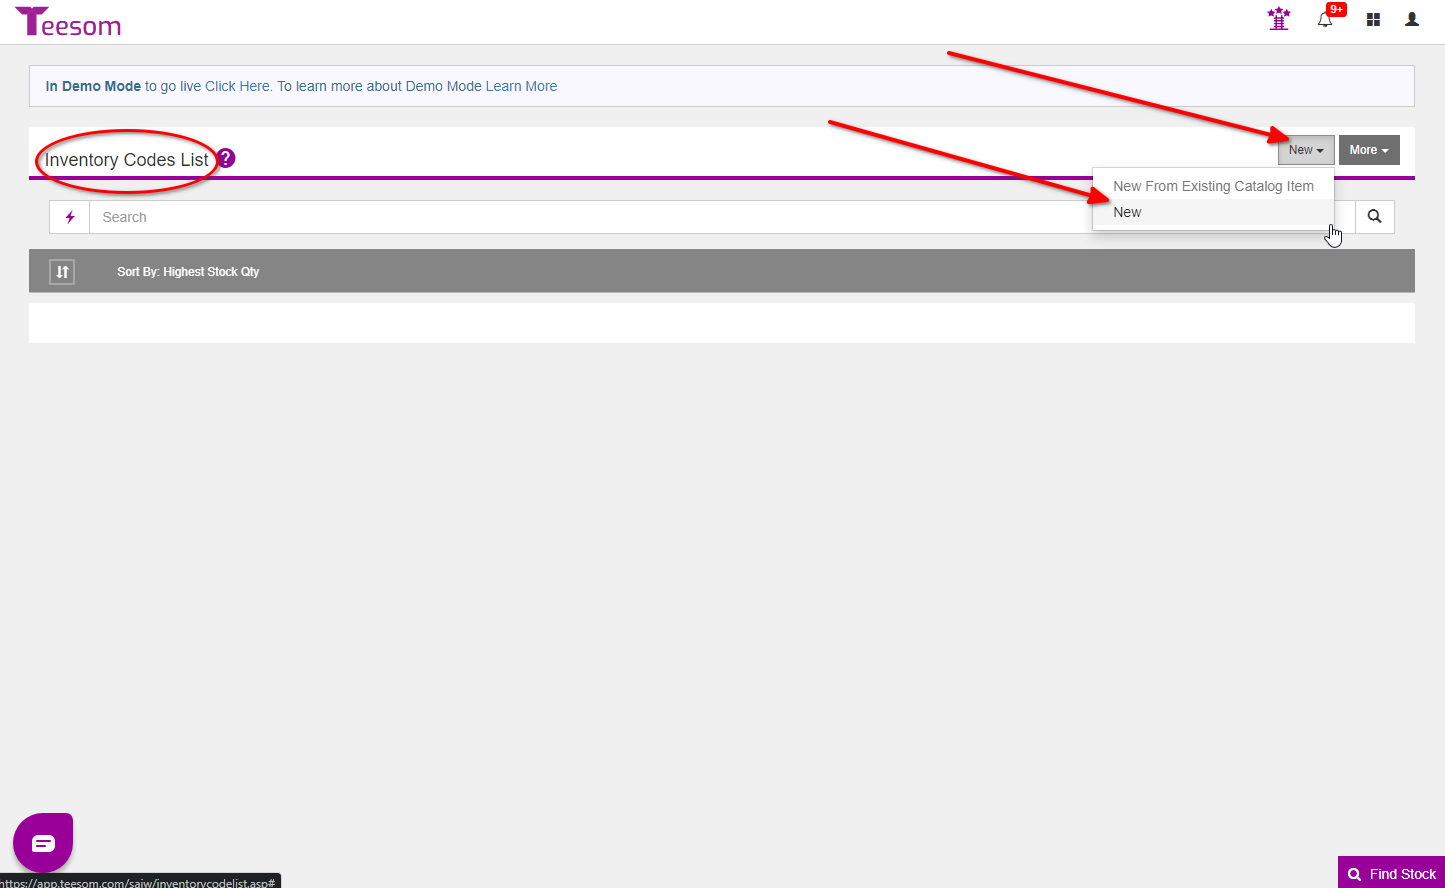
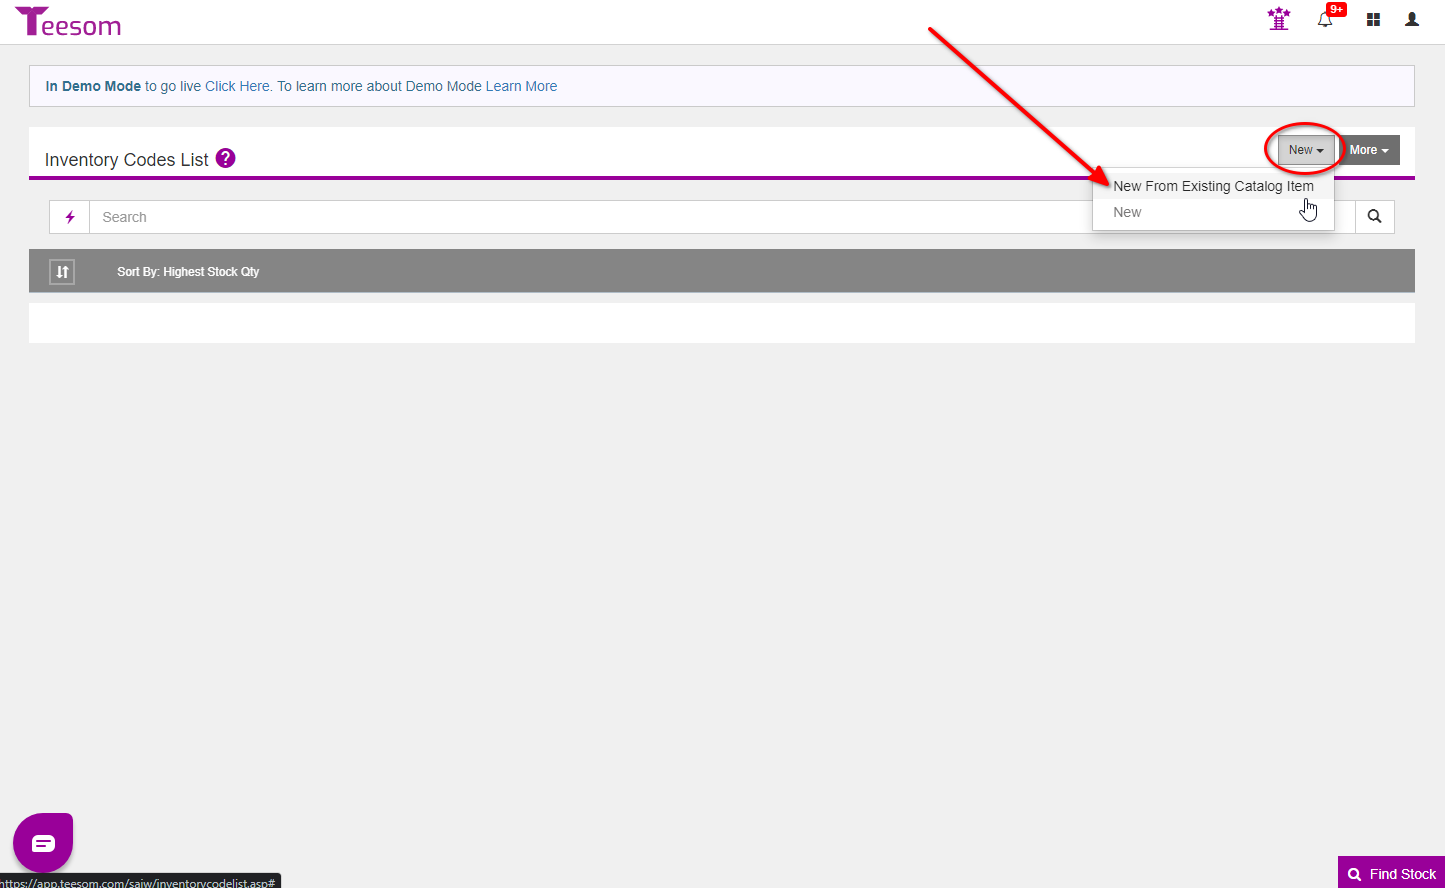
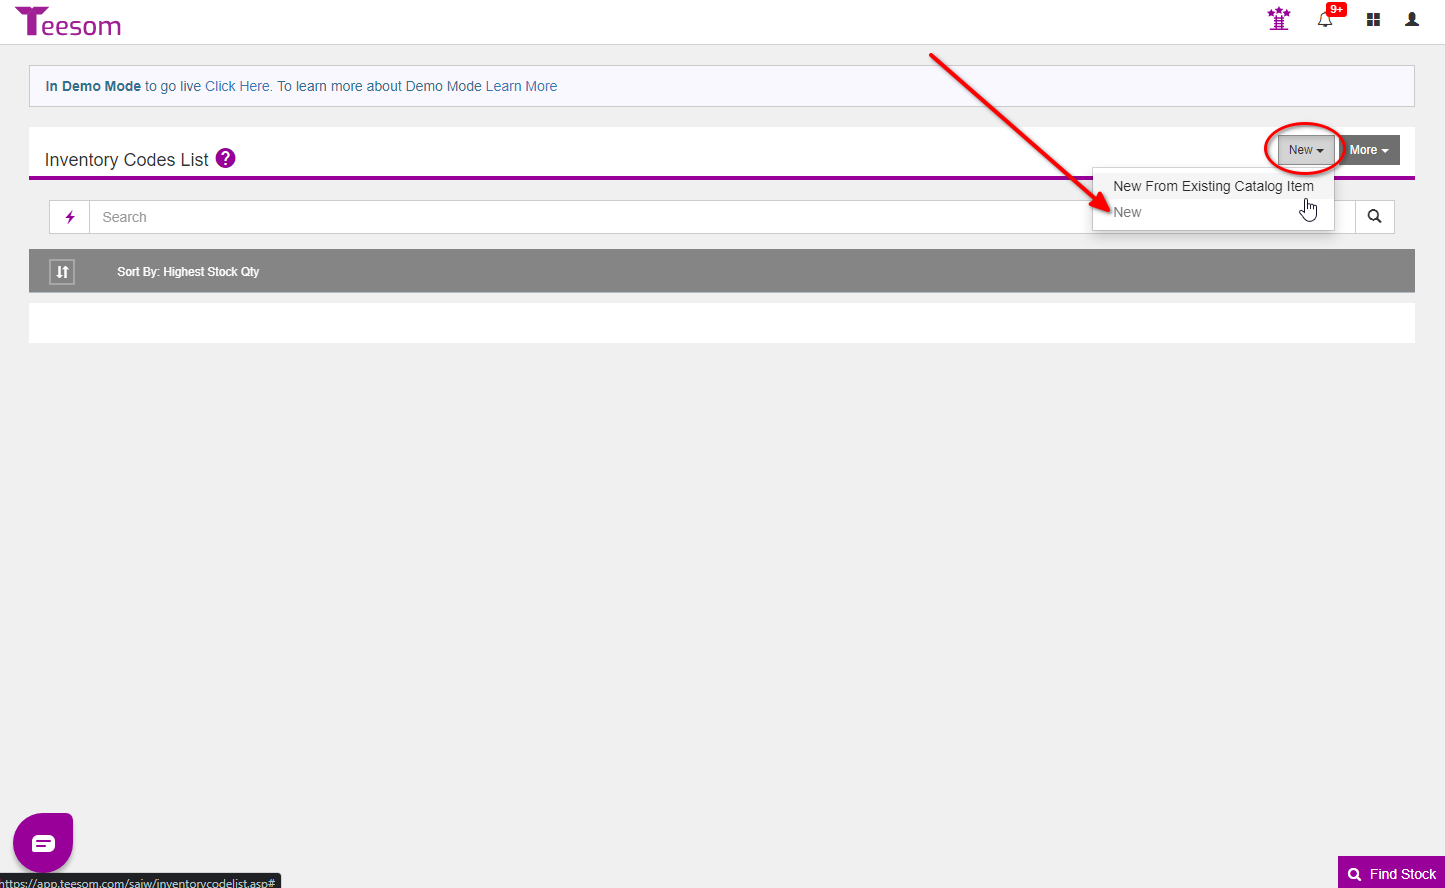
On the Inventory Codes List screen click on “New“.
From here you will be able to create new inventory codes, either from an existing catalog item or from scratch.
Add Your Heading Text Here
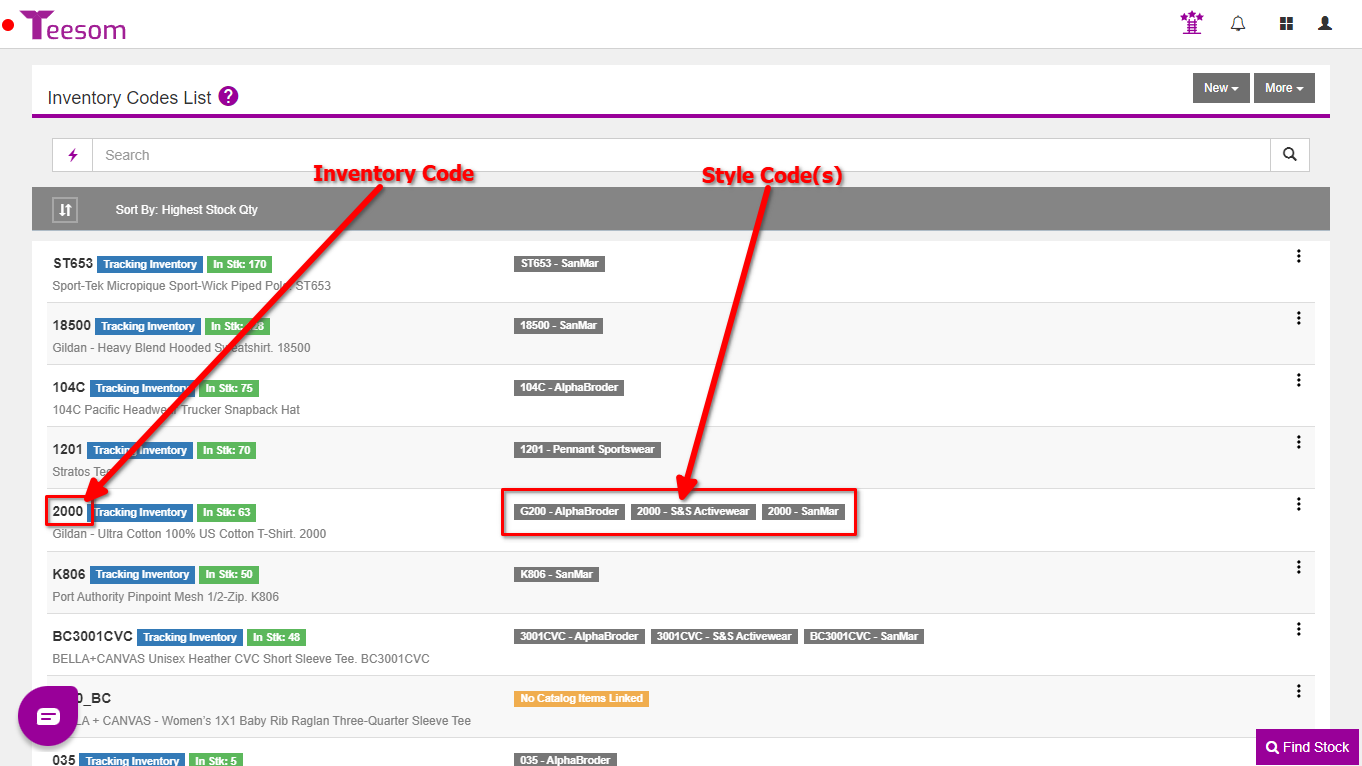
Catalog items are known by their "Style Code". Inventory items are known by their "Inventory Code".
Even if the inventory code and the style code are the same.
For example:
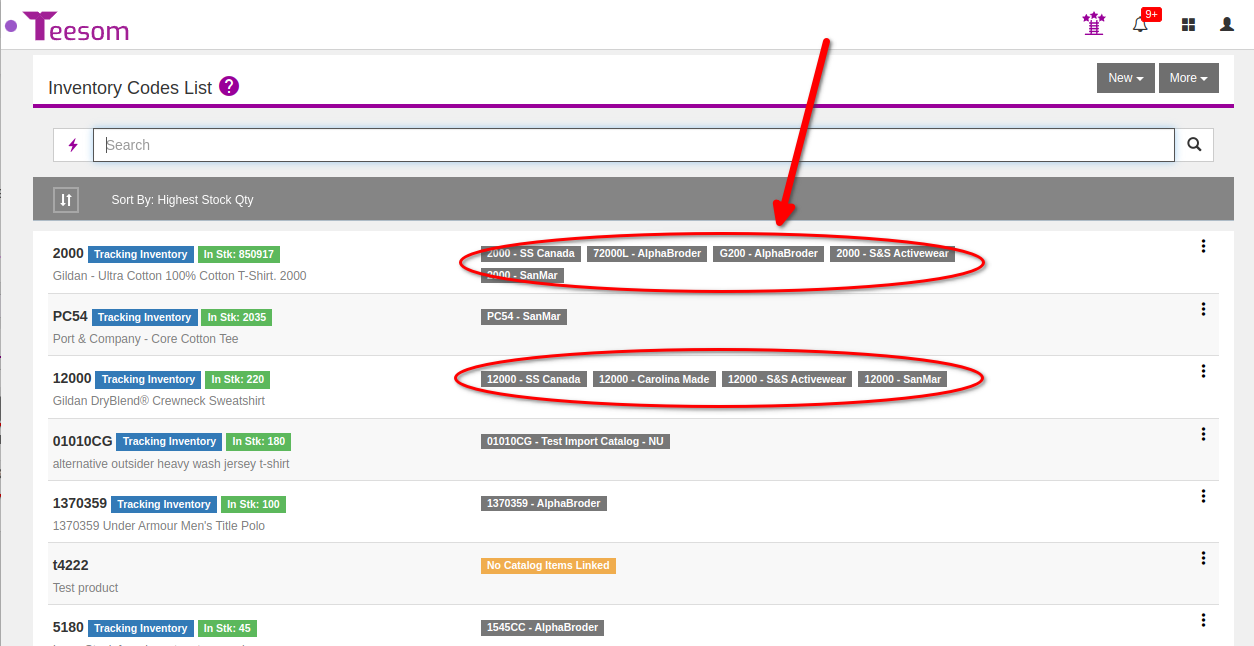
You may create an Inventory code as '2000' and link all the Gildans like the G200 from Alphabroder and the 2000 from S&S Activewear to it, but Teesom will still treat the catalog item Style Code differently than it does the Inventory Code.
The Style code belongs to only one certain item from one certain vendor, whereas the inventory code can be linked to multiple styles.
Creating an Inventory Code from an existing Catalog Item
Click on “New” then select “New From Existing Catalog Item“:
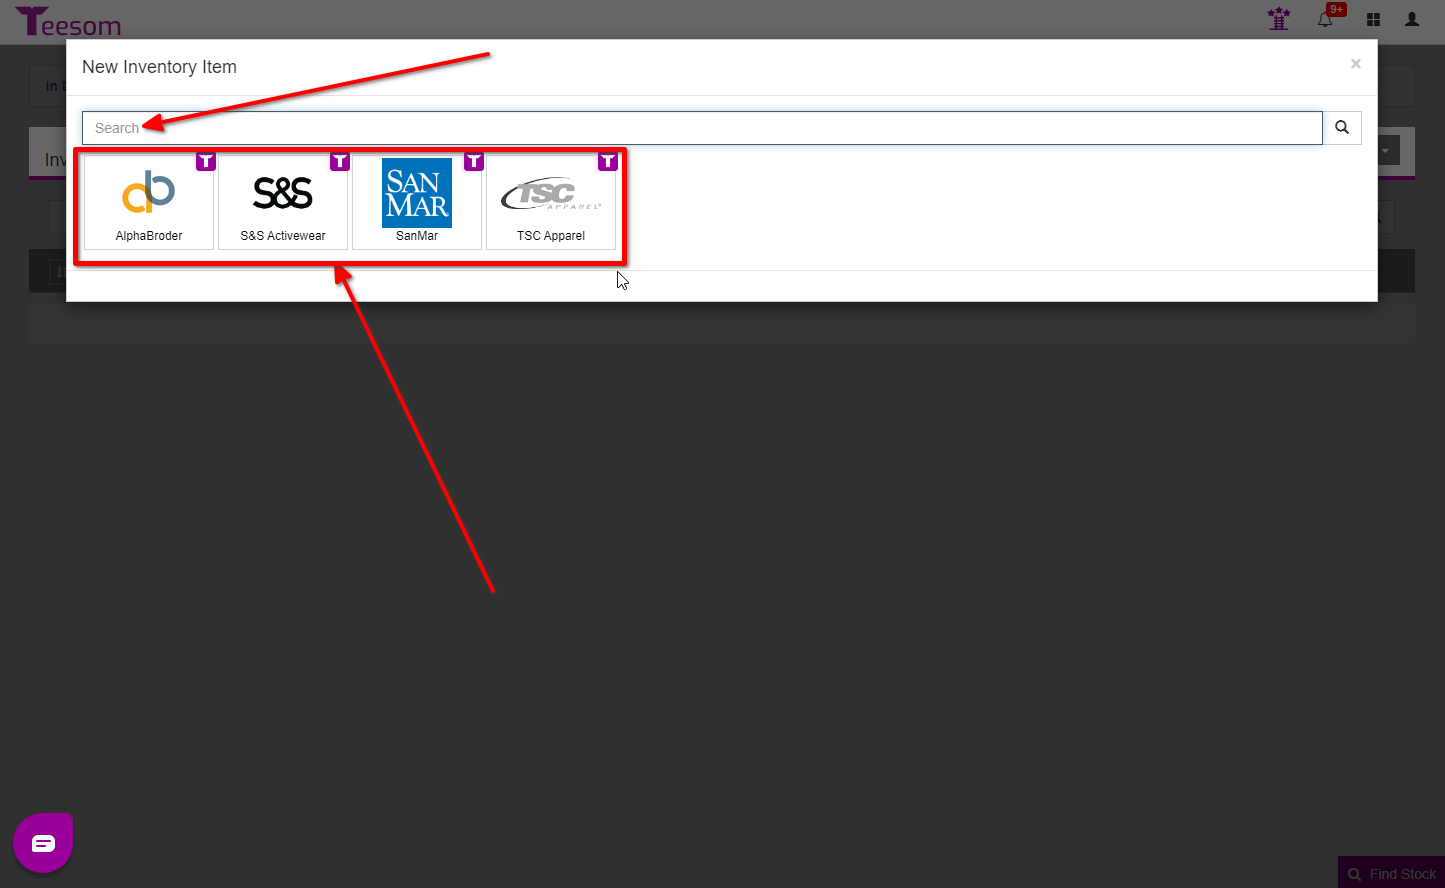
This will bring up the “Catalog Search” screen where you can search for a specific item via its style number or by browsing one of the catalogs:
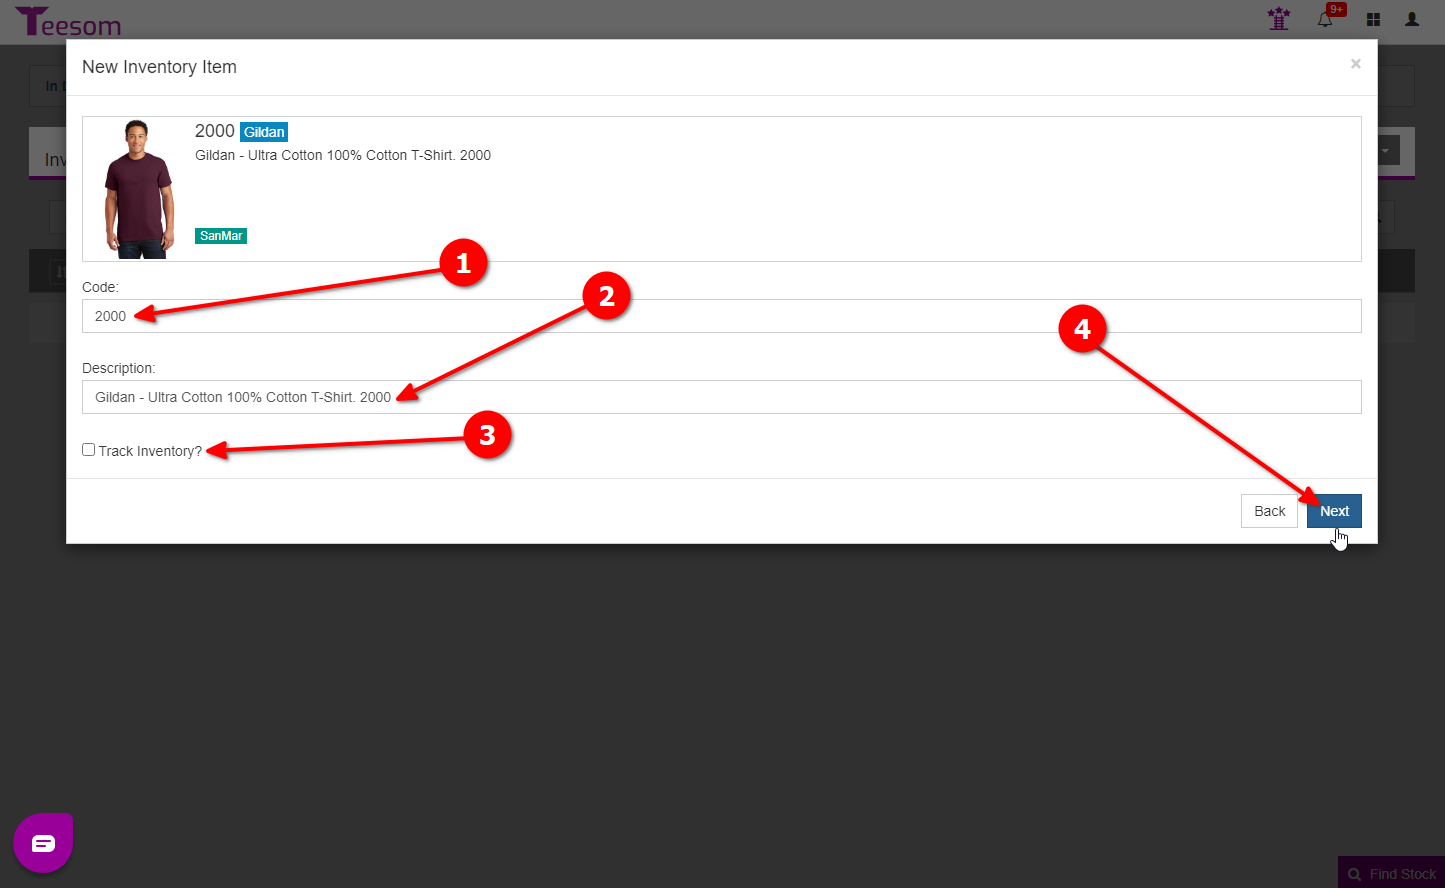
After Searching for and choosing an item you will be on the New Inventory Item screen:
Enter the Inventory Code.
Give it a description.
You can also choose to track stock of the item by checking the “Track Inventory” box.
When you are done click on “Next“.
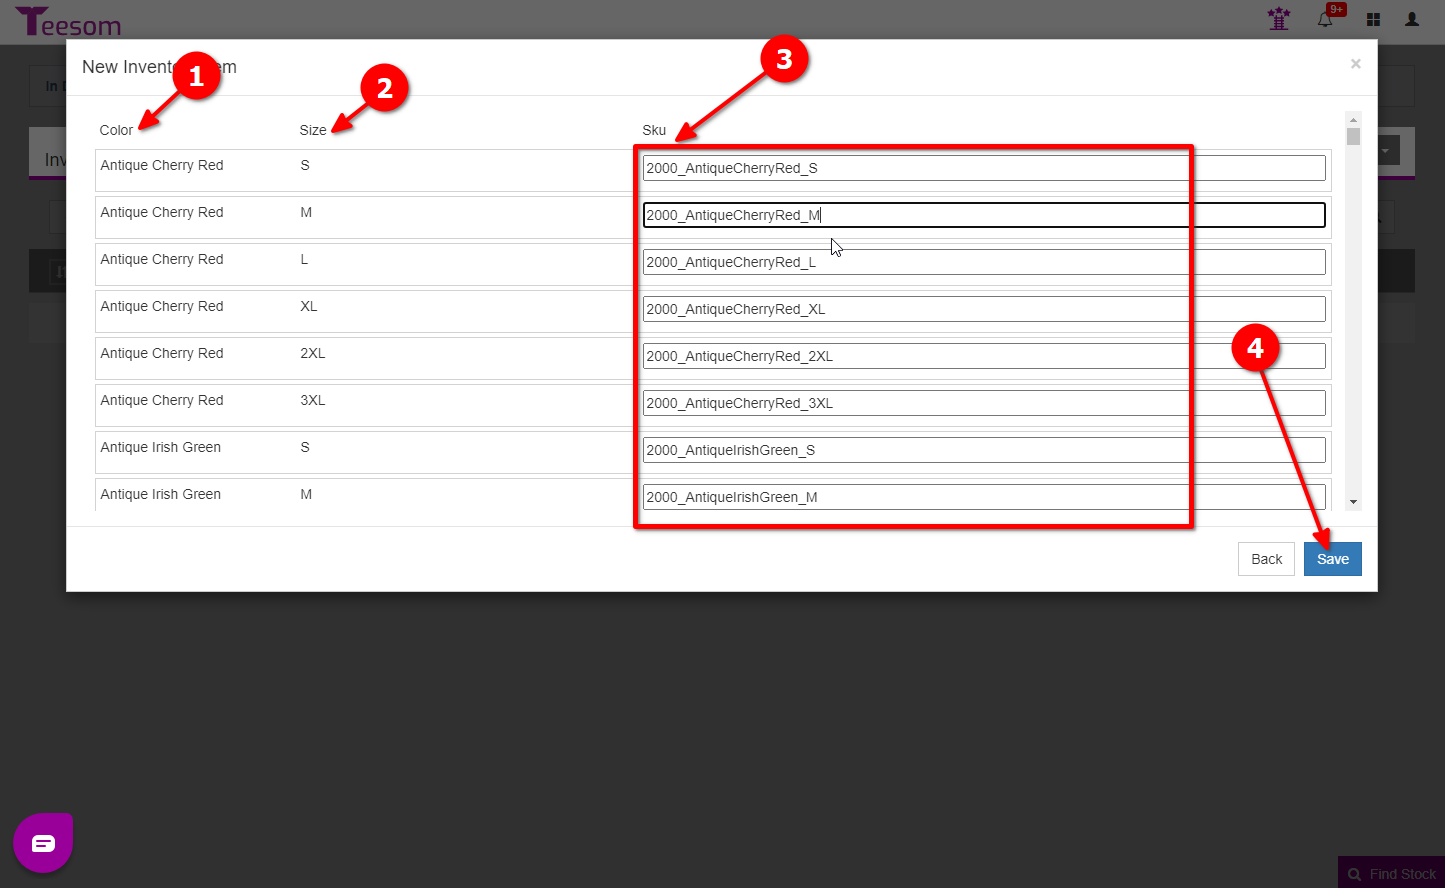
After clicking next you will see all the different colors and sizes for the item. Teesom will automatically generate a unique SKU for every item. Click Save to create the Inventory Code.
You are able to link the same style from different vendors to a single inventory code. If one style doesn't have an SKU but another one does, you can choose to link the style that doesn't have an SKU to the existing SKU or generate its own unique SKU. When you swap styles on a PO to order the same style from a different vendor your are able to link the SKUs that way as well.
Click on the “New” dropdown then select the “New” menu option.
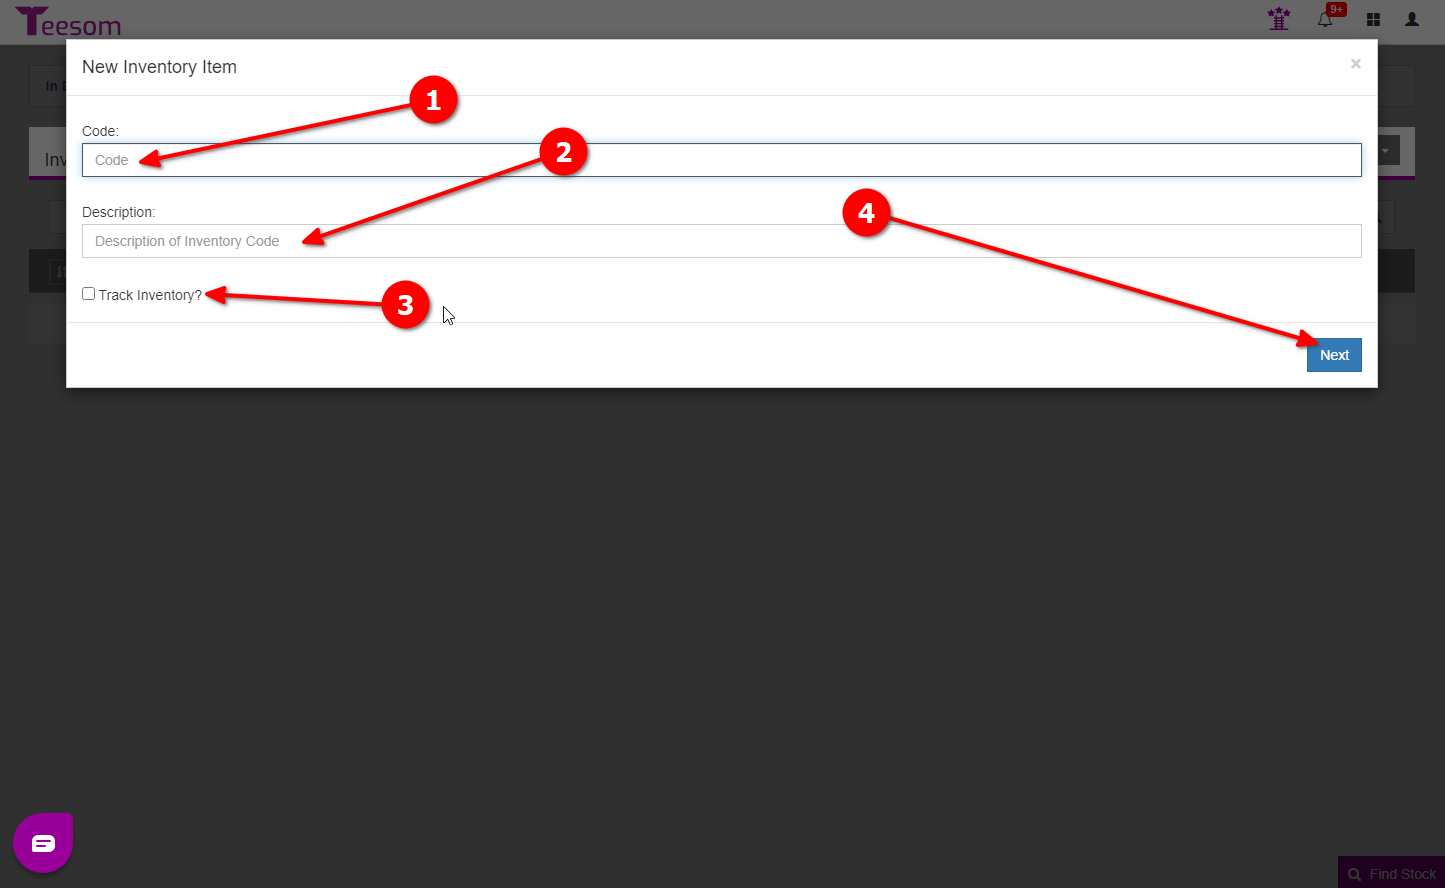
This will bring up the New Inventory Item screen.
Here you can enter a custom code and a description. To track stock of the item you can check the “Track Inventory” box. When you are done click “Next“.
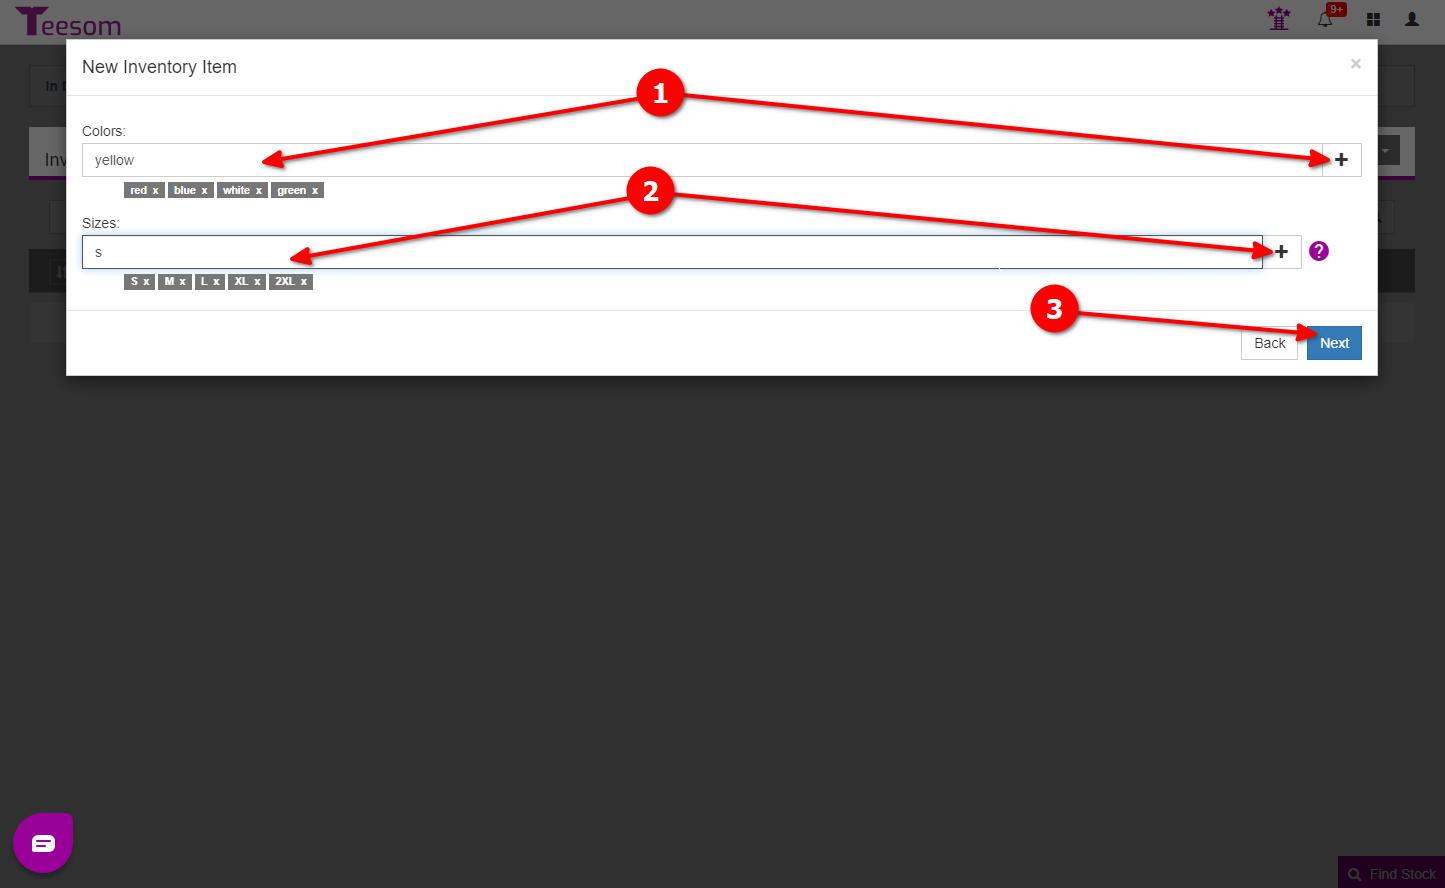
After clicking next you will now enter the colors and the sizes of the item by typing them into the relevant fields then clicking on the “+” symbols to add them. When you are done click on “Next“:
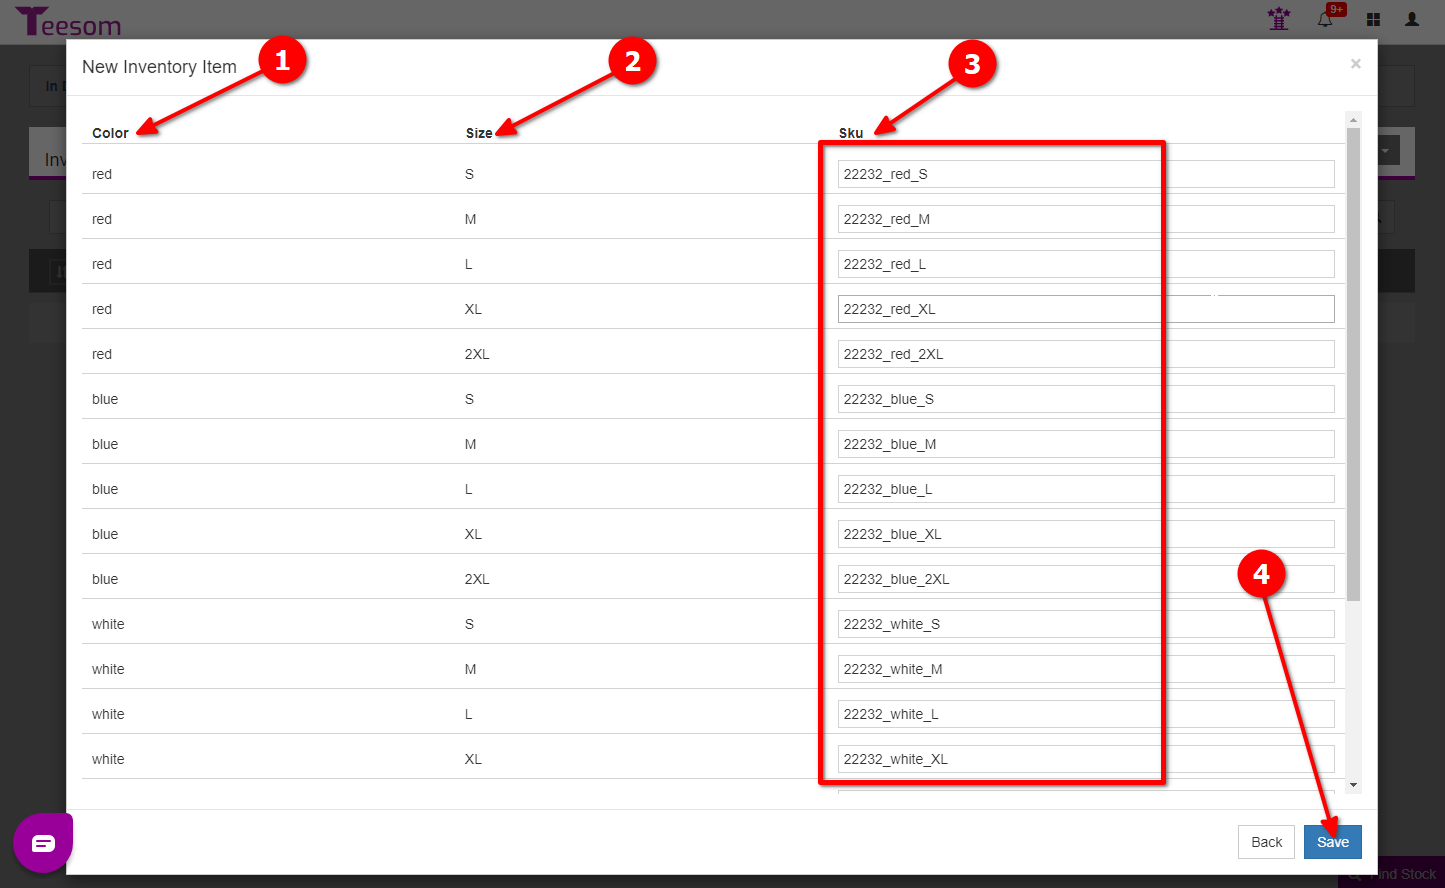
You will now be able to view the different colors and sizes and set different codes for each. When you are done click “Save“.
Teesom will automatically generate a unique SKU for you.
Feel free to override them, if you like.
Link Your New Inventory Codes
After refreshing the Inventory Codes List screen you will be able to see the new inventory codes you have created.
Notice how the custom code you made has “No Catalog Items linked”:
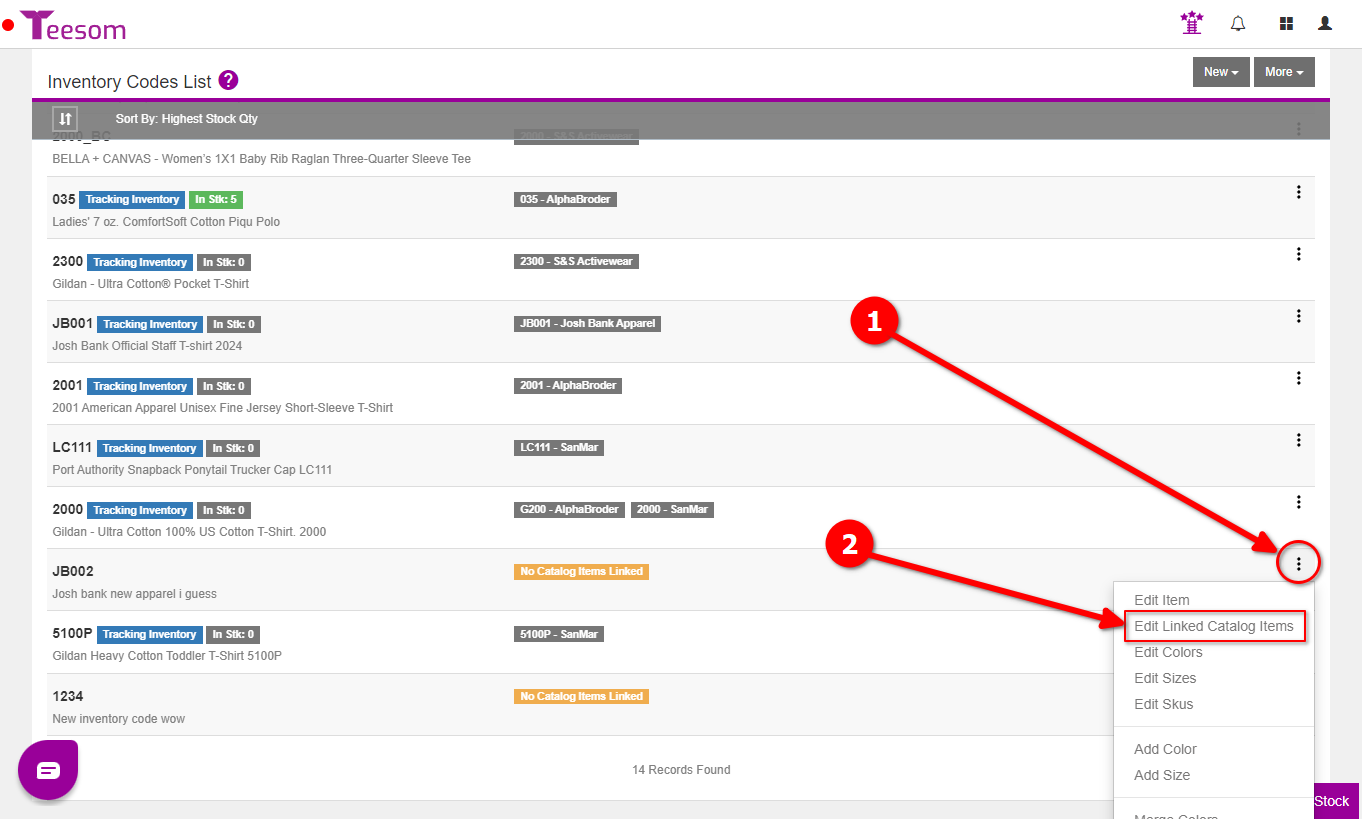
To link a catalog item click on the “3 Dot” menu and select “Edit Linked Catalog Items“.
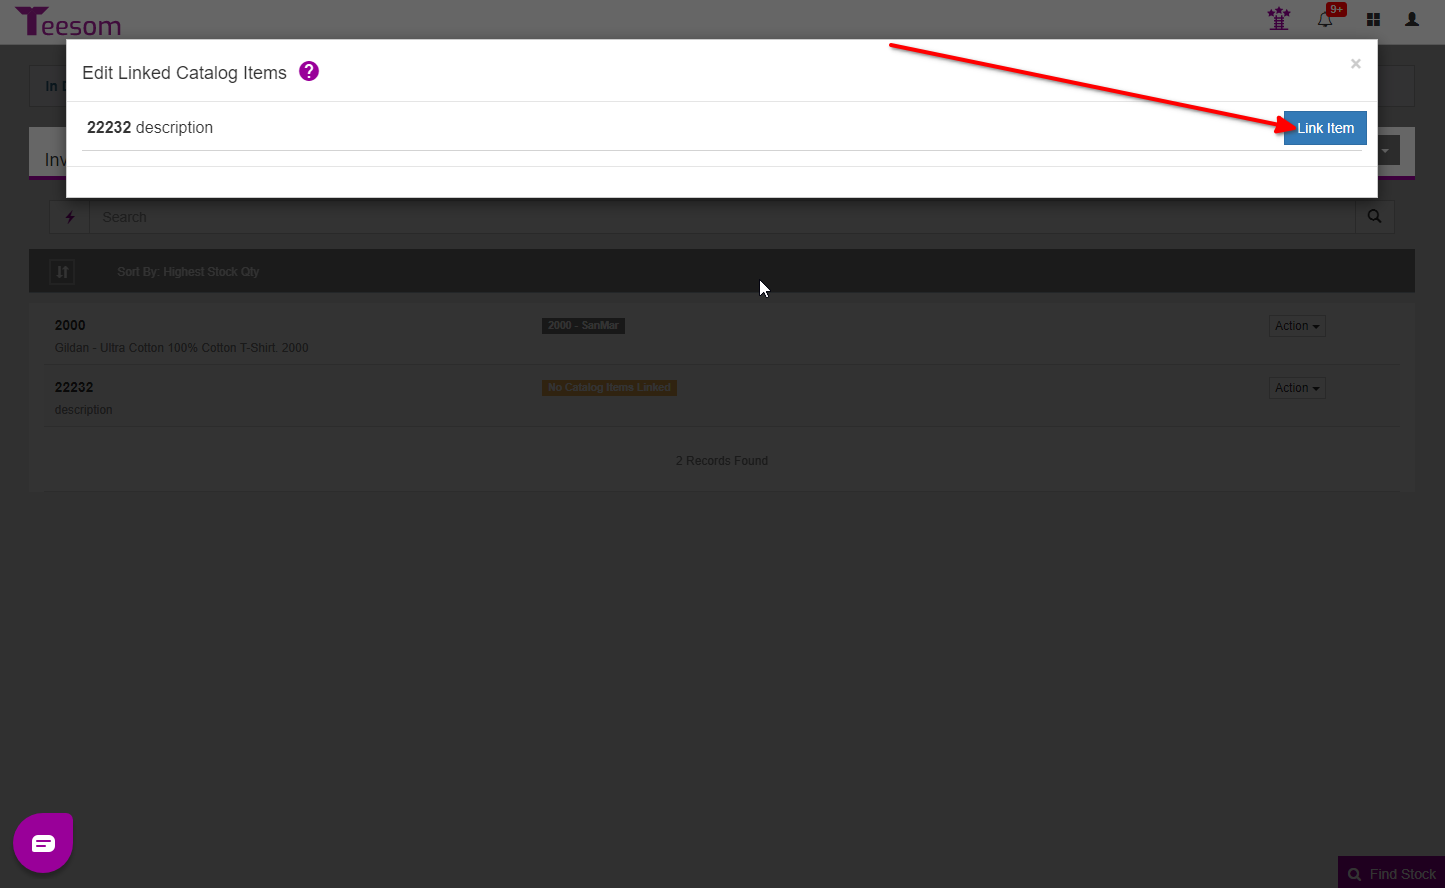
Click on “Link Item” then search for an item via its style code or by browsing one of the catalogs.
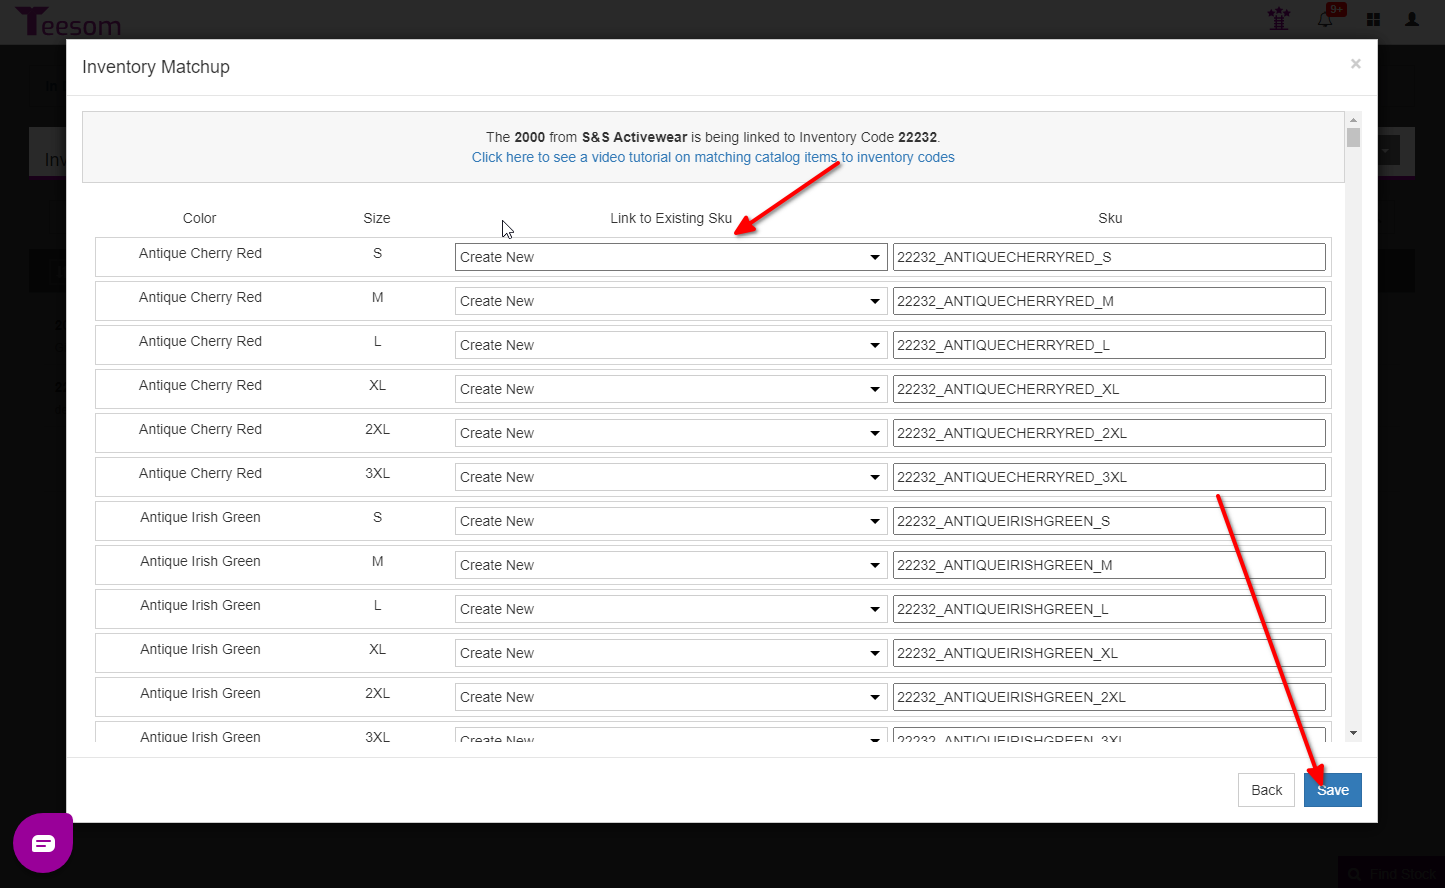
After selecting an item you will be on the Inventory Matchup screen, where you can choose to link it to an existing SKU in the middle column, or keep using the SKU Teesom has created for you in the righthand column.
Click on “Save” to link the item to your new inventory code.
You can see which catalog items are linked to the inventory code in the middle column: