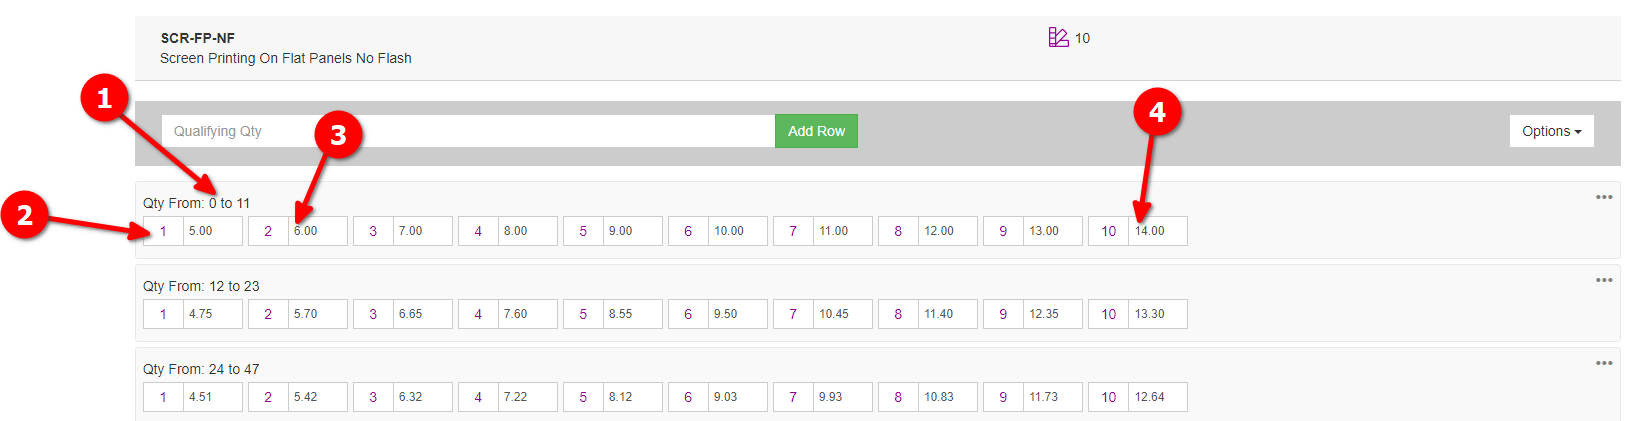
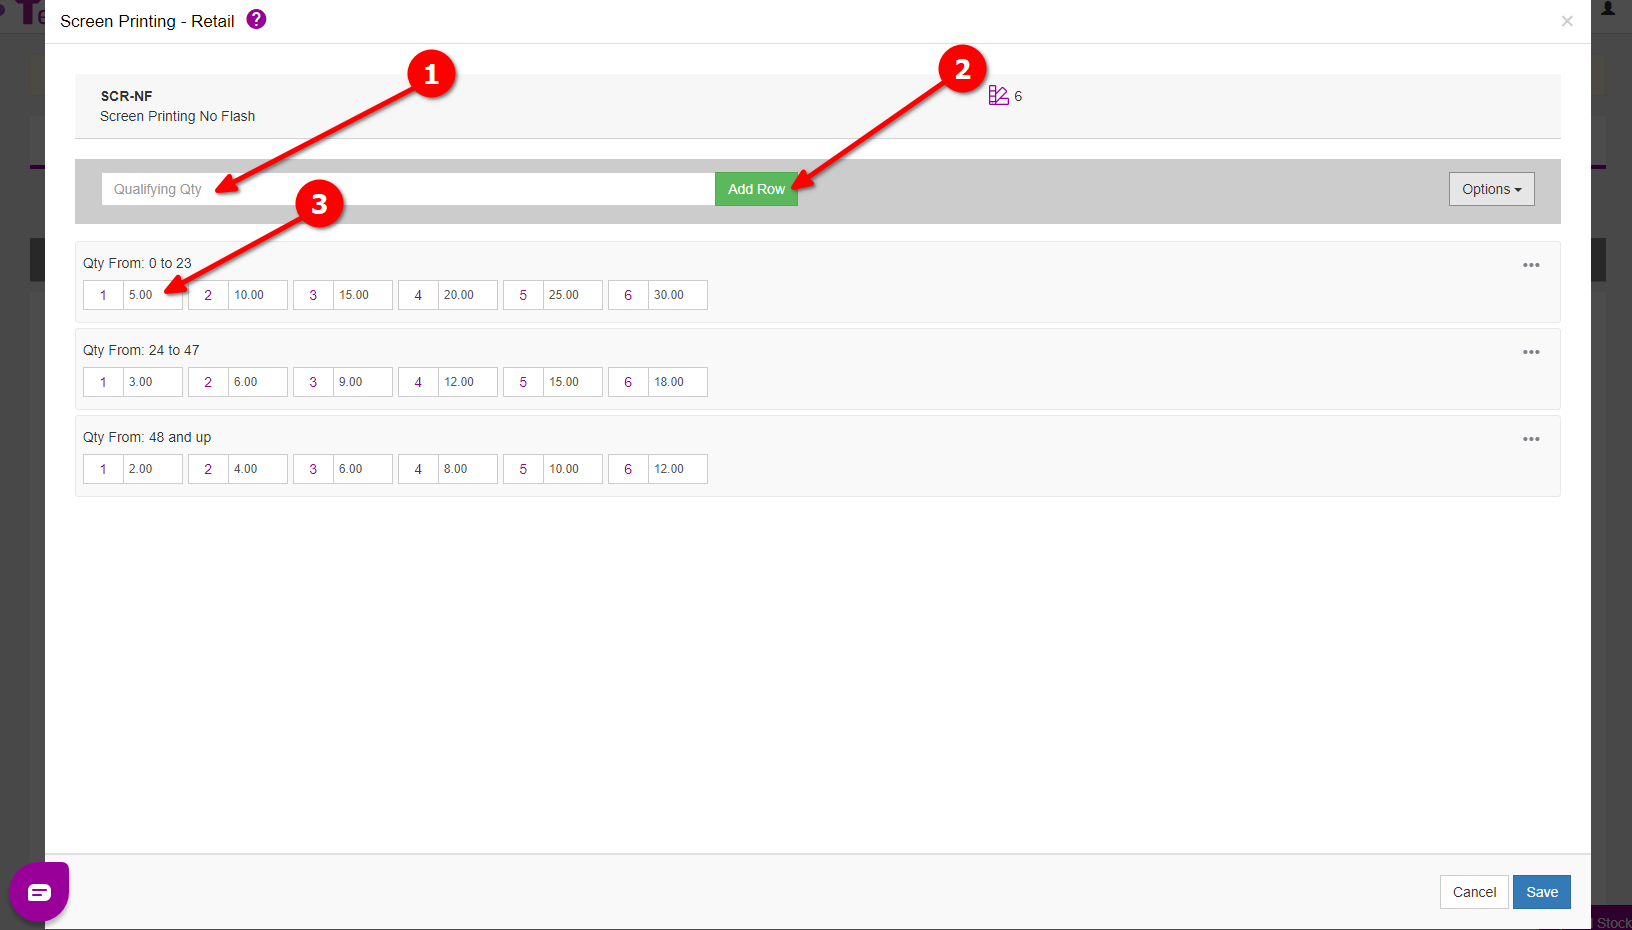
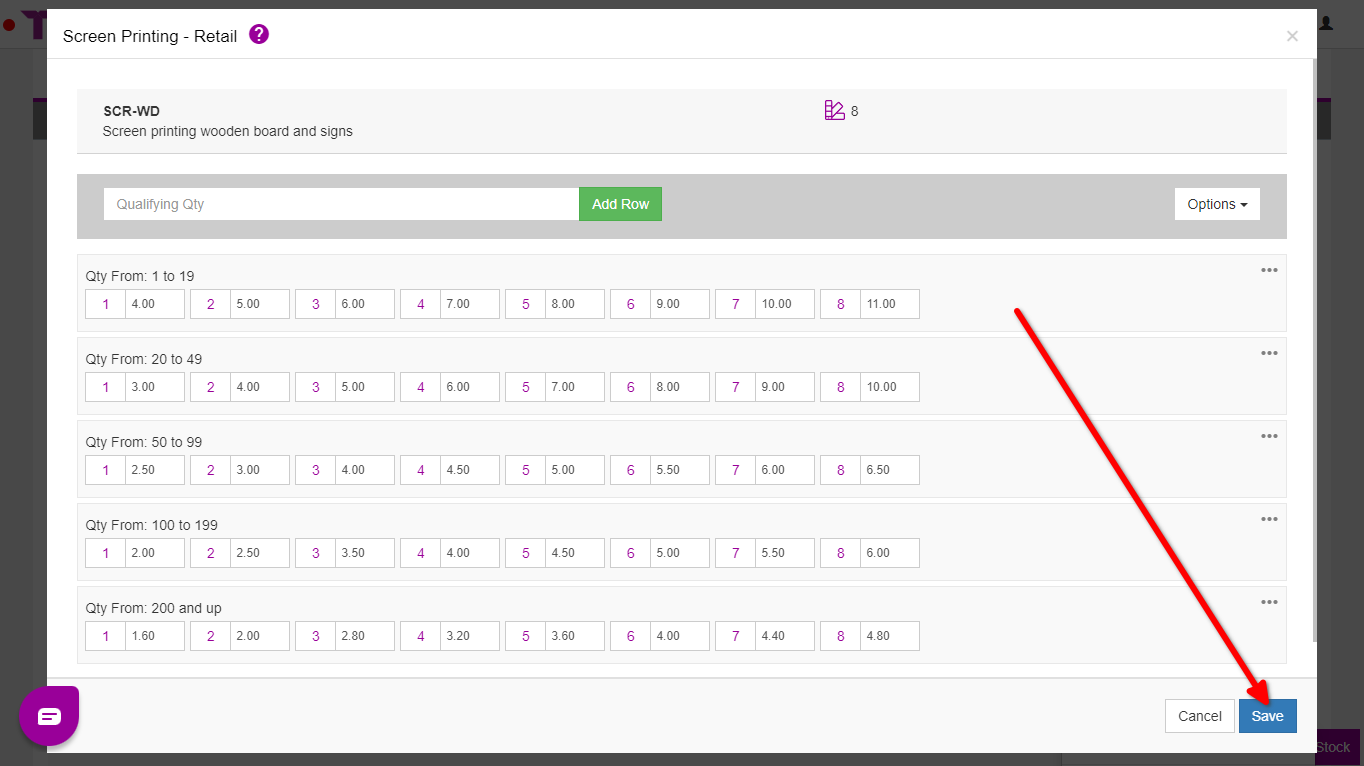
The way Teesom handles screen print pricing is by using quantity breaks for the products, with a set retail price for the number of colors.
For example using the price matrix below for product quantities of 0-11 that have one color Teesom will charge $5, and for products with two colors Teesom will charge $6, and products with 10 or more colors will be charged at $14.
You will use a screen print price matrix to create and house all your screen printing prices using a QTY break system. With a set number of colors for the whole matrix which will have a set price that you will setup. We will explain how to create a screen printing price matrix and how it works in this article.
Create A Screenprint Price Matrix
To create a screenprint price matrix:
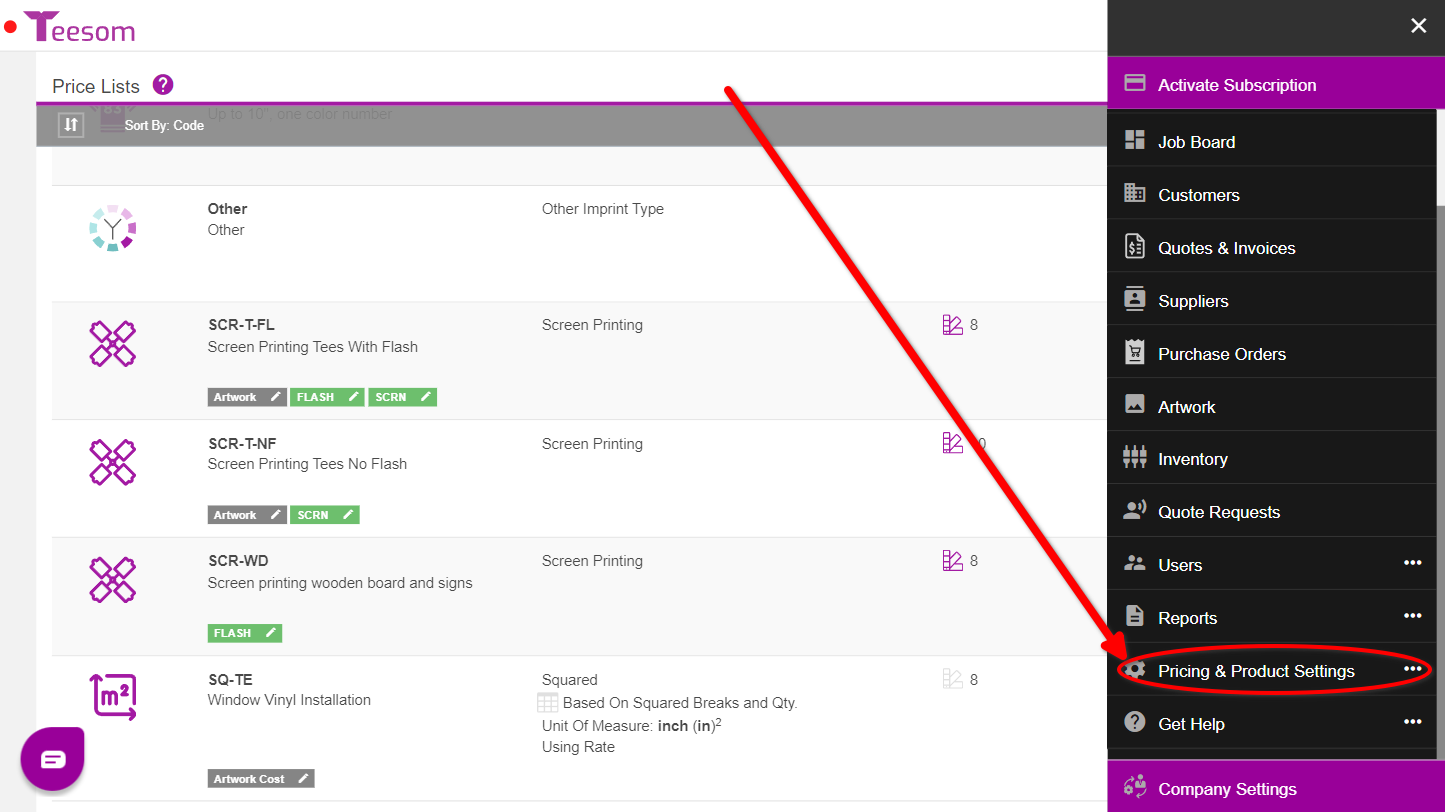
Go to the “Main Menu” -> “Settings“
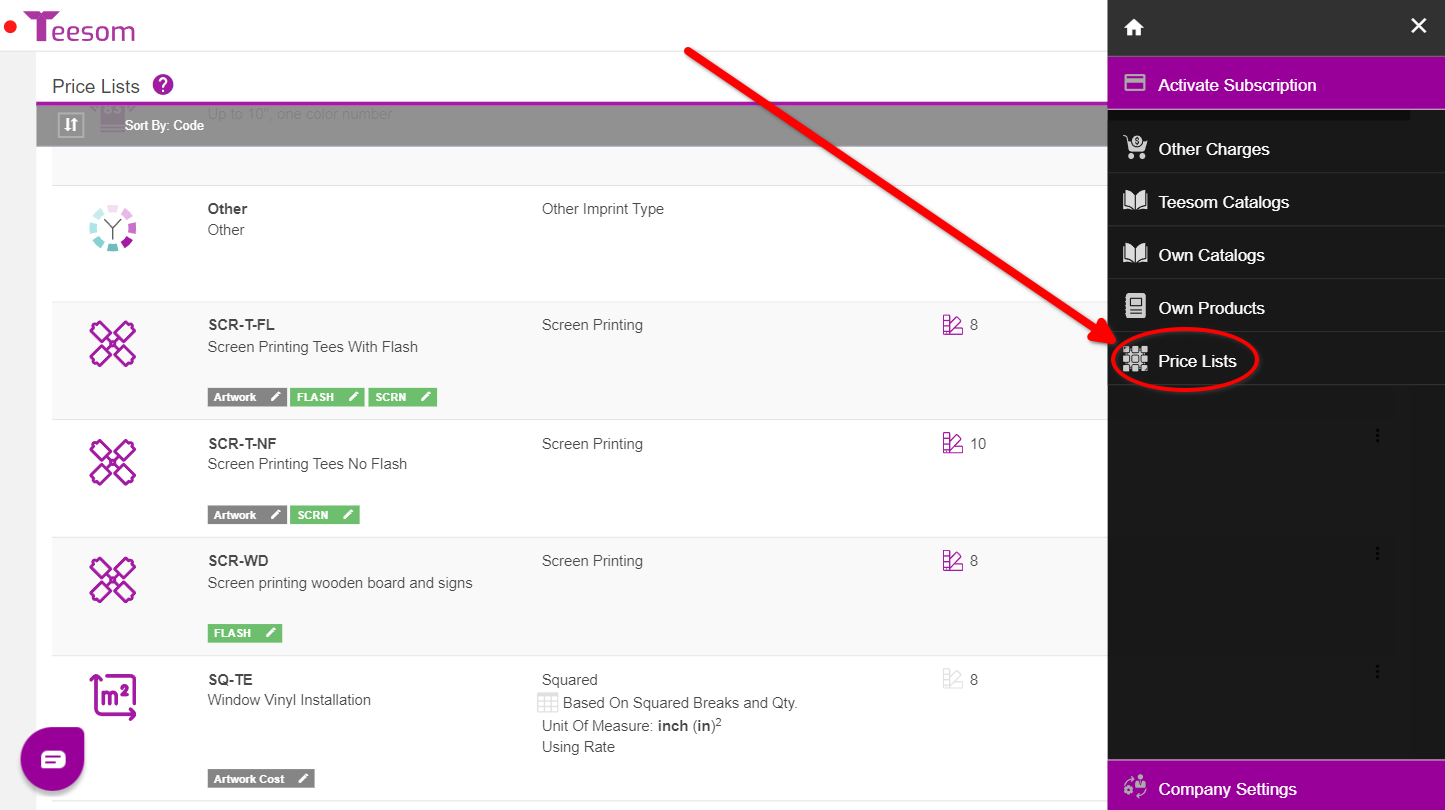
Select “Pricelists“
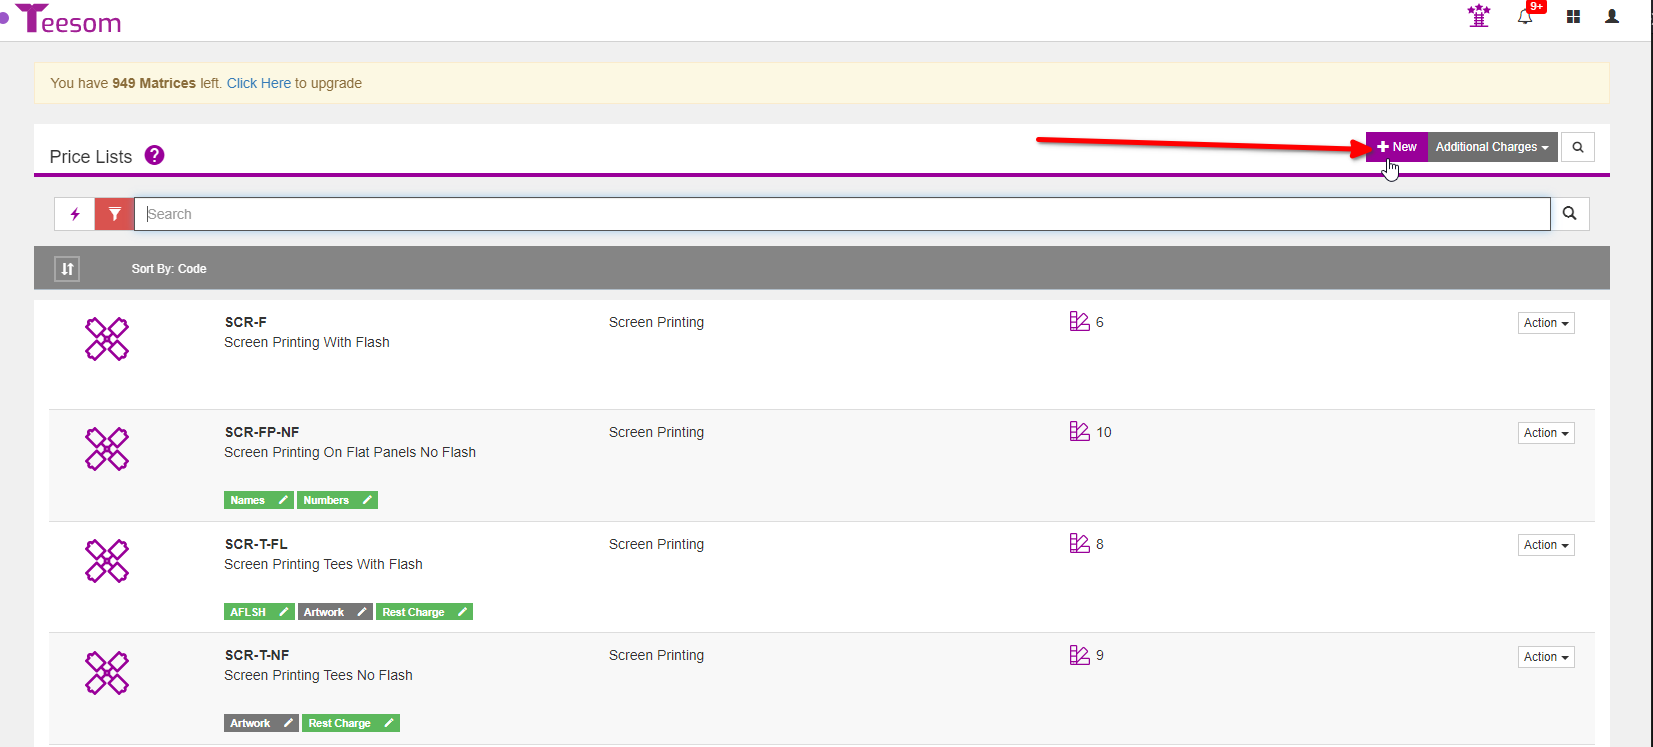
On the Price Lists screen click on “+ New“:
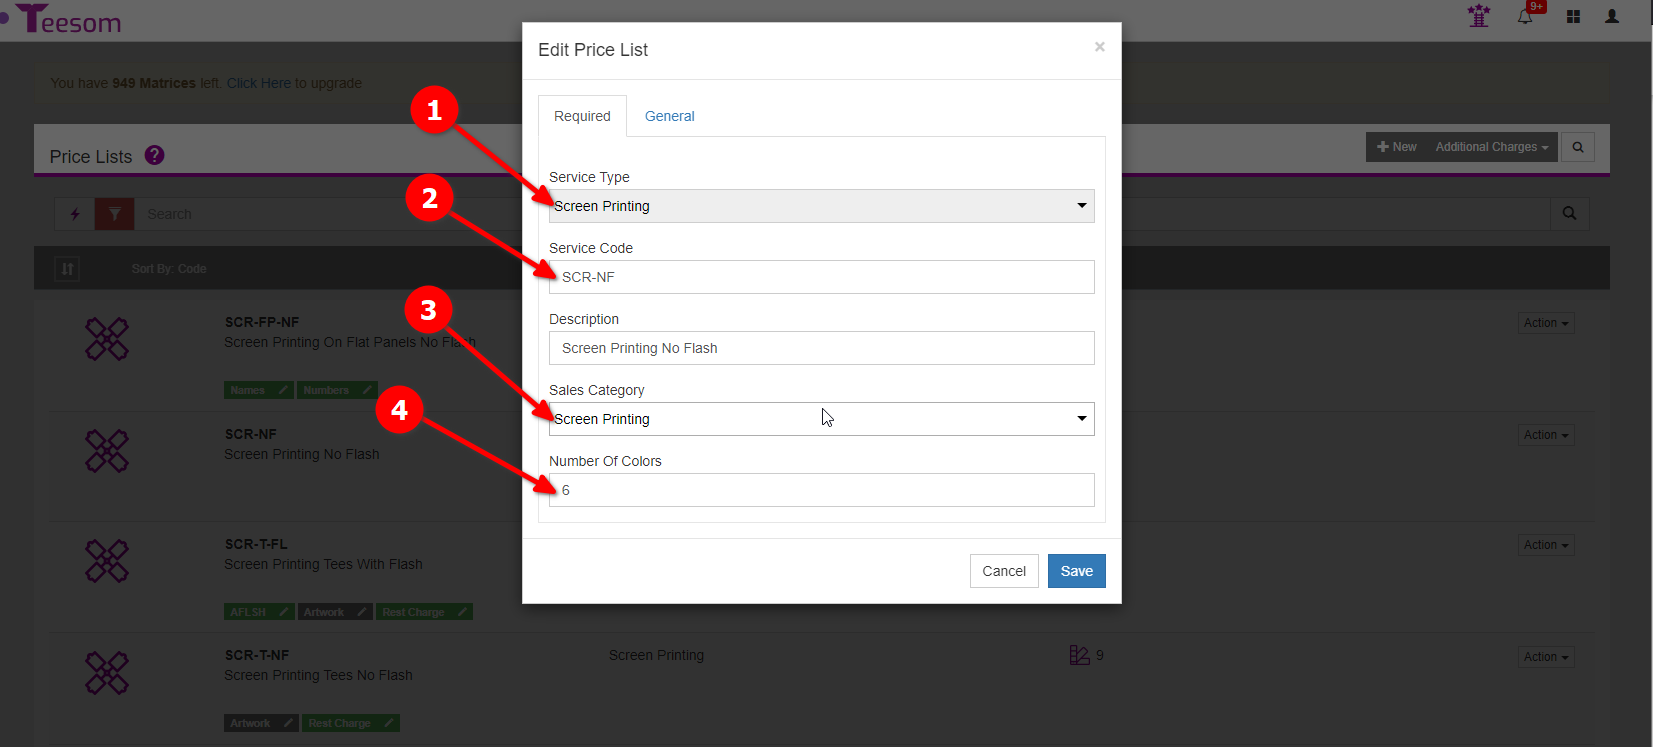
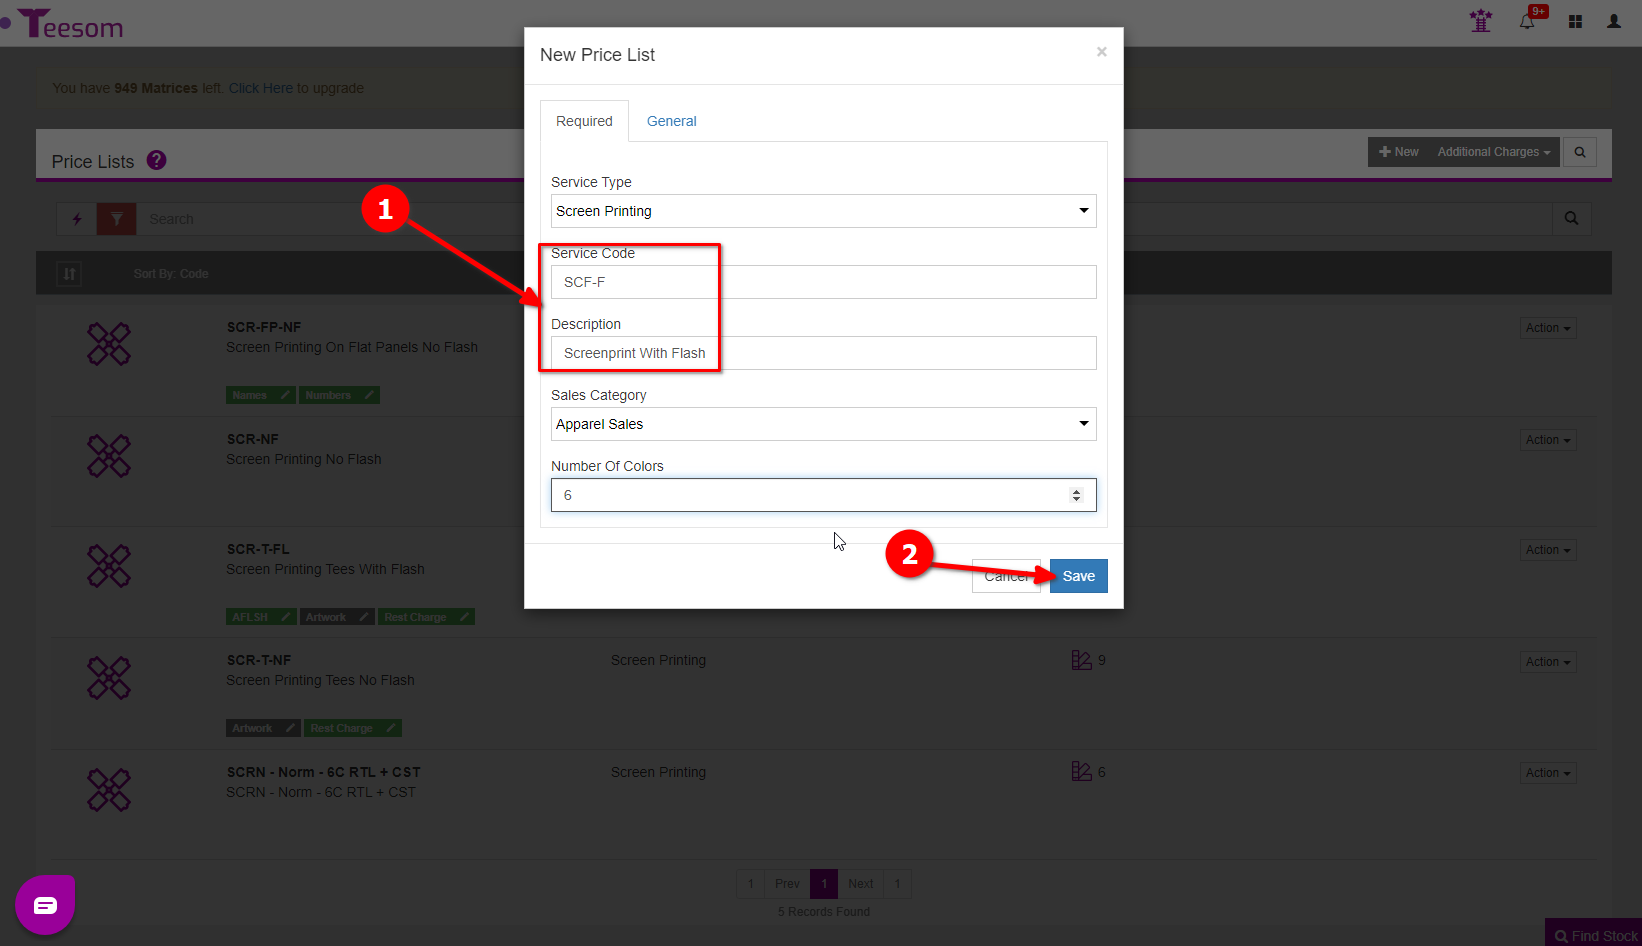
Then when on the “New Price List” screen on the “Required” tab:
Set the Service Type.
Enter a Service Code, this is the “name” of the pricelist in an abbreviated format, for example: Screenprint no flash becomes SCR-NF.
Select a Sales Category.
Enter the Number Of Colors, this will determine the amount of price breaks in the price matrix.
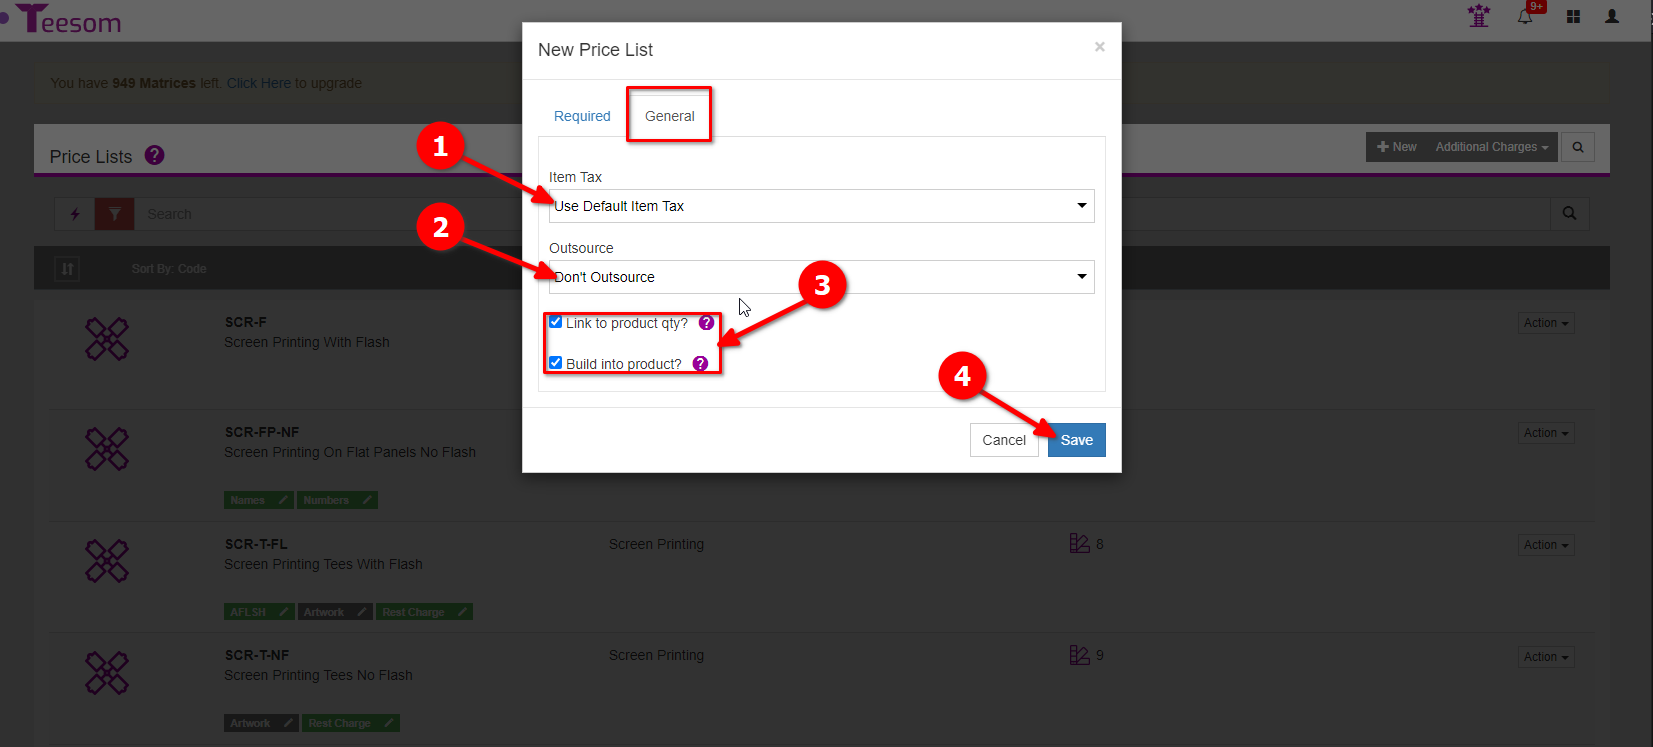
On the “General” tab:
Set the “Item Tax” the price matrix will use.
Choose whether or not you outsource the imprint work.
Check the box “Link to product QTY” if you want the imprint quantity to auto link to the product’s QTY on an order. Check the box “Build into product” to automatically build the imprint’s price into the product row.
Click “Save” to create the price matrix.
Create/Edit A Retail Price Matrix
Now we need to enter the retail prices that the price list will use.
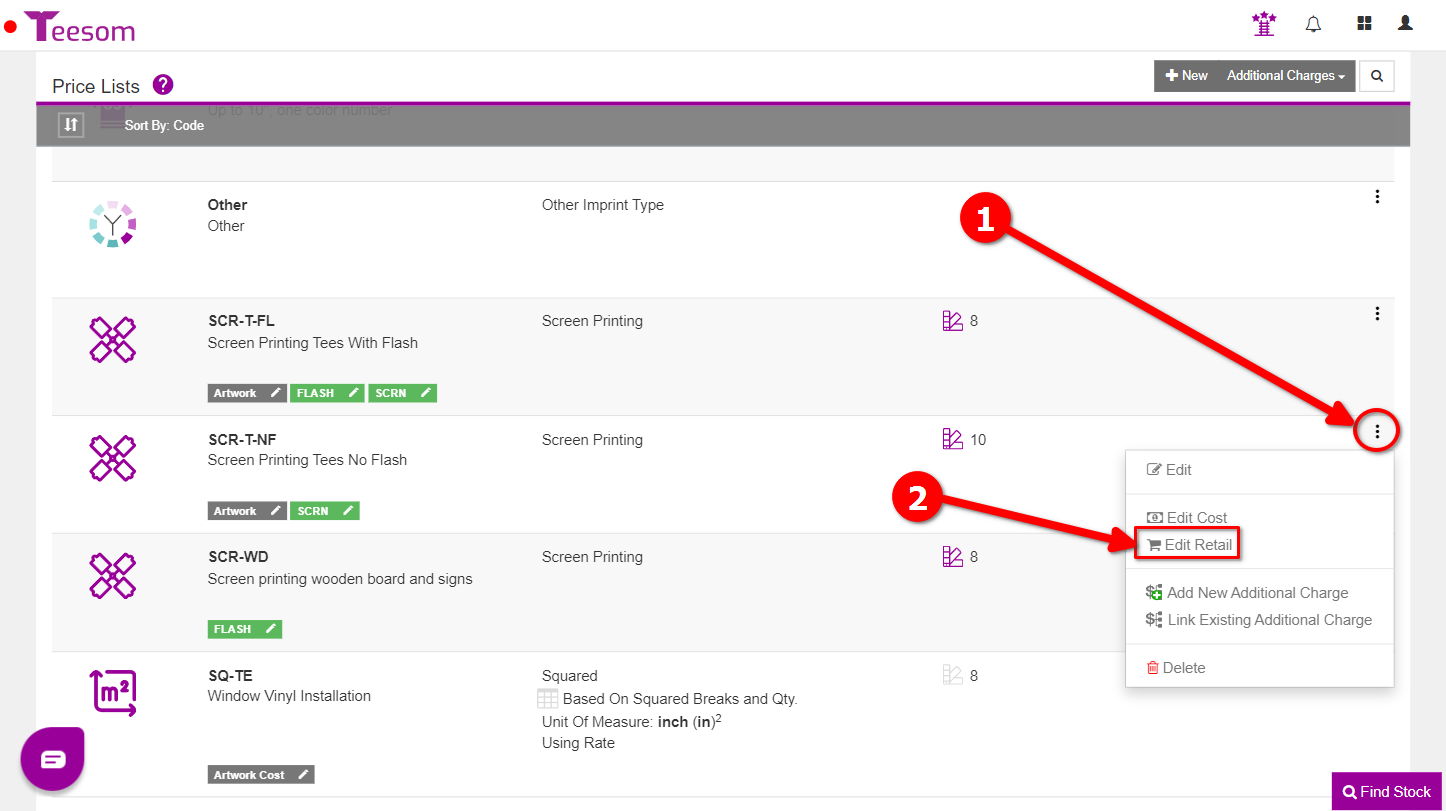
To create the retail price matrix:
Click on the “3 Dot” menu.
Select “Edit Retail“.
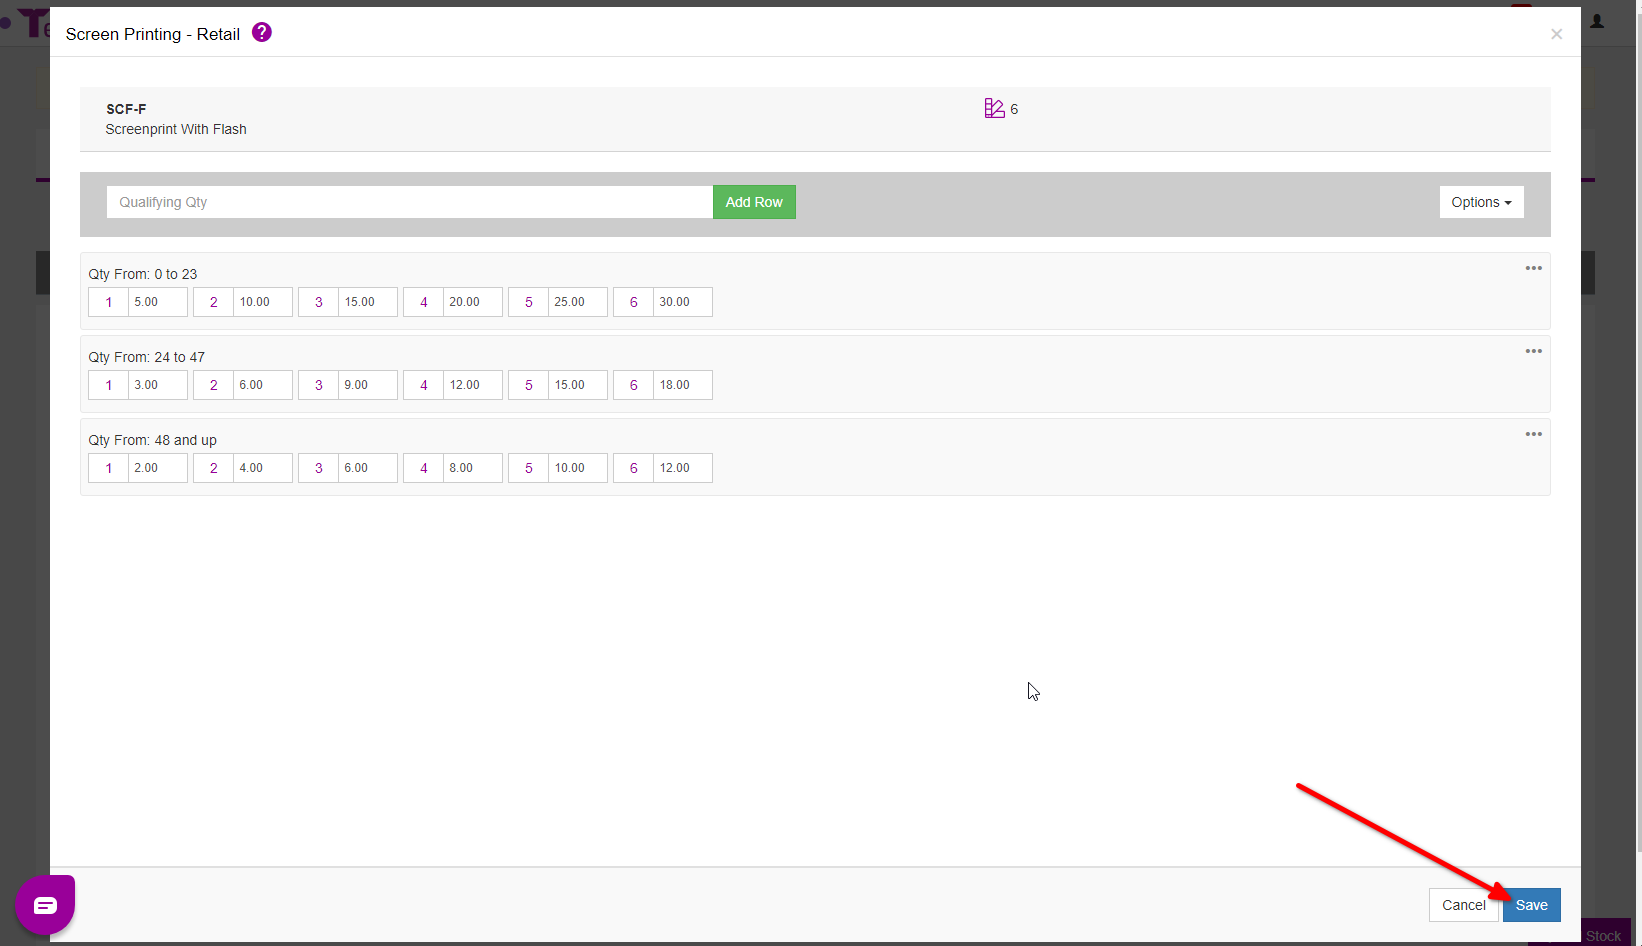
On the retail price matrix:
Enter a quantity. (The first row should always start at 0.)
Click on “Add Row“.
Enter your retail prices for each color for that QTY break.
Repeat until you have all your desired quantity breaks.
Click Save when you are done.
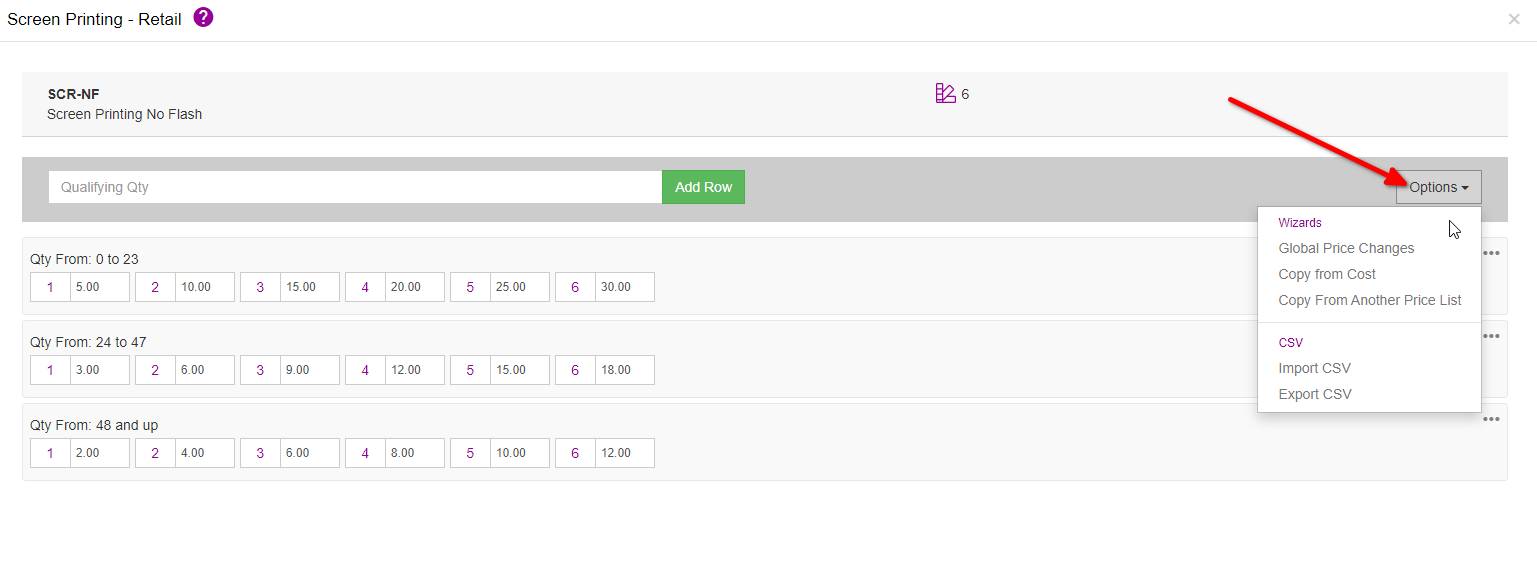
On the retail price matrix there are two dropdown menus that provide some handy options for making the process of editing/creating a price matrix easier. We will give you a brief explanation of both of them below.
The Options Dropdown Menu - Bulk Edit
The “Options” dropdown menu provides a variety of options to quickly setup your price matrix.
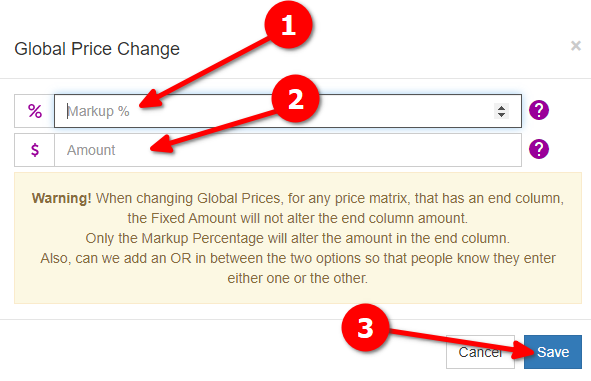
Global Price Changes: This option allows you to change the pricing on all your rows at once.
Enter a percentage to markup or use a negative percentage to markdown the price on all your rows.
OR Enter a flat amount to add on or use a negative to deduct from all rows.
Click on “Save” to apply the changes.
Copy From Cost: If you have set up a cost price matrix you can simply copy the price rows from that directly into your retail price matrix. Then use the ‘Global Price Change’ function, as described above, to apply a markup. (You can also copy from retail on the Cost Price Matrix screen.)
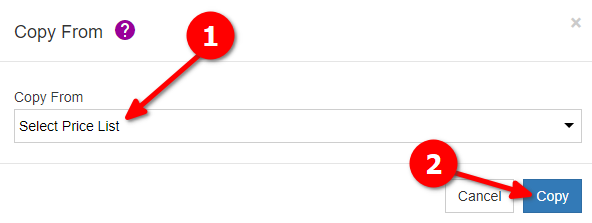
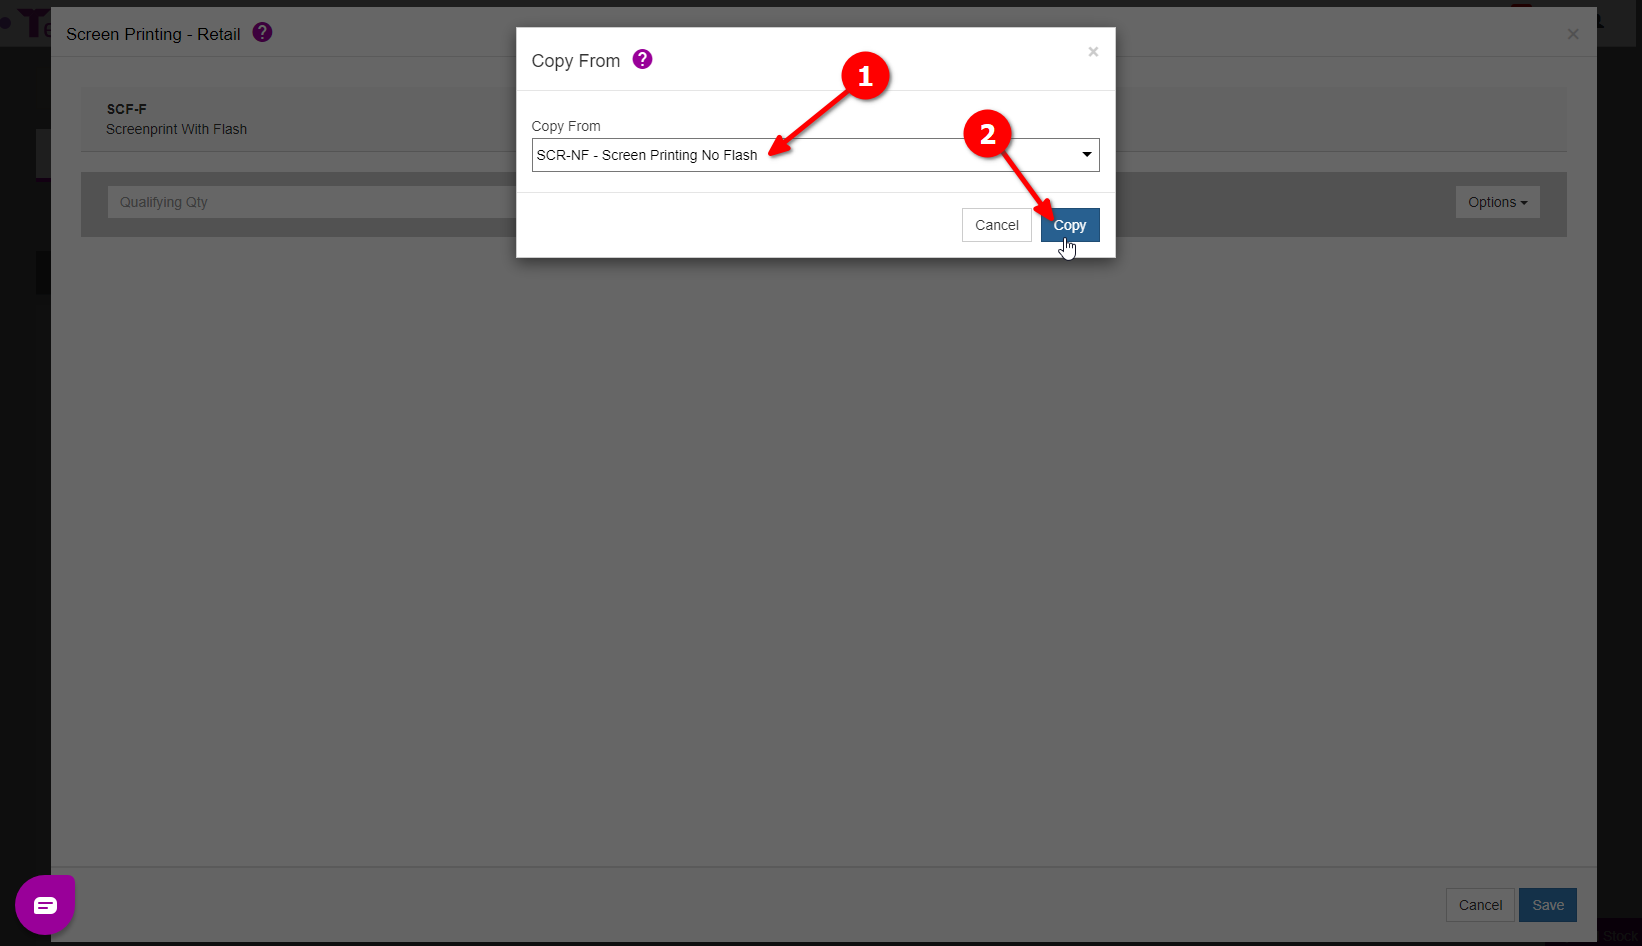
Copy From Another Pricelist: If you already have a price matrix setup and simply want to duplicate it, you can use this option to copy the price matrix setup from that one into this one. (Only for same service type i.e. screen printing, embroidery, etc.)
Select the pricelist to copy from.
Click on “Copy” to apply the changes.
Export/Import CSV: Click on “Import CSV” to import a price CSV if you have one. Click on “Export CSV” to export the price matrix as a CSV. Using this functionality can help speed up the uploading of your prices but you will need to follow the same format as Teesom for the CSV file.
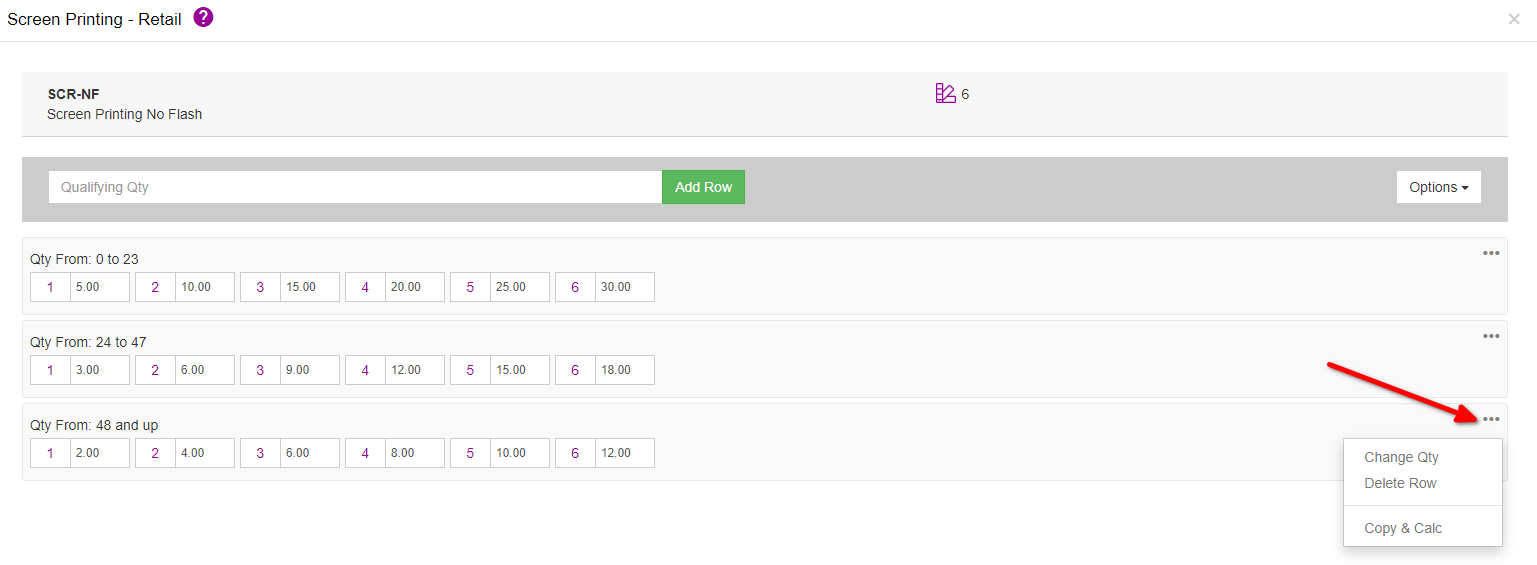
The [ … ] or overflow menu, on the righthand side of each quantity break, provides some options to help you with editing existing rows and adding new rows:
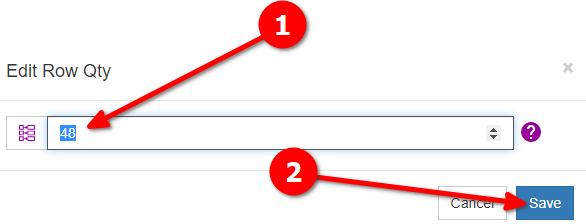
Change QTY: Click on “Change QTY” to change the QTY value on the row.
Enter the new QTY.
Click “Save” to apply the change.
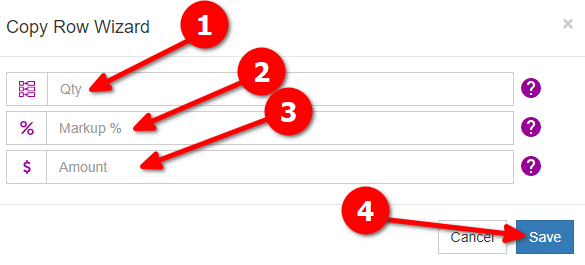
Copy & Calc: This feature allows you to take the values from the previous row and either mark them up or mark them down in order to calculate the values for the next row.
Enter the quantity break for the next row.
Enter a markup or markdown percentage:
If you enter a percentage here you will leave the amount field. (No. 3 in the image to the right) empty.
TIP: If you use a negative percentage, Teesom will mark down by that amount.
You can either add a percentage or a flat amount. If you have a value entered into the percentage field above, leave this empty, otherwise: add a flat value to either increase (positive value) or decrease (negative value) the amount for this row.
Click “Save“.
When you are done adding all your rows click on “Save“.
If you do outsource your imprints you will want to setup a cost matrix. It's the exact same process as the retail matrix. (You can just copy the retail price matrix, by going to the "Options" dropdown and clicking on "Copy From Retail".)
Create a Screenprint Price Matrix With Flash
If you want to create a screenprint price matrix with flash you will follow the same process of creating a price matrix as describe earlier in the article, but you will add an additional charge to it called “Flash”.
When you create the new price matrix:
Enter the Service Code and Description, for this example I used SCR-F for the code and “Screenprint with flash” for the description.
Click “Save“.
After you have created your new price matrix you can simply copy your retail price matrix from your no flash price matrix:
Click on the “3 Dot” menu.
Select “Edit Retail“.
On the retail price matrix:
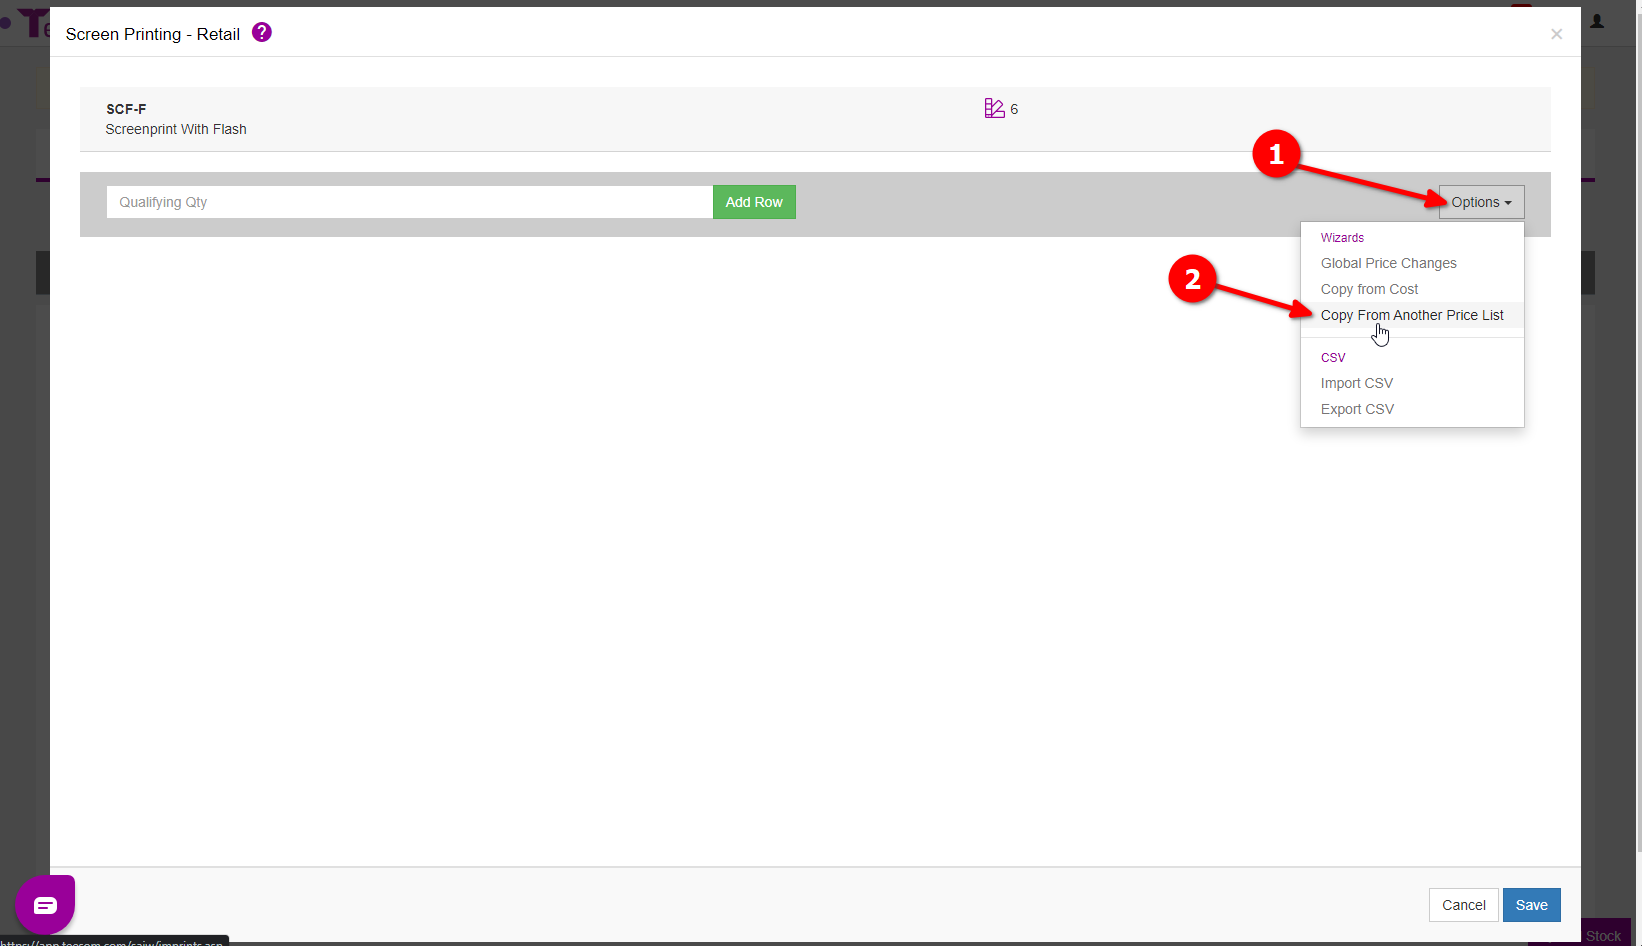
Click on the “Options” dropdown menu.
Select “Copy From Another Pricelist“.
Select the price matrix to copy from.
Click “Copy” to copy the price matrix into your new one.
Click on “Save” to create the pricelist.
Additional Charge - Flash
Now to add the additional flash charge:
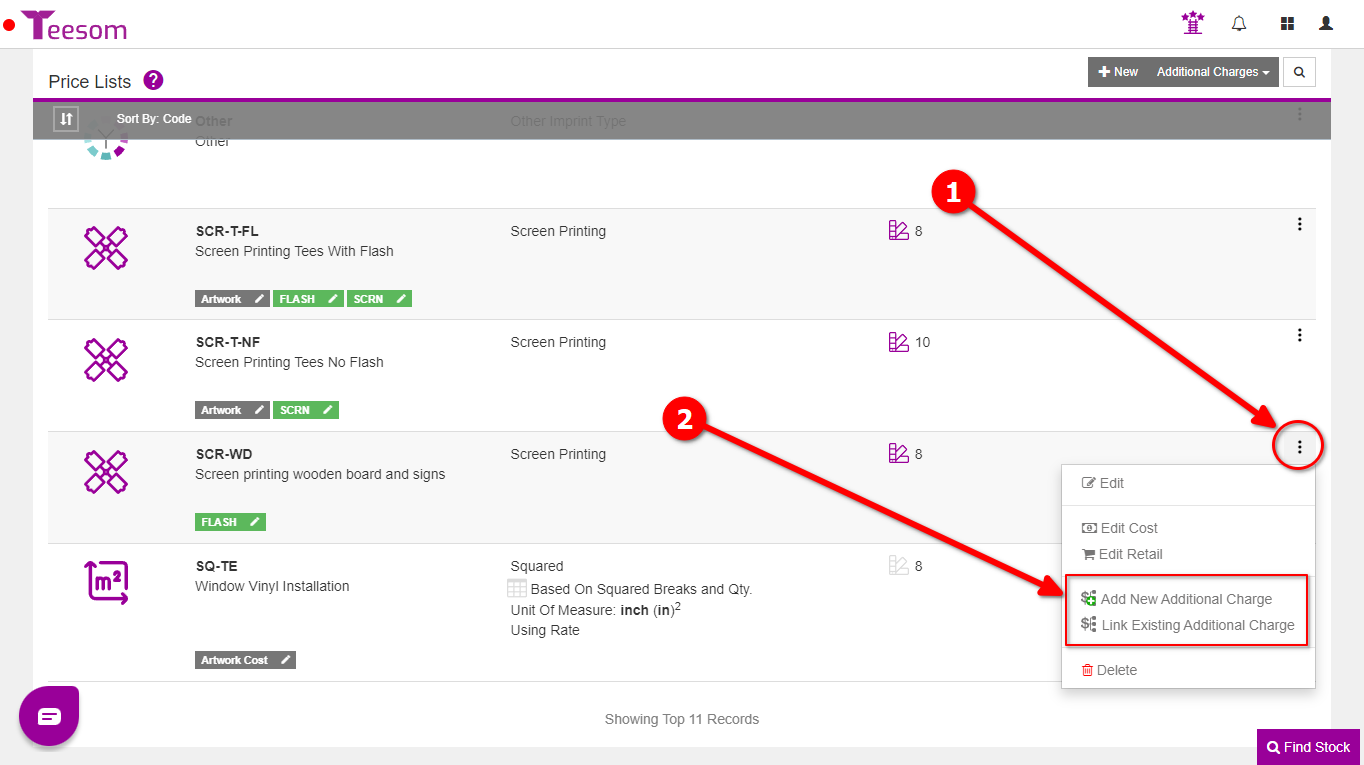
Click on the “3 Dot” menu.
Select “Add New Additional Charge” to create a new charge, or “Link Existing Additional Charge” if you already have a flash charge. For this example we are creating a new charge.
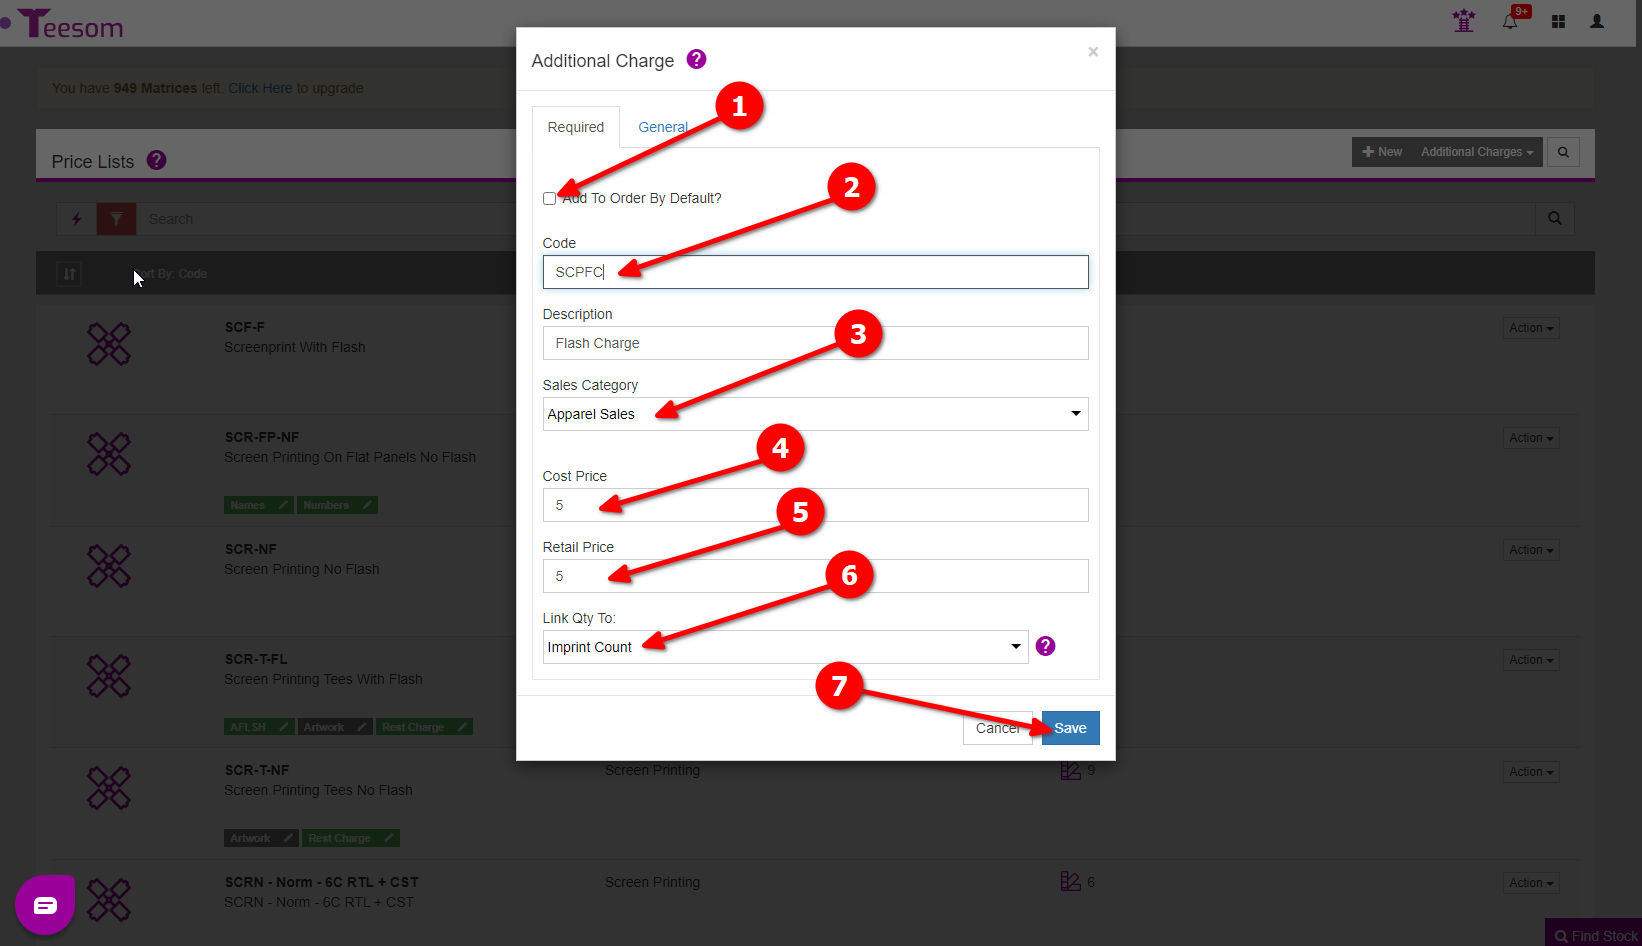
After clicking on “Add New Additional Charge“:
Check “Add To Order By Default” if you want this charge to be added to orders by default. If this is unchecked you will have to manually add the charge when using this price matrix.
Enter the code. (Abbreviated name of the charge.)
Select a Sales Category.
Enter a cost price. (This is must be filled even if you don’t outsource, you can enter 0.)
Enter a retail price.
Select what quantity to link the charge to, you can also choose not to link it.
Click on “Save” to create the charge and add it onto the price matrix.
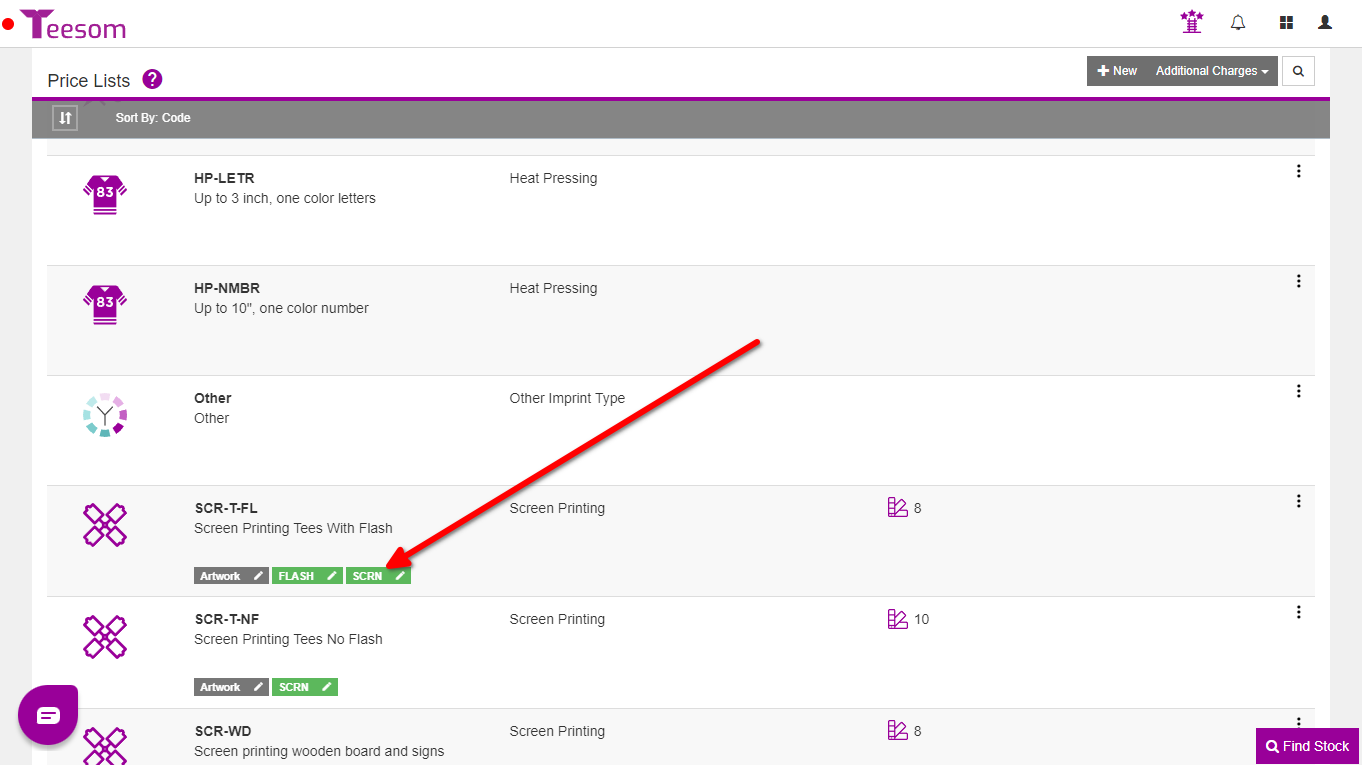
After clicking “Save” you will now see the additional charge on your price matrix.
If you checked the box “Add To Order By Default” whenever you add the price matrix to an order the charge will be added automatically aswell. (The additional charge will be shown in green under the price matrix.)
If you left “Add To Order By Default” unchecked you will have to manually add the charge when using this price matrix on an order. (The additional charge will be shown in gray under the price matrix.)