In this article we will be going over working with goods. From creating a purchase order to receiving goods, as well as issuing stock to an order and working with customer supplied goods.
Purchasing Goods Through A Supplier
There are 2 different types of purchase orders you can create; a consolidated PO and a single order PO.
Single order POs are created based on one order and are used to purchase goods for that order alone.
Consolidated POs are created either from the “Purchase Orders” screen or the Job Board and are used to order goods for multiple orders and/or POs unrelated to any orders.
Create a Single Order PO
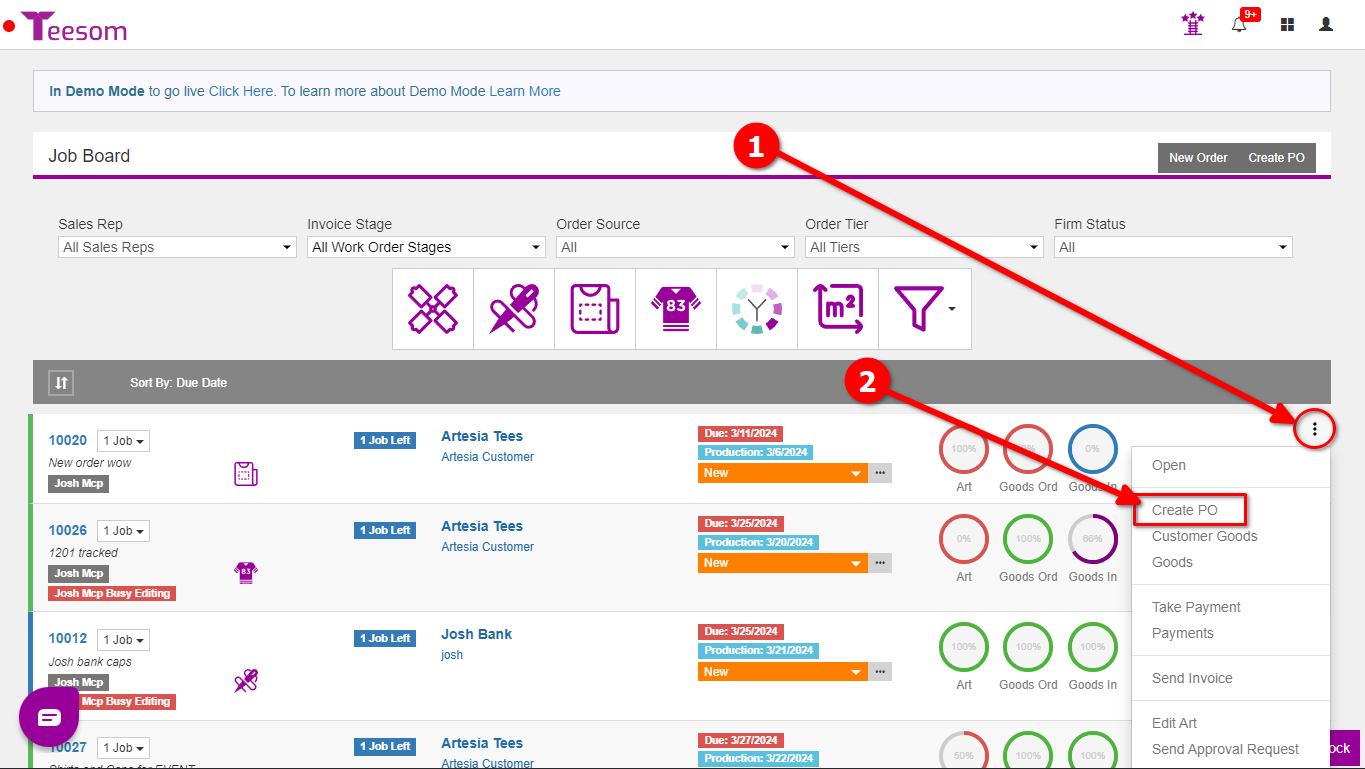
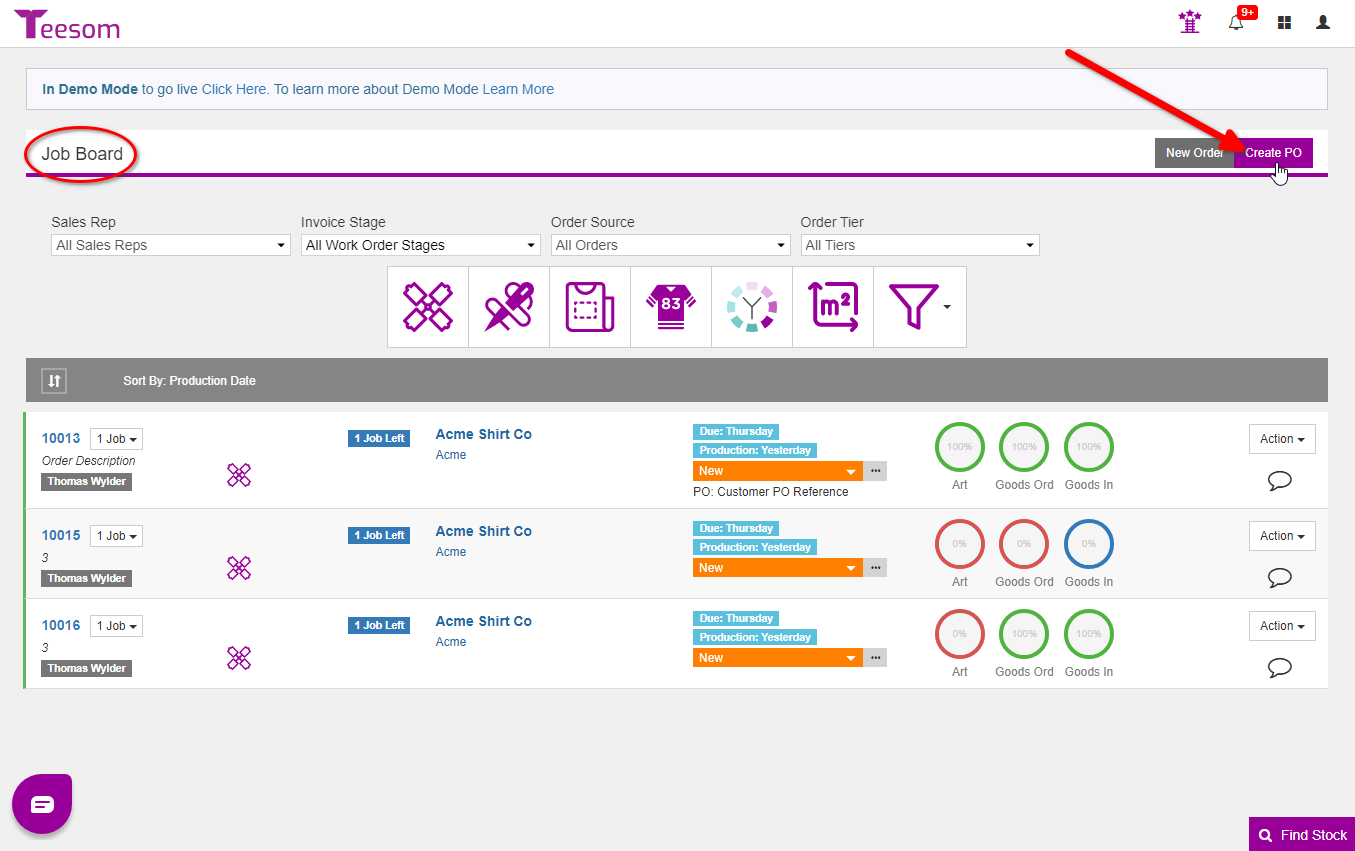
Create a Purchase Order from the Job Board
To create a “Single Order PO” from the job board:
Click the “3 Dot” menu on the order.
Select “Create PO“.
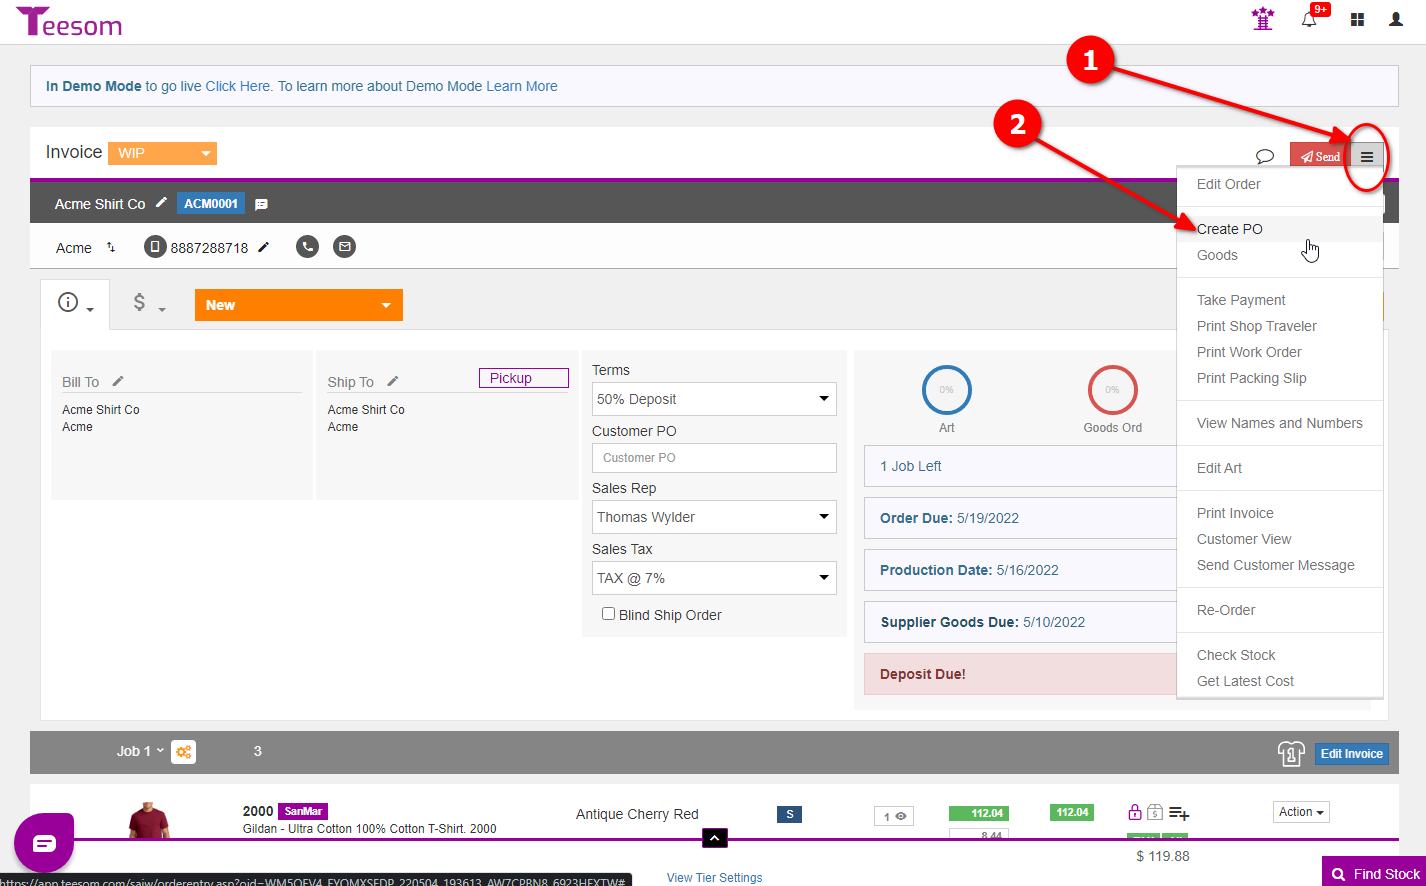
Create a Purchase Order from the Invoice
To create the PO from the order/invoice page:
Click the “Hamburger” menu.
Select “Create PO“.
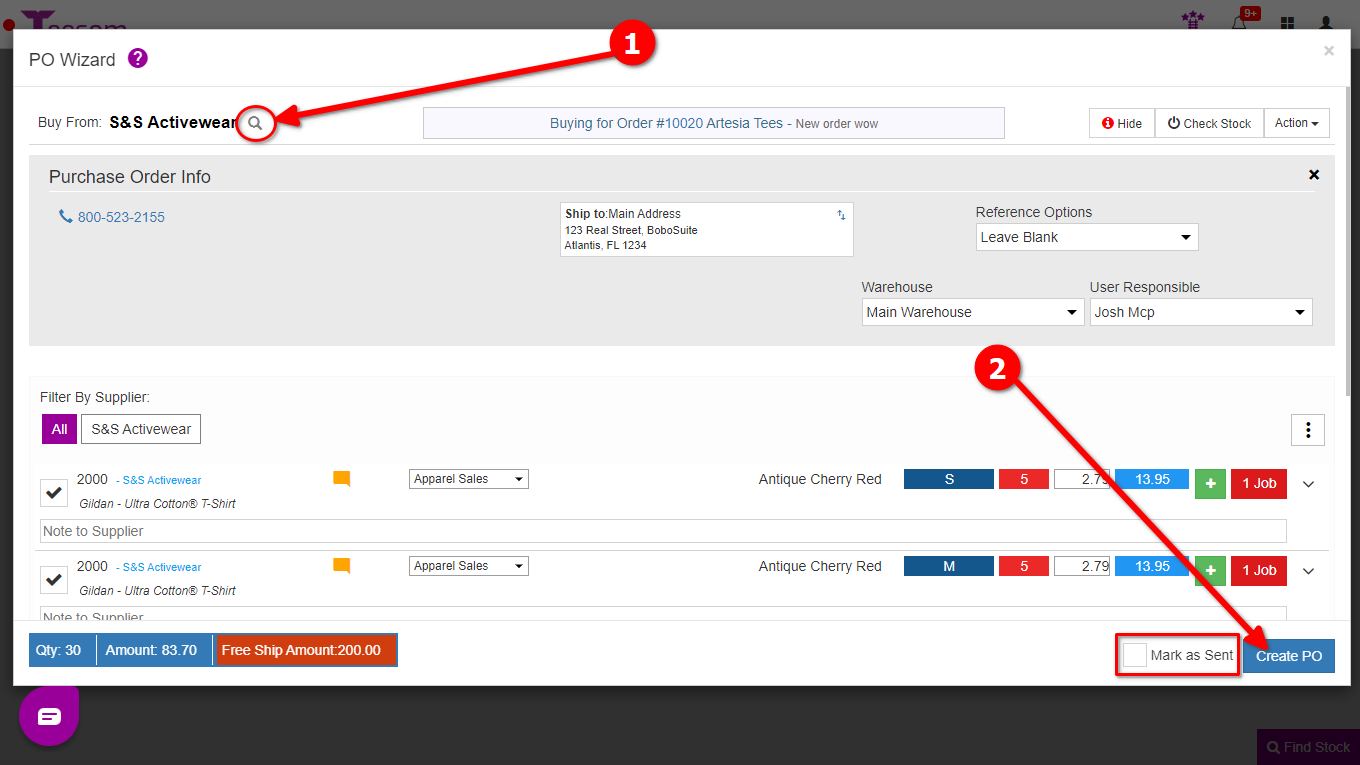
This will open the PO Wizard:
Click on the magnifying glass then enter the name of the supplier and select them.
Click on “Create PO” when you are ready. (This is a great time to double check that things are correct.)
You can also check the box “Mark as Sent” if you don’t want to actually send the PO to the supplier.
Issuing Stock For A Single Order PO
If you already have some of the stock you can issue that stock to the order before creating the PO.
Any items issued from stock will not be added to the purchase order, as they will now be marked as received.
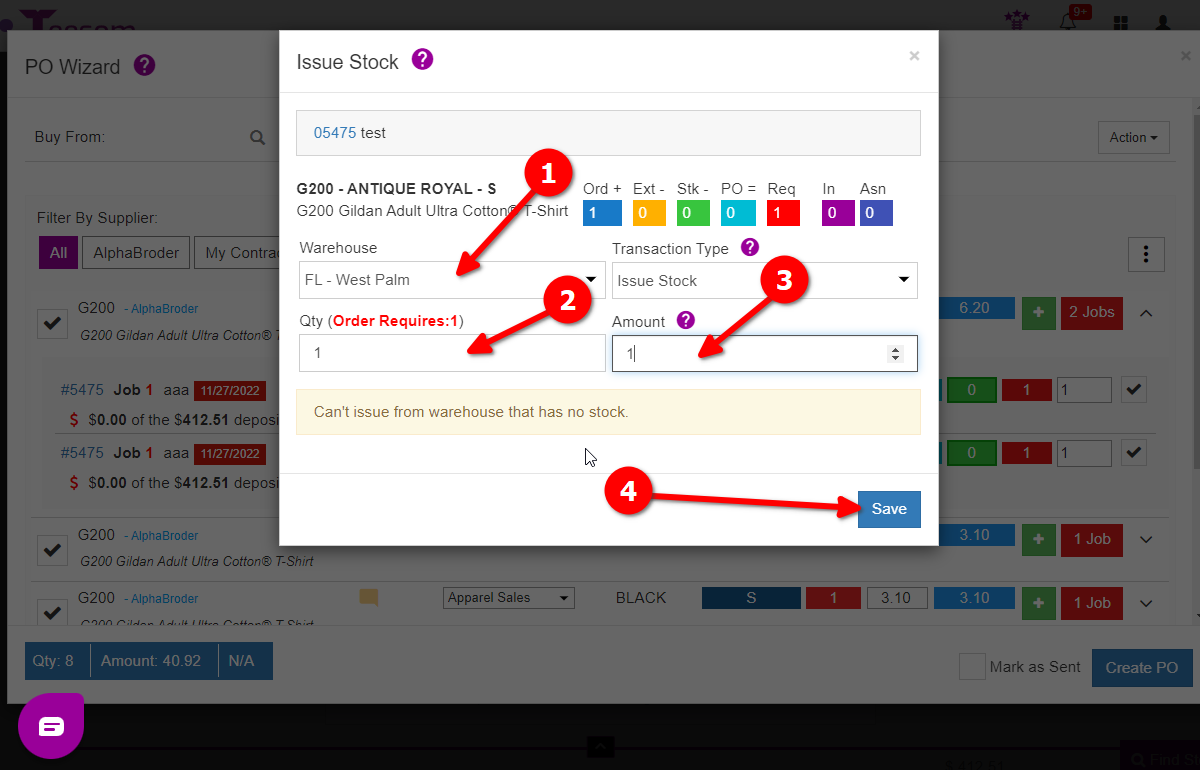
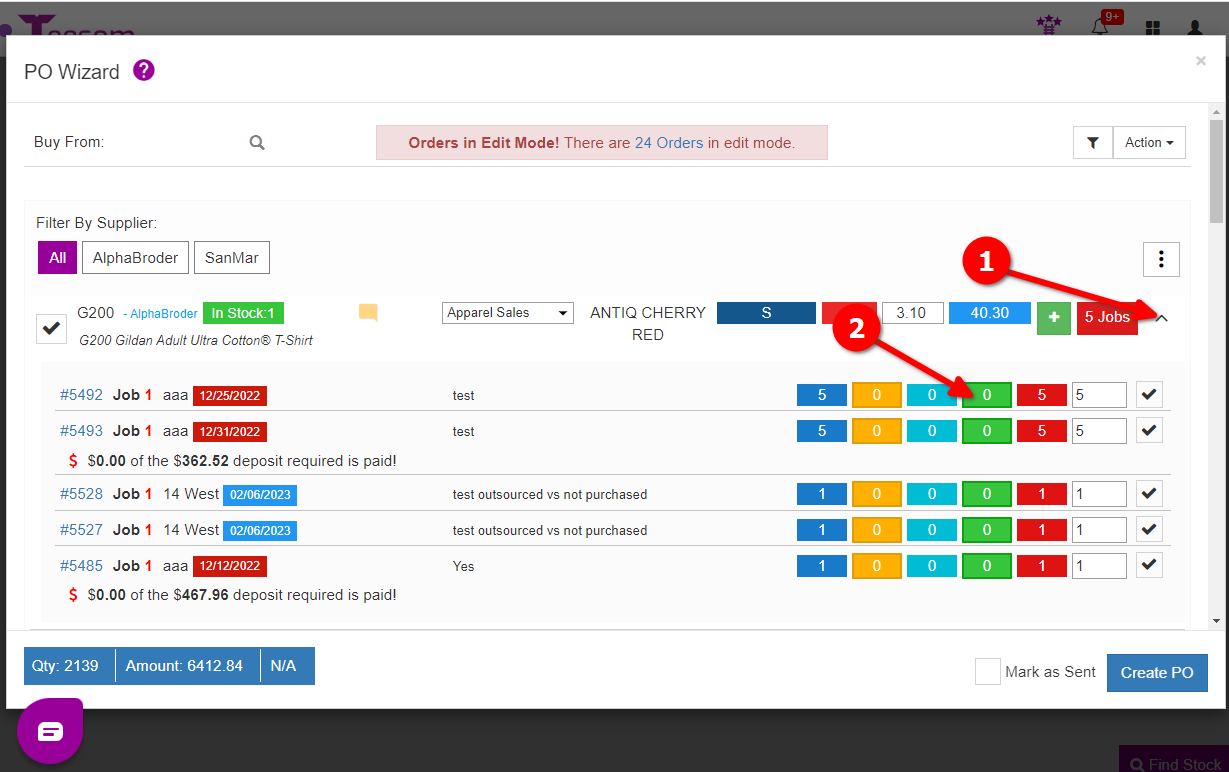
You can issue stock to an order from the PO wizard. To issue stock for a single order PO:
Click on the dropdown arrow.
Click on the “green box”.
On the “Issue Stock” screen:
Select the warehouse you want to issue stock from.
Enter the quantity you want to issue.
Enter the cost. (EX: $1 per shirt.)
Click “Save“.
The number in brackets next to to the name of the warehouse indicates how much stock it has.
Create a Consolidated Purchase Order
You can create a "Consolidated" Purchase Order from the Job Board or the 'Purchase Order List' screen
A “Consolidated Purchase Order” is for ordering required items for multiple jobs at once. This can help with meeting the minimum free shipping amount some suppliers provide.
A consolidated PO can be made from the Job Board, Purchase Order List, and Tasks page. We will be creating the consolidated PO from the Job Board in this example:
Go to the Job Board then click on “Create PO“.
This will bring up the “PO Wizard” which will now show you all the items that need to be ordered for all your open WIP Invoices.
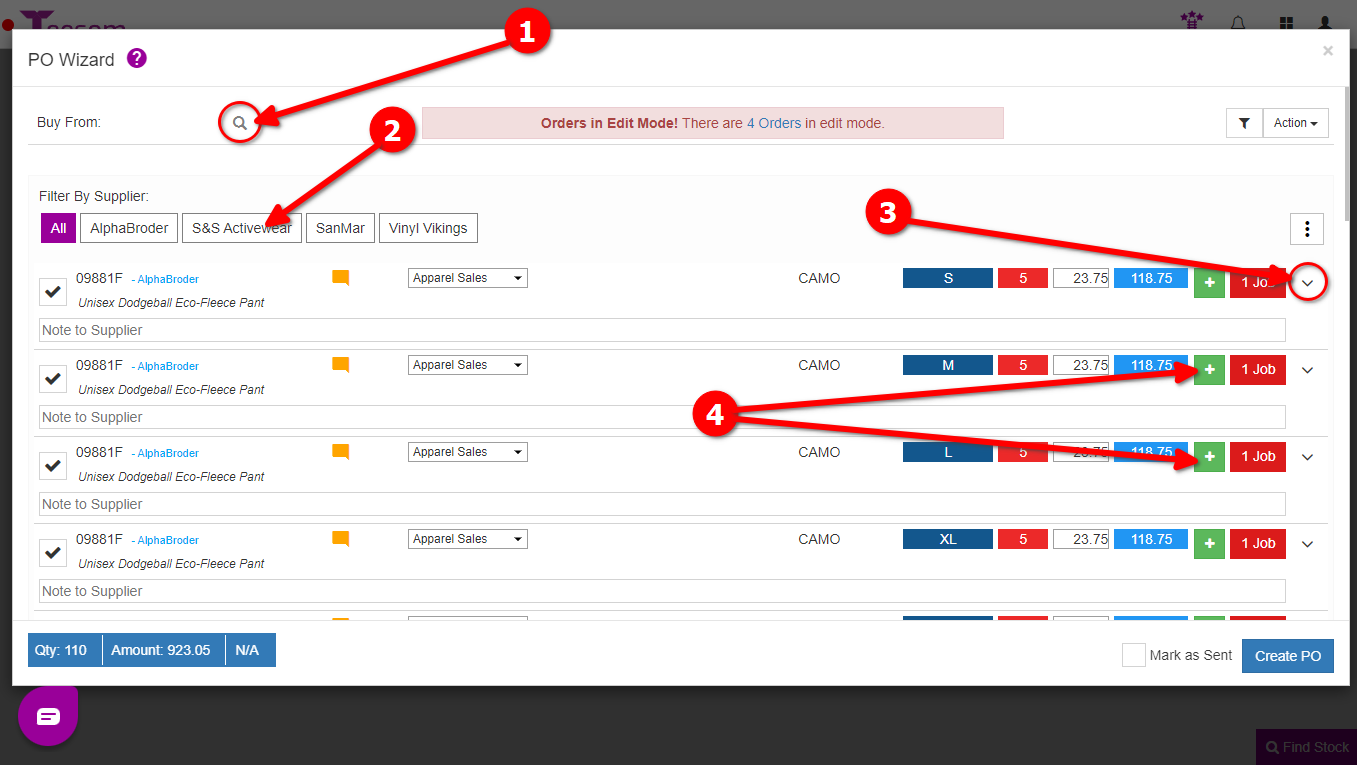
Click on the magnifying glass then enter the name of the supplier and select them.
Click on the supplier name to filter the goods to only those that come from that suppliers catalog.
On the far right click the dropdown arrow to expand the row to view all the orders that this item is linked to.
Click on the green “+” to add extra of this item that will not be linked to any order(s) for stock.
TIP:You are able to add extra goods to your order even after you have received the goods. Click here to learn how.
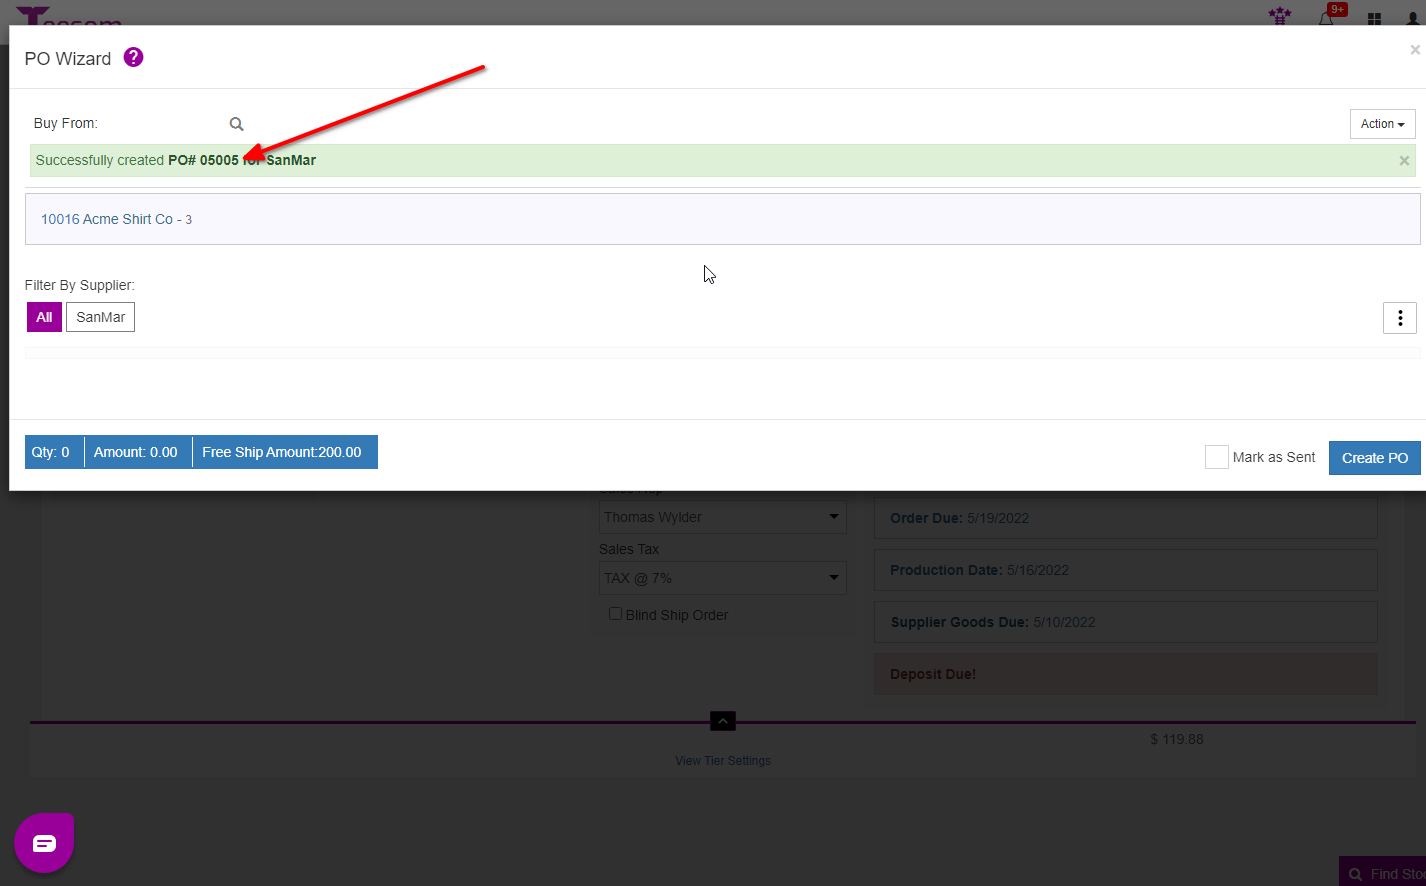
Once you click on “Create PO” you can click on the PO number to open it:
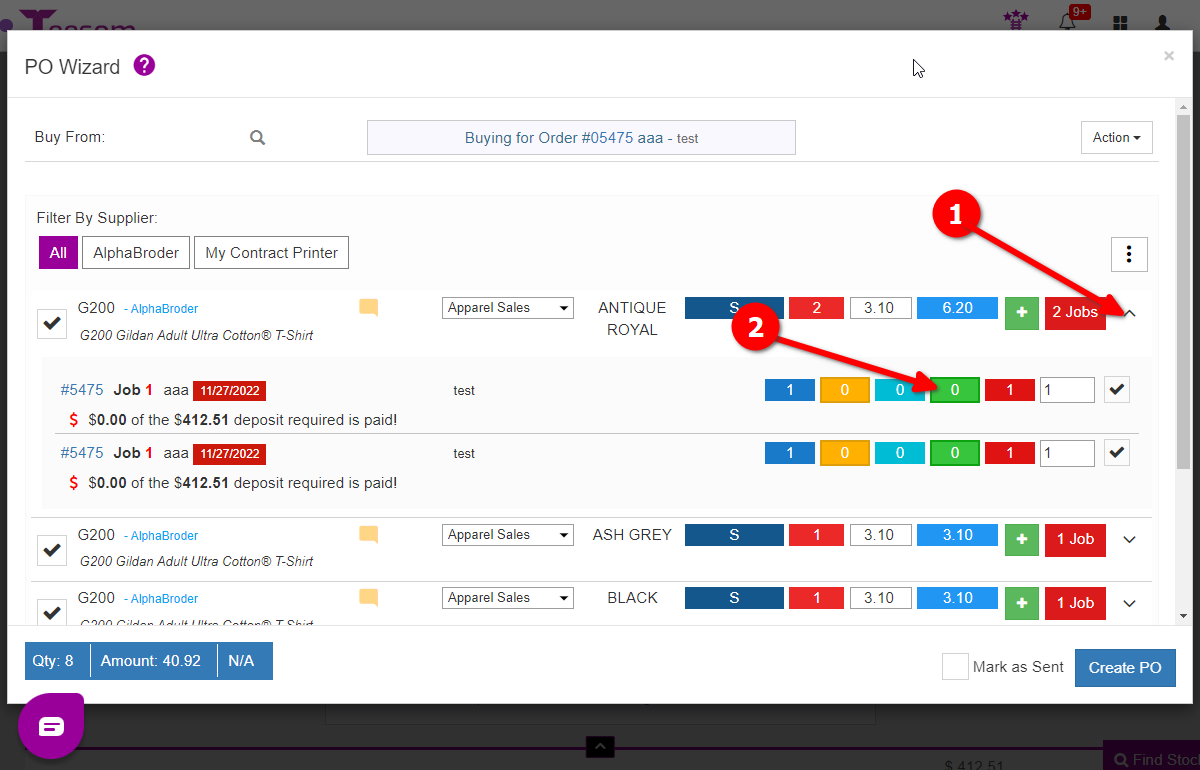
Issuing Stock For A Consolidated PO
To issue stock for a specific order:
Click on the dropdown.
Click on the green square.
On the “Issue Stock” screen:
Select the warehouse you are issuing stock from.
Enter the QTY.
Enter the price per product. (EX: $1 per shirt.)
Click “Save“.
Send the PO to the Supplier
With the purchase order open, review all the information to ensure that it is correct.
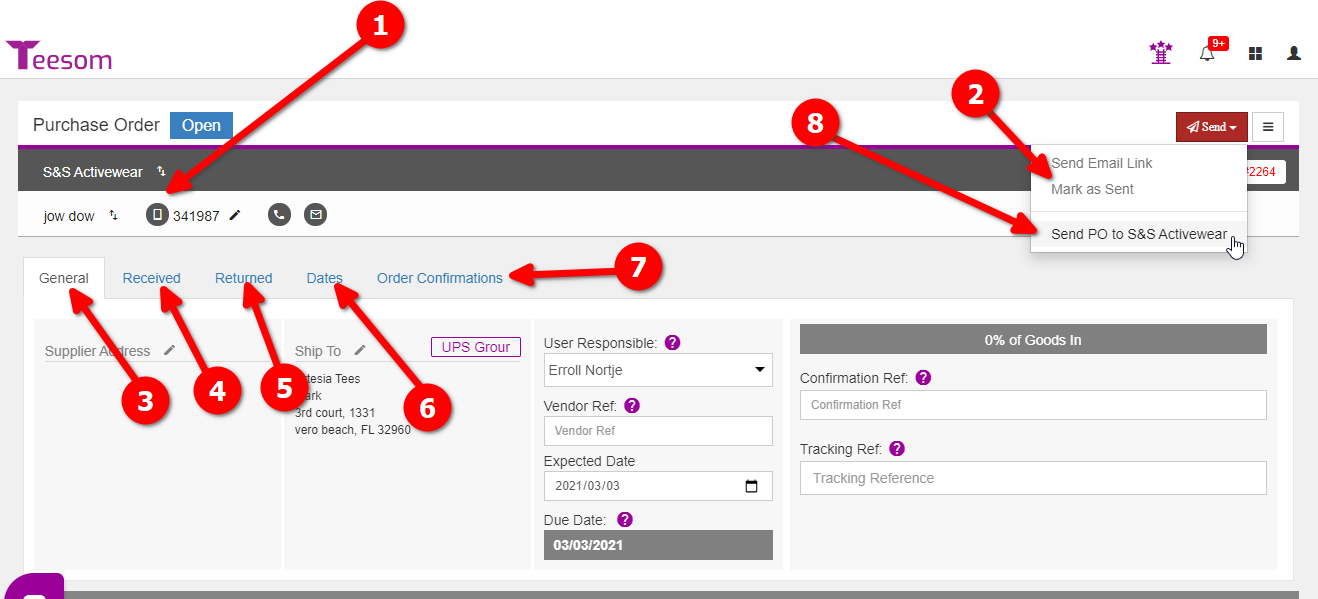
Purchase Order Overview
1.) The Suppliers contact, name and information.
3.) The General Tab: Here you can see/edit the general information of the order.
5.) The Returned Tab: Here you will see what Goods have been/need to be returned.
7.) The Order Confirmations Tab: When you submit a PO electronically the vendor will automatically send you an ID, this is where it is listed.
2.) Send the PO as email to supplier or mark it as sent.
4.) The Received Tab: Here you will see what goods have been received.
6.) The Dates Tab: Here you can see and edit the different dates. The Order Date, Sent Date, Expected Date, and the Received Date.
8.) Click “Send PO to …” to send the purchase order directly to the supplier.
When you’re ready, click on the “Send” dropdown and select either “Send Email Link” or “Send PO to …” to send the PO to the supplier.
"Mark as sent" will NOT send the PO at all.
"Mark as sent" will only flag the PO as having been sent without actually sending it .
"Send PO to Vendor" vs "Send Email Link"
“Send PO to Vendor” is only for integrated vendors and will submit the purchase electronically to the supplier directly.
“Send email link” will only send an email to the supplier, which will contain a link for them to view the PO in a browser.
NOTE: By using "Send Email Link" to your outsourced vendor they will now be able to update the Expected Date, the Confirmation Reference and the Tracking Reference.
Customer Supplied Goods
There are times when a customer has a unique item that they will supply rather than purchasing the item from you. Or, maybe it is a contract printer that will be supplying the product to you. Either way, it is quite easy to manage these items within Teesom.
Let’s go through the process using an example.
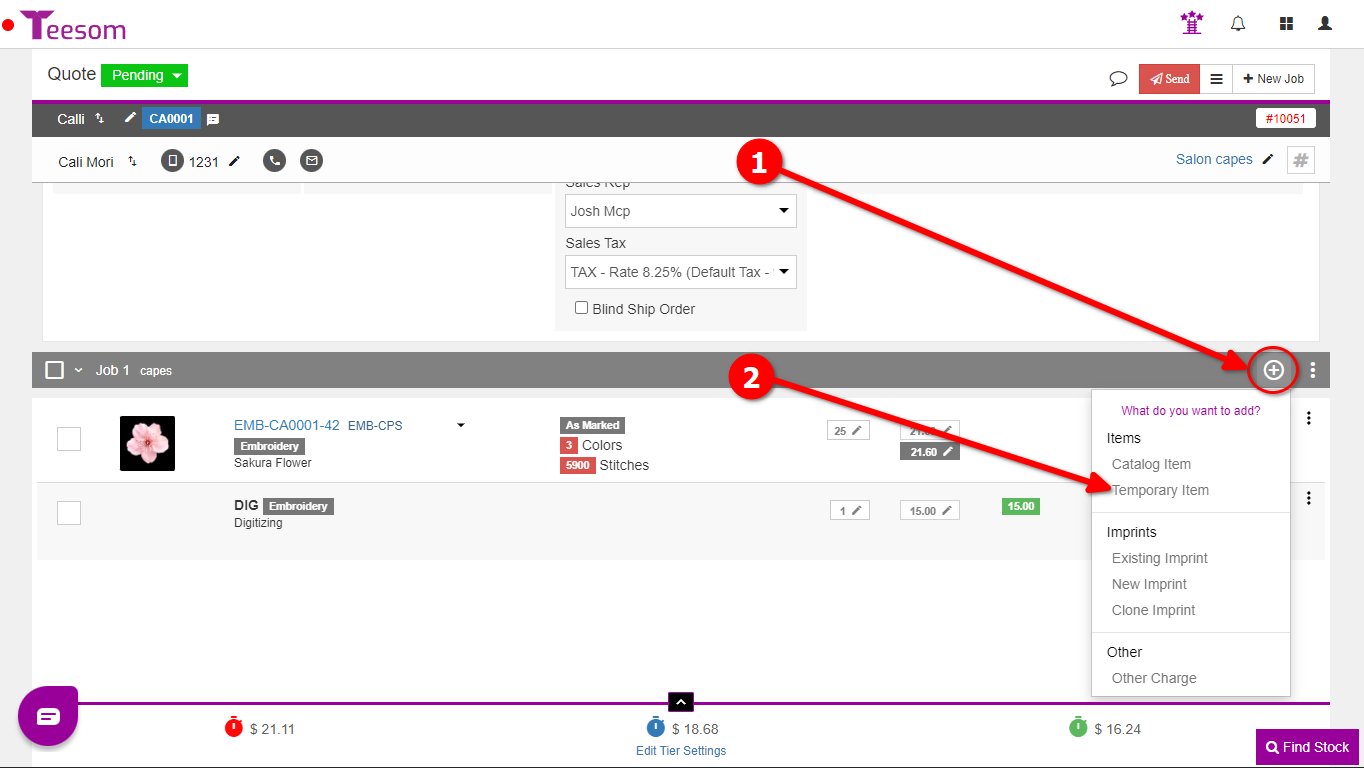
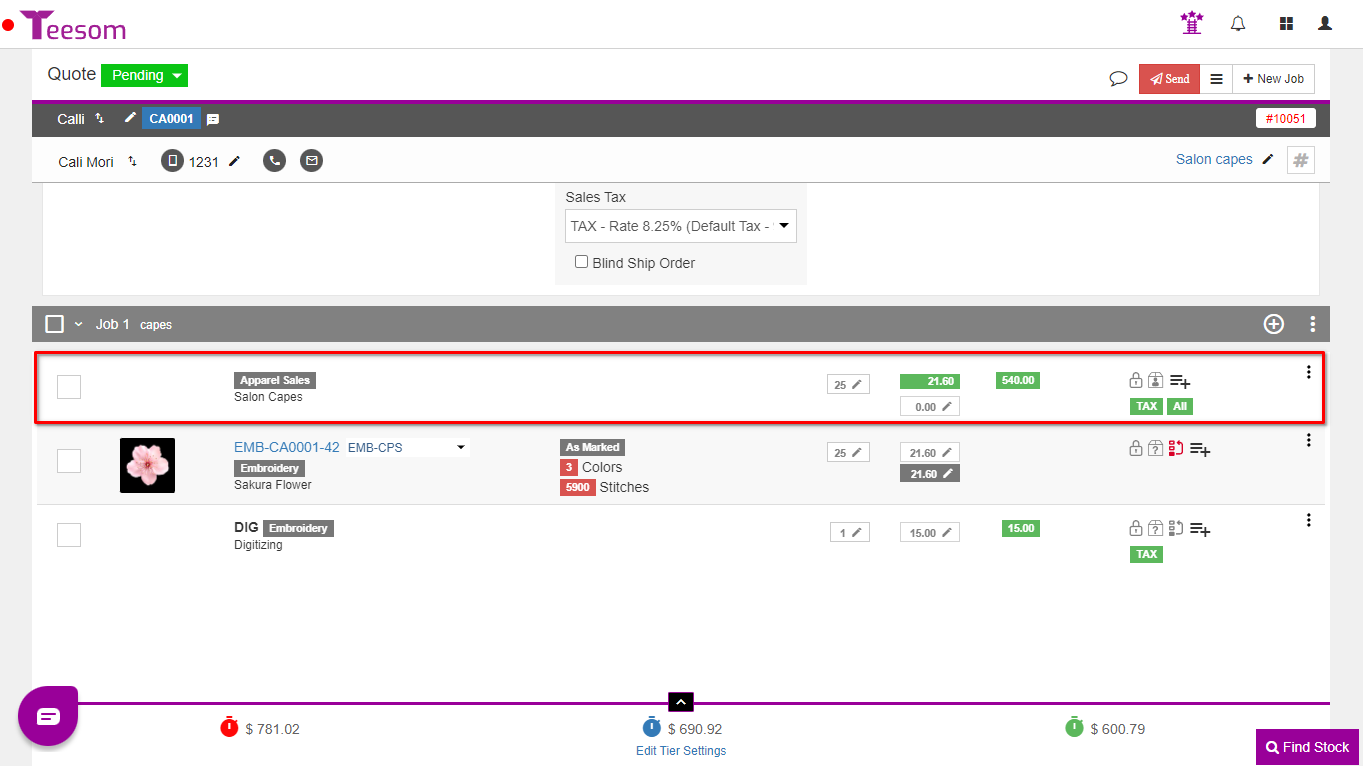
In the below example, a hair salon is supplying us with 25 capes to be embroidered. We are going to create a Temporary Item for these products on this order.
The capes are added using the Temporary Item option in the (+) area of a job:
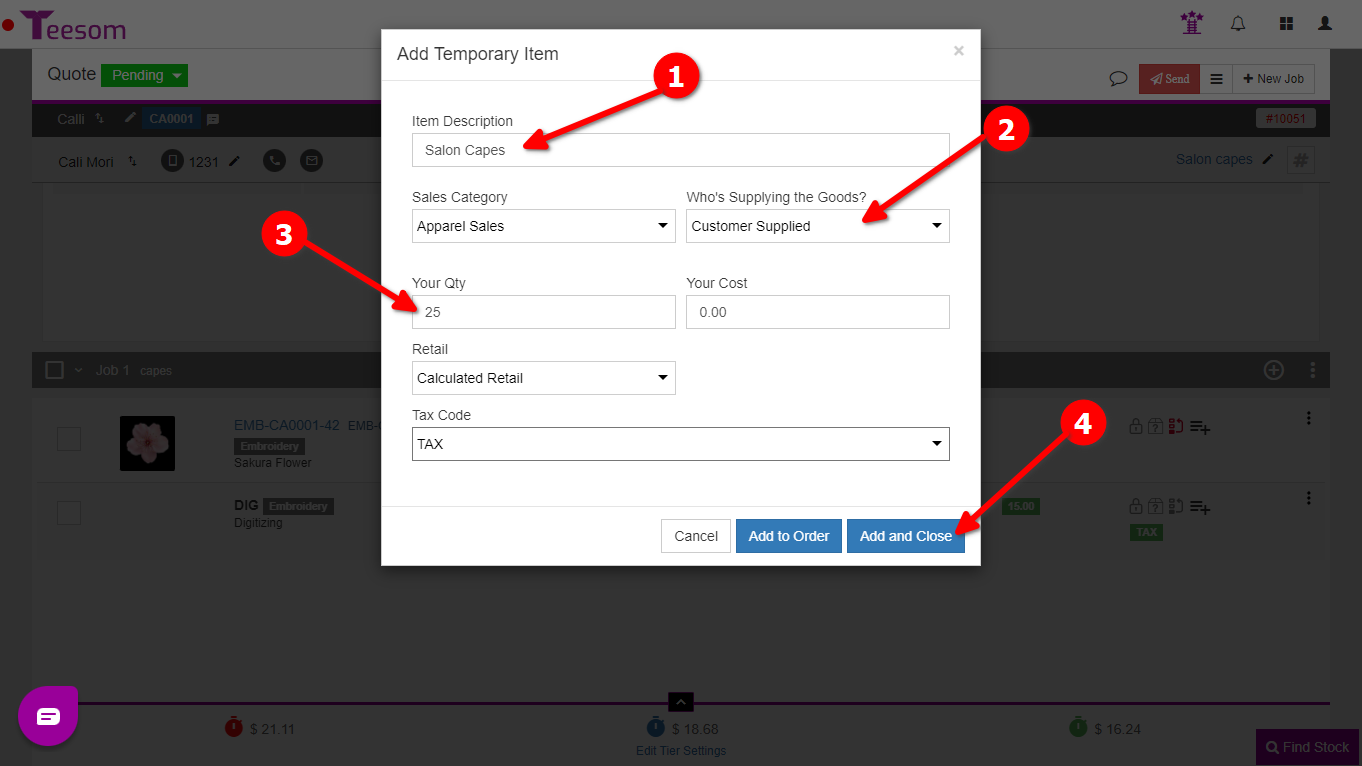
Now complete the details required for the temporary item:
Enter a user friendly description.
Set the goods as “Customer Supplied”.
Enter the quantity of goods being supplied..
Click “Add and Close” when you are done. (If you are adding multiple temporary items, click “Add to Order” instead.
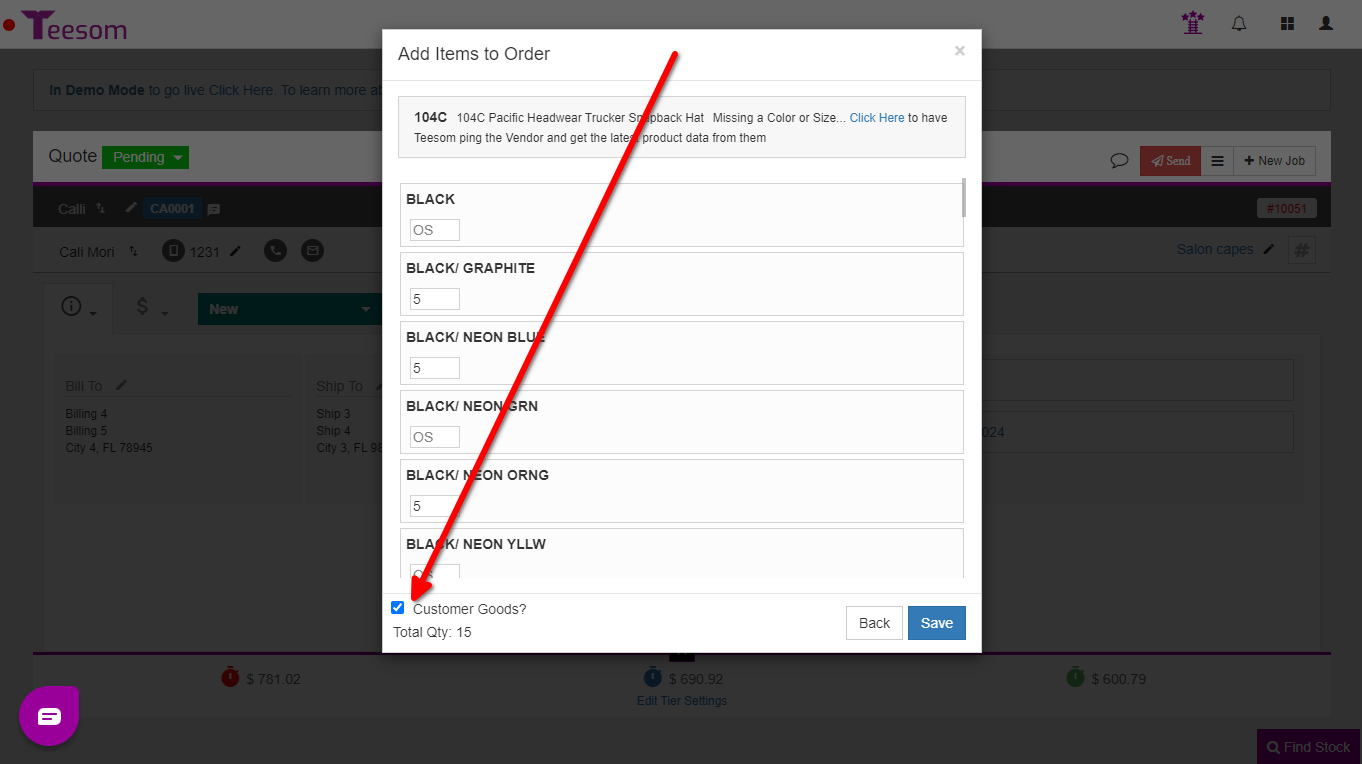
Catalog Item as Customer Supplied Goods
This customer is also supplying their own hats that they will purchase from AlphaBroder. We can add those items to the order, but the “Customer Goods?” box should be checked before adding. This will automatically mark the goods as customer supplied.
TIP: You can also add your "Own Products" from your own "Custom Catalog" and mark them as 'Customer Supplied' on the order. It might be useful to actually create a special catalog containing various generic products, which you can use whenever you need to add Customer Supplied Goods to an order.
Receiving Customer Supplied Goods
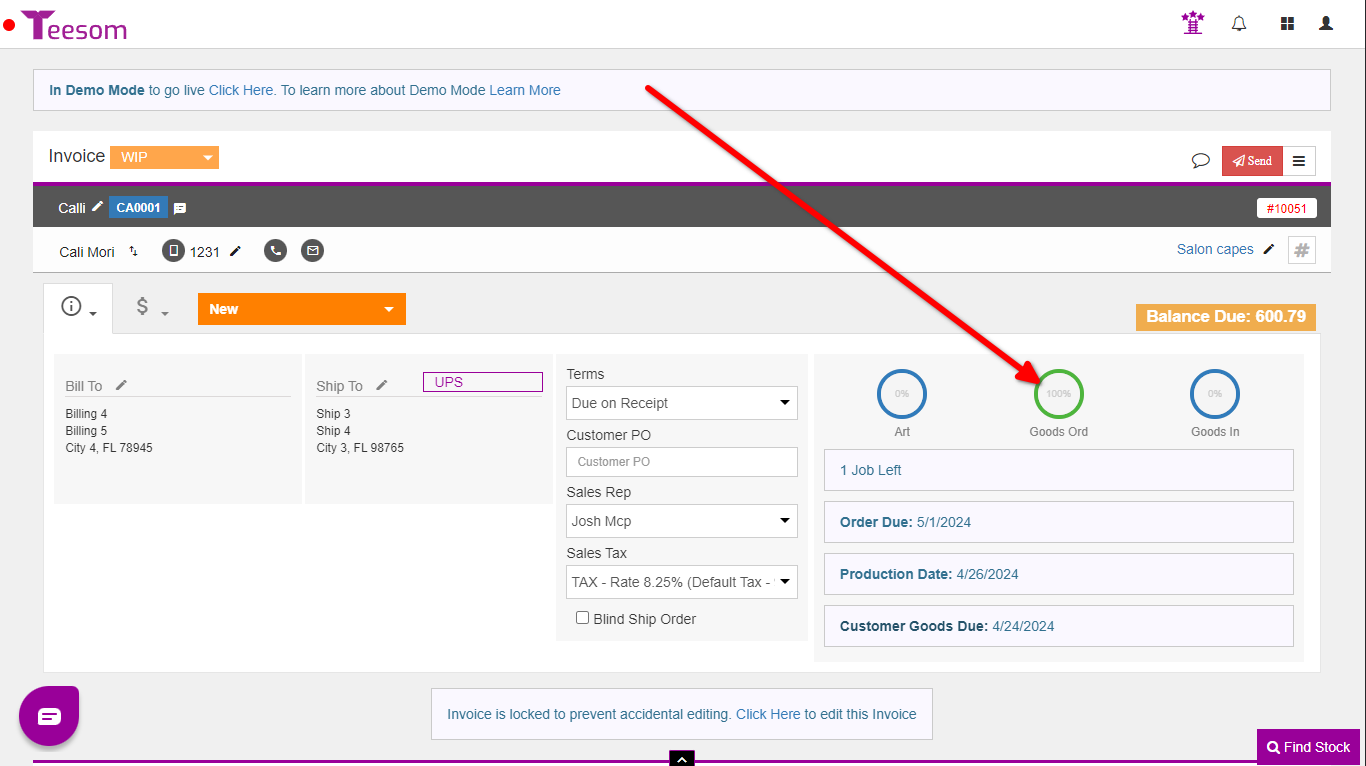
When emailing a customer’s quote, that has customer supplied goods, the customer will be able to clearly see which items are being supplied by them and which items you are purchasing. Once the customer pays the deposit, or otherwise confirms the order, then the quote will be converted to an invoice.
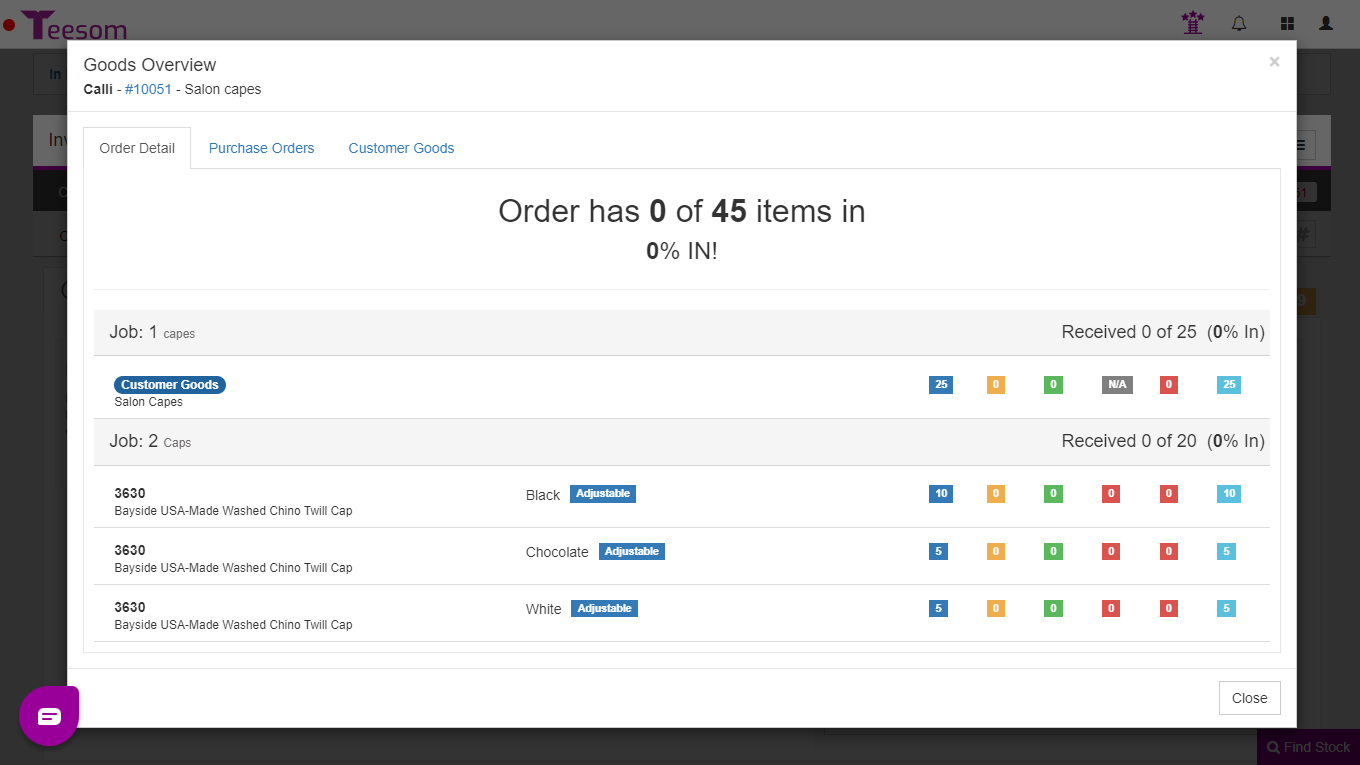
Now that the order is an actual Invoice, we must be concerned with receiving the items from the customer in time. If you click on the “Goods Ordered” circle, as seen in the image below, it will take you to a screen that will show you what the customer is supplying and what you are purchasing.
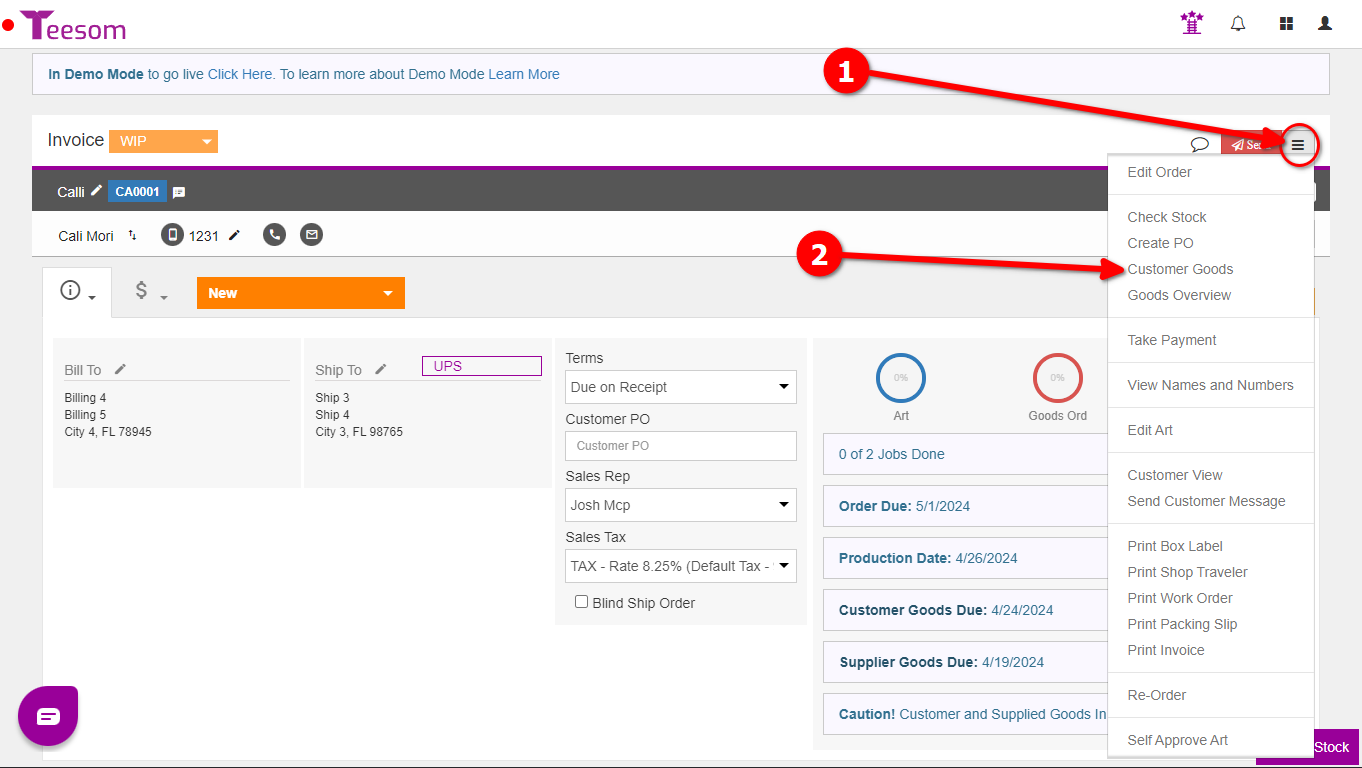
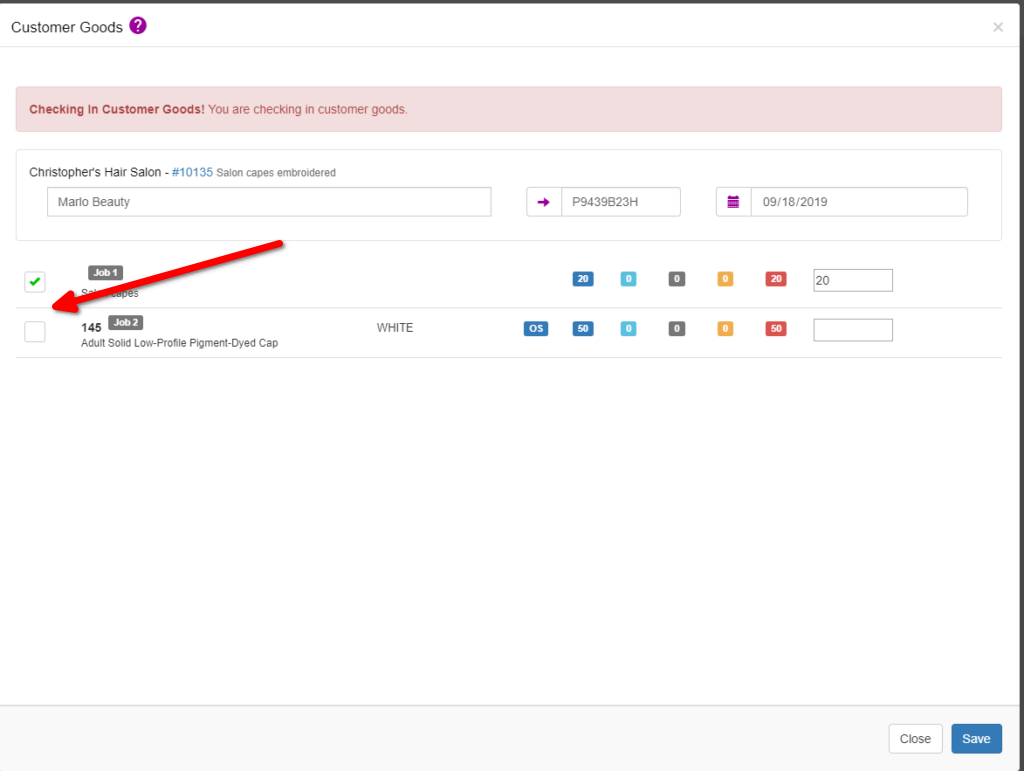
If the items are being drop shipped to you by another supplier, you can easily receive the items in by clicking on the “Hamburger” menu and then selecting Customer Goods.
The capes and the caps are coming from different vendors so they will be received separately, by unchecking one of the boxes on the far left. In the image below I am receiving the capes in only.
Hover over the colored boxes for more detail on what they mean.
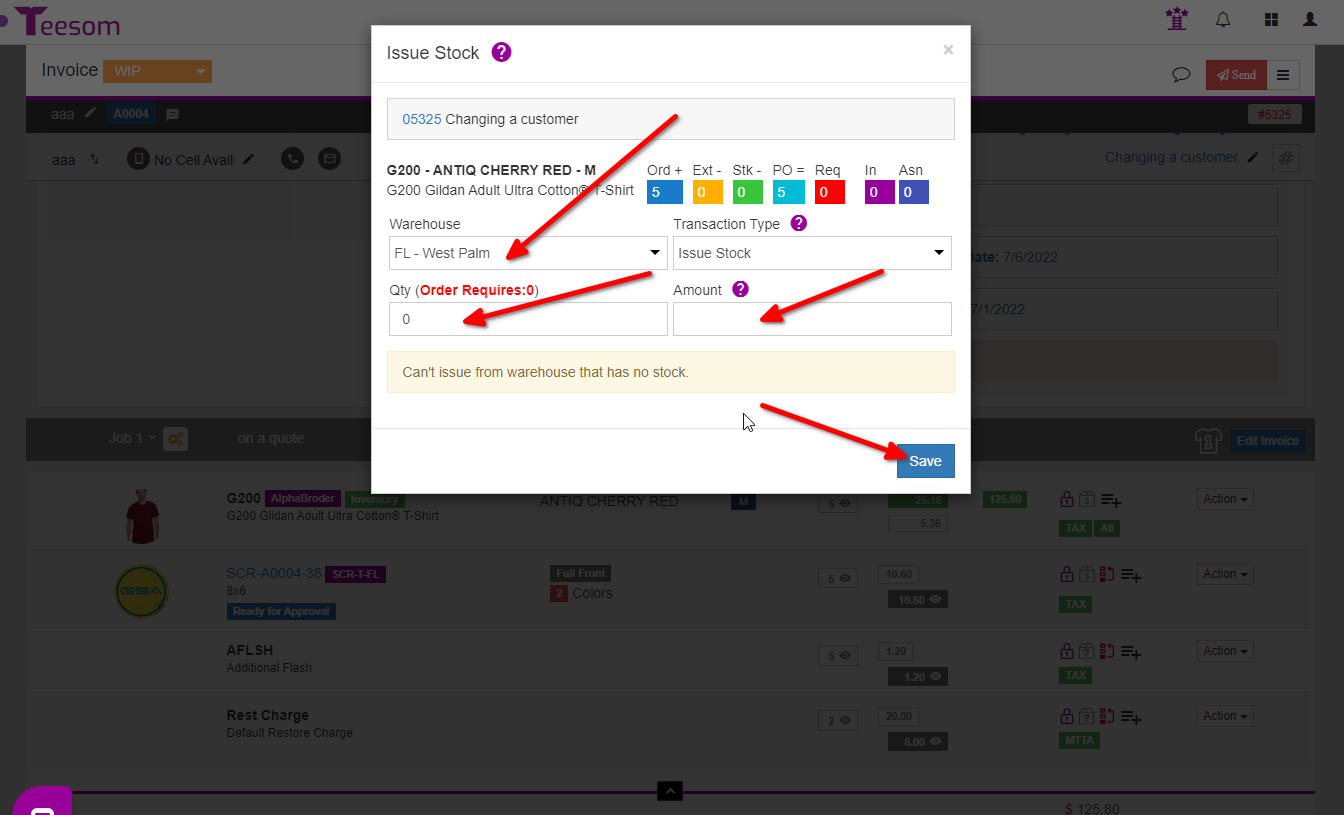
How to Issue Stock to an Order
NOTE: You should issue stock to your order *before* using the PO Wizard to create the purchase order/s.
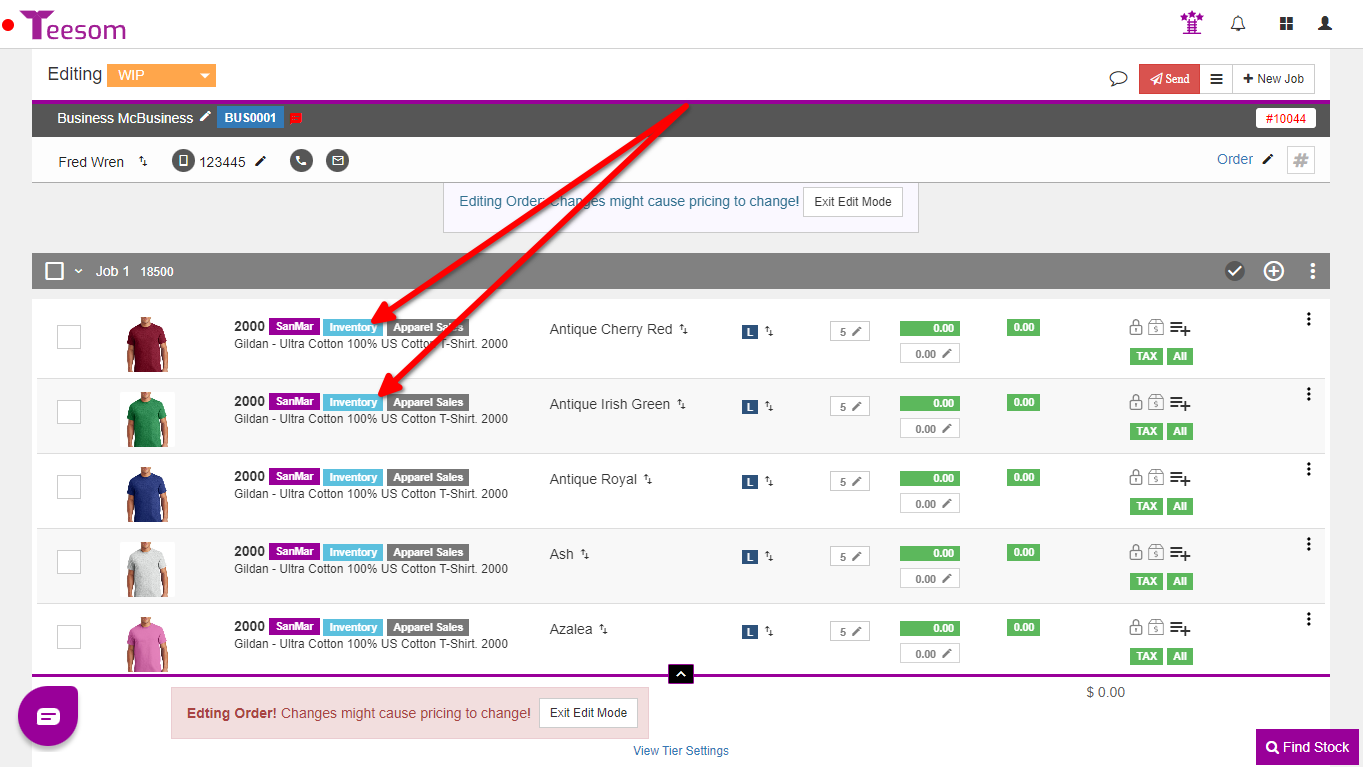
The first way is to click on the word “Inventory” next to the item number:
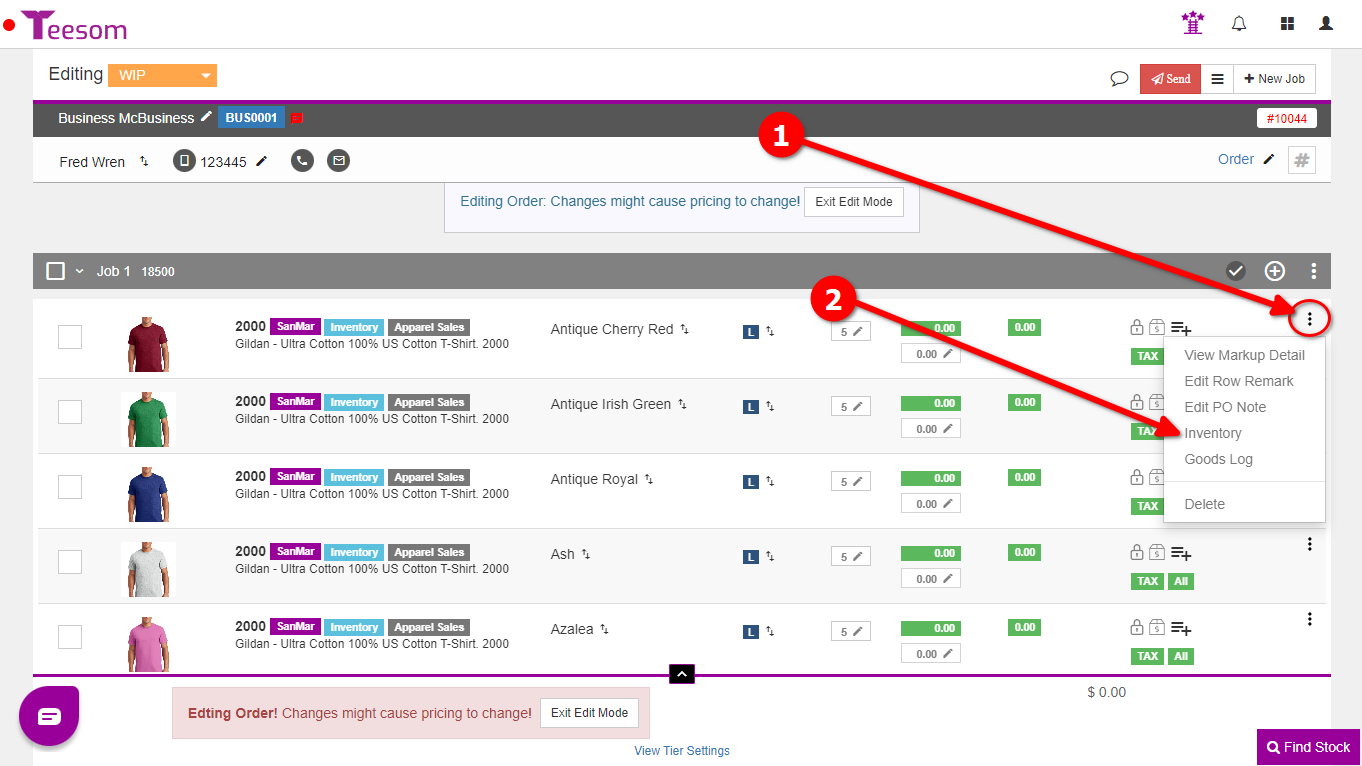
The second way is:
Click the “3 Dot” menu.
Select “Inventory”.
On the issue stock screen:
Select a warehouse that has stock in it.
Enter the quantity of goods to be issued..
Enter the amount. (Total cost value of the goods being issued.)
If you don’t know the cost, leave it blank: Teesom will calculate an average cost based on previous transactions such Goods Adjustment journals and PO’s that have been checked in.
Click “Save“.
Goods status indicators
Ord is the Qty of the item on this Order.
Ext is the Qty we are ordering Extra for the Item.
Stk is the Qty we have assigned to the order from Stock.
PO is the Qty that is coming from a Purchase Order.
Req is the Qty we still need for this item.
In is the Total Qty in for this item. (Qty from Stock + Qty from PO.)
ASN is the total Qty that has been Assigned to the order.