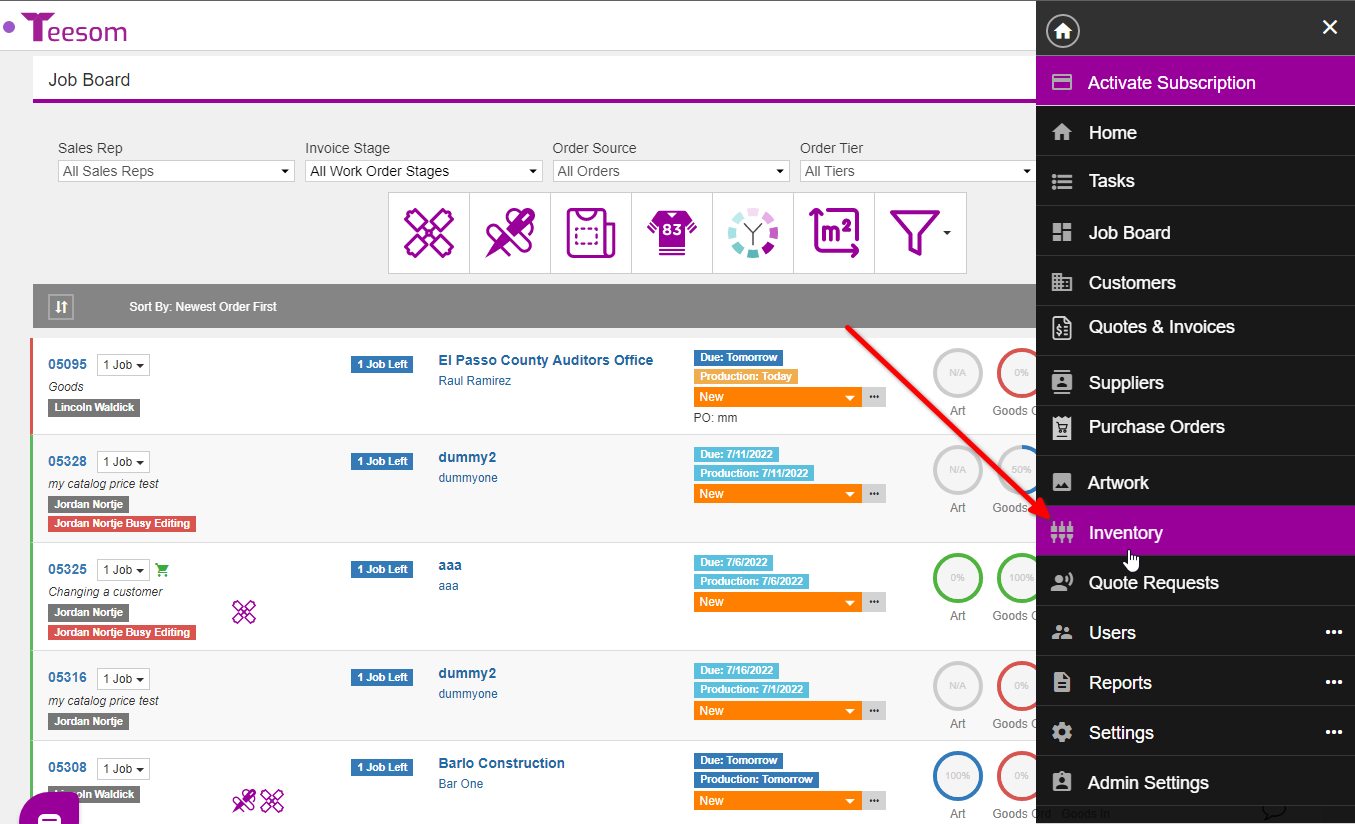
To get to the “Inventory Codes List” screen go to the “Main Menu” then select “Inventory“:
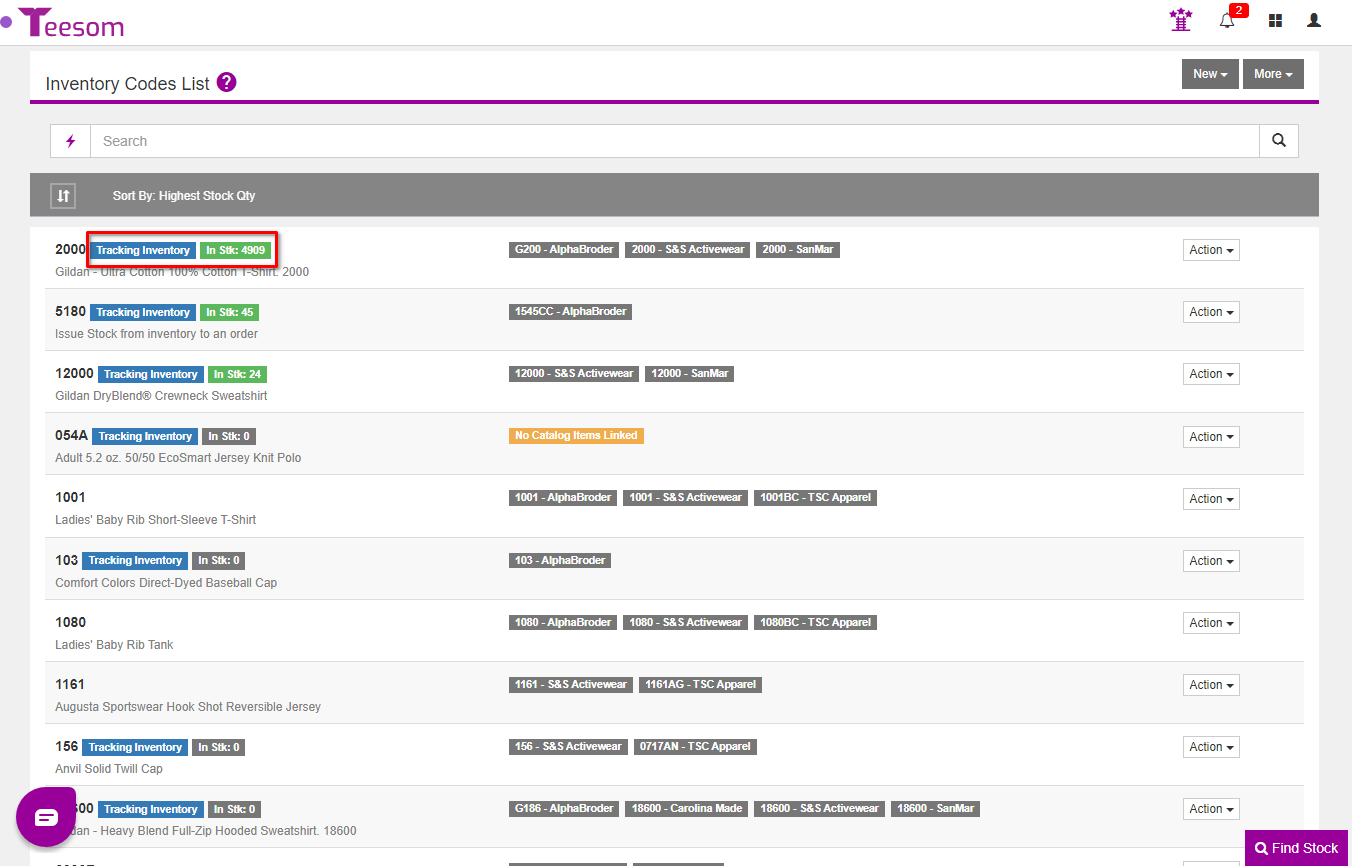
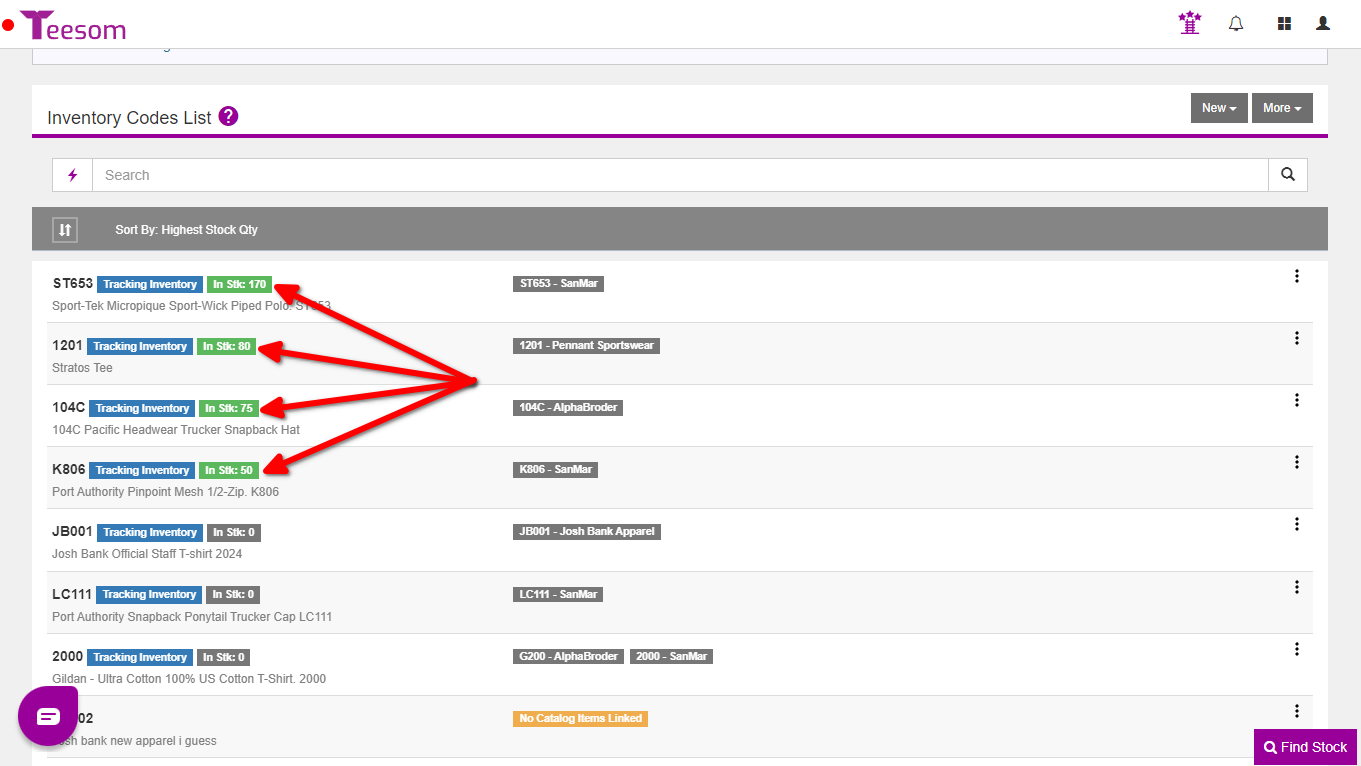
Any inventory code that is currently tracking stock will have a green rectangle displayed next to it otherwise it will be gray.
You can click on the green 'In Stk' rectangle to see a list of what there is stock of.
The 'In Stk' value will only be displayed for inventory codes that have 'Track Inventory' toggled on.
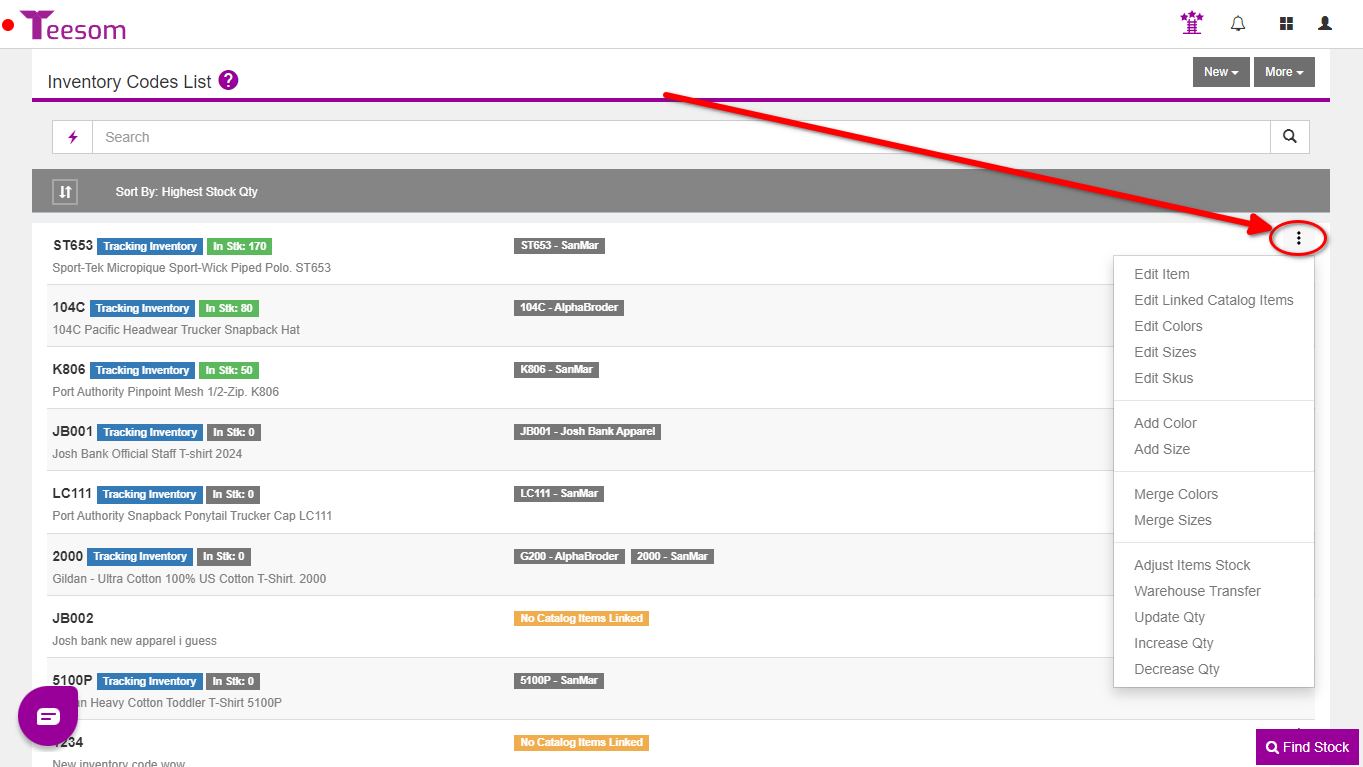
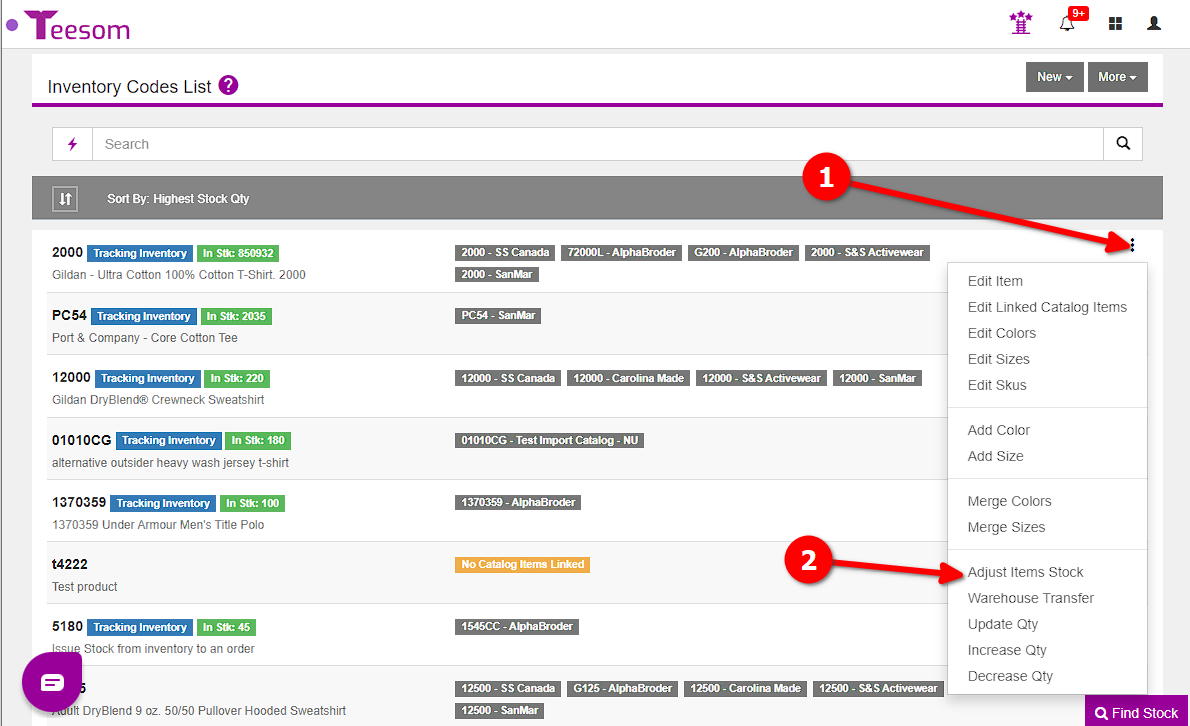
To Adjust the stock for an inventory Code click on the “3 dot” menu.
You will have several different options for Adjusting Stock:
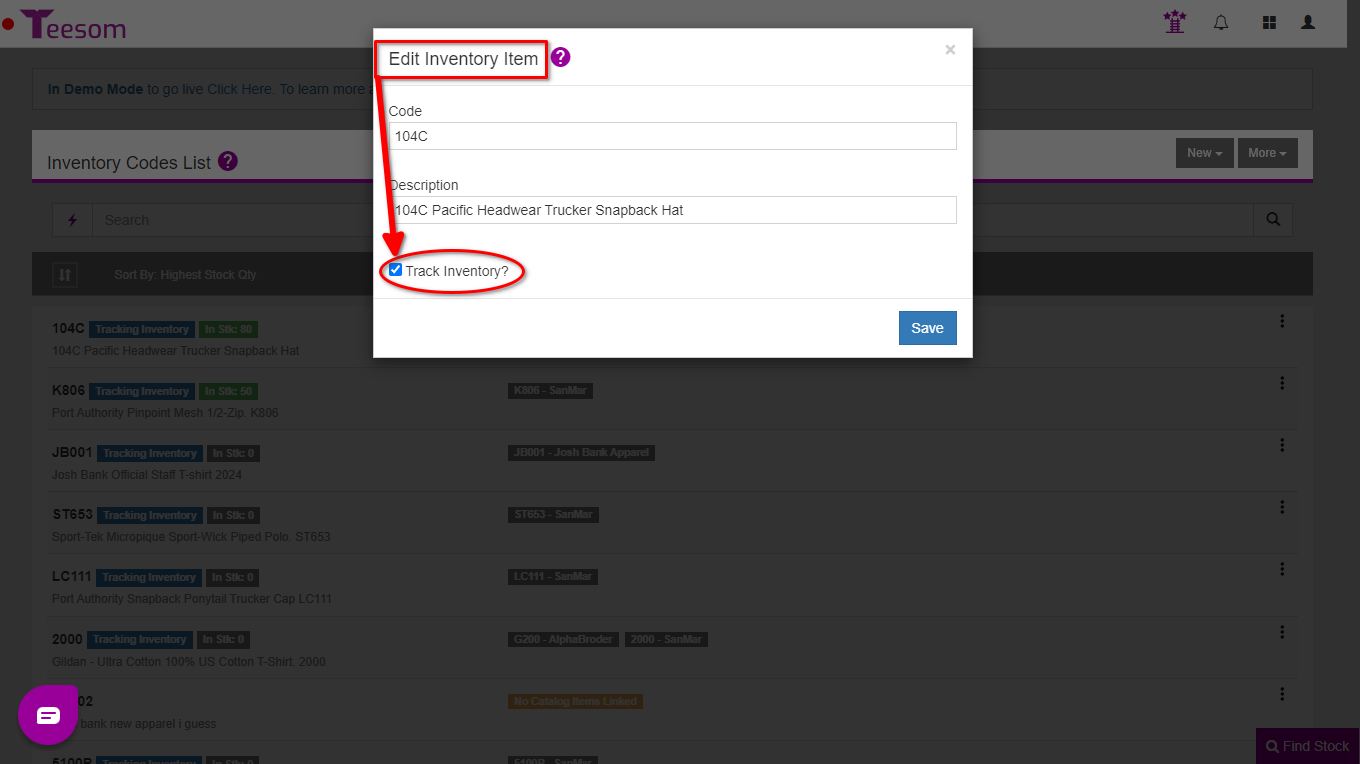
Edit Item: The first option on the dropdown, here you can set the ‘Track Inventory‘ toggle on or off.
Adjust Items Stock: Allows you to manually decrease or increase the stock quantity of a specific color/size option of the Stock Code. You must select a warehouse option if you have multiple warehouses.
Update QTY: Allows you to do a bulk Inventory journal adjustment. You can either select increase, decrease or transfer.
Increase QTY: Allows you to do a bulk inventory journal adjustment that defaults to increasing the stock level.
Decrease QTY: Allows you to do a bulk inventory journal adjustment that defaults to decreasing the stock level.
Adjust Stock for a Single Style
To Adjust stock for a single size and color:
Click on the three dots menu.
Select “Adjust Items Stock”.
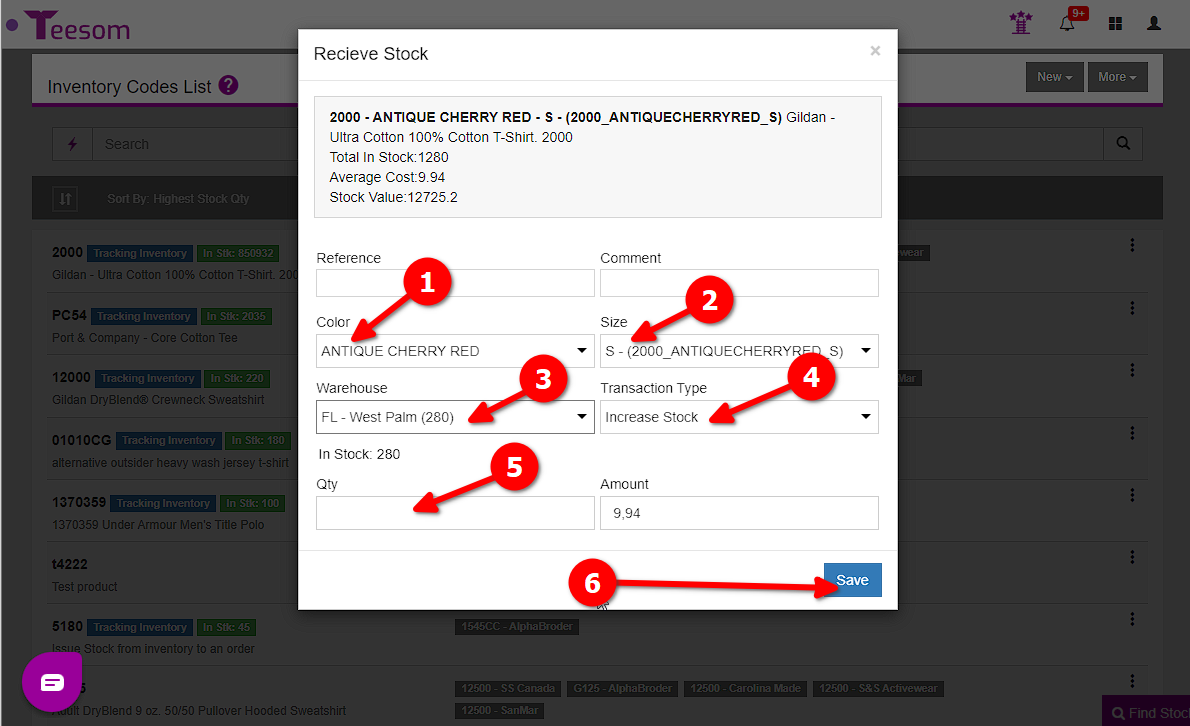
On the “Receive Stock” screen to adjust the stock:
Select a Color.
Select a Size.
Select which warehouse to adjust stock for.
Set the “Transaction Type” to Increase or Decrease Stock.
Enter the Quantity to Increase/Decrease by. (Amount isn’t required but you can put the cost of goods there)
Click “Save”.
After saving the ‘Receive stock’ screen will remain open for you to add another item. However if you would like to edit stock in bulk we’ll show you how to in the next part of this article.
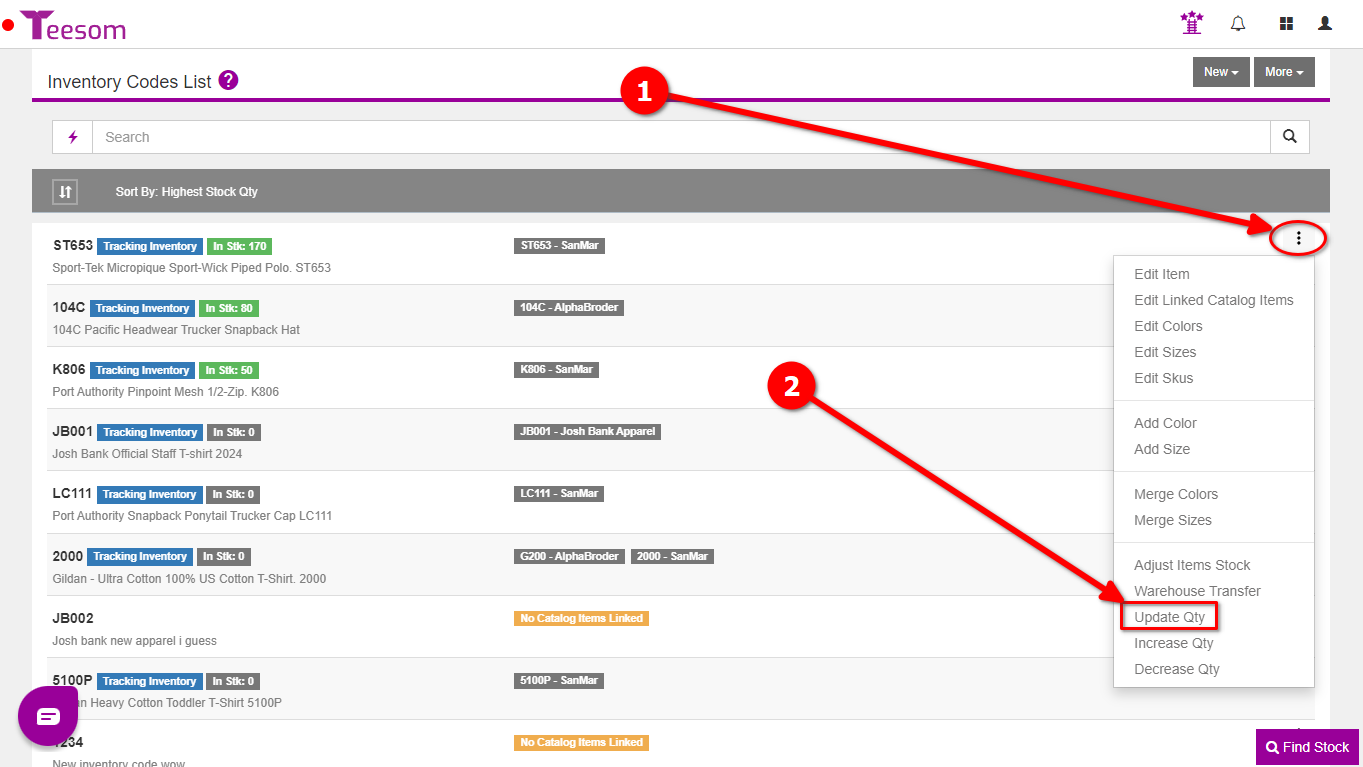
Adjust Stock By Bulk Using Update QTY
On the “Inventory Codes List” screen click on the “3 dots” menu and select “Update QTY“.
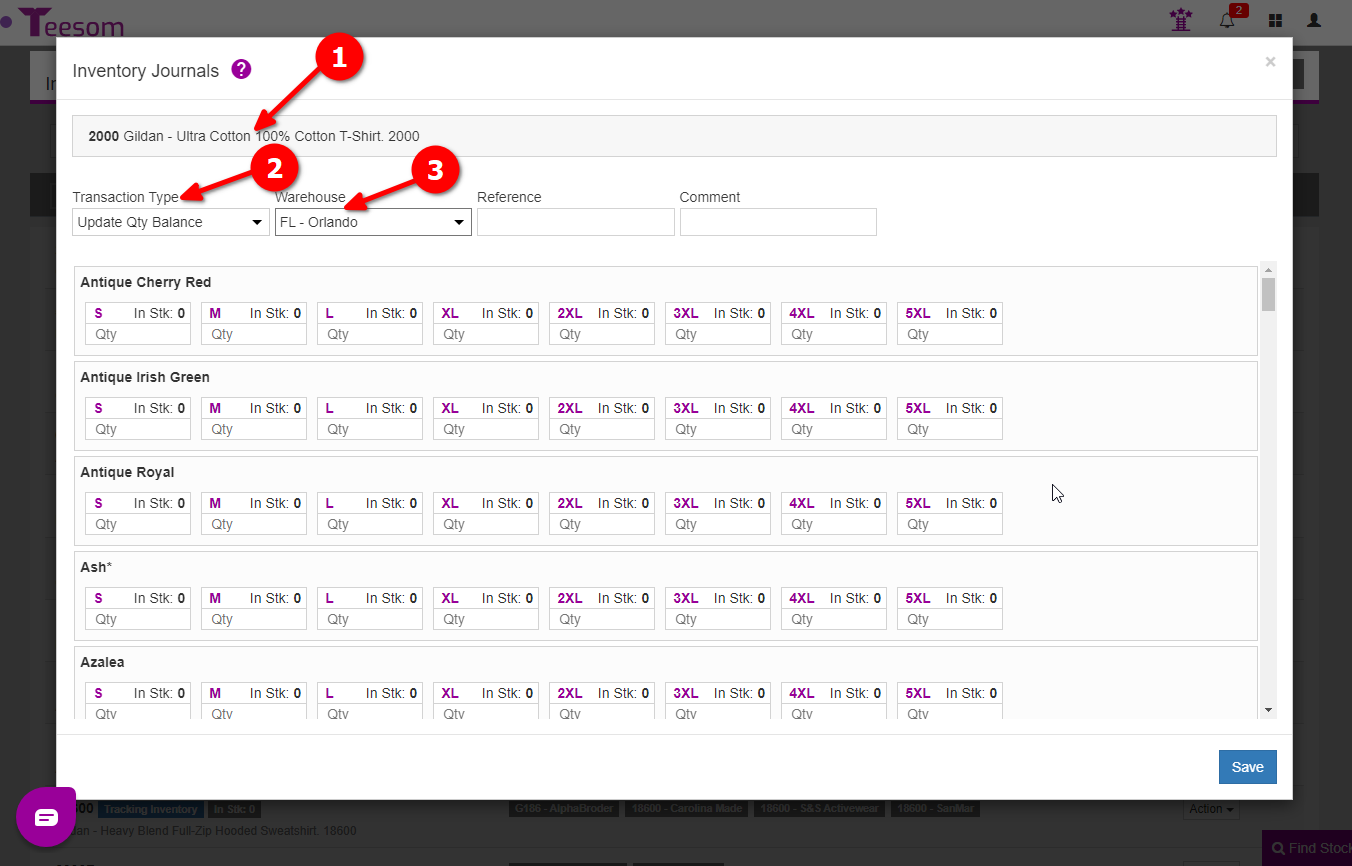
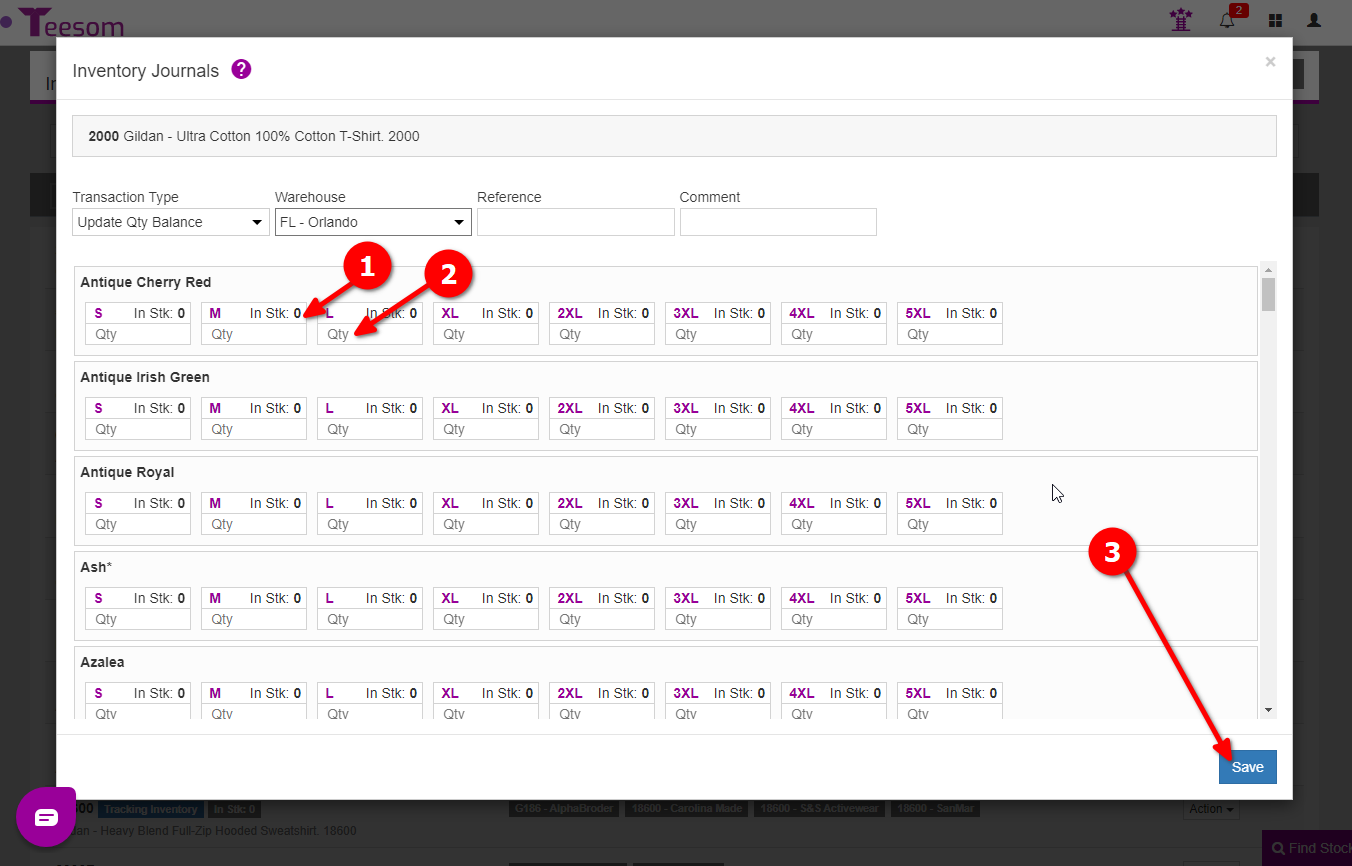
On the ‘Inventory Journals’ screen you can:
See what inventory code item you are adjusting stock for.
Update Qty Balance: Enter the quantity of stock available presently and it will overwrite the current stock amount.
Increase Qty Balance: Enter the quantity to increase by and it will increase stock by that value. The amount field is for entry of the cost of goods and isn’t required.
Decrease Qty Balance: Enter the quantity to decrease by and it will increase stock by that value. The amount field is for entry of the cost of goods and isn’t required.
Click “Save” to update stock changes.
You can see how much total stock there is for the code here provided that ‘Track Inventory’ is toggled on.
Add Stock From A Purchase Order
IMPORTANT: In order to add inventory directly from a PO you must first add the relevant catalog item to your 'Inventory Codes List' and ensure that 'Track Inventory' is toggled on.
Firstly open the “Main Menu” and select ‘Inventory’ to go to the ‘Inventory Codes List’ page.
If you have already added the catalog item then click the “3 dot” menu and click edit. This will bring up an ‘Edit Inventory Item’ screen for that inventory code where you can ensure ‘Track Inventory’ is toggled on.
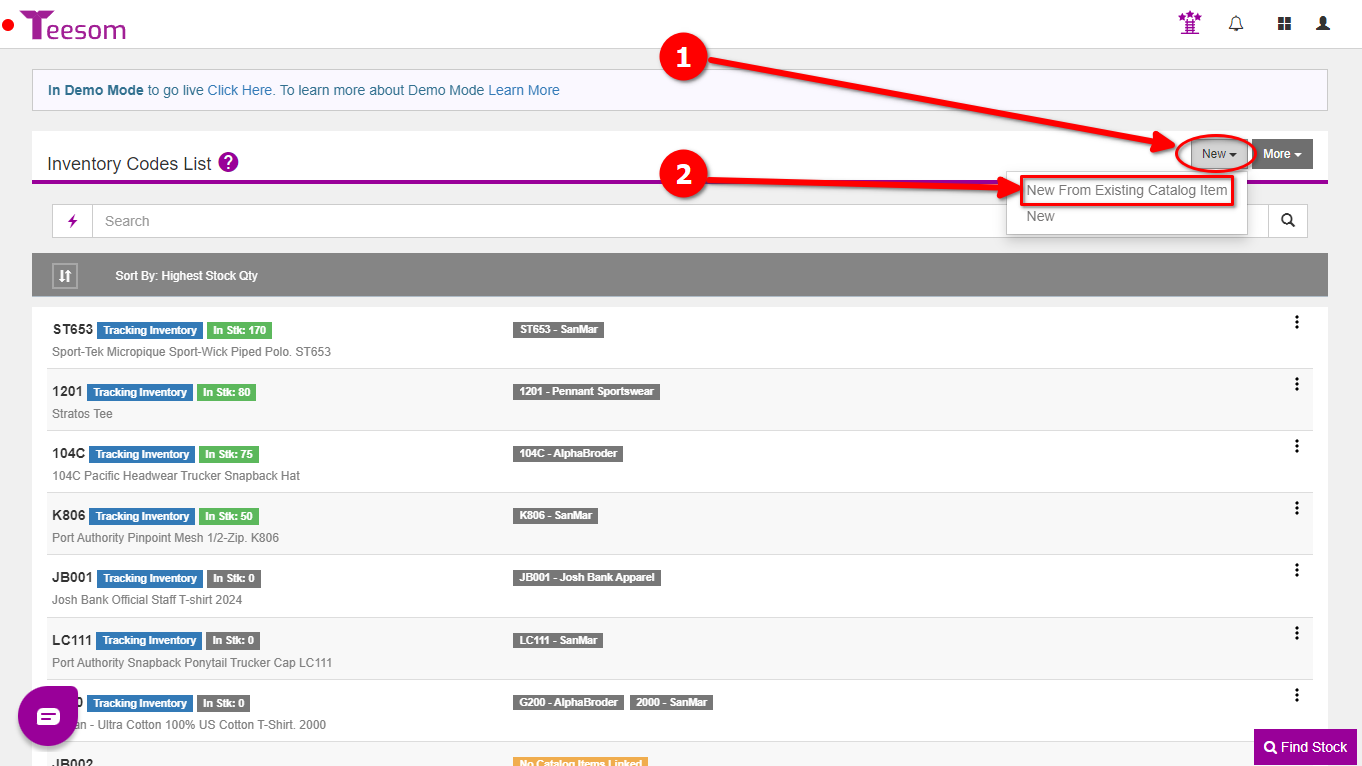
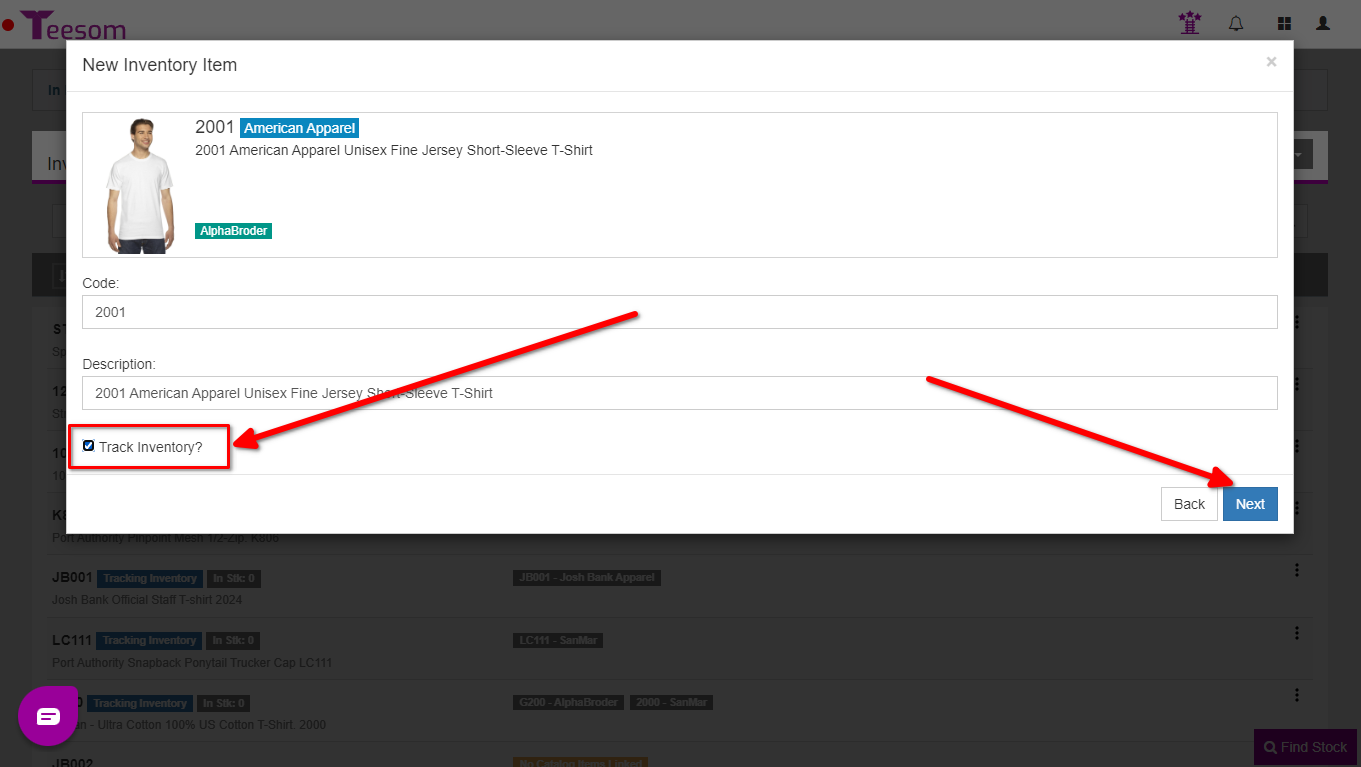
If you have NOT already added the catalog item then click ‘New’ and then ‘New From Existing Catalog Item’. Select the product you want to add and then before clicking next ensure ‘Track Inventory’ is on.
Now that we know the stock item is being tracked we can proceed with adding stock via a PO.
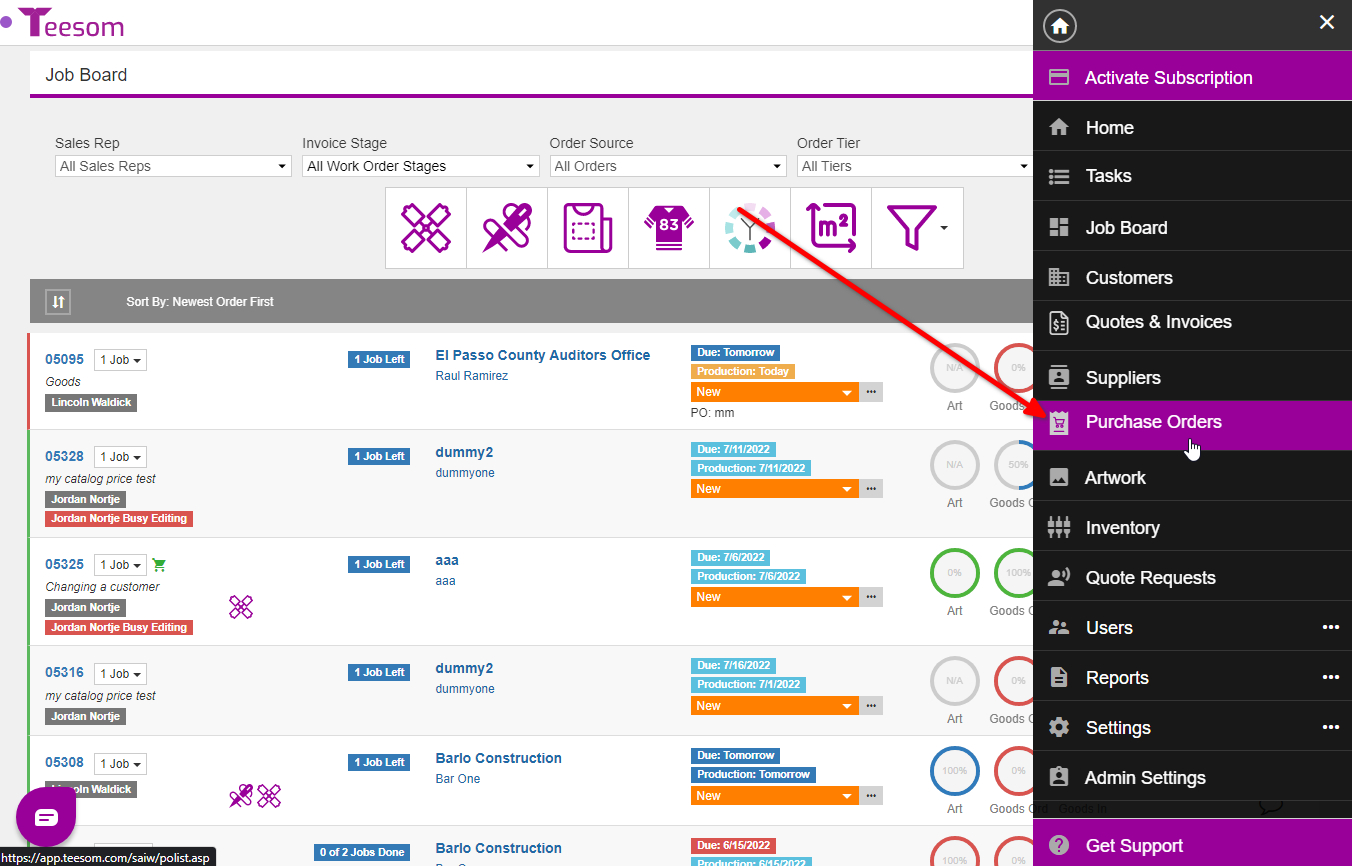
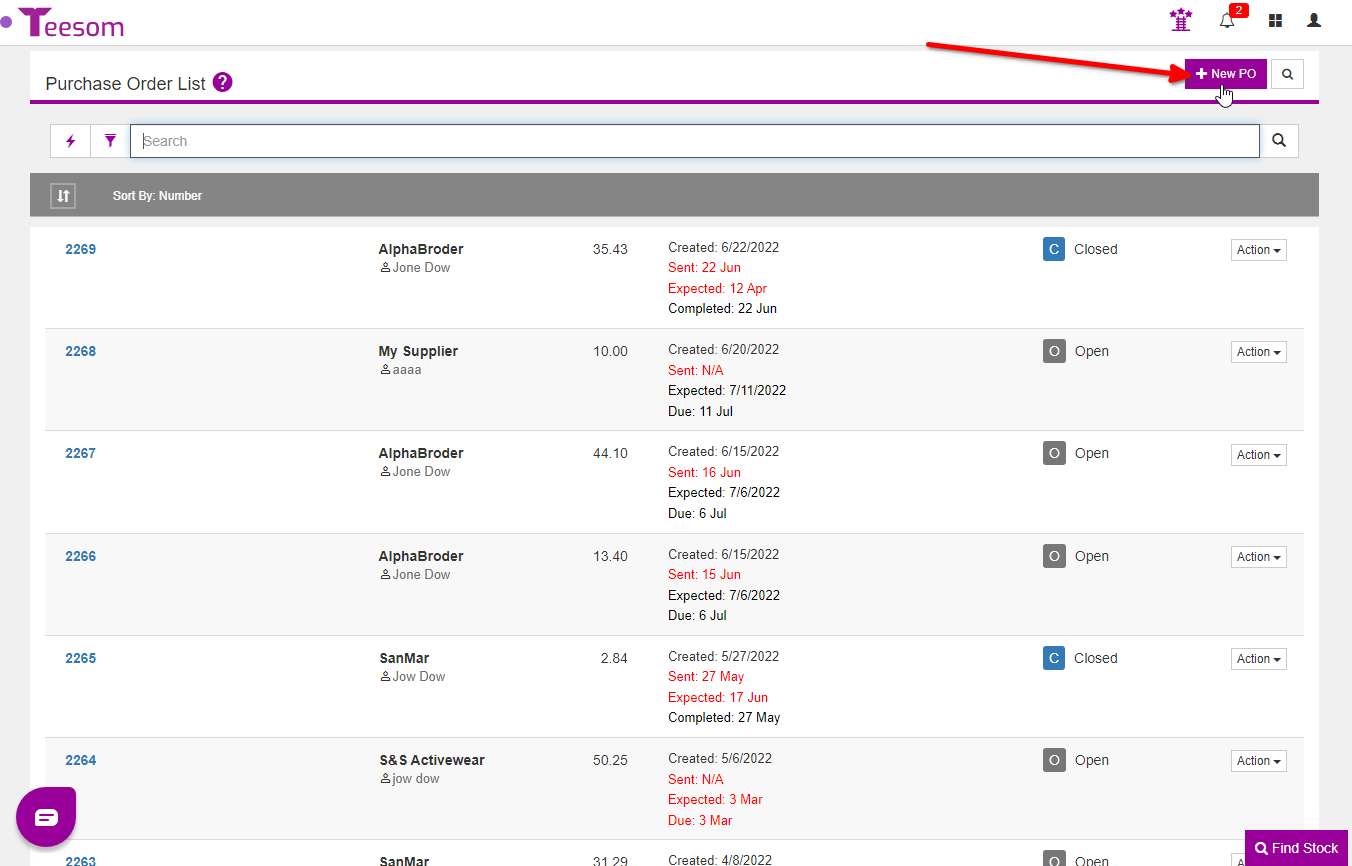
To add stock from a purchase order go to the “Main Menu” then select “Purchase Orders“.
Click on “+ New PO“
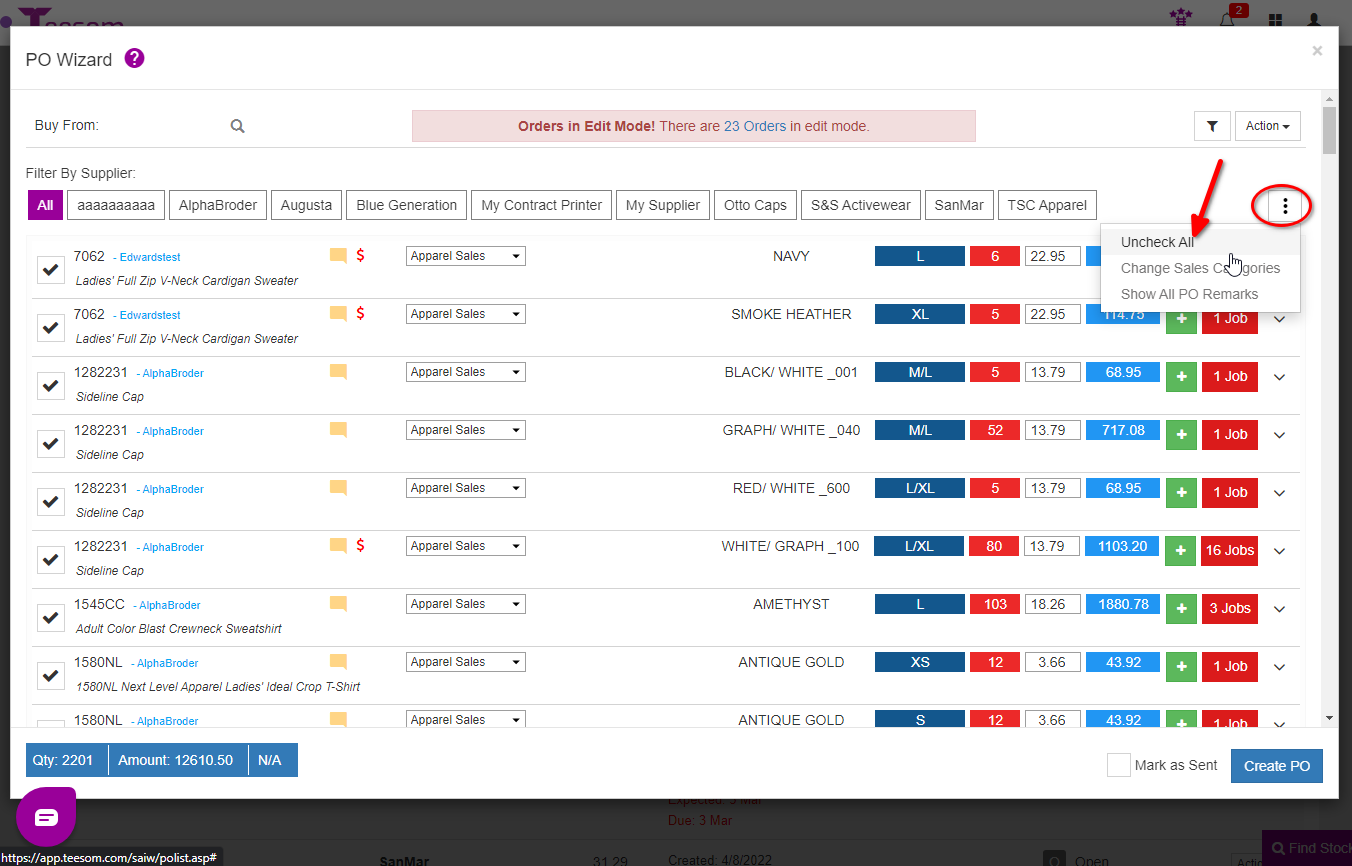
By default it will show all the items you have to order from all suppliers.
Uncheck all the items by click on the three dots and selecting “Uncheck All“.
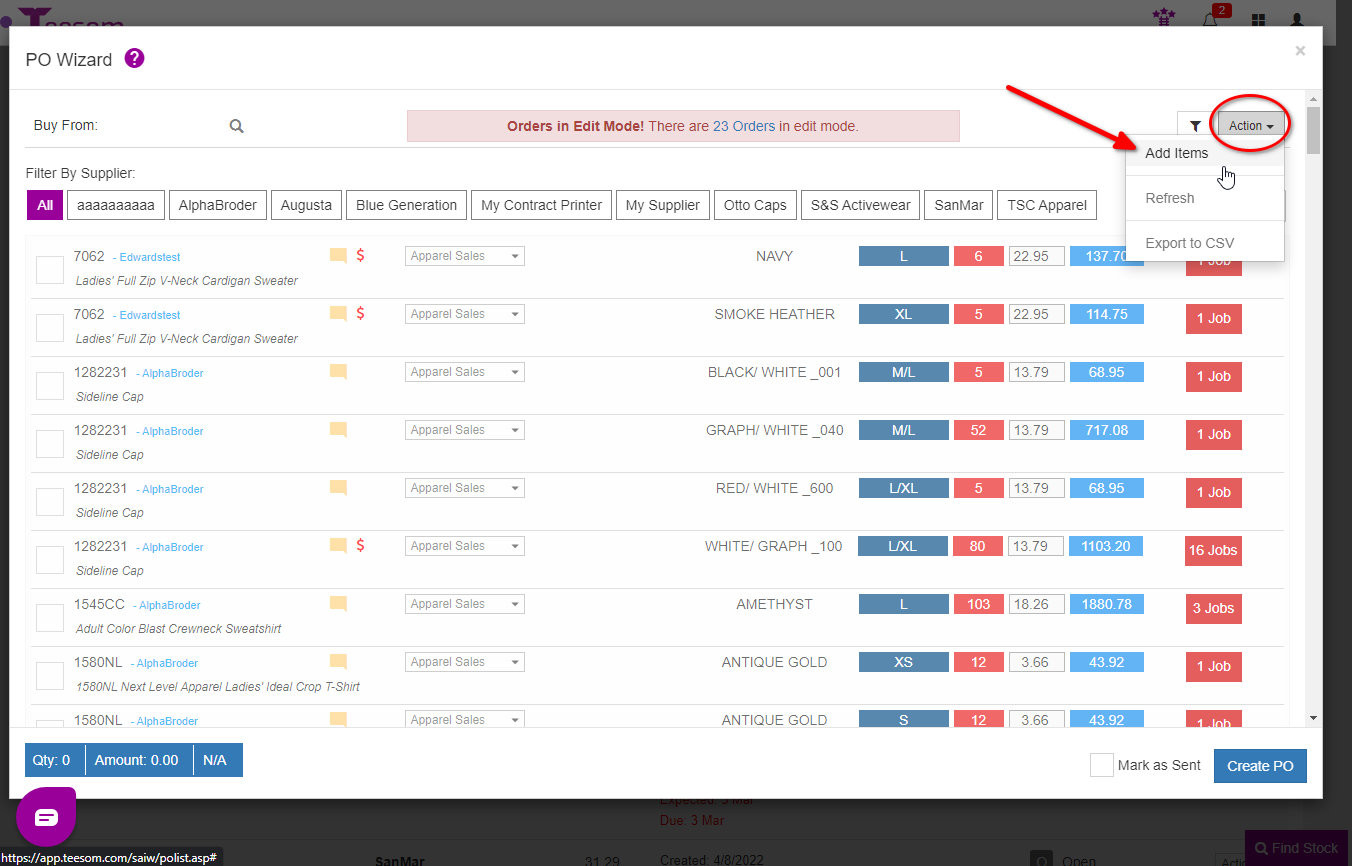
Click on the “Action” dropdown and select “Add Items“.
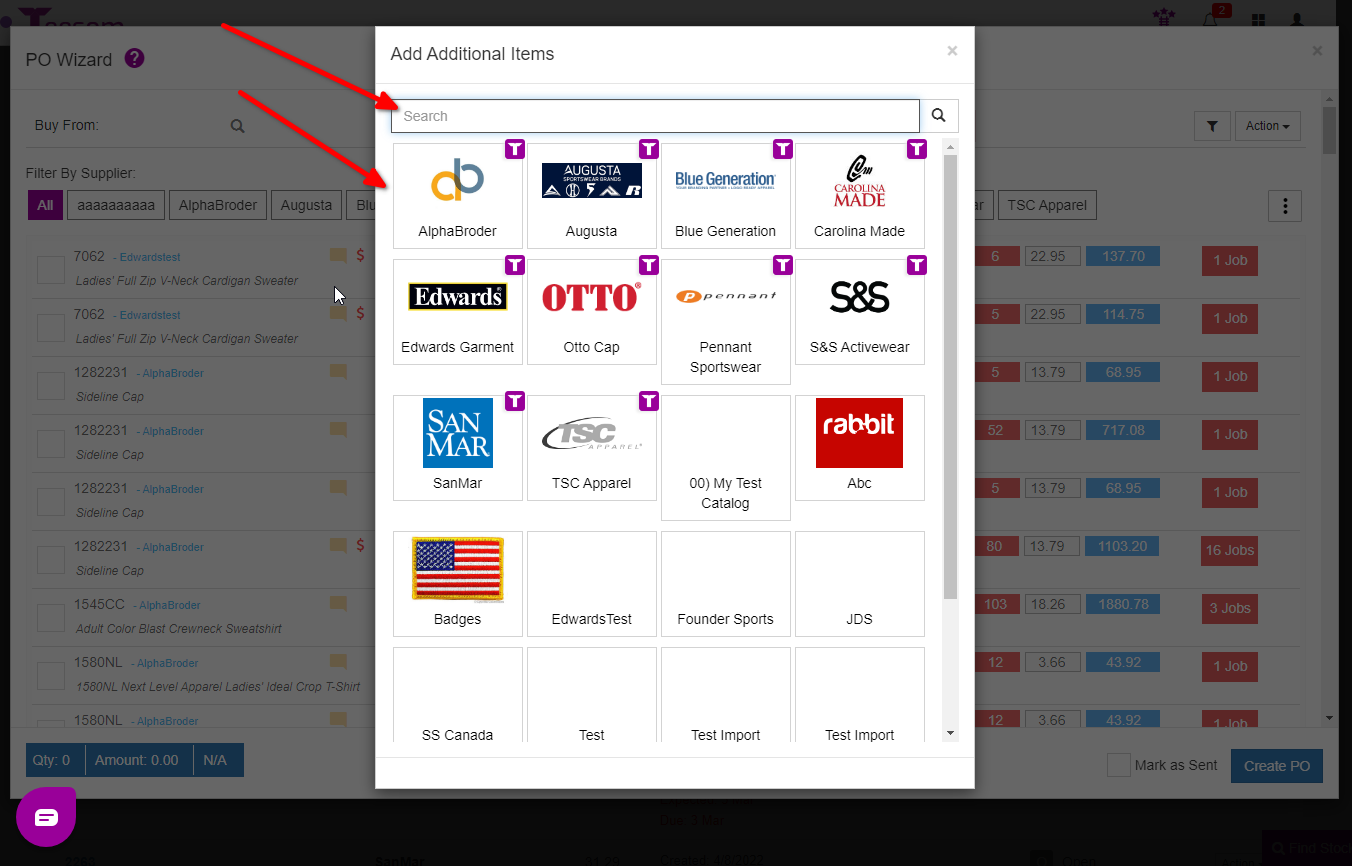
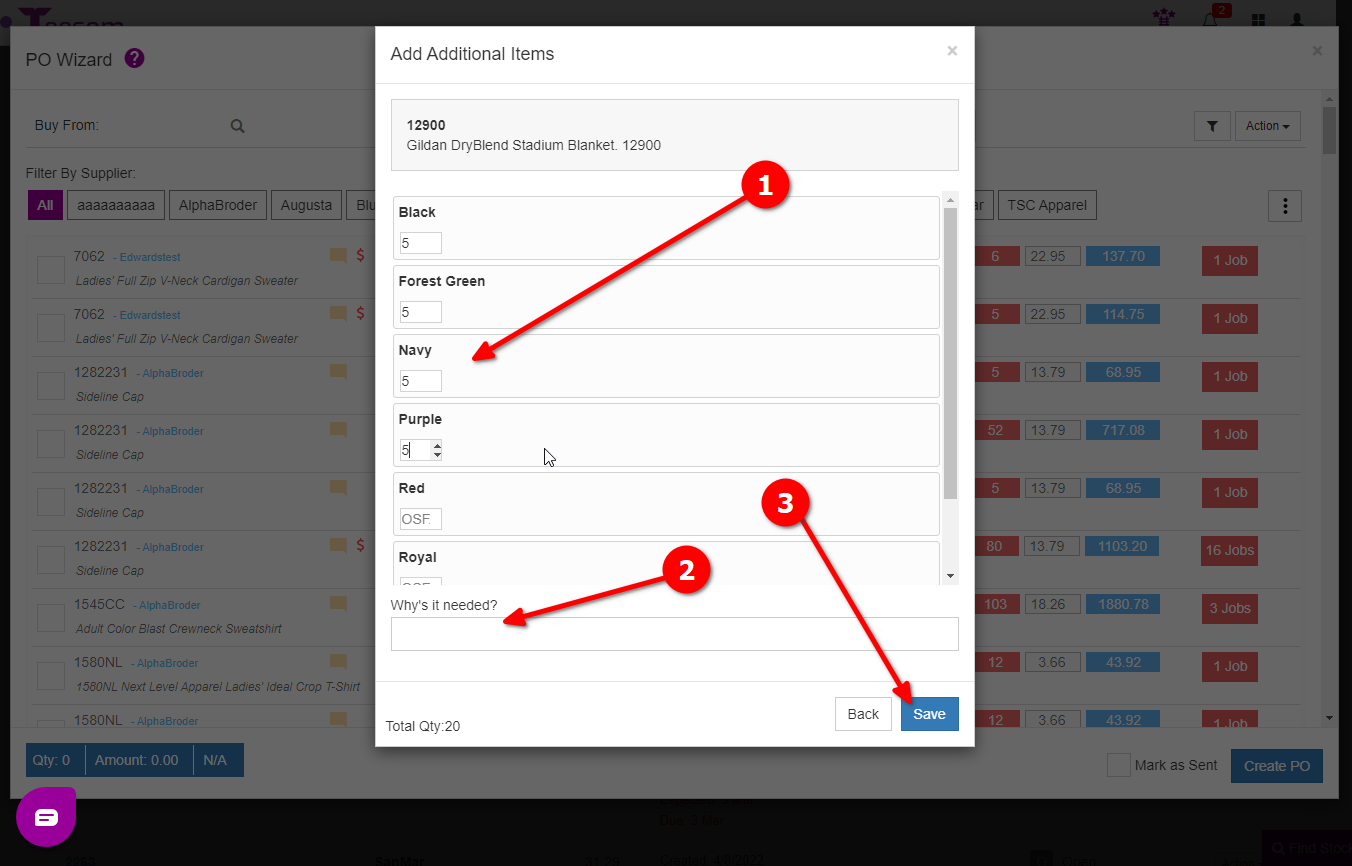
Search for the item you want to order stock for by either browsing the catalogs or searching for it directly using its style number.
After choosing an item, enter the quantity and a reason why it is needed then click on “Save“.
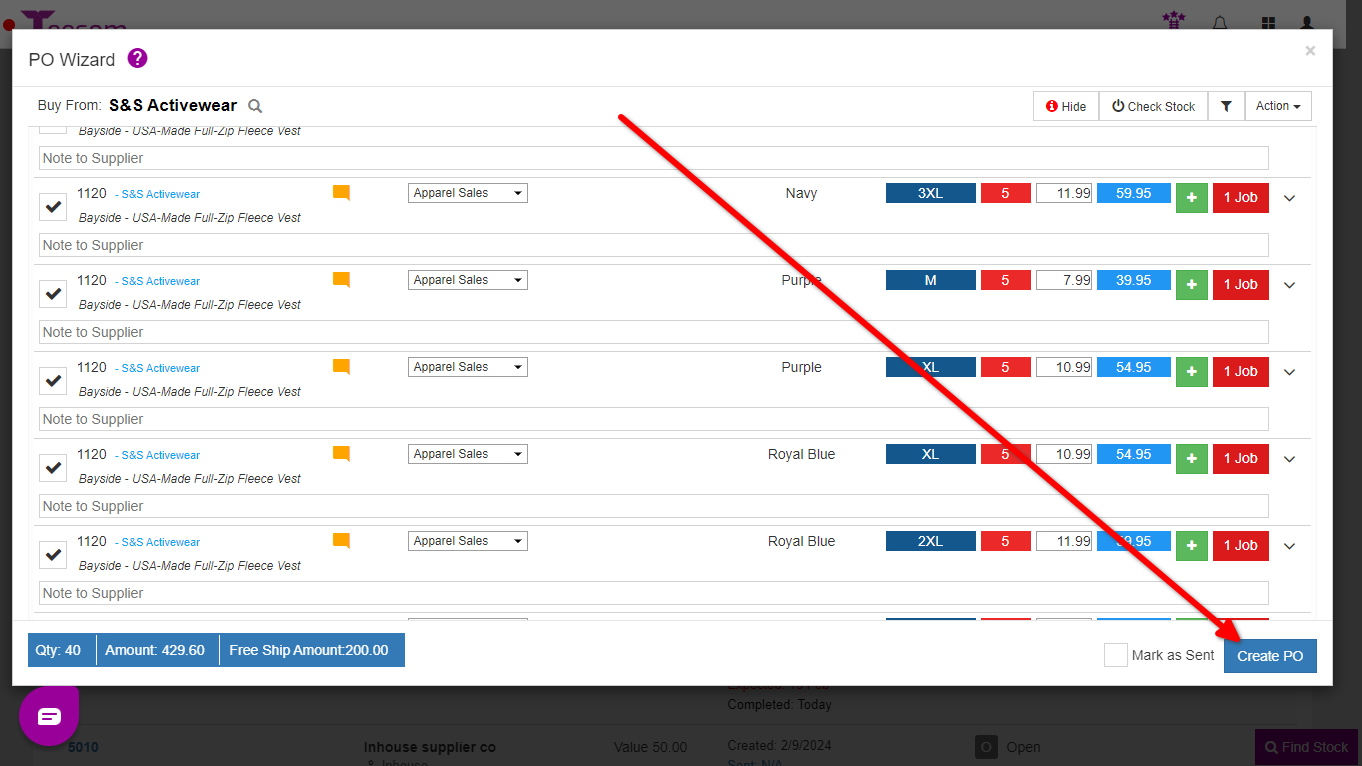
Click on “Create PO“.
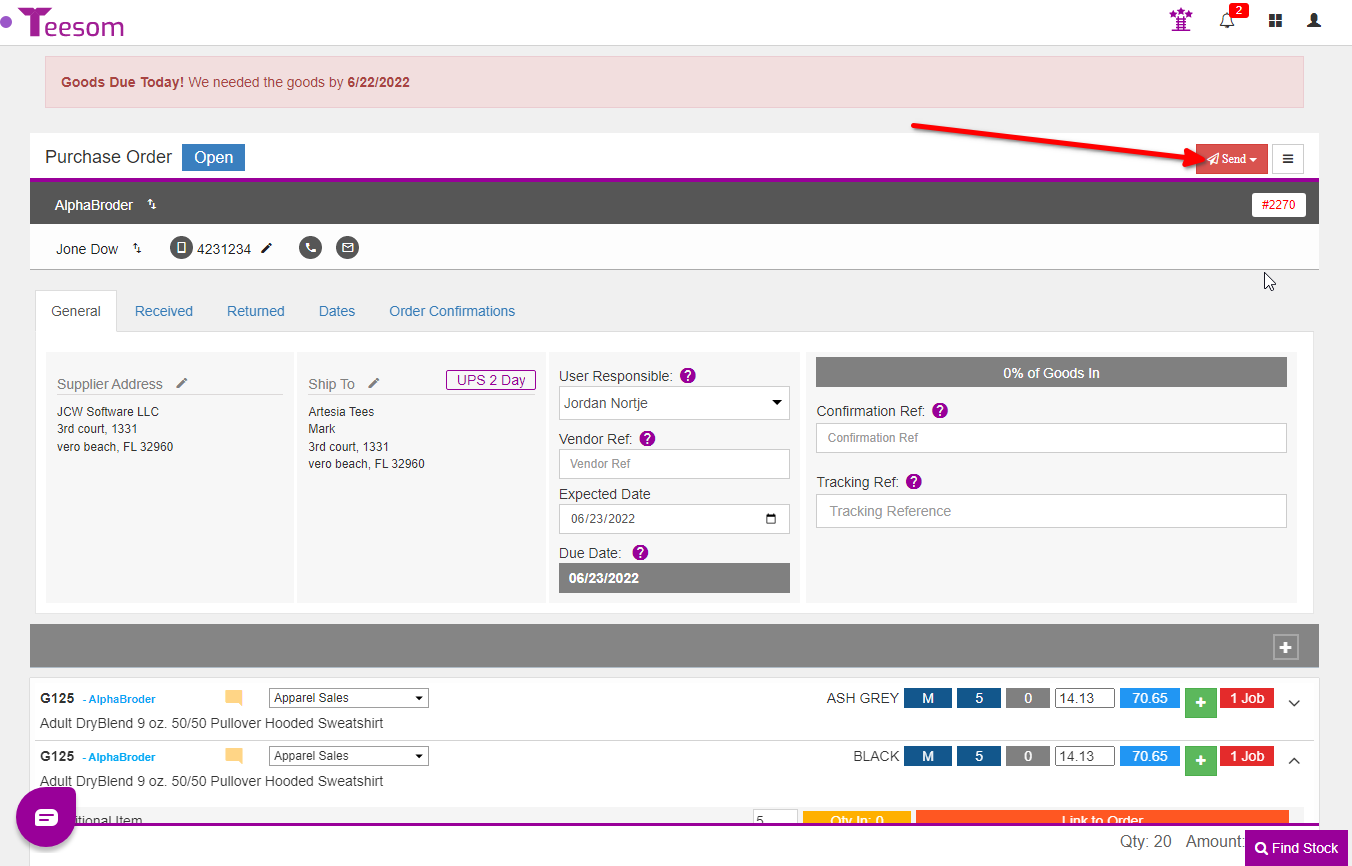
Now we can send the PO.
To begin receiving the goods in, click on the hamburger menu and select “Receive Goods“.
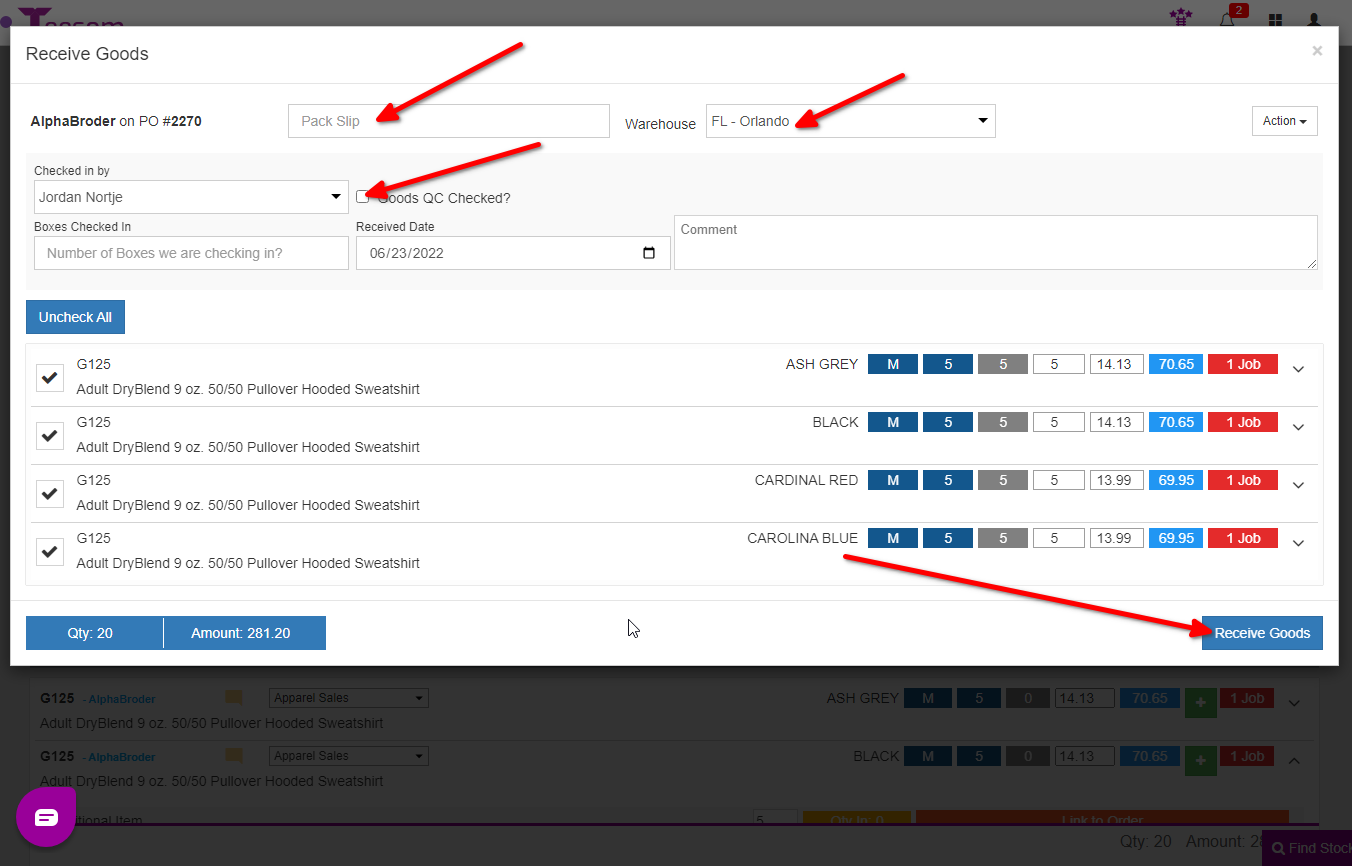
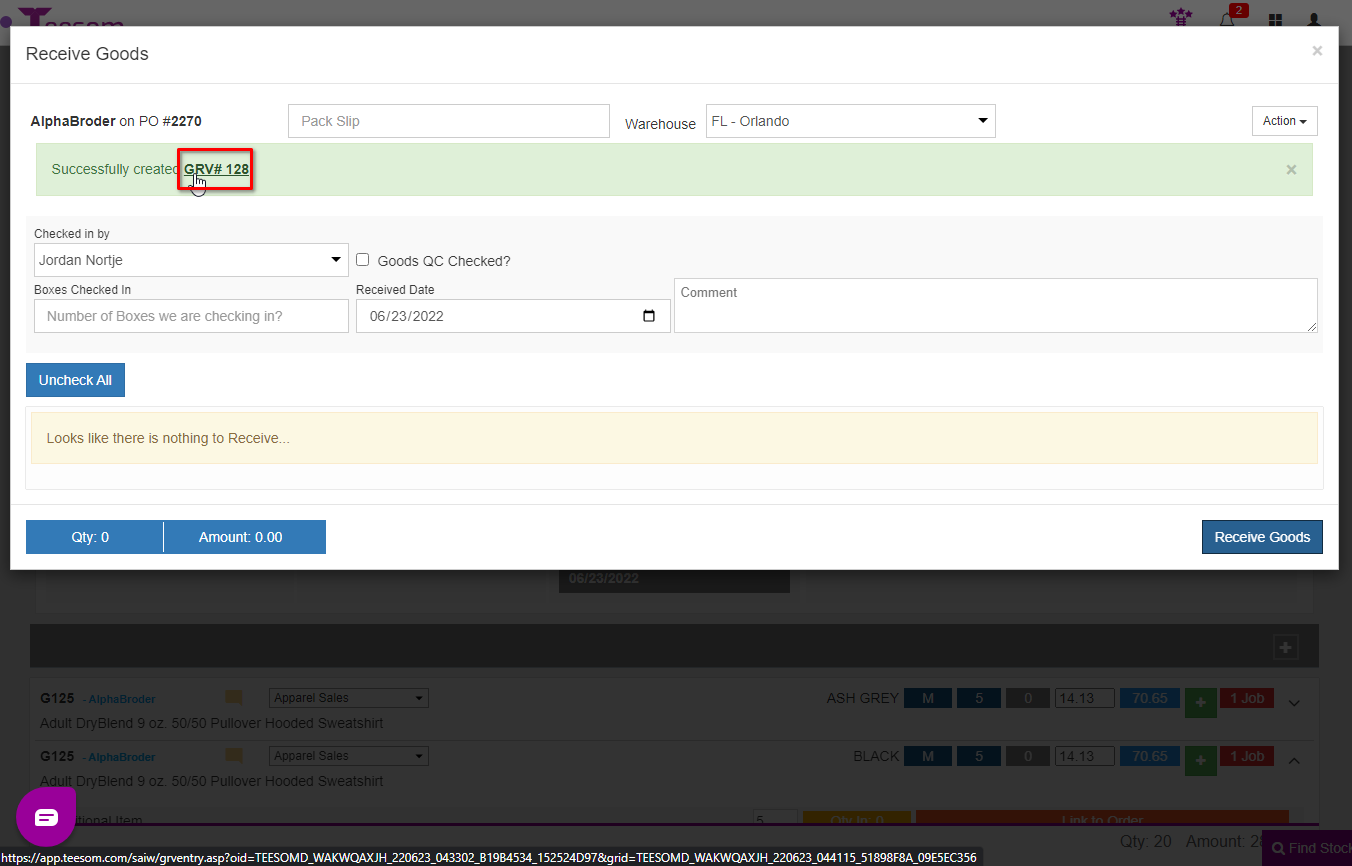
You can optionally add the Pack Slip number but you must pick a warehouse to store the goods in, you can also check that the goods were quality checked. When you are done click on “Receive Goods“.
You can view the GRV (Good received voucher) by clicking on the hyperlink that appears in the green box.
You can confirm the stock by going to the “Inventory Codes List” screen. You should see the updated stock in the green box and you can click on the green box to see more stock details.