Now that you have created your screenprint price matrix we can go ahead and create the screenprint artwork.
There are two places where you can create your screenprint imprint from.
The “Artwork List” screen and on the order itself. We will show you how to create the imprint from both places below.
Create The Screenprint Imprint From The Artwork List
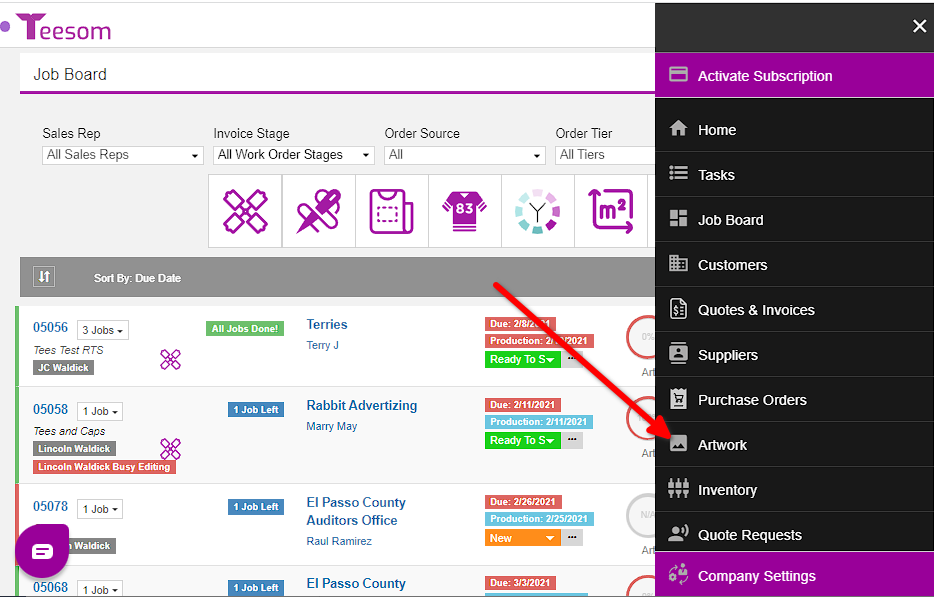
To get to the “Artwork List”, go to the “Main Menu” then select “Artwork“:
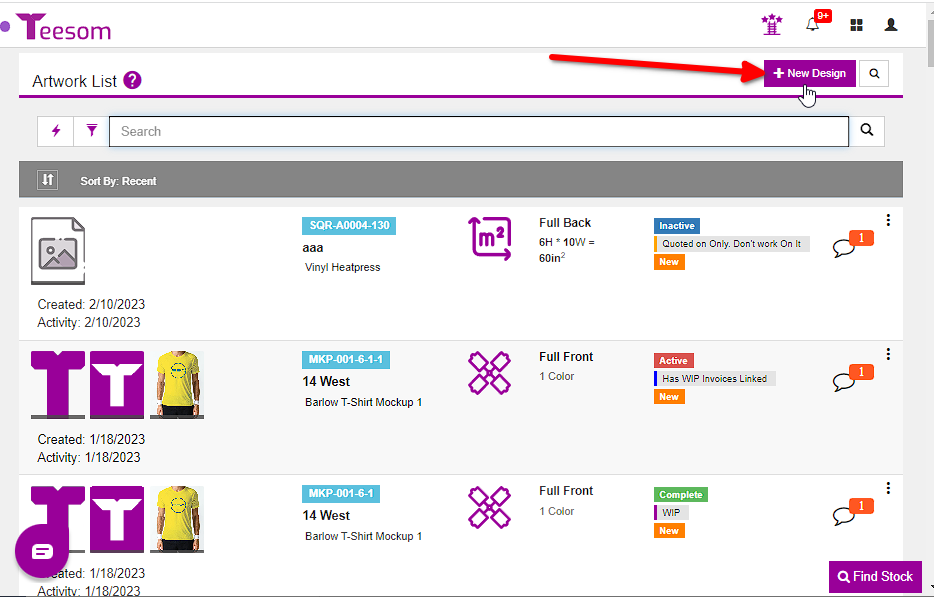
On the “Artwork List” screen, click on “+ New Design“:
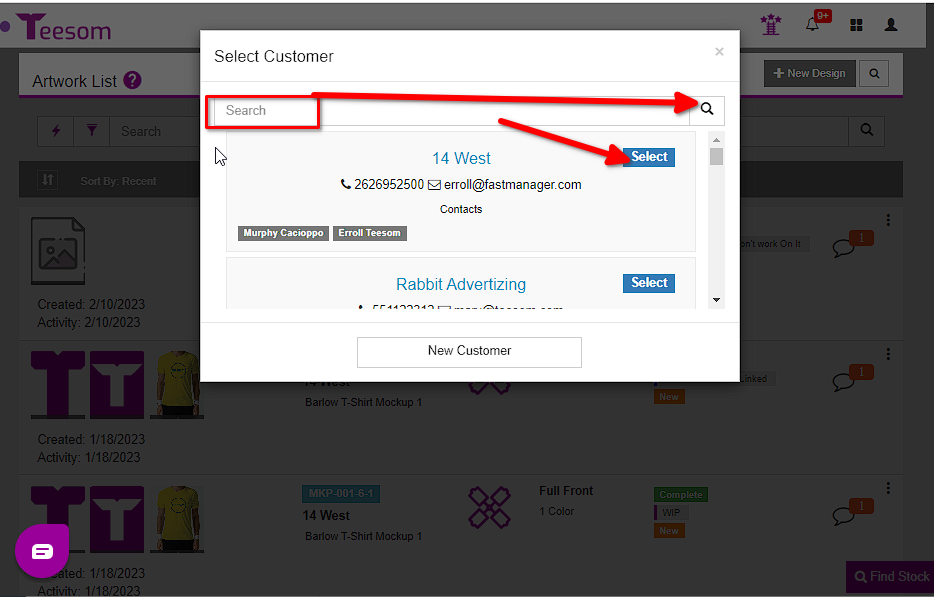
Select the customer the artwork will be linked to:
You can either scroll and then click on "Select" or you can search for the customer by typing their name into the search field and then click on the magnifying glass.
Artwork being "linked" means whenever you create an order for that customer you can select the already existing imprint when adding an imprint instead of having to create a new one.
After selecting the customer:
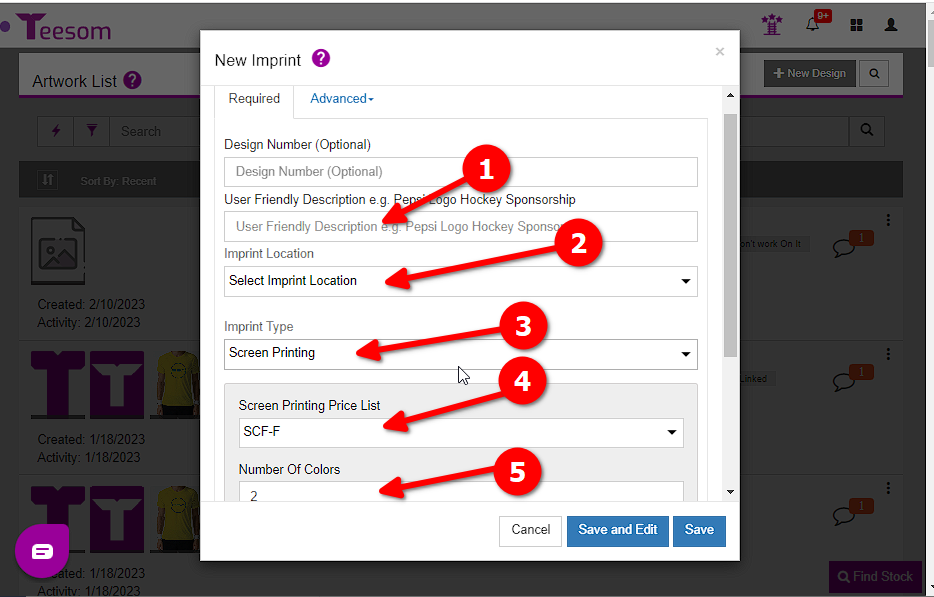
Enter the imprint description.
Select the imprints location. front. back, sleeve, etc.
Set the “Imprint Type” to “Screenprint”.
Select the price matrix the imprint will use when added onto an order. (You can change this on the order.)
Set the number of colors the imprint will have. (You can change this later.)
You can enter your own UNIQUE design number, but if you choose not to Teesom will generate one for you.
The "Advanced" tab is for uploading an artwork image as well as attaching any extra production files the artwork might need. Production files uploaded will appear in the artwork message board.
After adding the required information for your imprint you can now click on “Save” or if you want to edit the artwork click on “Save and Edit“.
You can edit the artwork after it is created.
Create A Screenprint Imprint From The Order
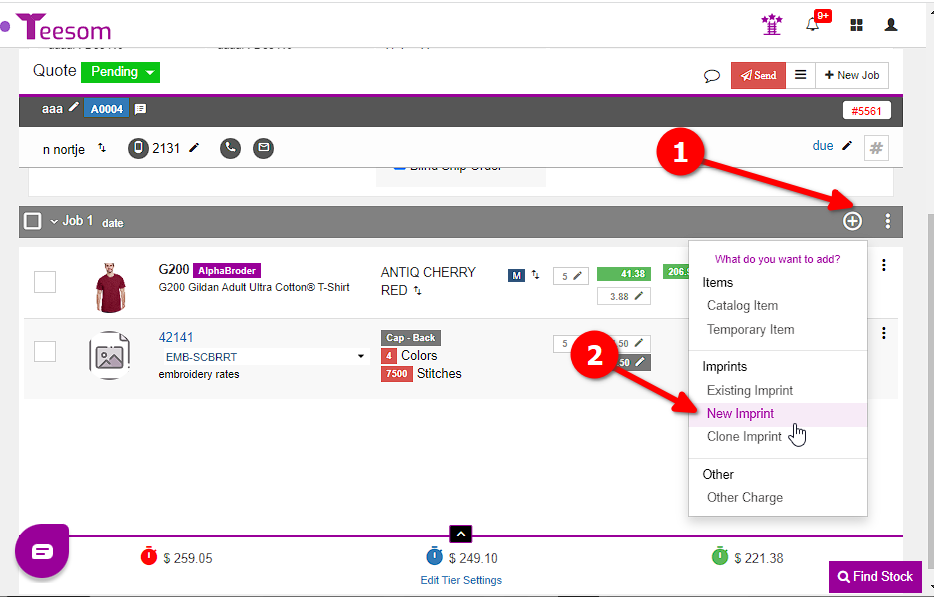
To create a new “Screenprint Imprint” from an order:
Click on the (+) on a job.
Select “New Imprint“.
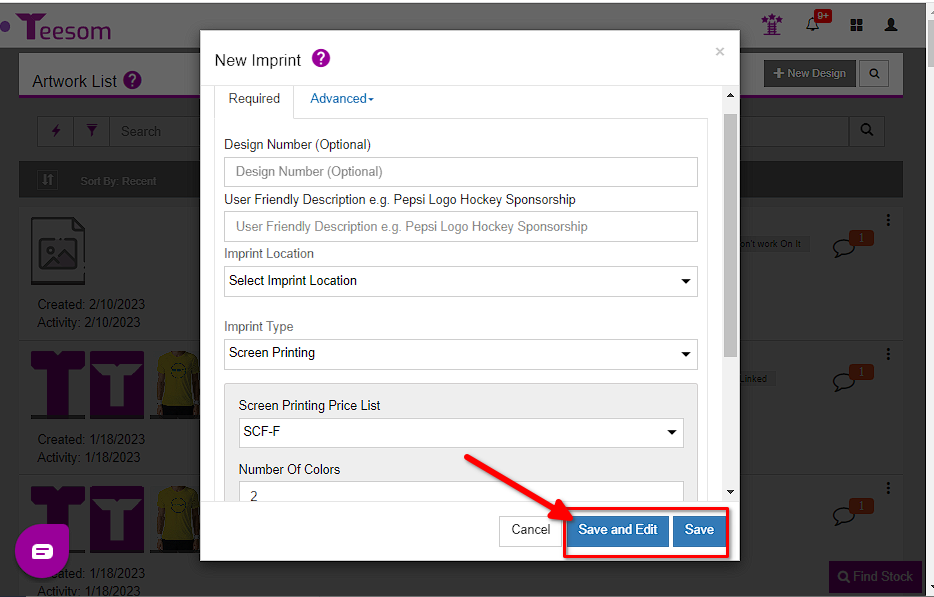
On the “New Imprint” screen:
Enter the imprint description.
Select the imprints location. front. back, sleeve, etc.
Set the “Imprint Type” to “Screenprint”.
Select the price matrix the imprint will use when added onto an order. (You can change this on the order.)
Set the number of colors the imprint will have. (You can change this later.)
You can enter your own UNIQUE design number, but if you choose not to Teesom will generate one for you.
The "Advanced" tab is for uploading an artwork image as well as attaching any extra production files the artwork might need. Production files uploaded will appear in the artwork message board.
After adding the required information for your imprint you can now click on “Save” or if you want to edit the artwork click on “Save and Edit“.
You can edit the artwork after it is created by clicking on its design number on the order.