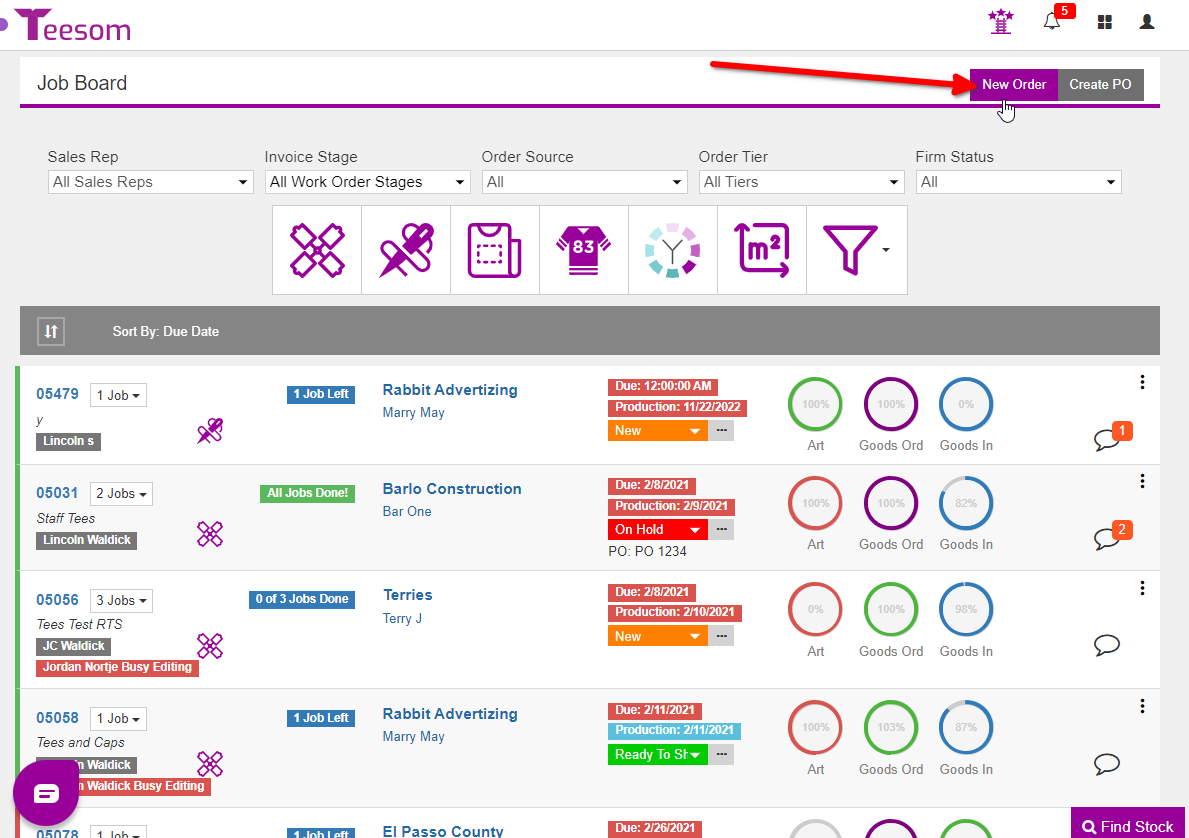
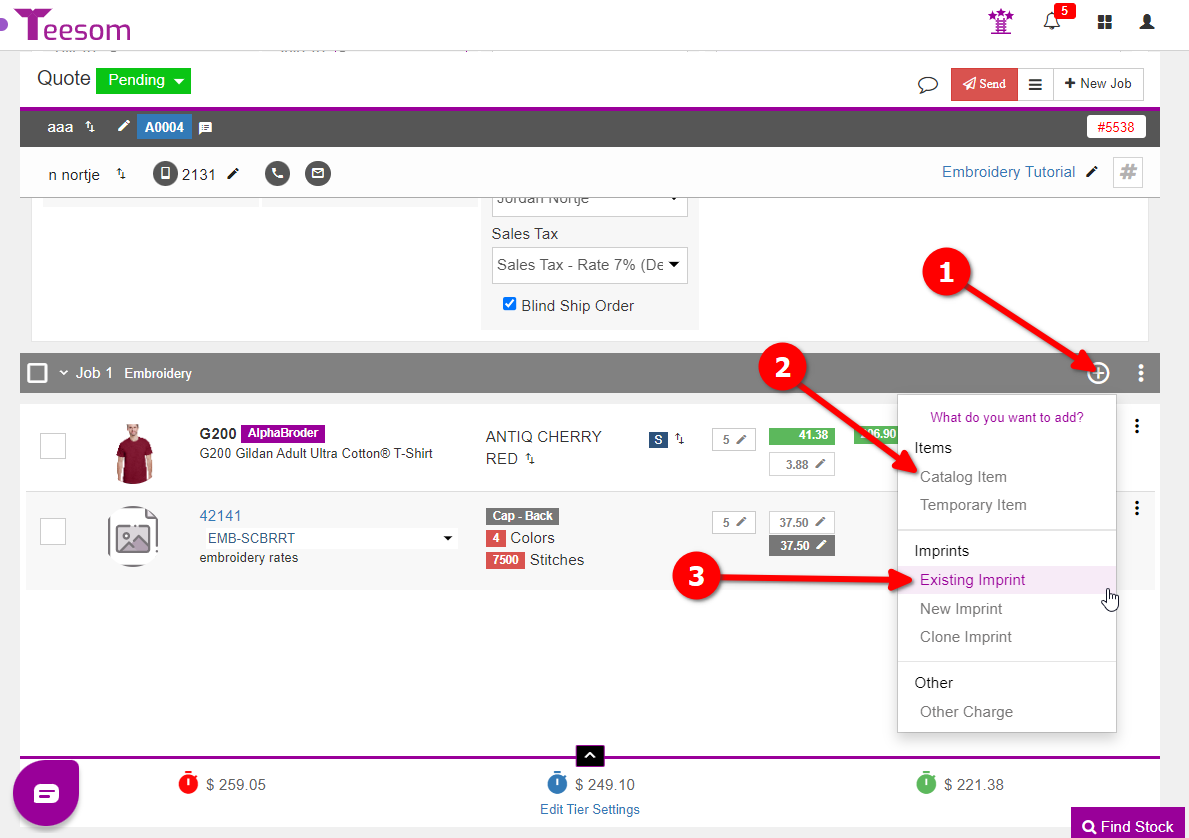
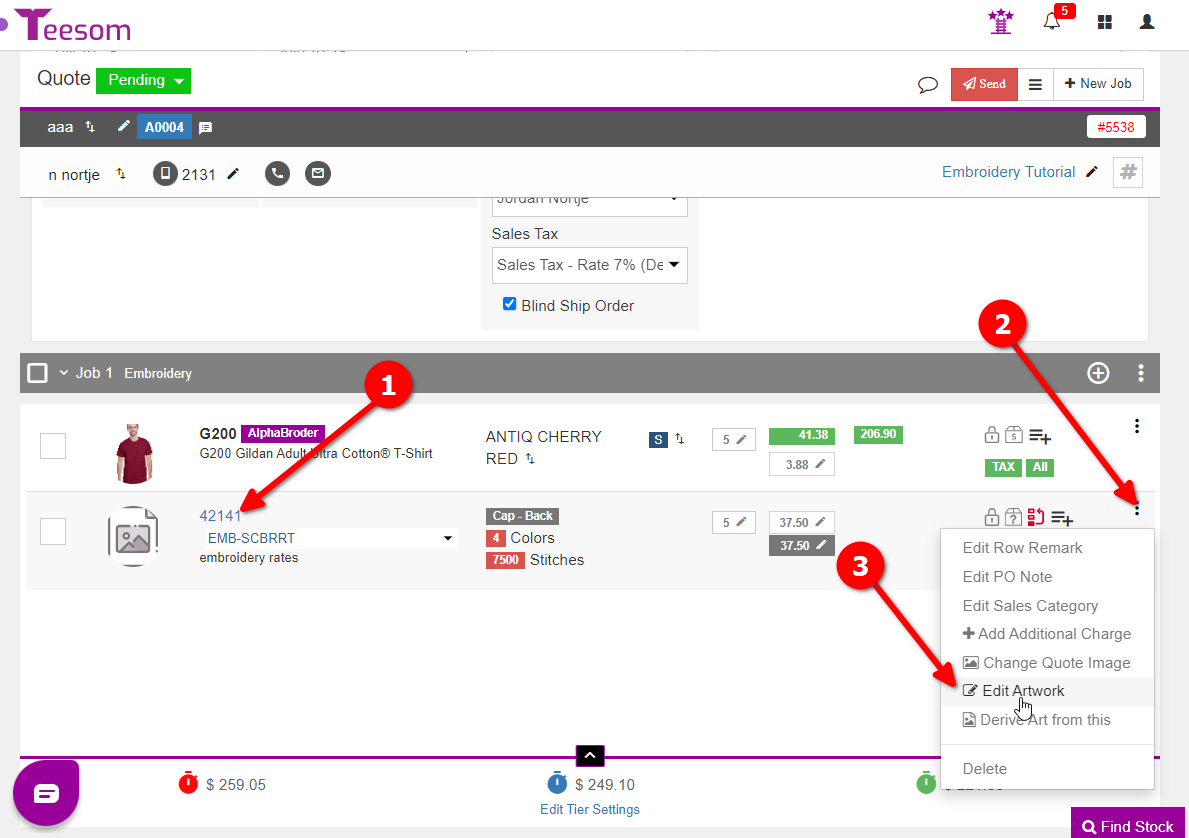
< Back You are here: Home KnowledgeBase Frequently Asked Questions & Common Issues Create an Embroidery Order Print Create an Embroidery Order In this article we will go through the process of creating an order for an embroidery job. Create an Embroidery Order To create the order, on the “Job Board” click on “New Order“: After creating the order you can now add your product and imprint:Click on the (+) on a job.Select “Catalog Item” to add a product.Select “Existing Imprint” to add the imprint you created, or select “New Imprint” if you want to create a new imprint for this order. Update and Edit the Artwork on the Order To get to the artwork edit screen you can:Click on the design number, or Click on the three dots and then click on “Edit Artwork“. On the “Artwork Edit” screen:The “Sales” tab is used for when the order is a quote. You can change the colors, stitch count and price matrix in use.The “Production” dropdown is used once the quote has been converted to an invoice and you are getting ready to start production.You can also click on “Notes” to open the message board for this artwork. Related Topics: 1.) Production Approval Requests 2.) Working with Artwork 3.) Embroidery Pricing Tutorial