The customer portal is a way for *your customers* to get a detailed overview of their account with you. Including pending quotations, current work-in-progress, outstanding invoices, and more.
Getting Set Up
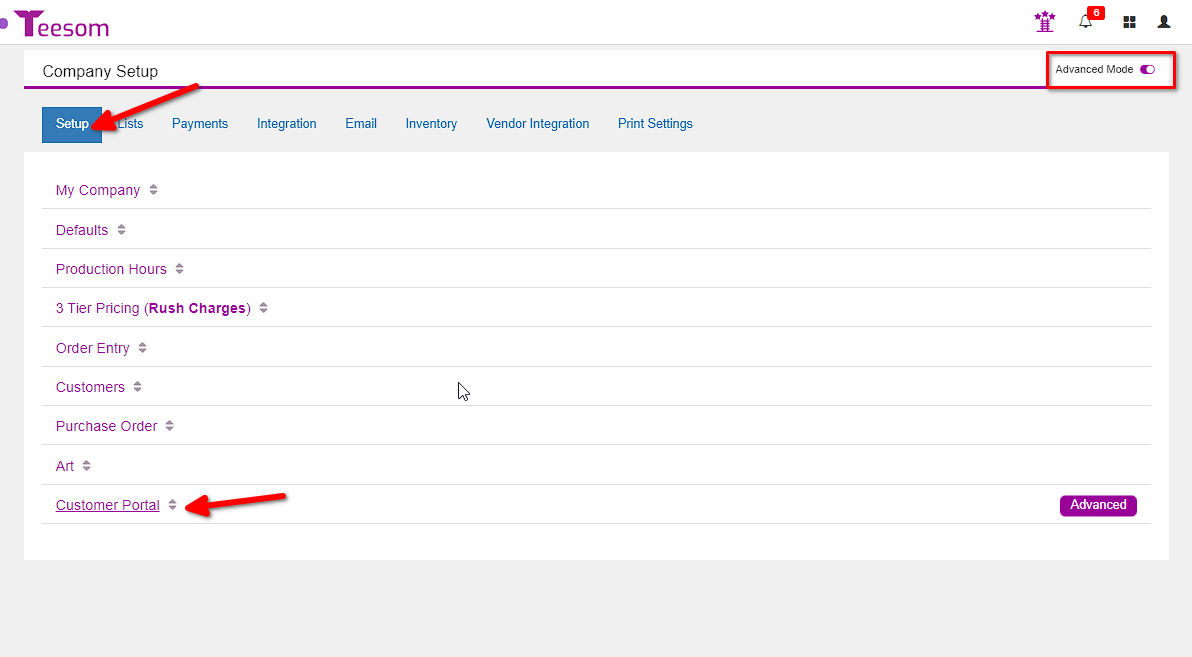
To get started with the Customer Portal the first thing you must do is go into Company Setup expand the “Customer Portal” section and fill out all the options.
Company Portal Slug
To be able to see the Customer Portal option make sure that "Advanced Mode" is toggled on.
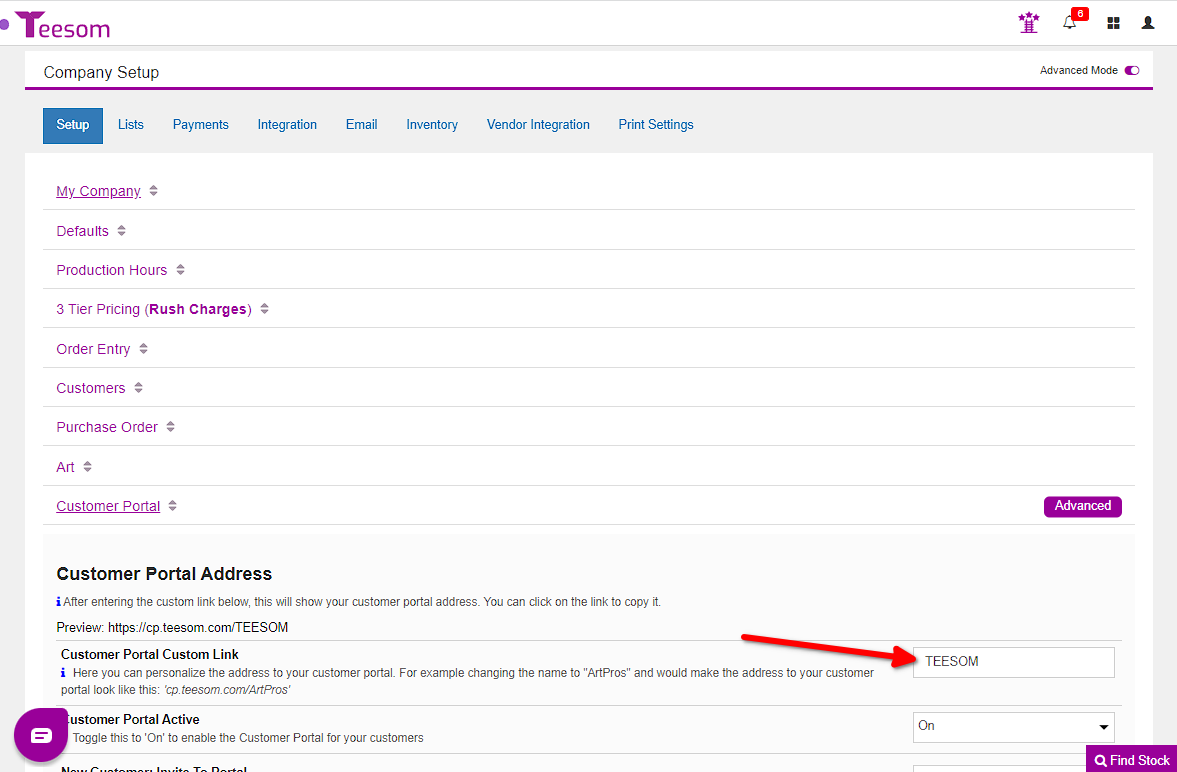
The first setting is the URL “Slug”.
This is a subdirectory that your customers will use to login to the portal. The address will always be the same for all your customers, i.e:
https://cp.teesom.com/<SLUG>
So, for example, if you make the slug, or custom link, “JOETEES” – then the address to your portal will be:
https://cp.teesom.com/JOETEES
Note:The "Slug" will always come at the end of "cp.teesom.com/" and should be based on the name of your own company. For example, if your company is called "Acme Widget Co", you might make your slug something like: "AcmeWidgetCo", which will make the full address of your portal look like this: cp.teesom.com/AcmeWidgetCo
There must be no spaces in your slug, it should be all one word.
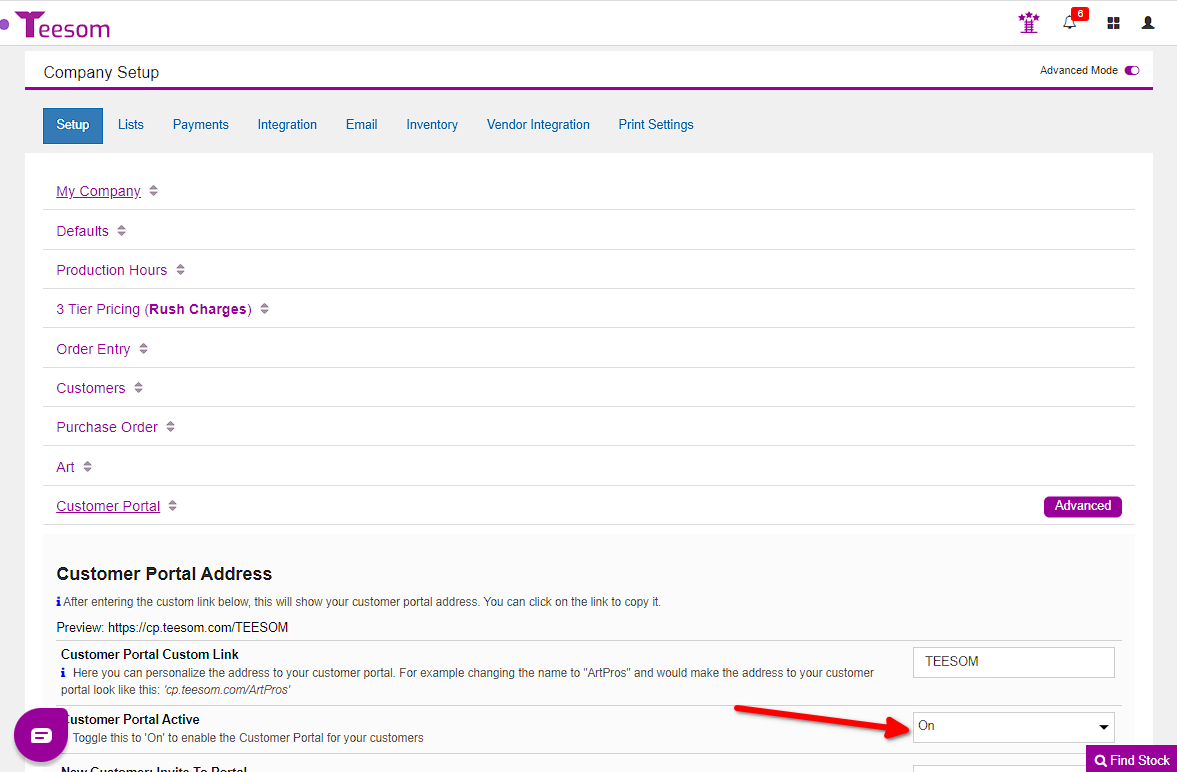
Turn It On
Next, toggle the “Customer Portal Active” setting to ON:
Remember to edit the email templates. Make them your own!
The rest are preferences that you can adjust to your liking.
Each one has its own explanation, if you need any assistance we are right there in Live Support, ready and eager to assist.
Invite a Customer to use the Portal
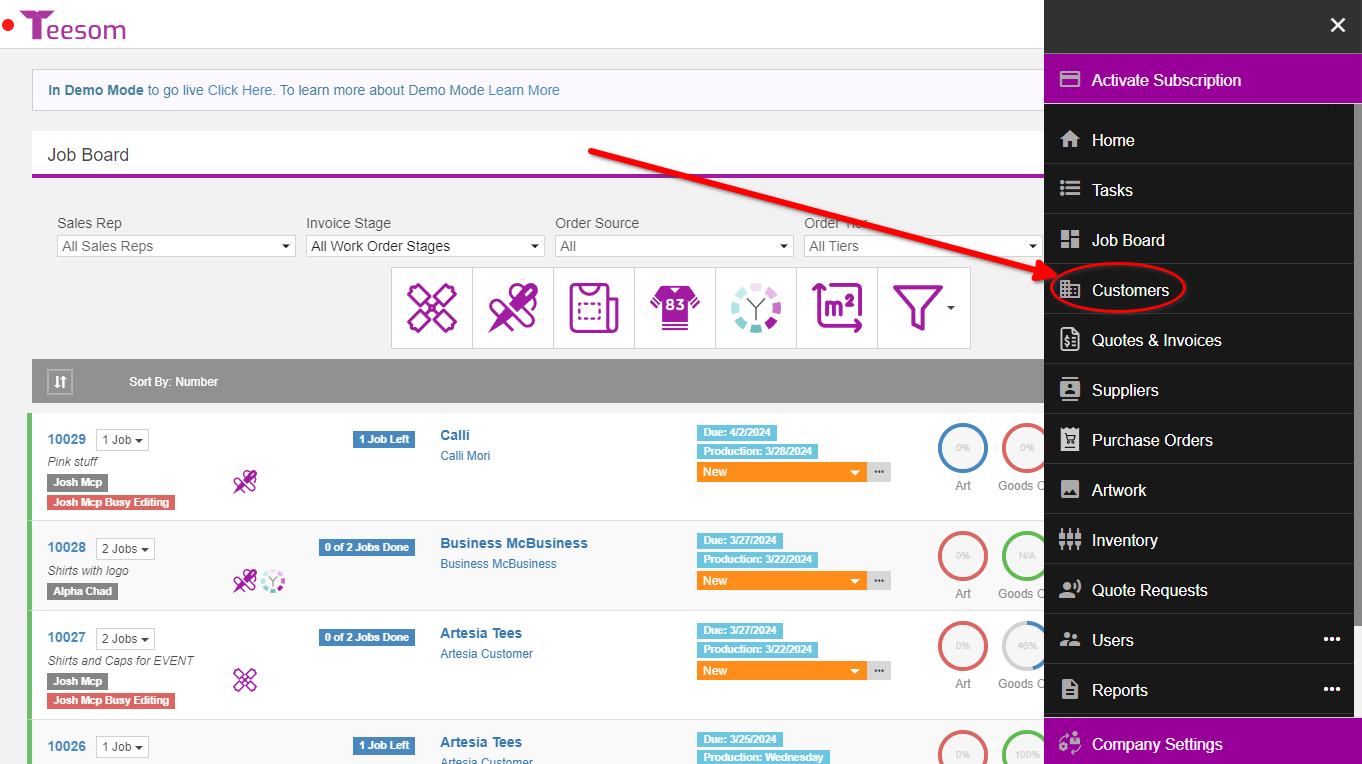
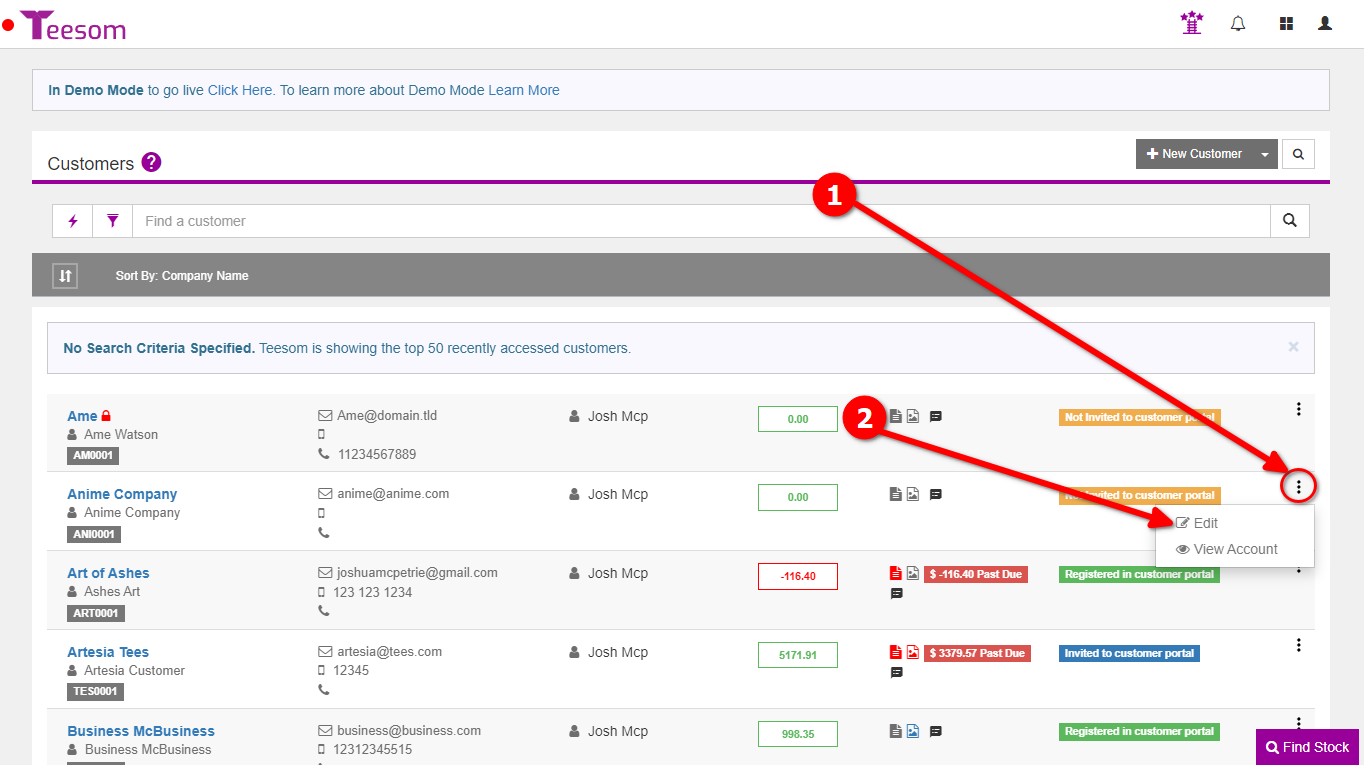
In Teesom, go to your Customers page via the Main Menu:
On the Customers page click the “3 Dot” menu of the relevant customer and select Edit:
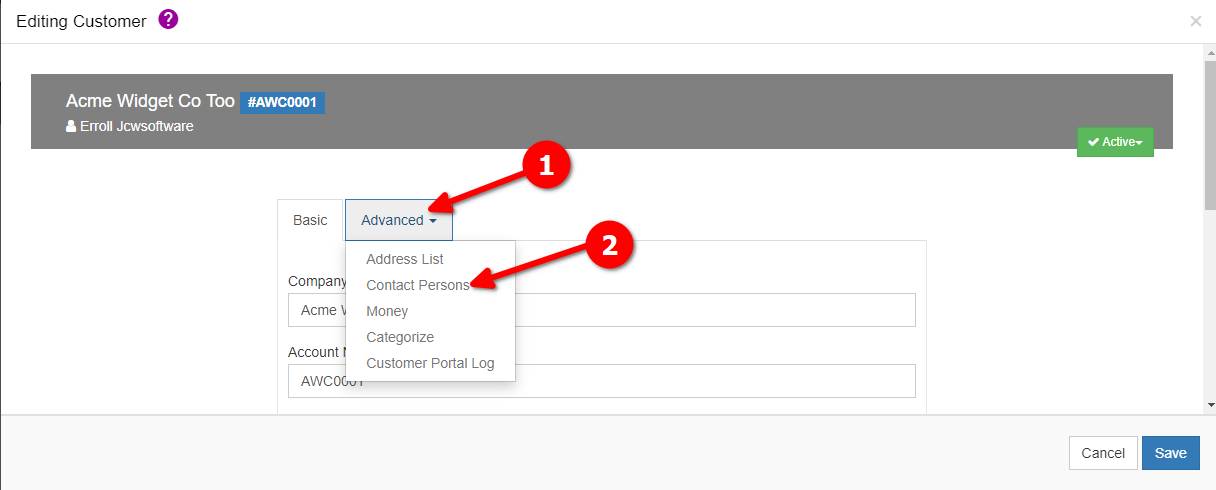
Then click the “Advanced” dropdown and select “Contact Persons”:
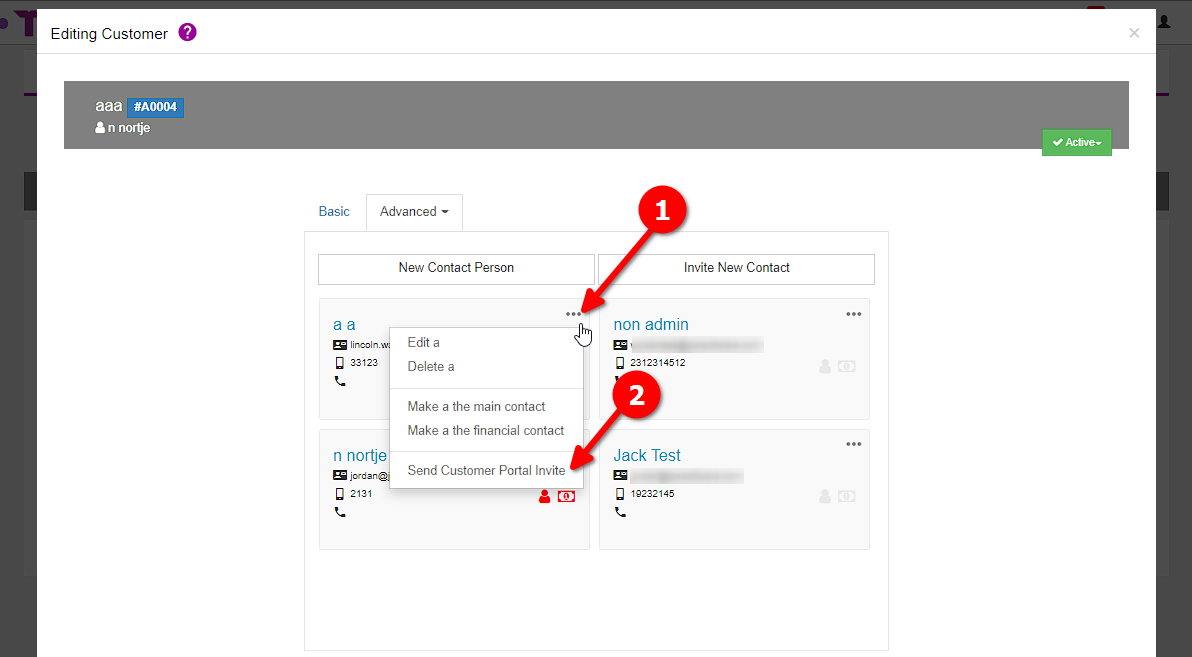
Here you can click the “3 Dot” menu on the relevant contact and then select ‘Send Customer Portal Invite‘:
NOTEThe "Main Contact" for your Teesom Customer will have administrator privileges in their customer portal. Allowing them to edit, add and delete other users from their own company, as well as manage saved cards and a few other things.
Of course they will only be able to do this for their own company and will not have any access whatsoever to anybody else's accounts or information.
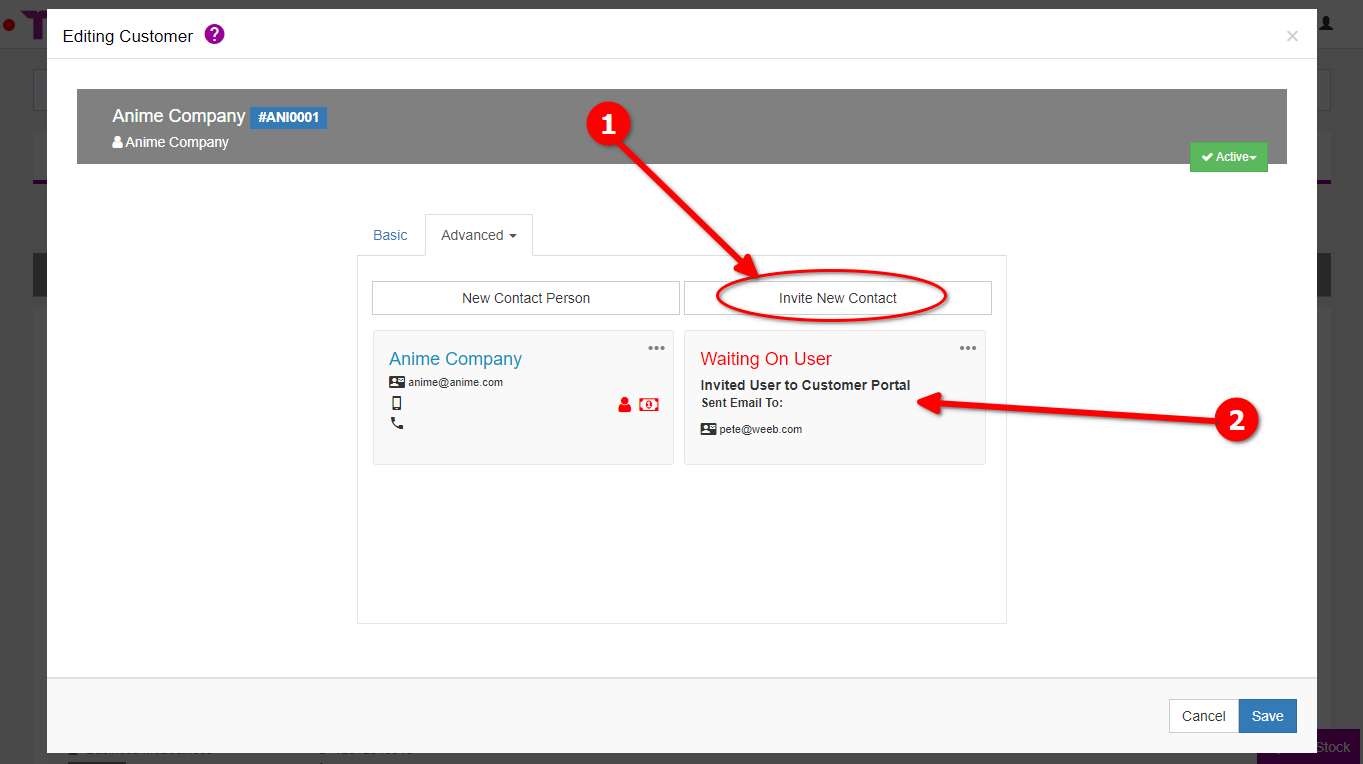
You can also click on ‘Invite New Contact‘ – which will send the user a link, via email, to setup their customer portal account. Once they follow the link and setup their account the contact details will populate in Teesom.
If you have allowed your customer to invite their own contacts, (in the Customer Portal section under Company Setup), then you can perhaps leave it to them to add or invite the staff they want to use the portal.
If they add or edit any of their users, the appropriate contact information in Teesom will be updated.
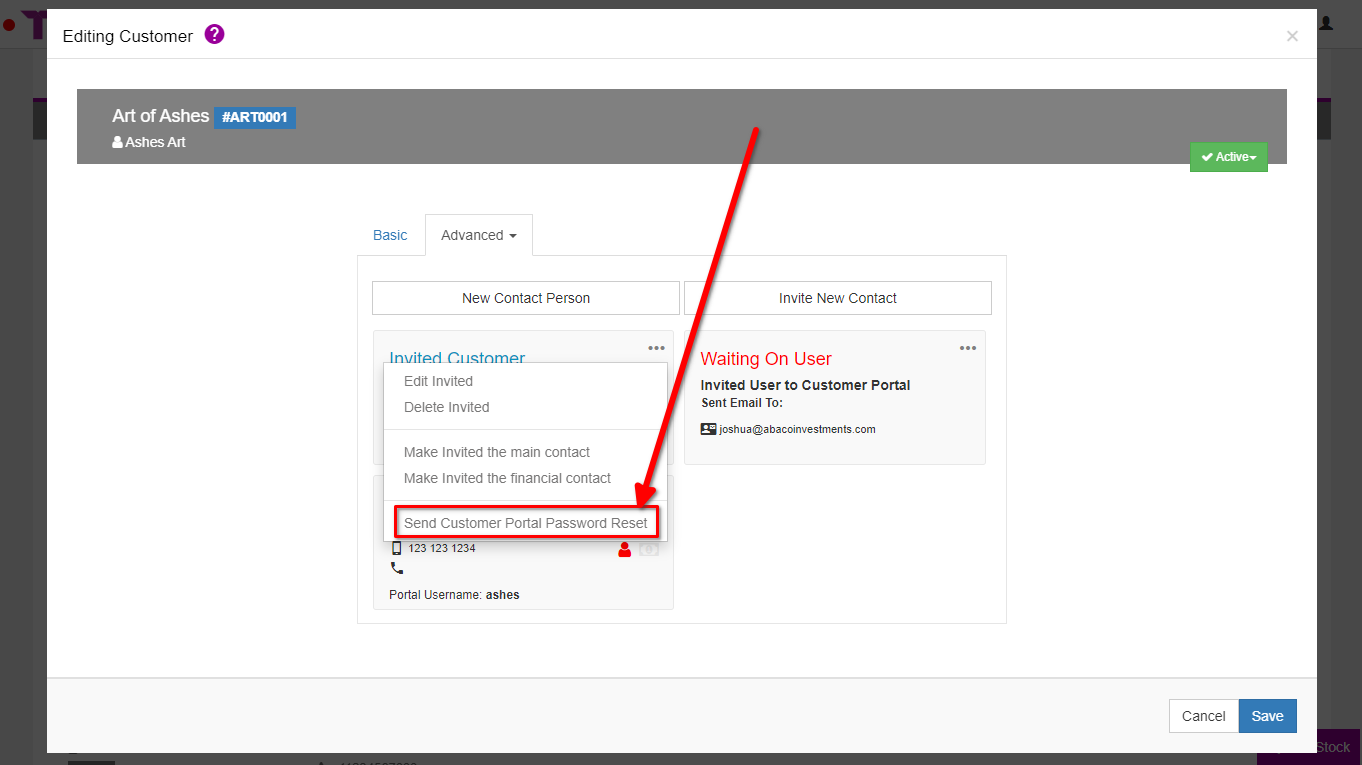
Of course you can also go ahead and send password reset links to any contacts that have been invited to the portal previously:
TIP:For your own testing & training purposes create a fake/dummy customer in Teesom, then add yourself as the primary contact.
Then you can login to the portal as that customer/user and take a look at what your customer will see there.