In order to send information to QuickBooks, you will need to cross-match certain company information. When you first linked QB to Teesom most of your settings will be imported.
In this article we will go over all the things you can set up:
Setup Quickbooks Desktop
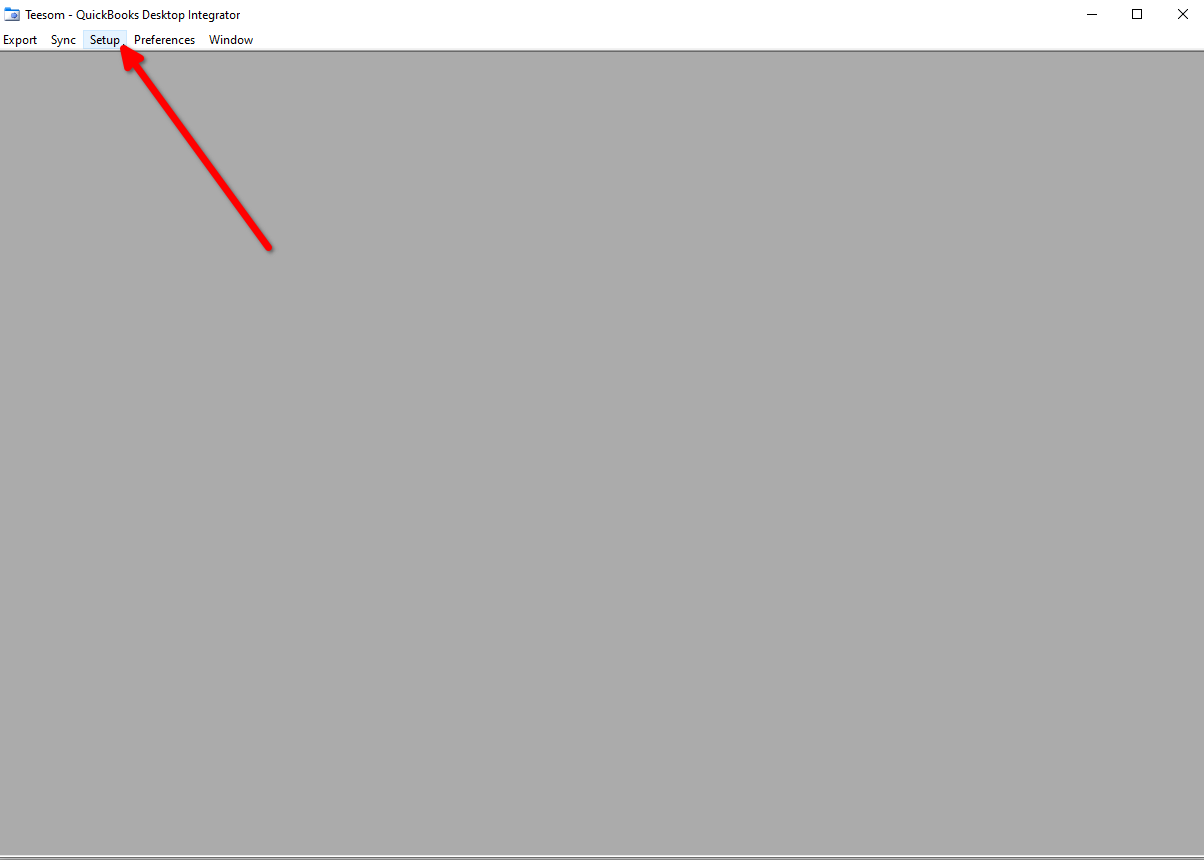
In the QB Desktop Integrator, click on “Setup“
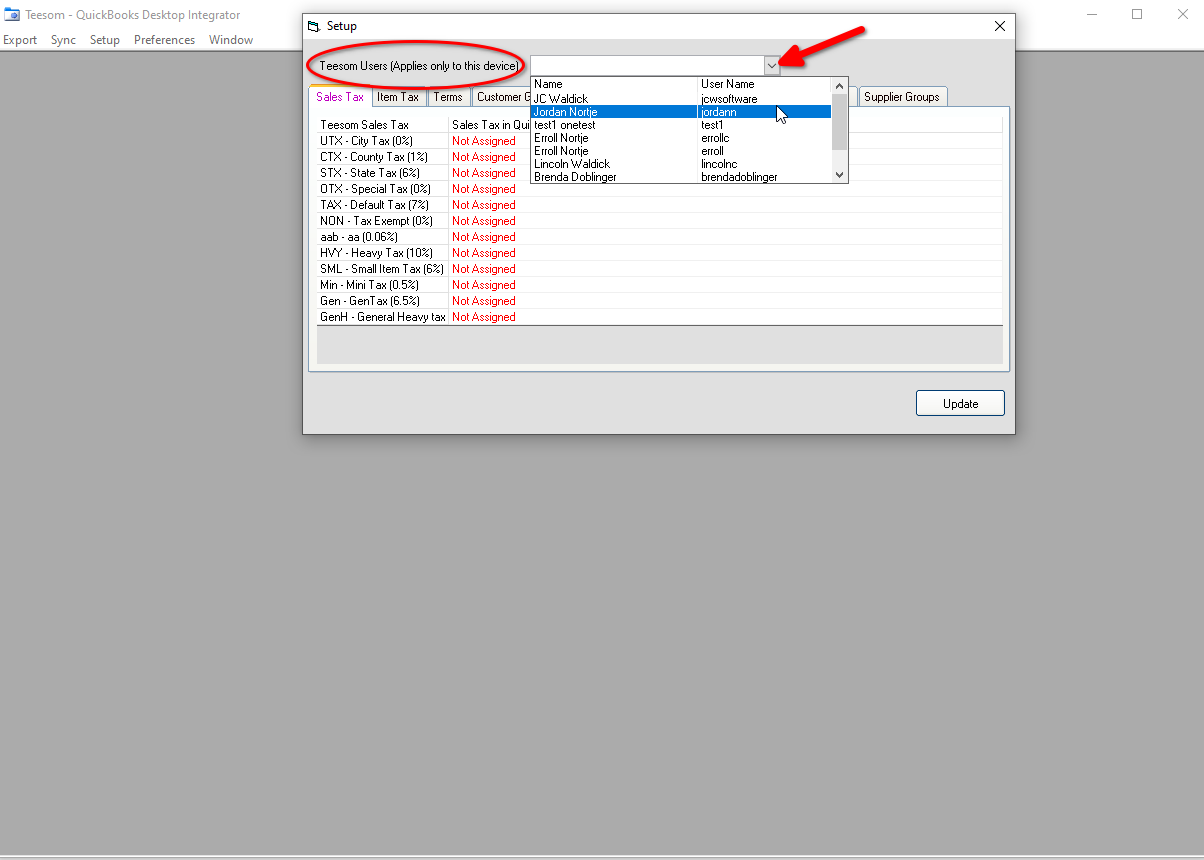
Next, select your own username from the dropdown next to: ‘Teesom Users’
Setup: Sales Tax
Your tax rates have to be the same in Teesom and Quickbooks
First you will have to manually setup your taxes in QB desktop before you can link them up.
In QB desktop:
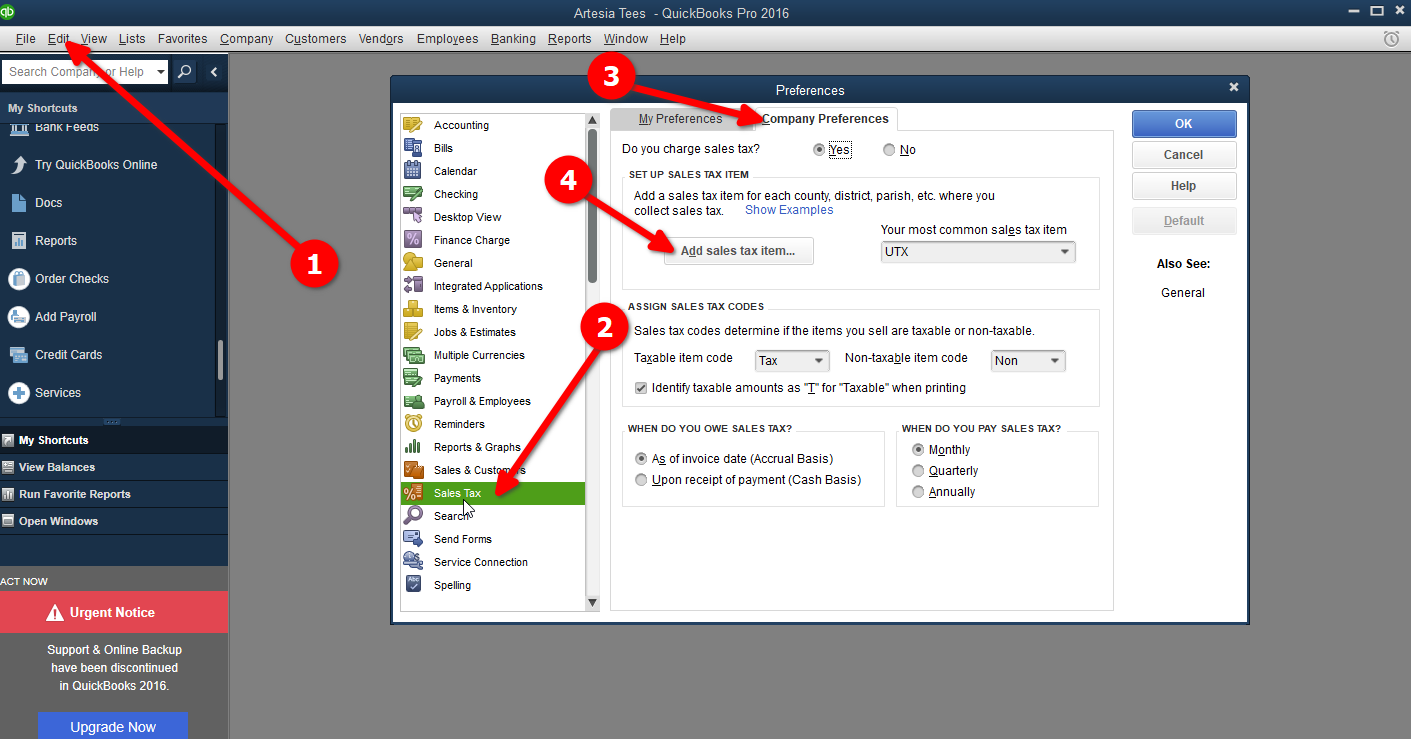
click on “Edit” then select “Preferences” at the bottom of the list,
go to “Sales Tax“
Click on “Company preferences“,
Click on “Add sales tax item” and setup all your different tax rates.
Once you have created the tax rates in QB go to the integrator:
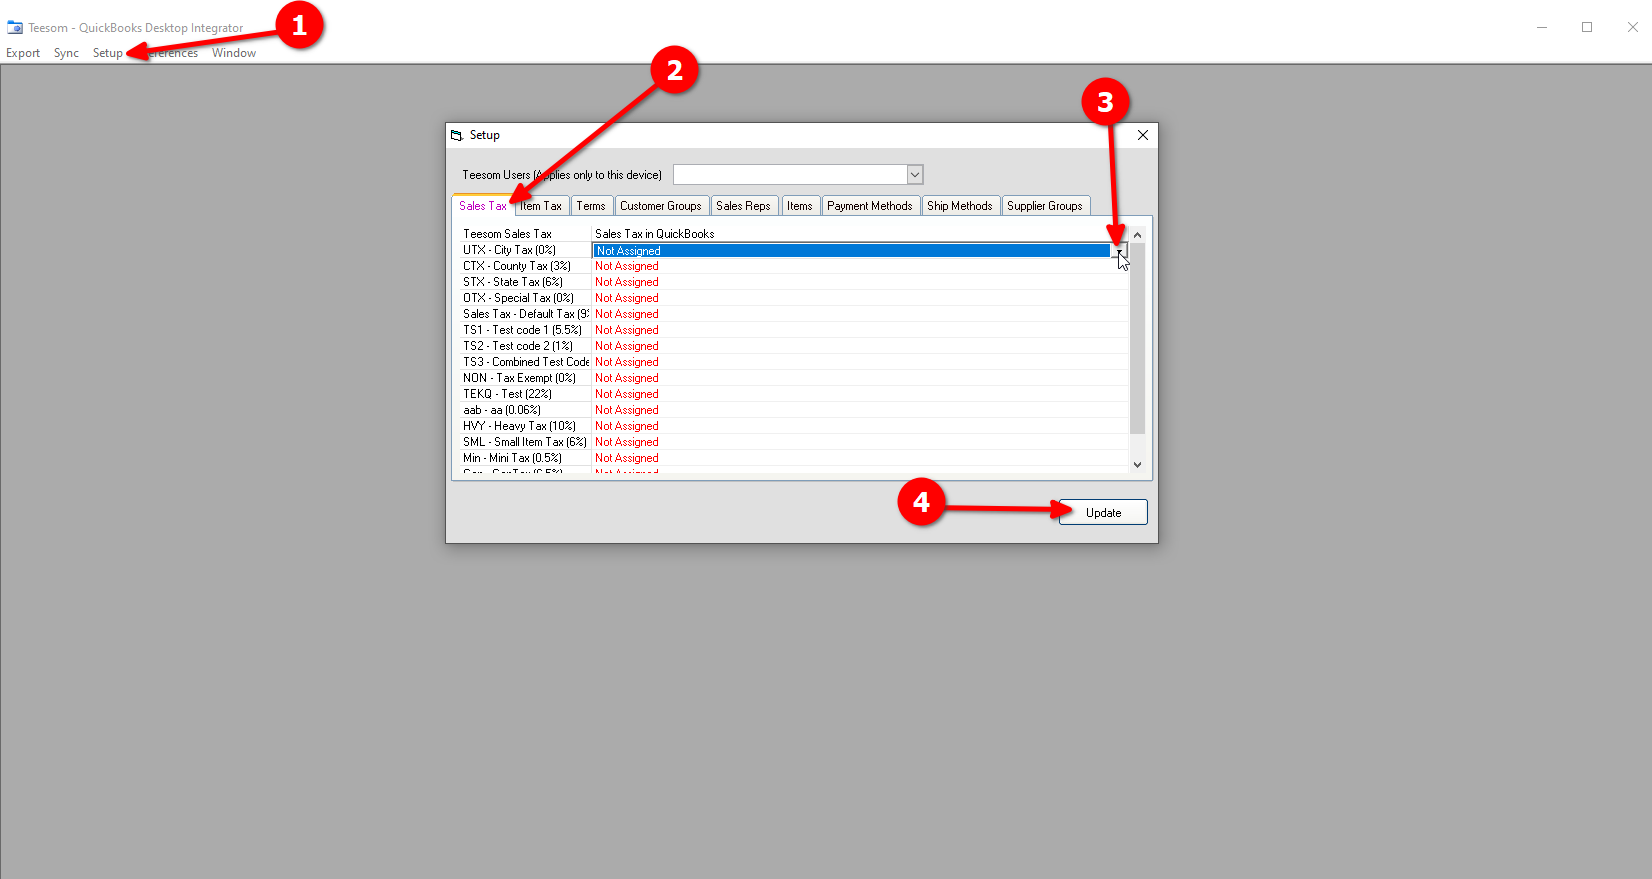
Click “Setup“
On the setup screen click on “Sales Tax“
Select the matching sales tax to link up by clicking on the drop down. ( you have to click in the white space next to “Not Assigned” to bring up the dropdown)
Click on “Update” when you are done linking your tax codes
If the tax rates you created do not appear restart the integrator
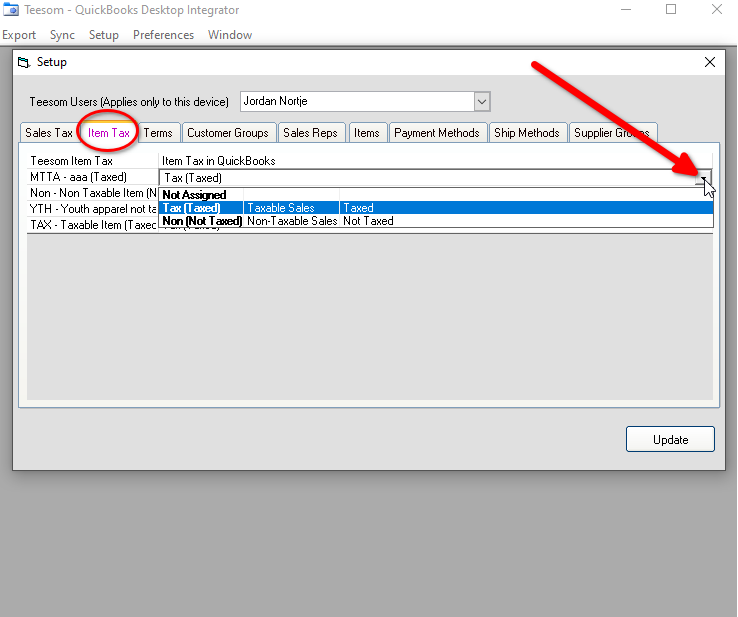
Setup: Item Tax
Under “Item Tax” link up the corresponding taxes by clicking on the dropdown and select
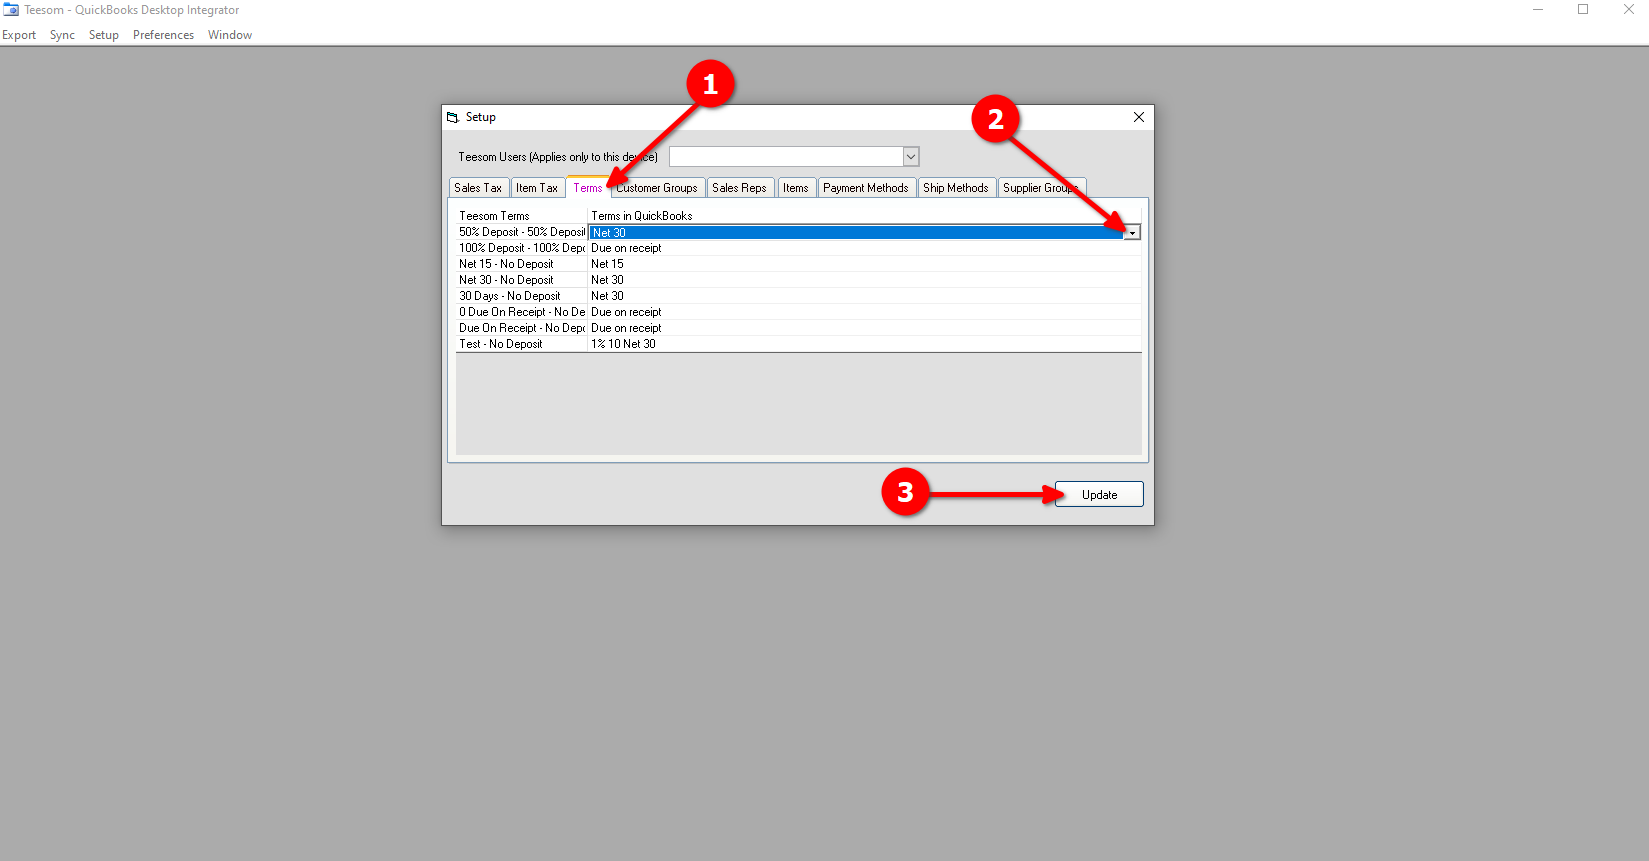
Setup: Terms
Under “Terms” click on the dropdown arrow and select the corresponding terms.
To create new terms, in QB desktop:
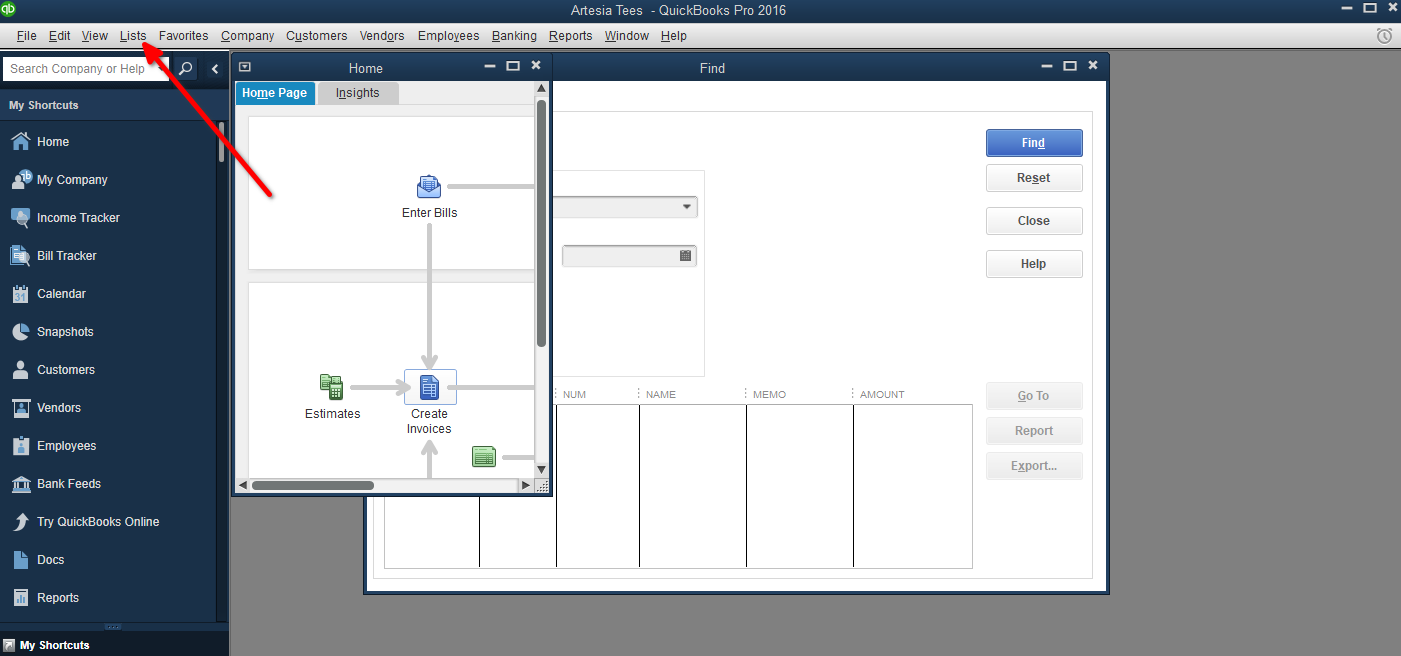
Go to “Lists” -> “Customer & Vendor Profile Lists” -> “Terms List”
Then click on the dropdown and select “New”
In the integrator on the setup screen:
Click on “Terms“
Select the corresponding term from the dropdown(click on the whitespace to bring up the dropdown menu)
Click “Update“
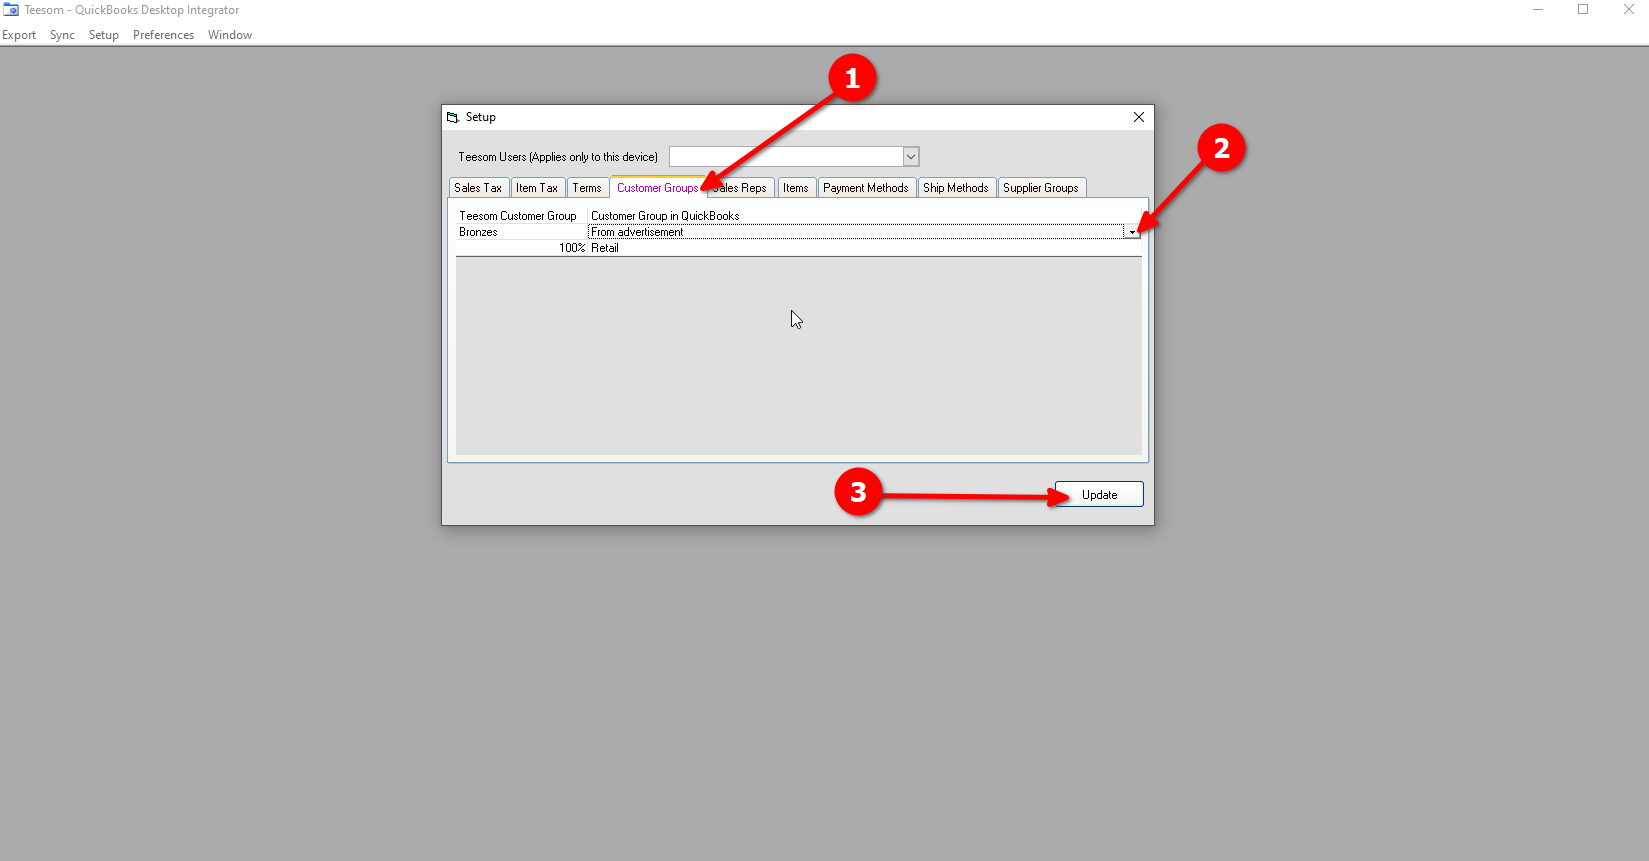
Setup: Customer Groups
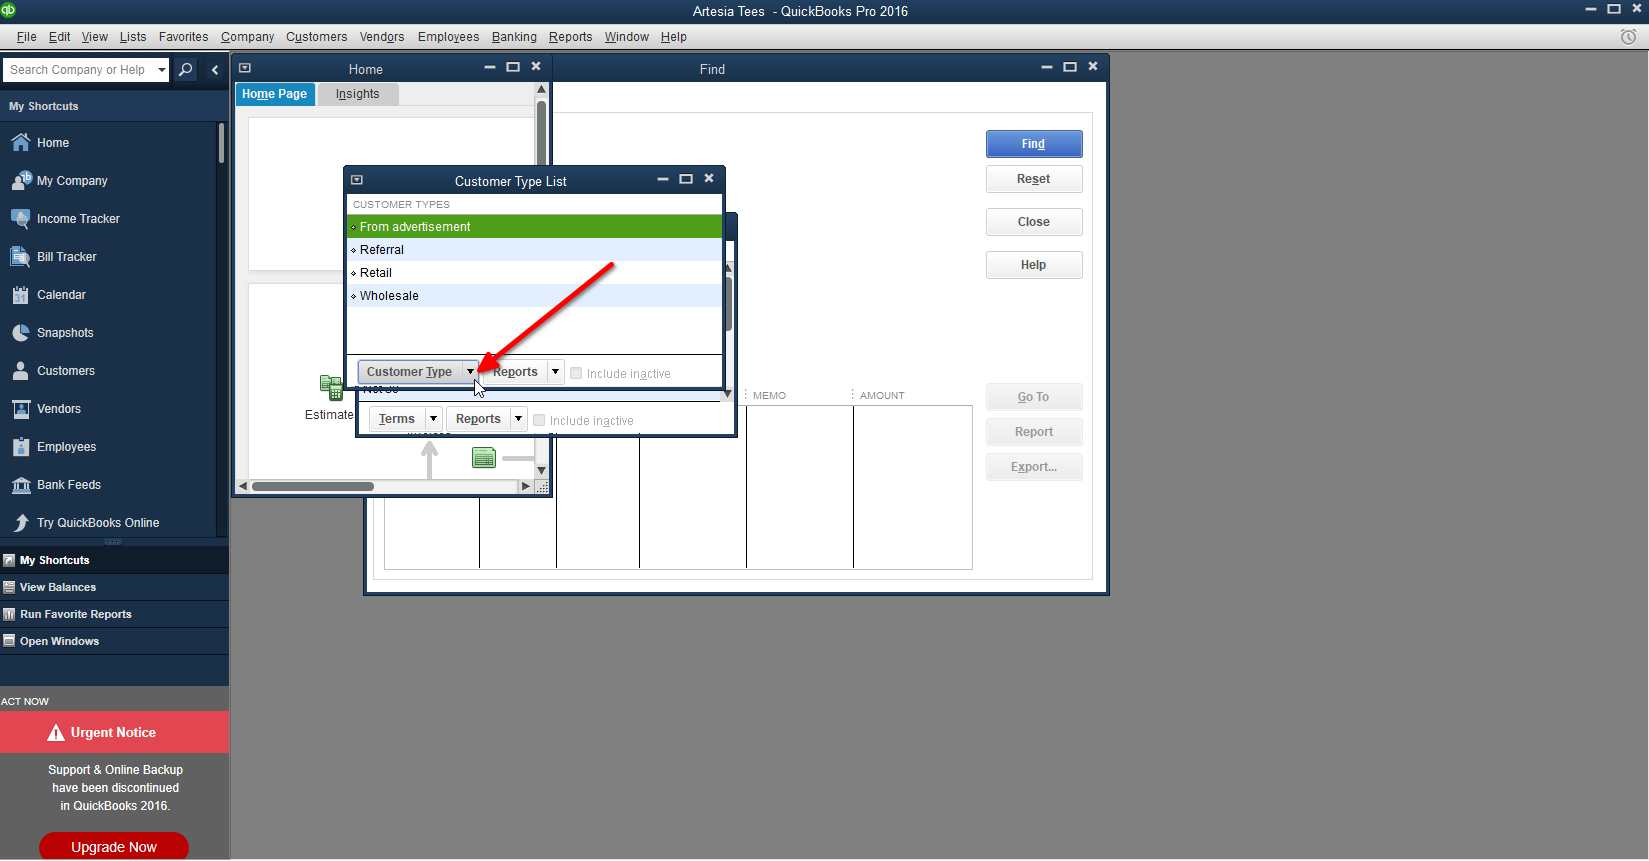
To create more customer groups in QB desktop:
Go to “Lists” -> “Customer & Vendor Profile Lists” -> “Customer Types”
Then click on the dropdown and select “New”
In the integrator on the setup screen:
Click on “Customer Groups“
Select the corresponding group from the dropdown
Click “Update“
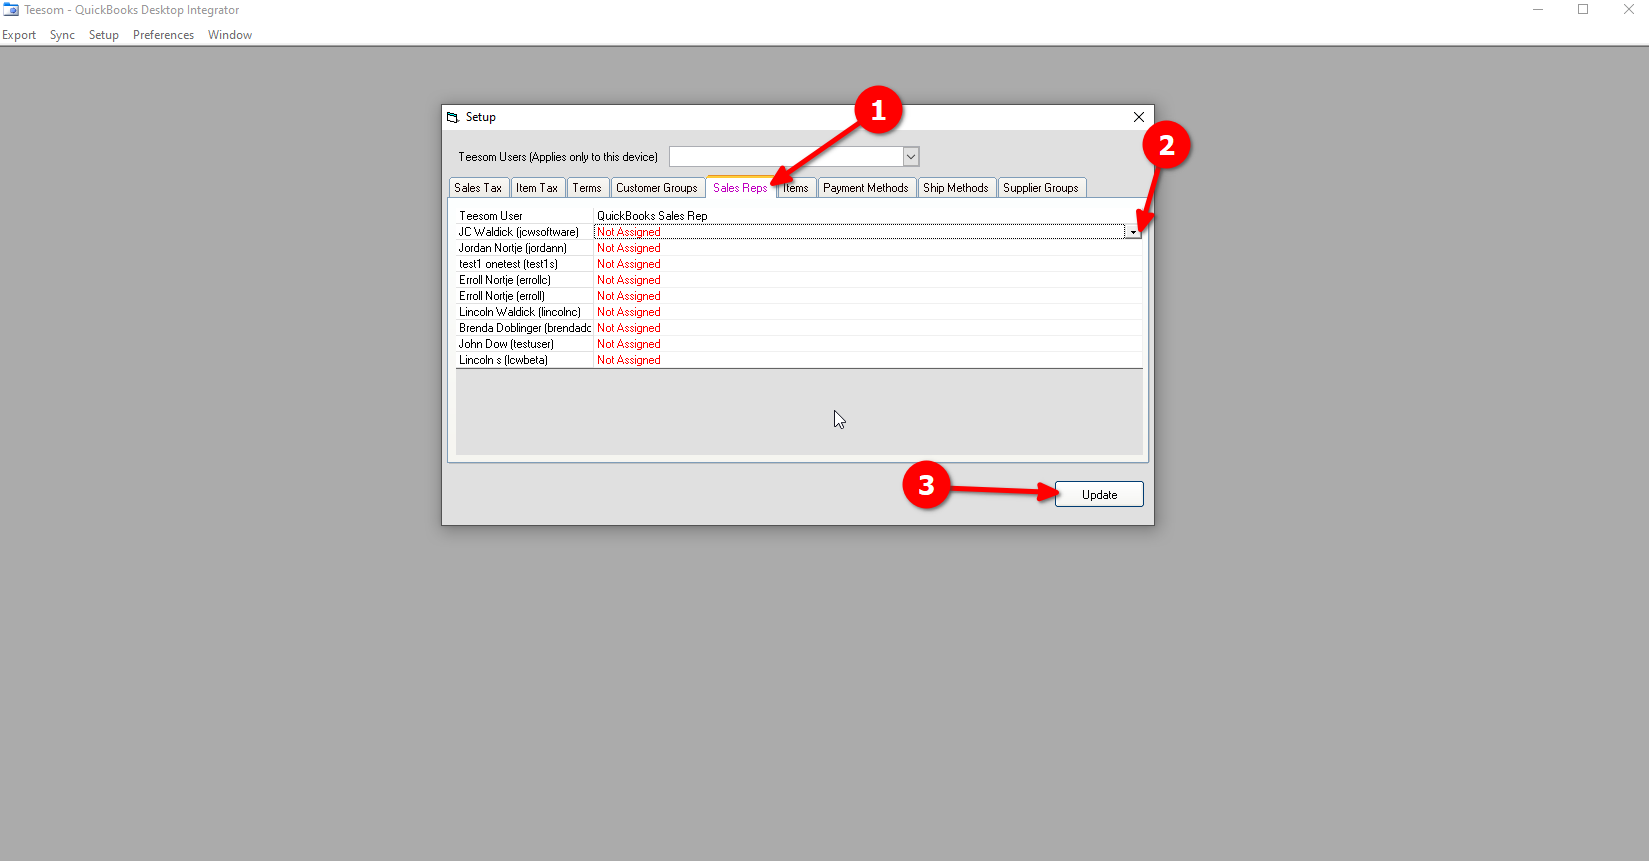
Setup: Sales Reps
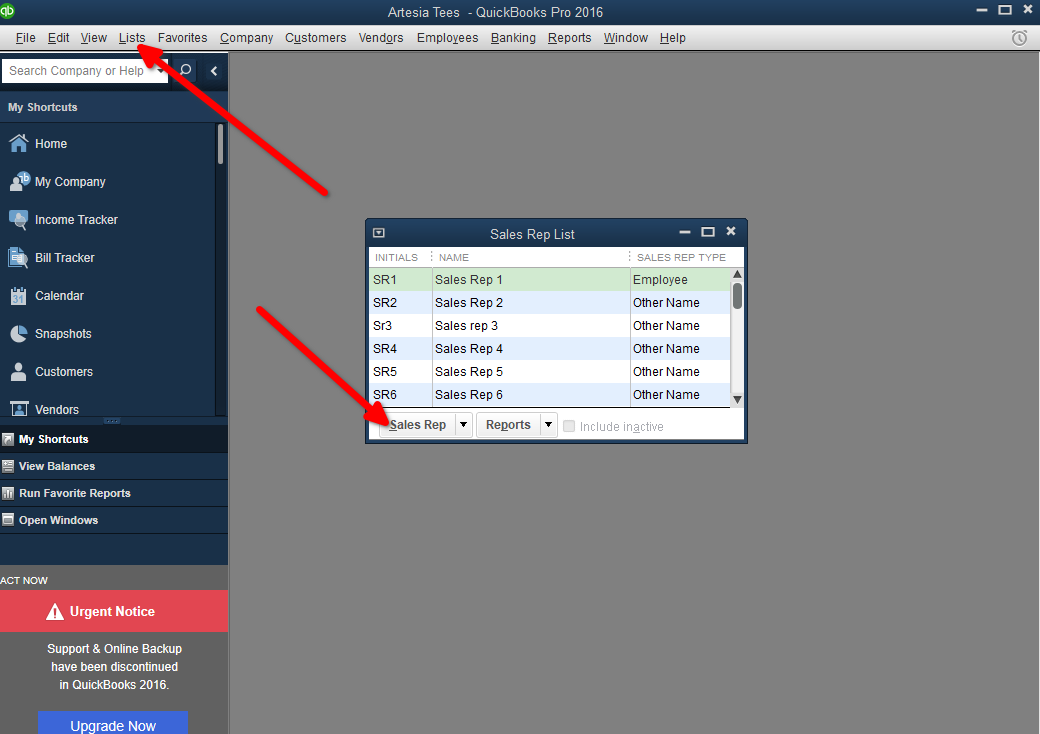
In QB desktop click on “Lists” then go to “Customer & Vendor Lists” then select “sales Reps” then click on the dropdown and create your sales reps
In the integrator on the setup screen:
Select “Sales Reps”
Click the dropdown and select the corresponding sales rep
Click “Update“
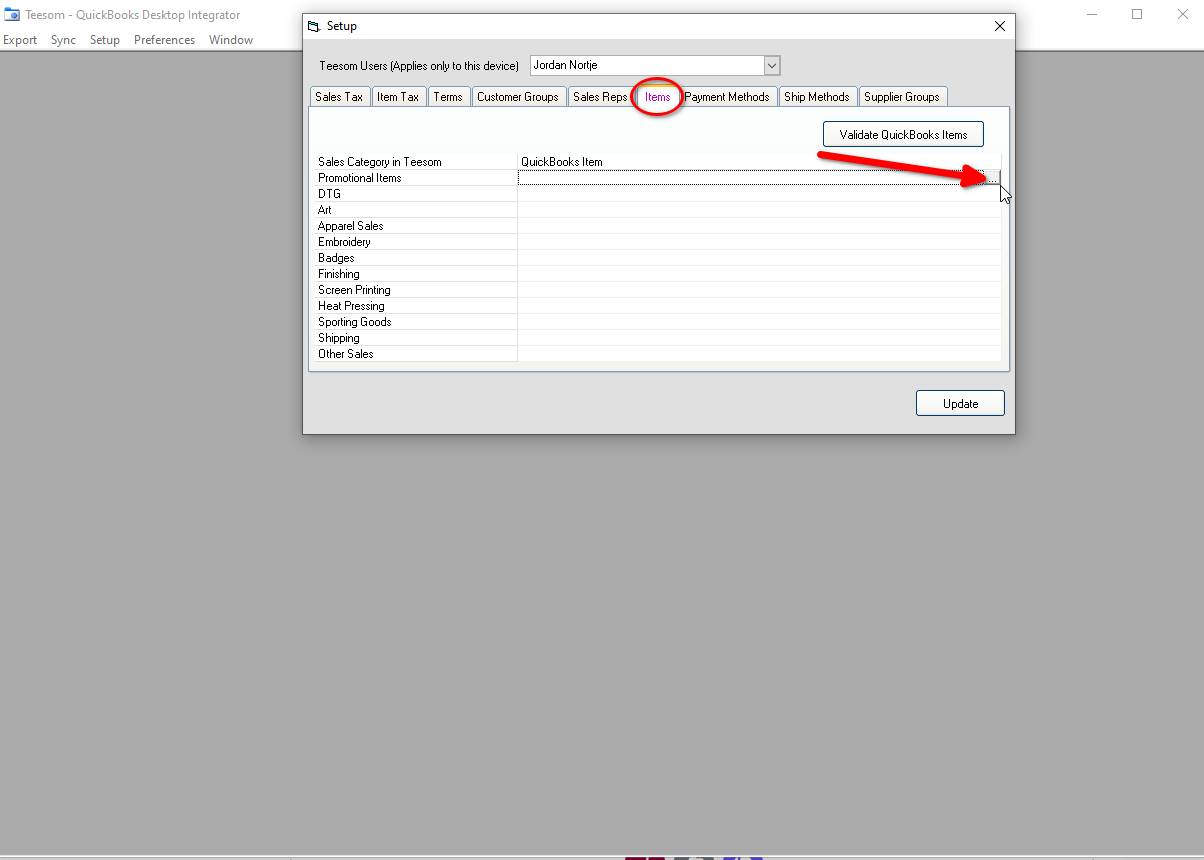
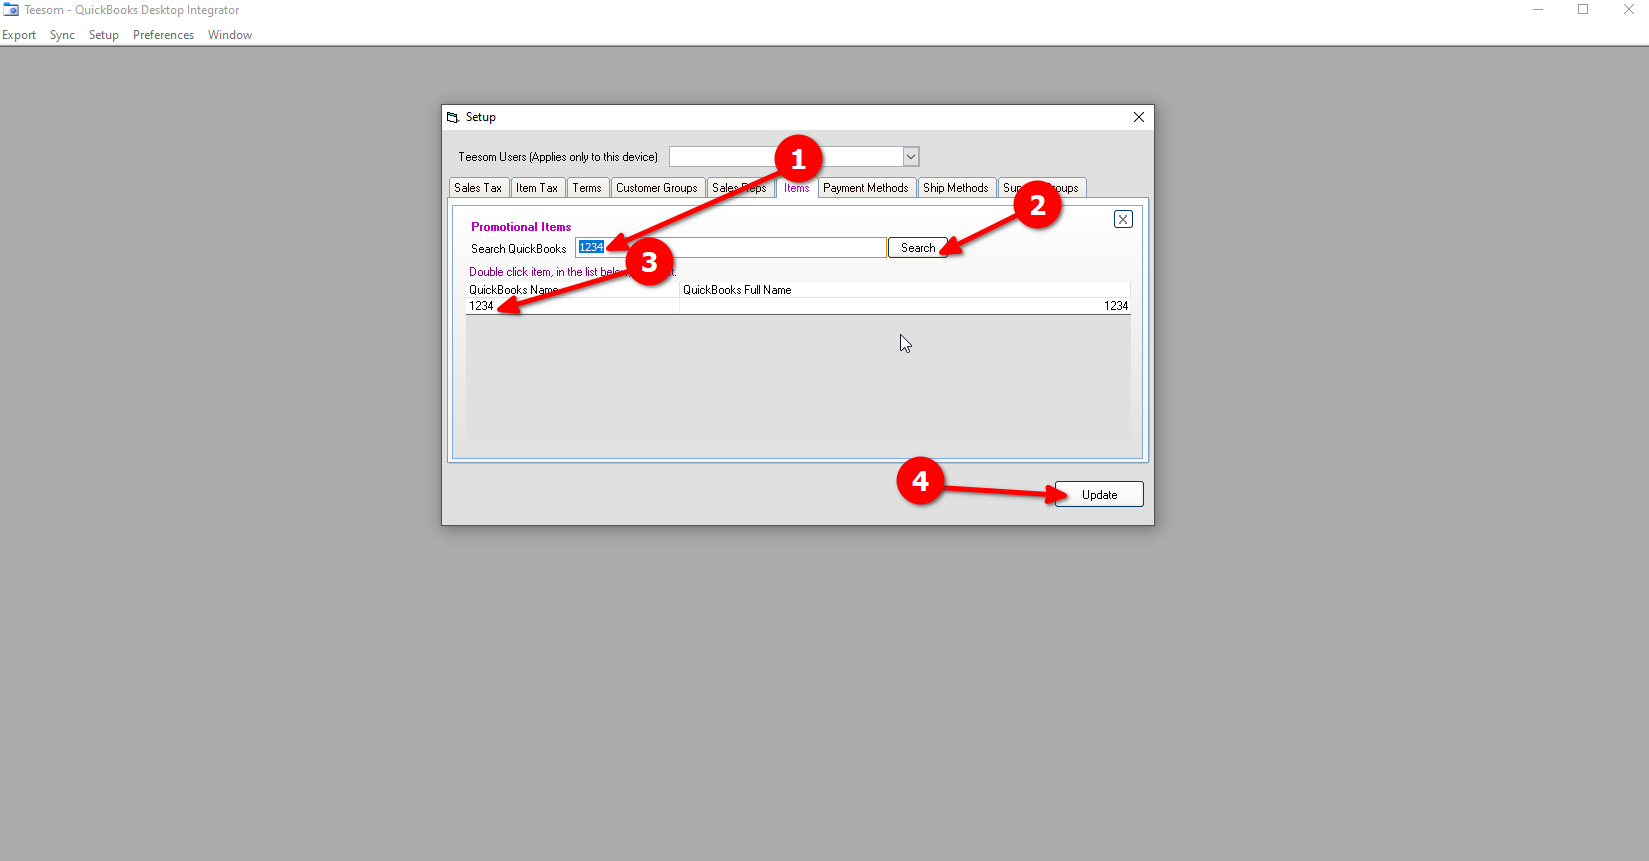
Setup: Items
You will need to tell the integrator which QuickBooks items to use when sending invoices and purchase orders (on the Items tab).
Click the “Three dots” on the right to search for a specific item ( the three dots only appear after clicking on the row)
Enter the name of the item in QB
Then click on search, a list of items with that name will appear
Double click it to add it.
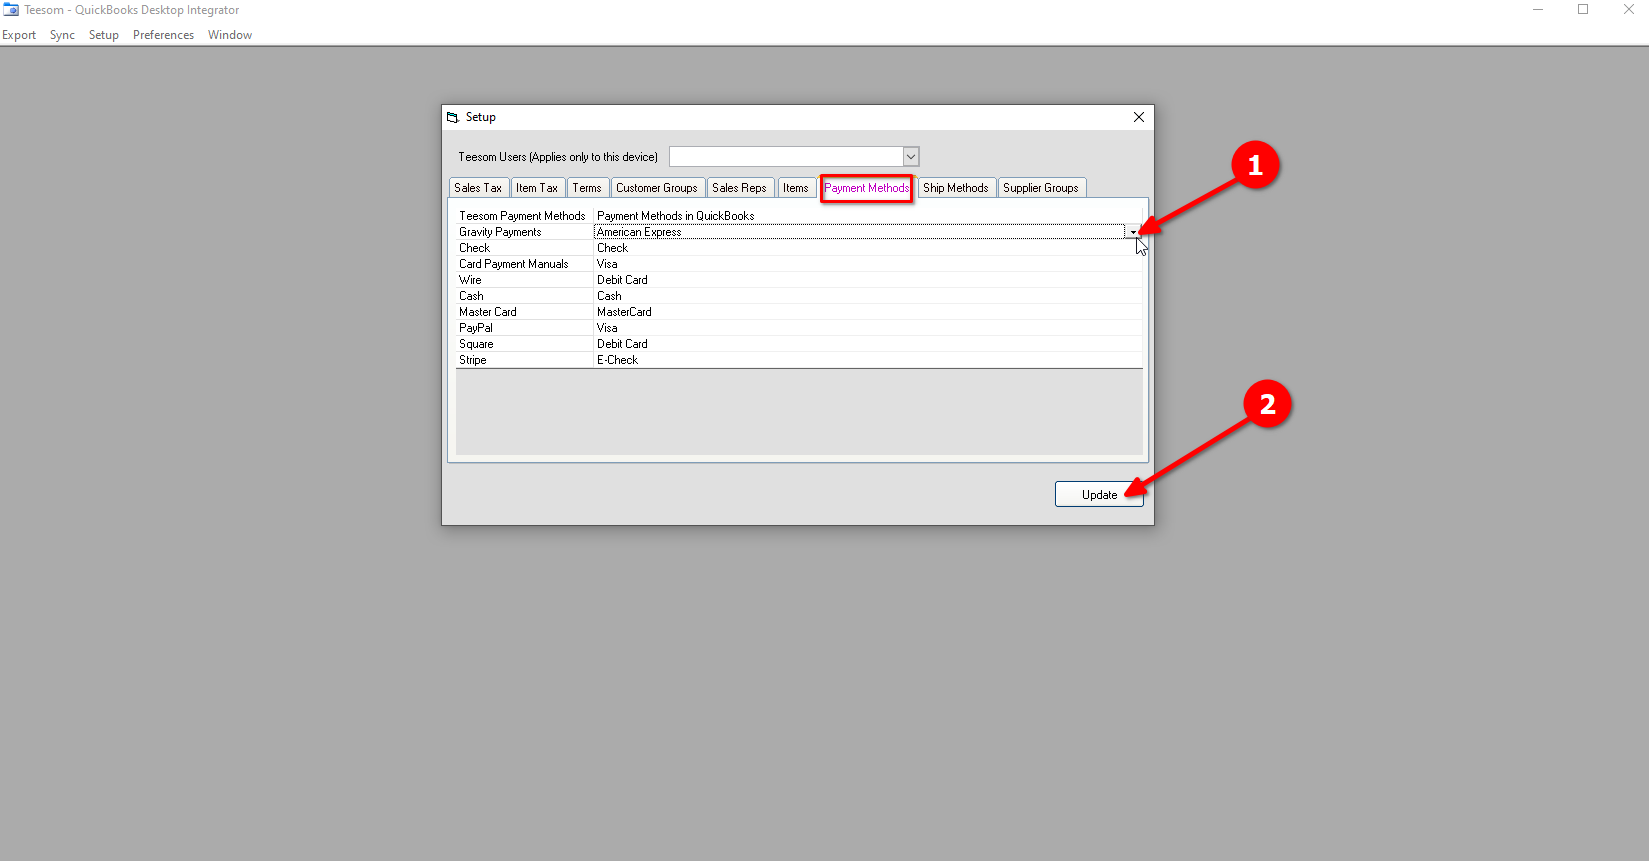
Setup: Payment Methods
Under “Payment Methods”:
Click on the dropdown and select the corresponding payment method
Click “Update“
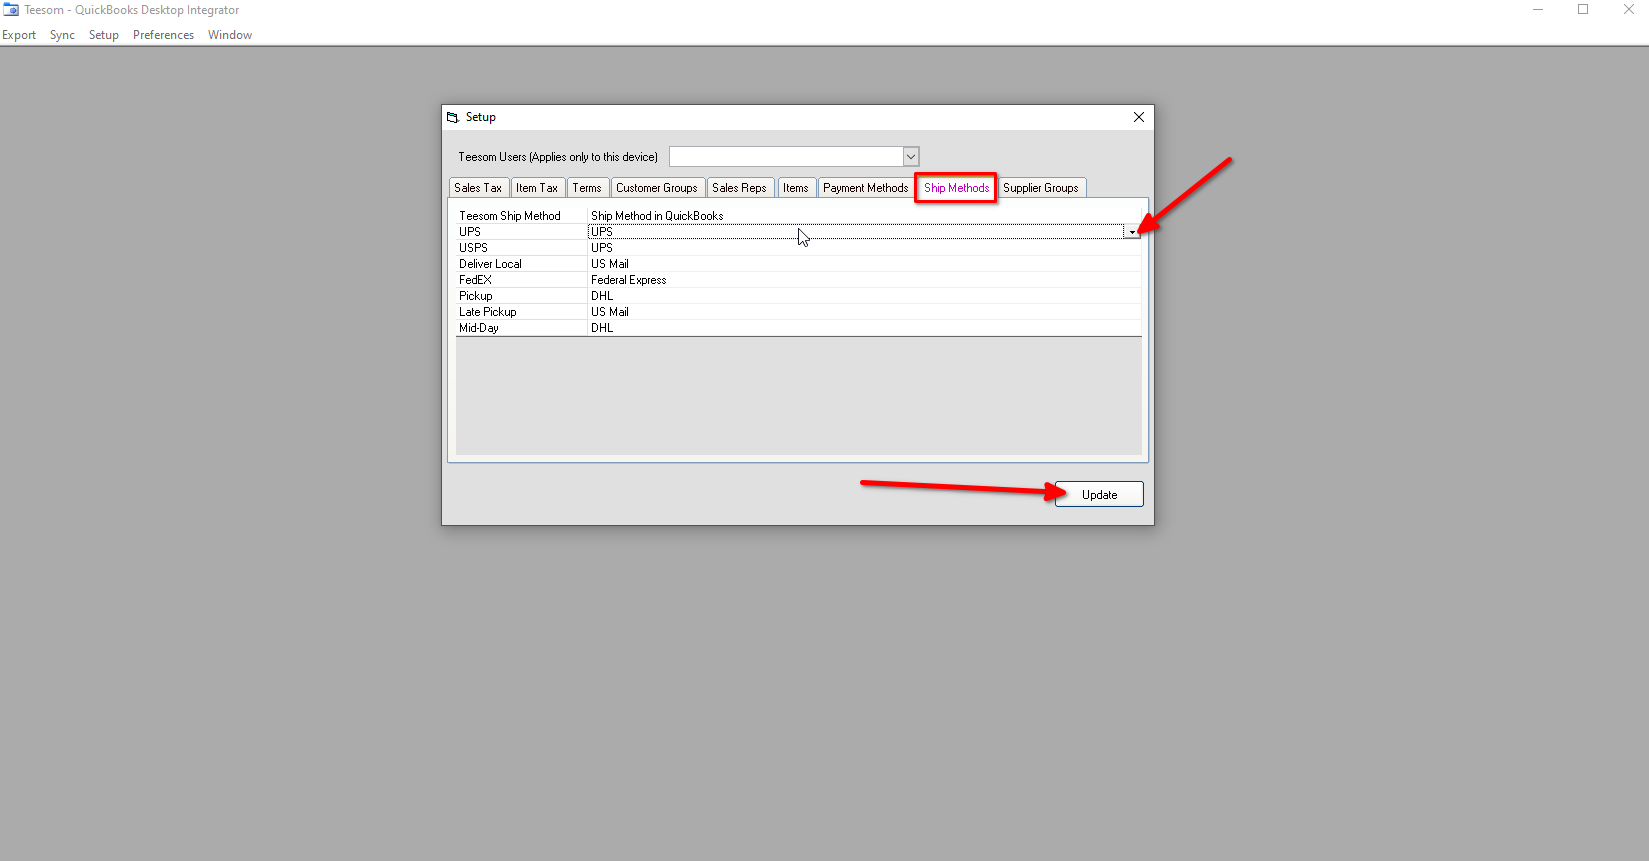
Setup: Ship Methods
Under “ship methods”:
Click on the dropdown
Select the corresponding ship methods
Click “Update”
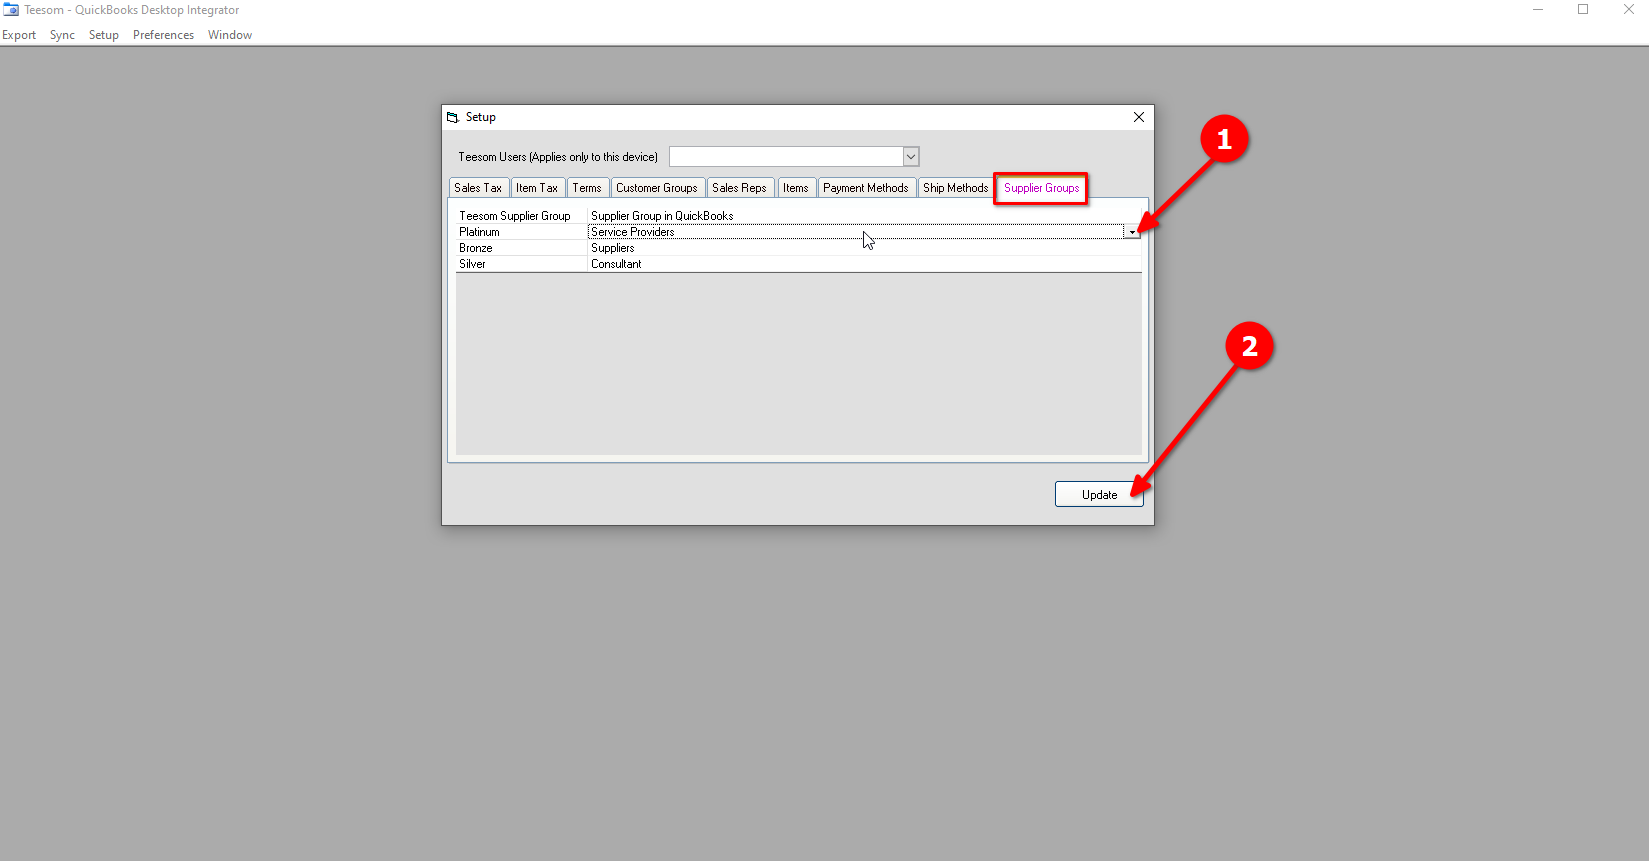
Setup: Supplier Groups
Under “Supplier Groups”:
Click on the dropdown and select the corresponding supplier group