For the start of this tutorial we will go over how to connect QuickBooks Desktop to Teesom
Connecting QB Desktop
Before You Will Be Able To Export To Quickooks You Will First have To Complete The Setup
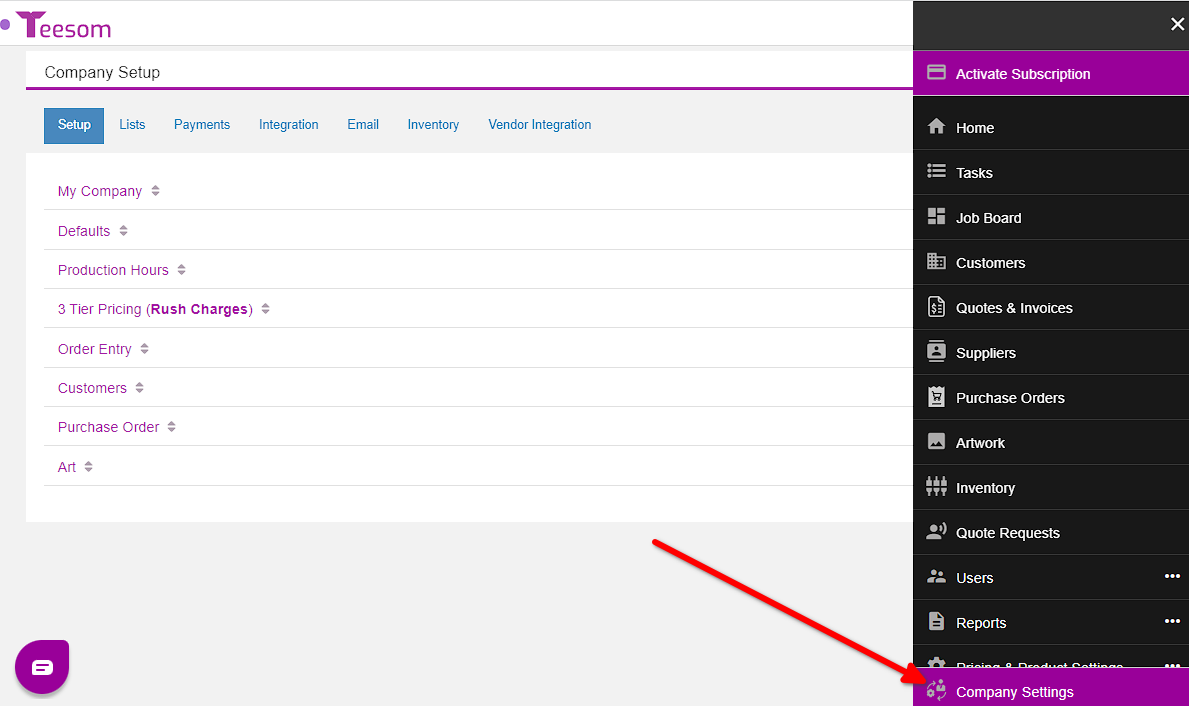
First go to the “Company Setup” screen:
Go to the “Main Menu“
Select “Company Settings“
On the company setup screen:
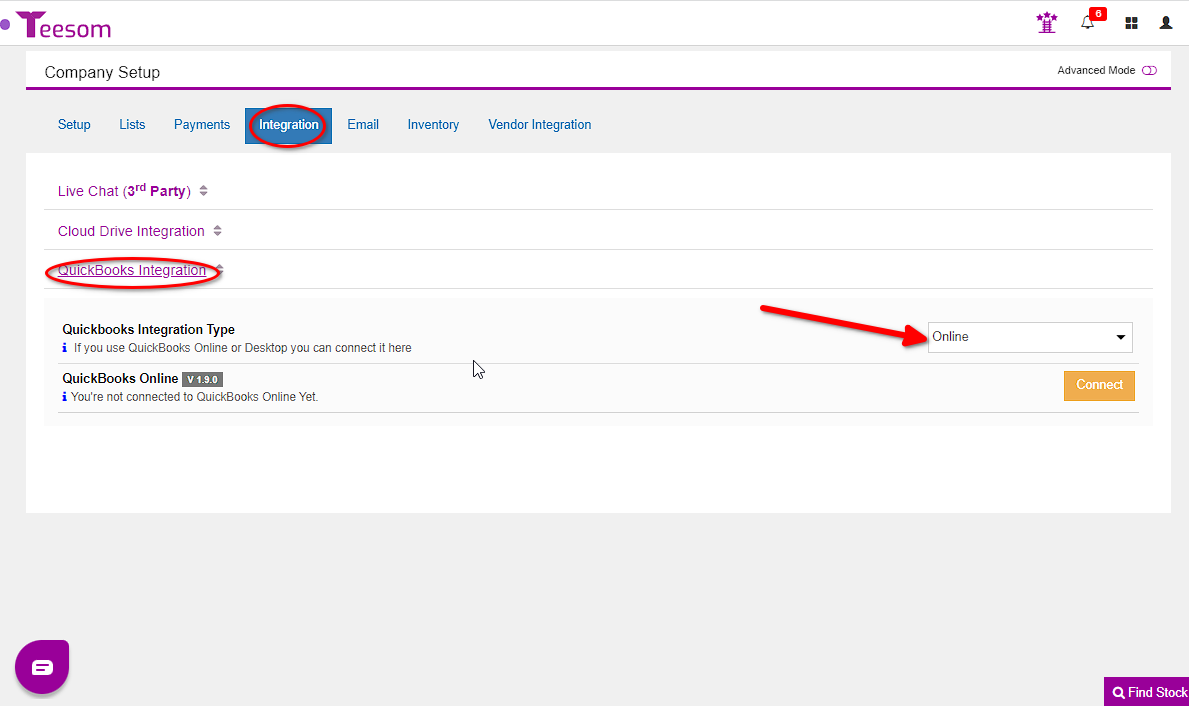
Click on “Integration”
Expand “Quickbooks Integration“,
Select QB desktop
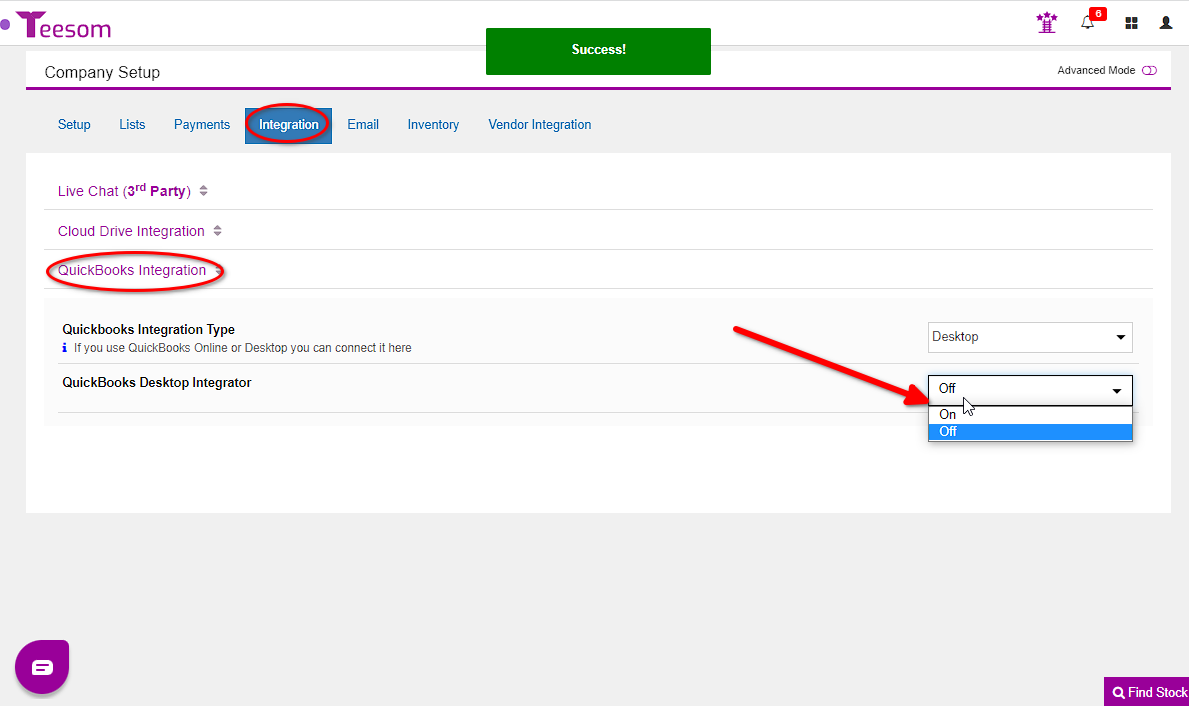
After selecting QB desktop, set the integrator to on
Then download and install the Integrator ( You will have to restart your PC).
The QB desktop integrator is a seperate app after downloading it, there will be a desktop icon
Take notice of the API key that was generated, you will need this to connect to QB desktop
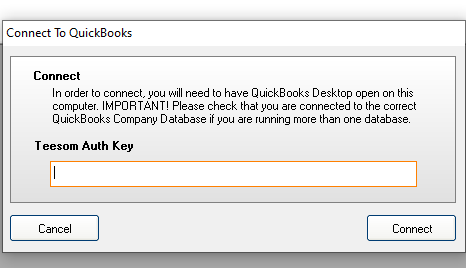
After restarting your PC, open up QB Teesom and enter your API/Auth Key, then click “Connect“
QB desktop has to be running for you to connect to it
After you have entered your API key and clicked connect.
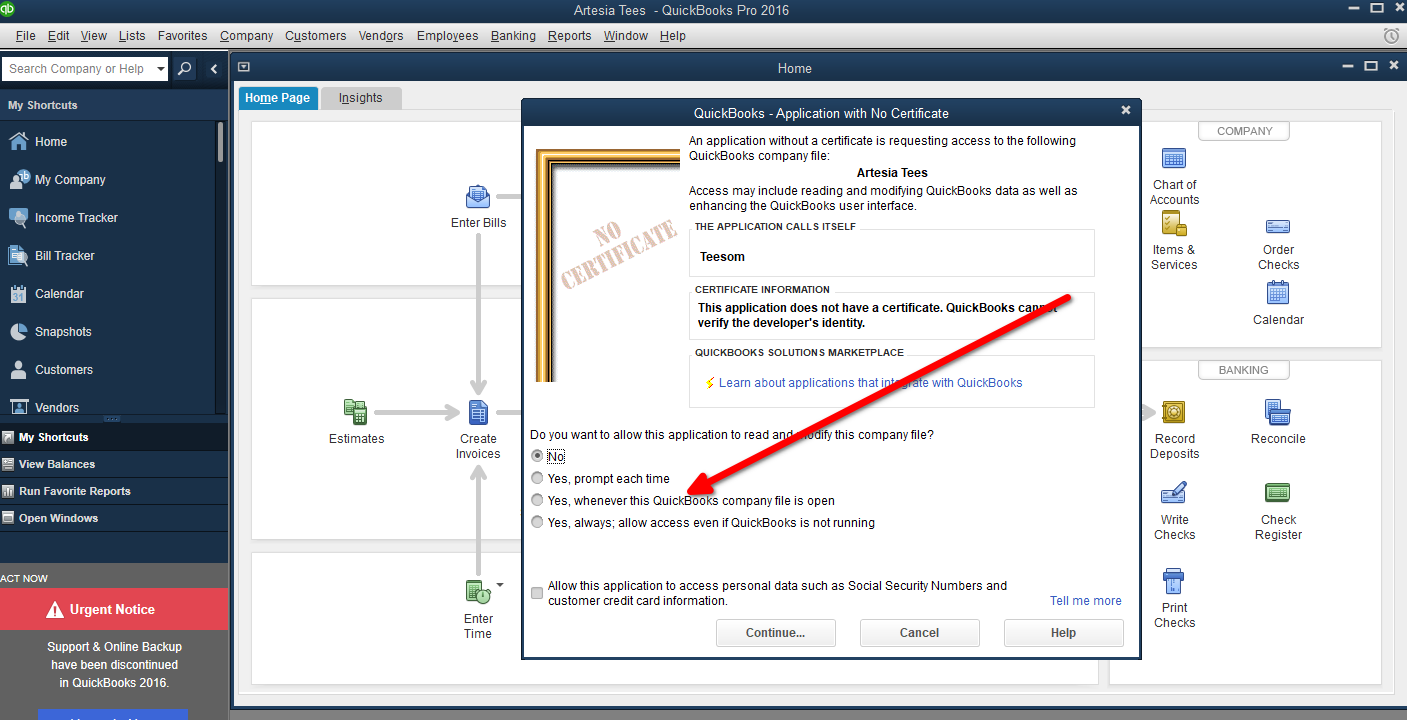
You will need to give permission for the integrator to access your Quickbooks data, this is why you must be logged in as an admin. The first time that you connect, Quickbooks will prompt you to provide this permission:
Select: ‘Yes, whenever this Quickbooks company file is open‘. You will only need to do this once:
Click on “Continue“
If you are connecting to QB for the first time, ensure that you are logged into Quickbooks with the Administrator account so that you are able to grant the permissions required by the integrator.
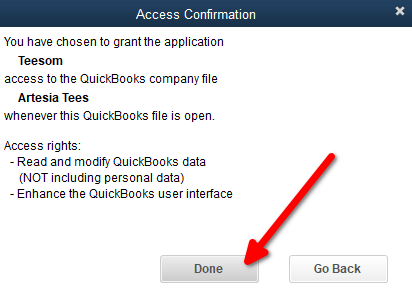
The access confirmation screen will pop up after you click on continue:
Click on “Done“
Now if you go back to the QB Teesom integrator, you will be prompted with a connected pop up click “OK“
Teesom will proceed to load all the required setup information from QuickBooks.