In Teesom each integrated vendor has their own purchasing options.
In this article we will go through each vendor and show you their different options.
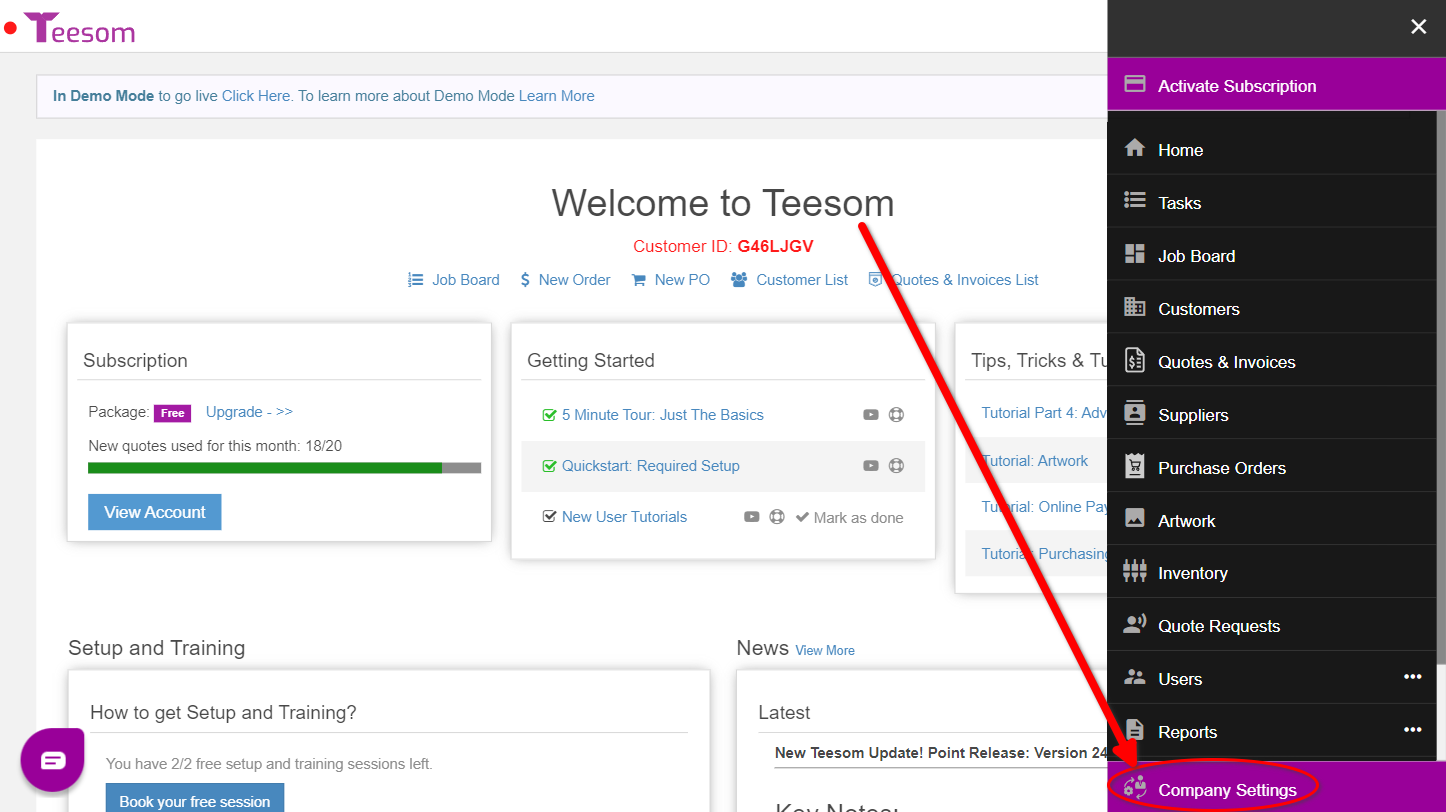
Where to view Integrated Vendors
You can view each integrated vendors purchase options on the “Company Setup” screen:
Go to the “Main Menu” -> Select “Company Setup”
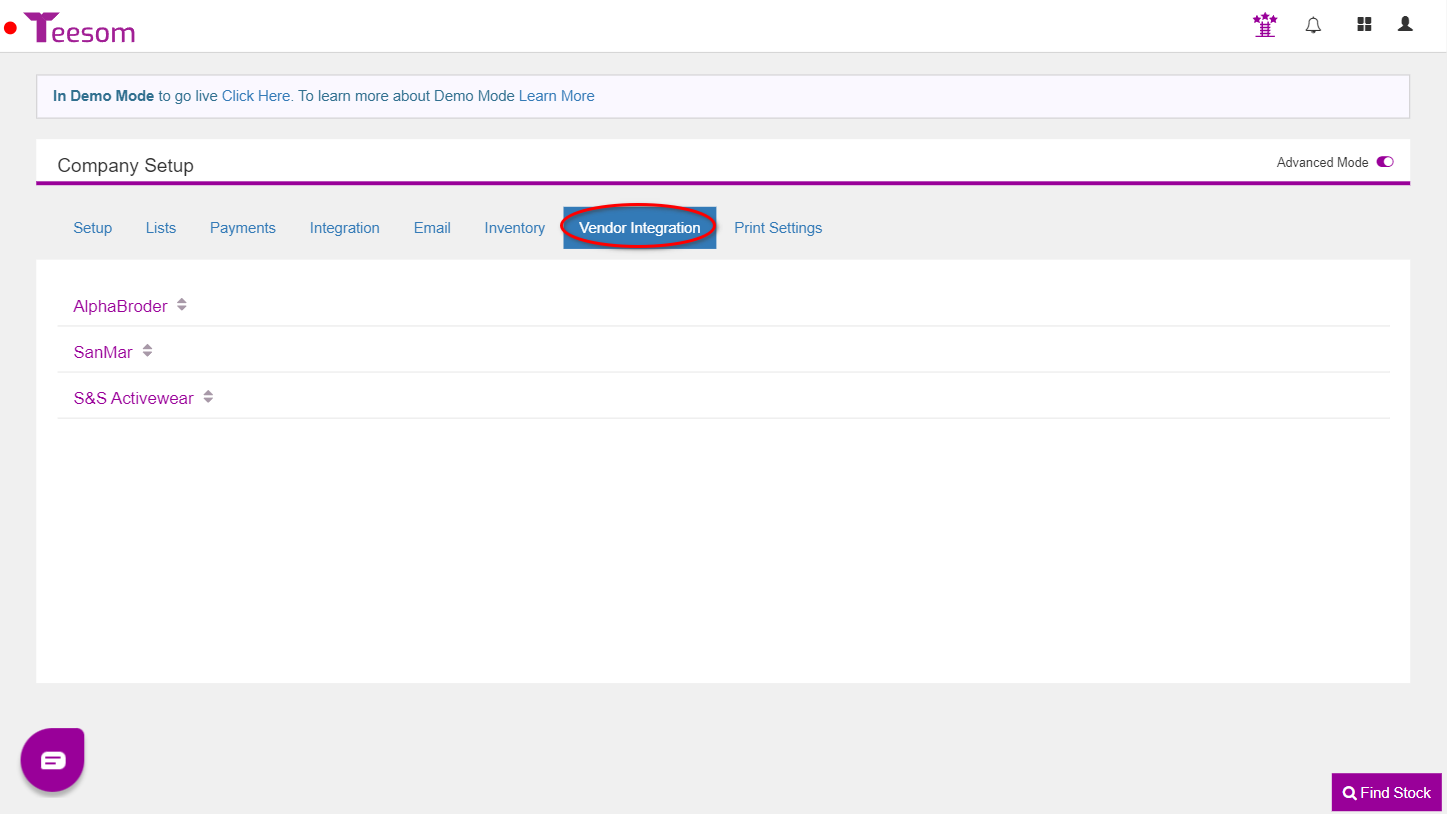
Click on “Vendor Integration”
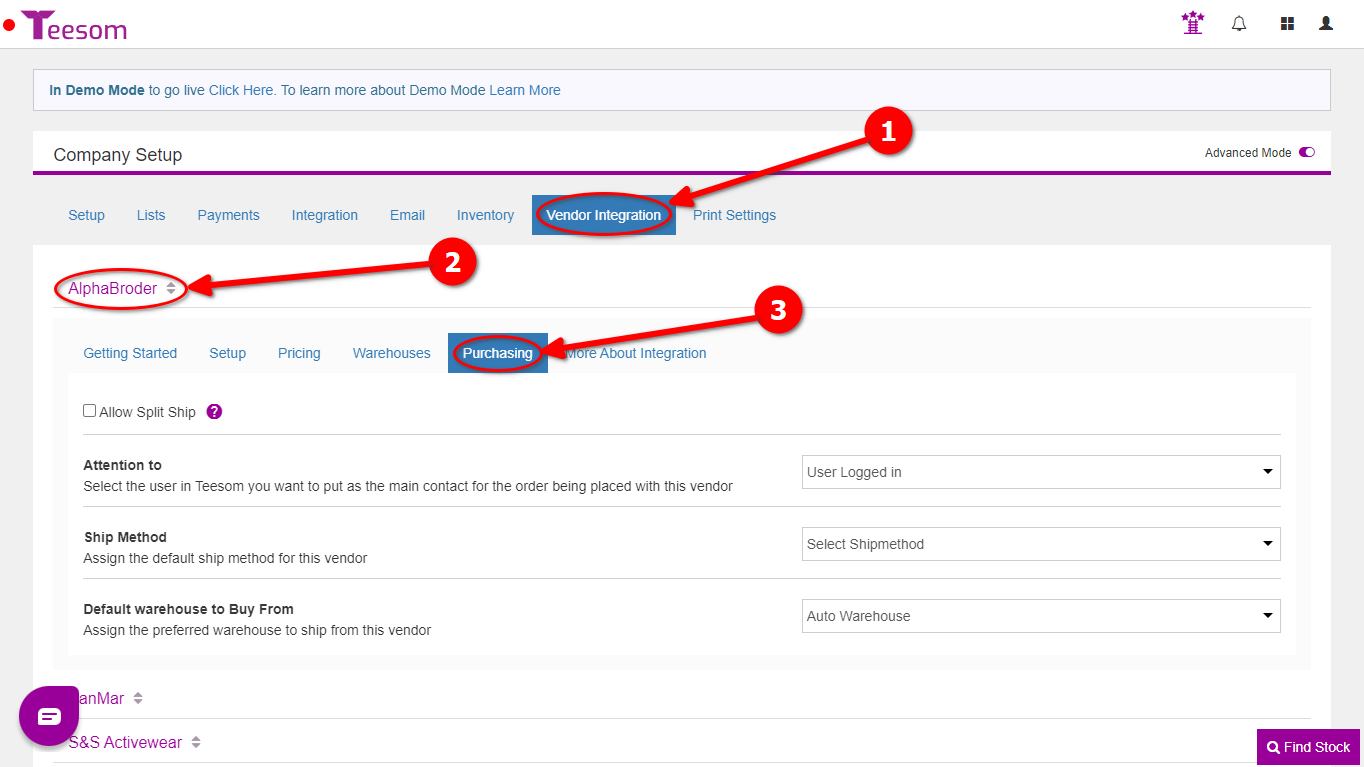
AlphaBroder Purchasing Options
To see and change AlphaBroder’s purchasing options:
Expand AlphaBroder
Click on Purchasing
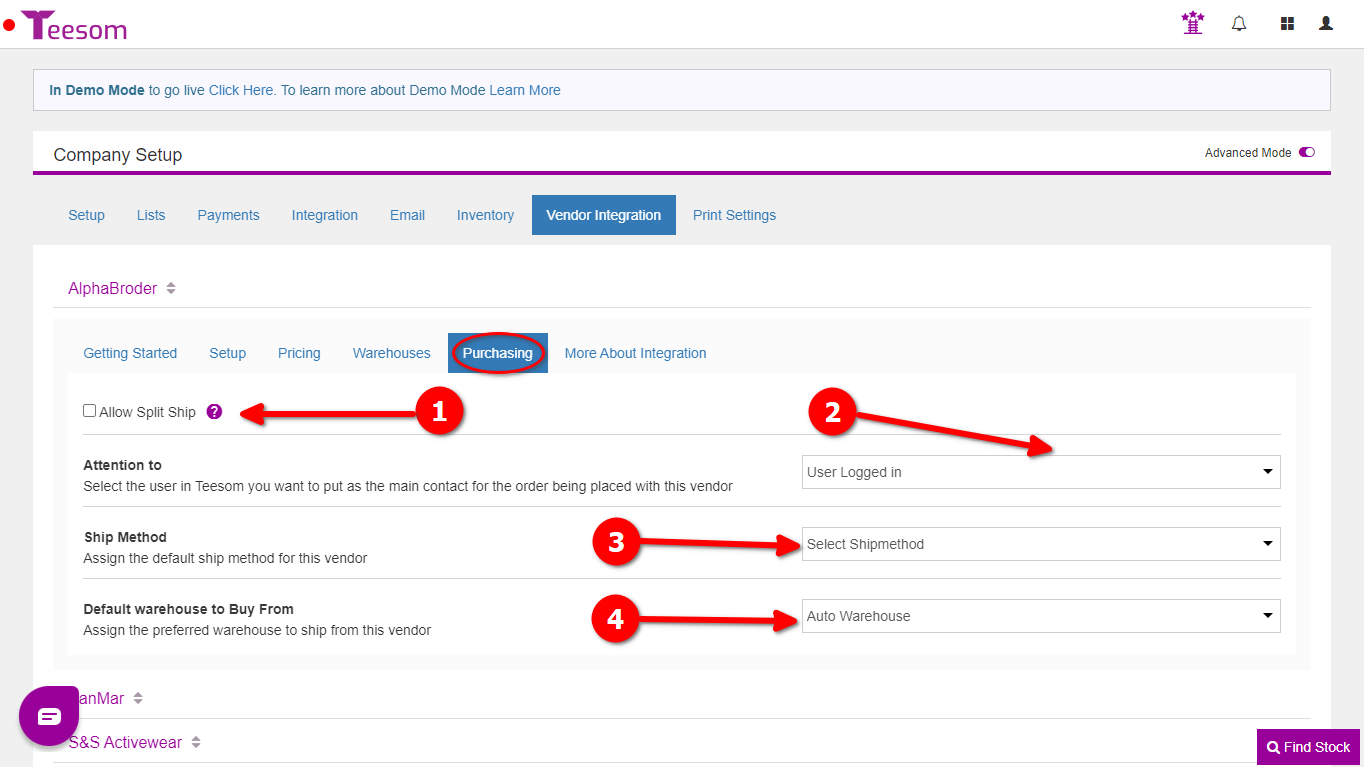
Under “Purchasing” you will see the different options available:
Allow Split Ship: Allows split ordering from multiple warehouses.
Set the “Main Contact” that will be used when you create a PO for this vendor. This will be the user in Teesom and not a contact from AlphaBroder.
Set the default shipping method that will be used when you create a PO for this vendor. The shipping methods that are shown here are the ones available with AlphaBroder.
Set the default warehouse that Alphabroder will ship from, if you select “Auto Warehouse” then AlphaBroder will select the warehouse.
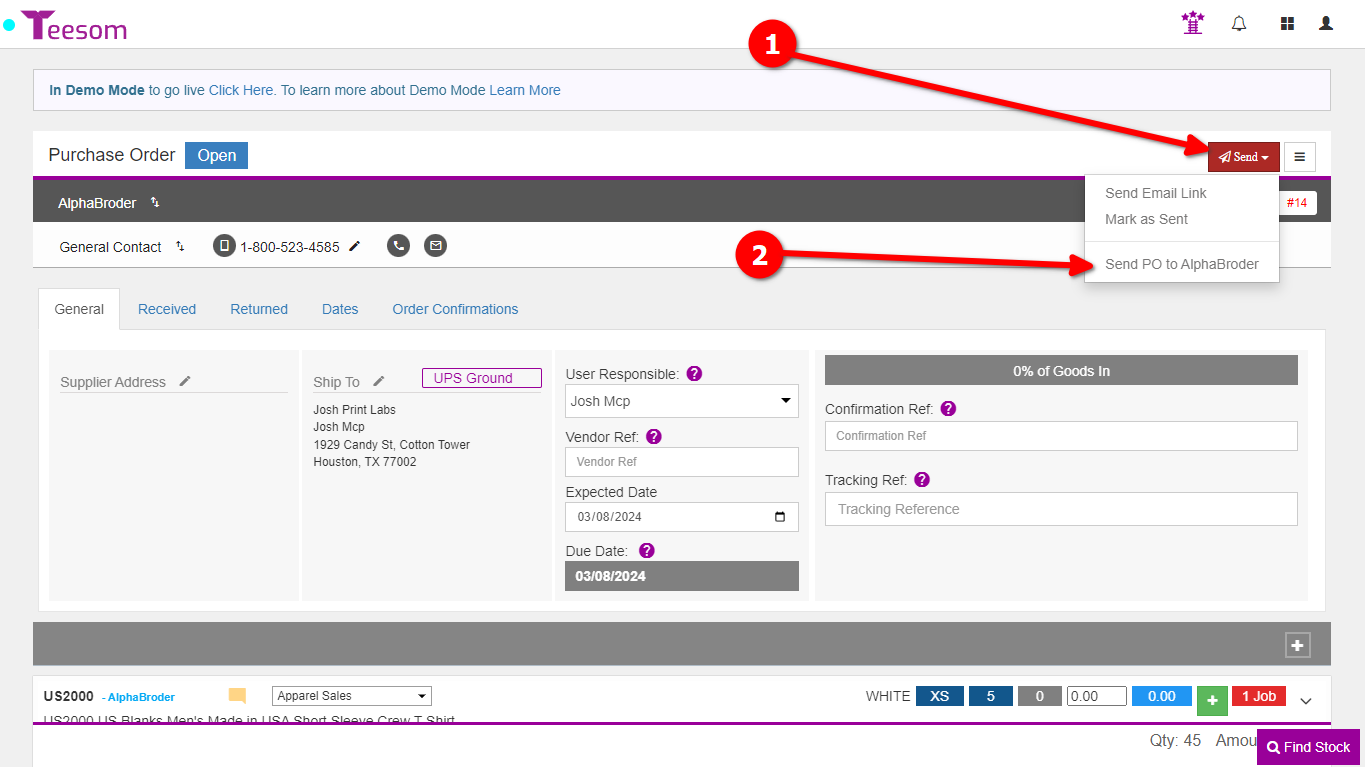
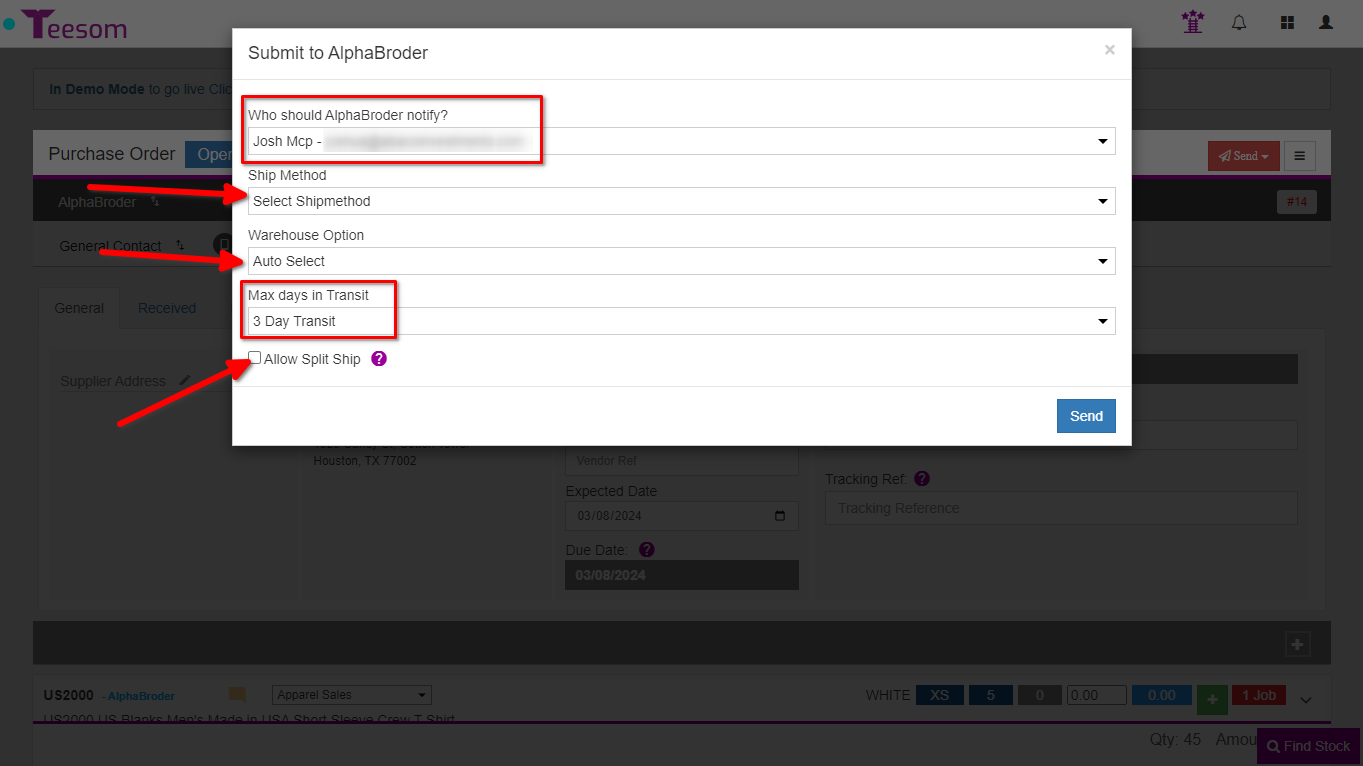
When you send a PO to Alphabroder you are able to change and set the following options:
Who Should be Notified: Which user should be notified of the PO being sent.
The Ship Method you would like to use.
Warehouse Option:
Auto select: AlphaBroder will choose. (Recommended)
Single Warehouse: Choose one warehouse to ship from.
Multi Warehouse: Specify which warehouses to ship each item from.
Max days in Transit: How long you are willing to wait for the order to arrive.
Allow Split Ship: Choose whether or not to allow for your order be sent from multiple warehouses.
All the options seen on the submit screen will automatically be set to the defaults you set in the “Company Setup.”
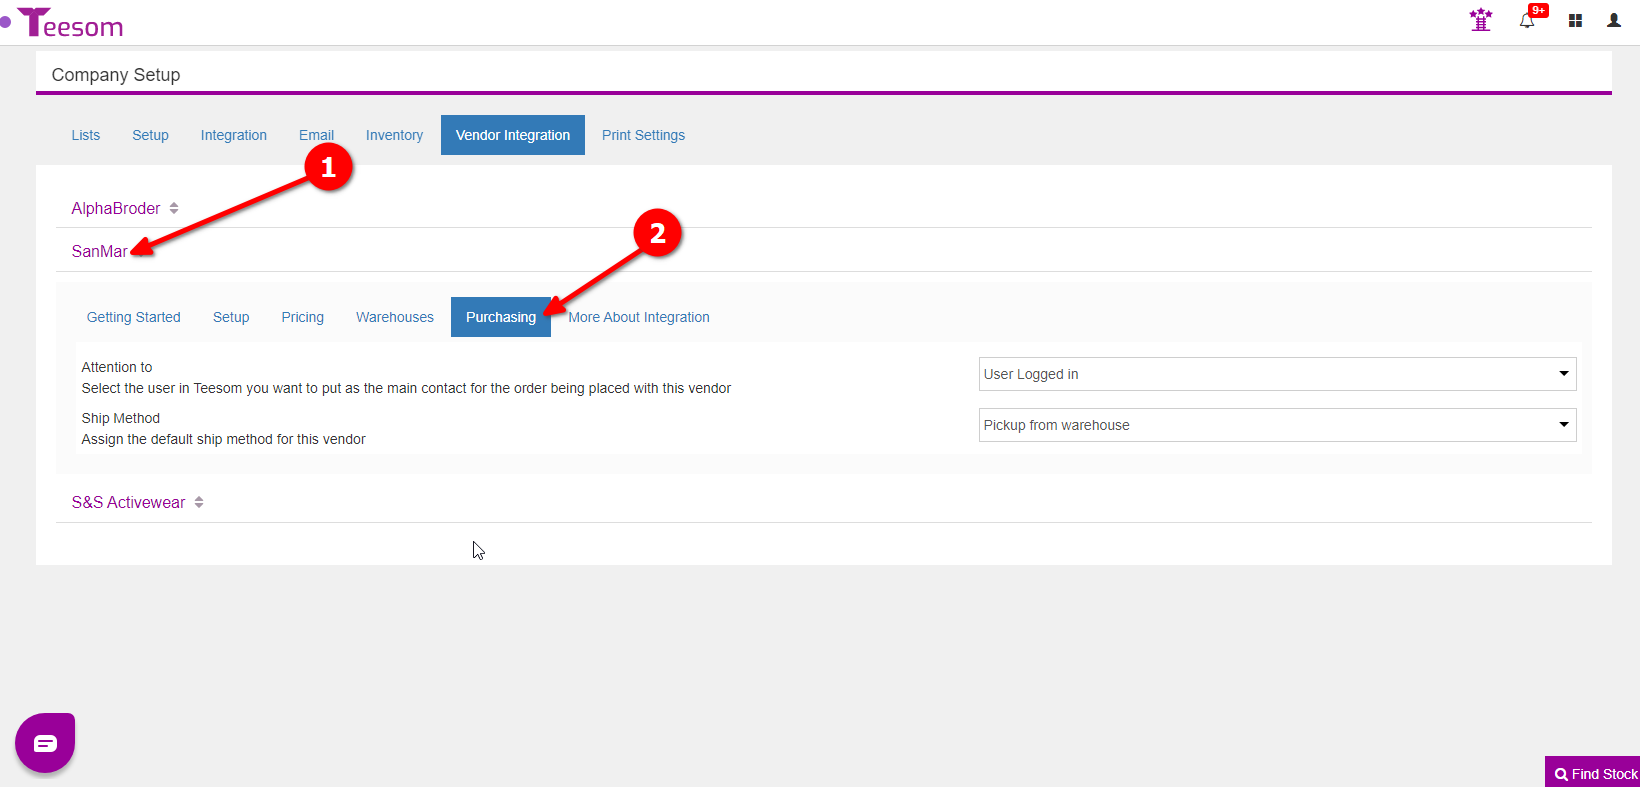
SanMar Purchasing Options
To see and change SanMar’s purchasing options:
Expand SanMar
Click on Purchasing
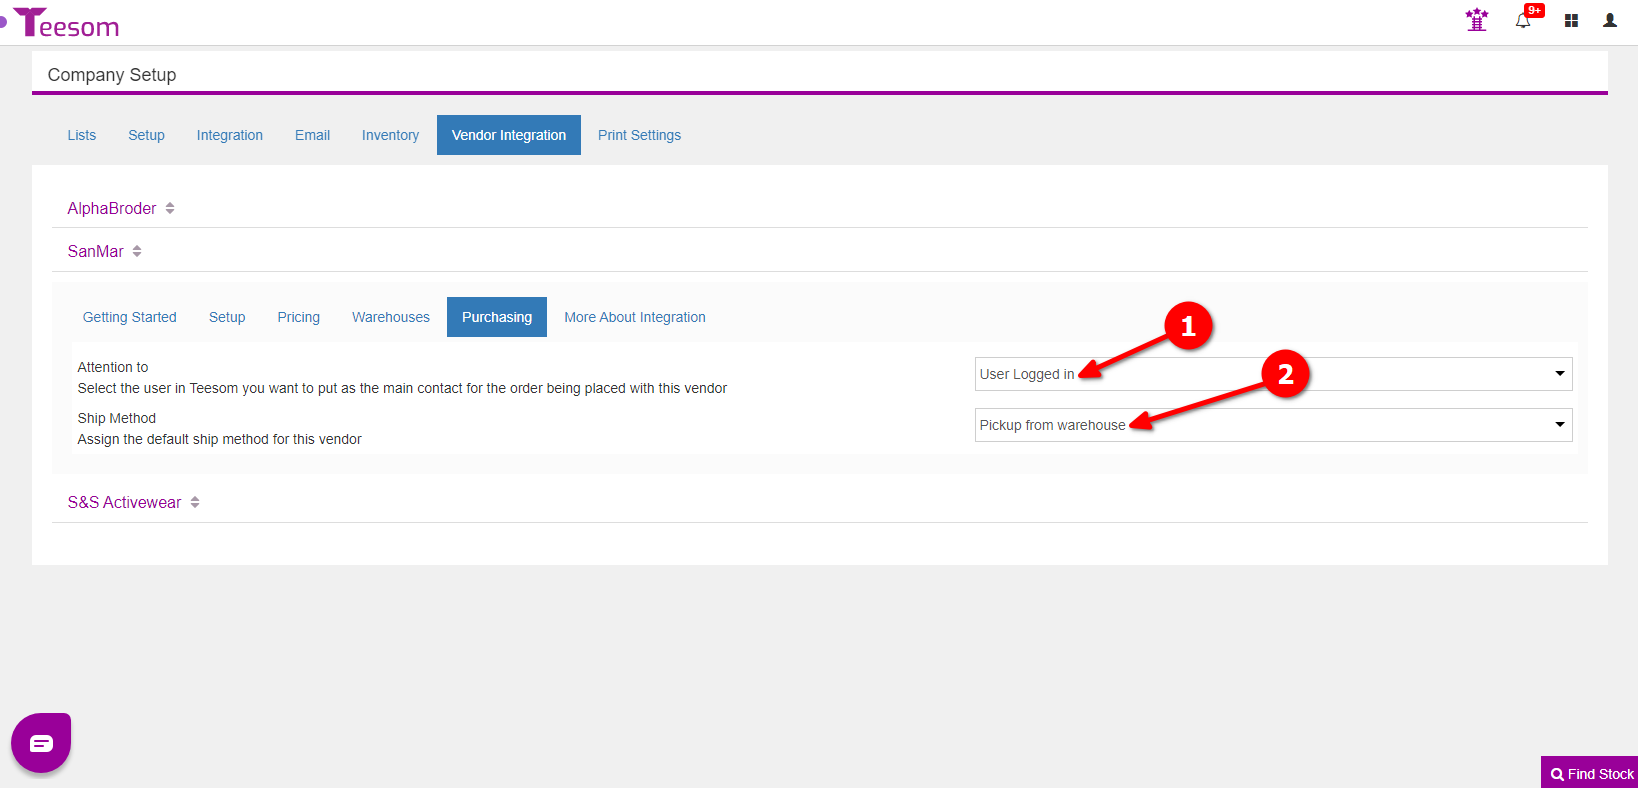
Under “Purchasing” these are the options you have:
Set the default contact that will be used when the PO is created/sent. This is the user in Teesom not a contact from SanMar.
Set the default ship method that will be used when you send a PO.
You cannot set a default warehouse for SanMar instead you will select which warehouse is used when you send the PO.
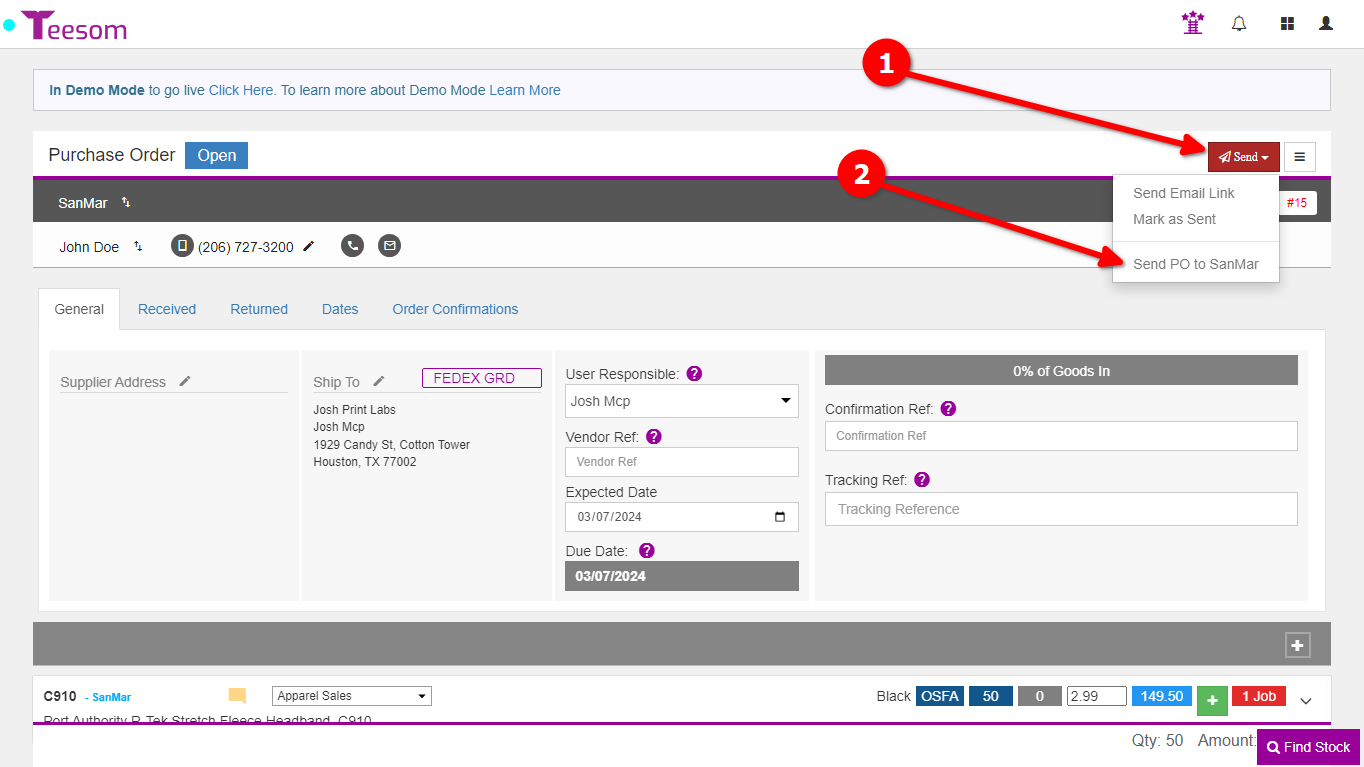
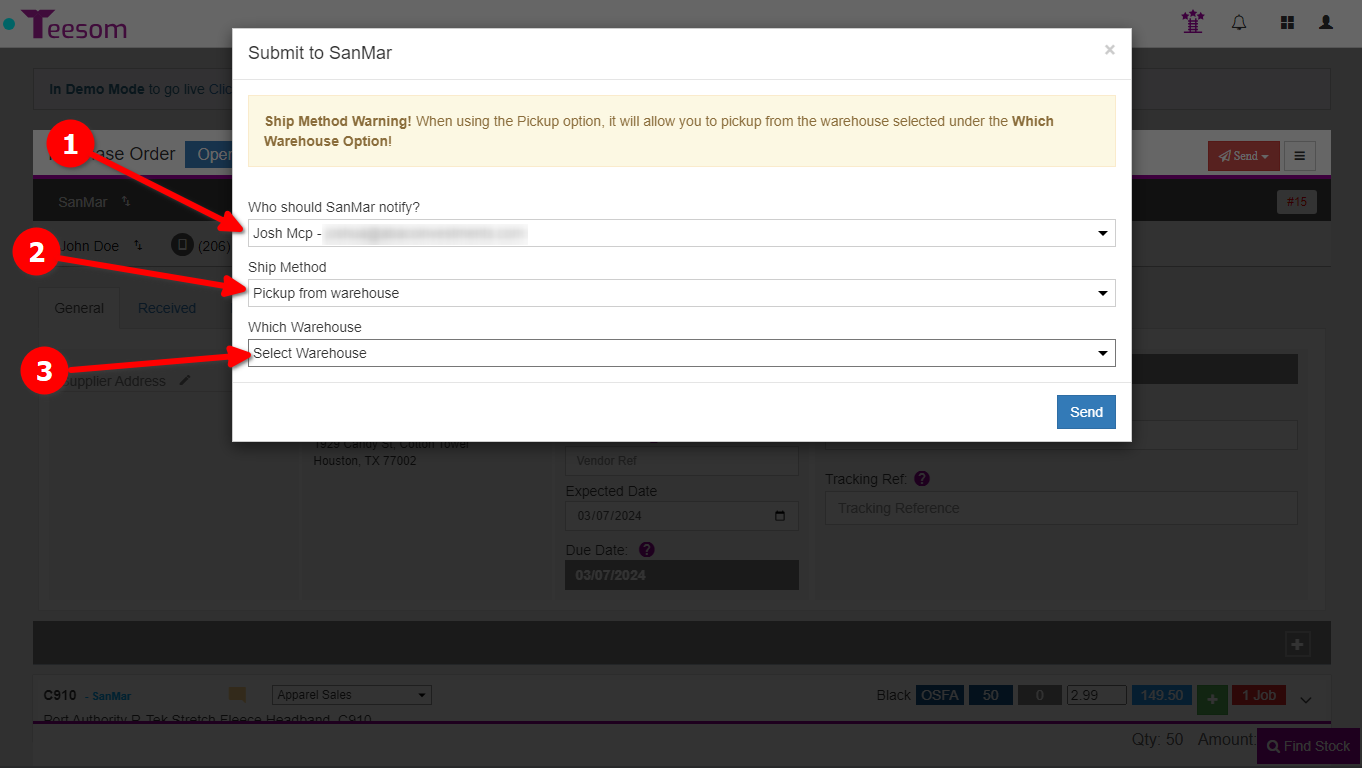
When you send a PO to SanMar you will be able to select:
The user that will be notified about the PO.
The shipping method that will be used.
Which warehouse the goods will come from, if you selected “Pickup from warehouse” then this is the warehouse that you will pick the goods up from.
All the options seen on the submit screen, will automatically be set to the defaults you set in the “Company Setup.”
When shipping using SanMar the PSST (Pack Separately, Sold Together) - "ship to us address" must match 100% with what SanMar has on file. Ensure the desired ship address on Teesom is the same as on SanMar.
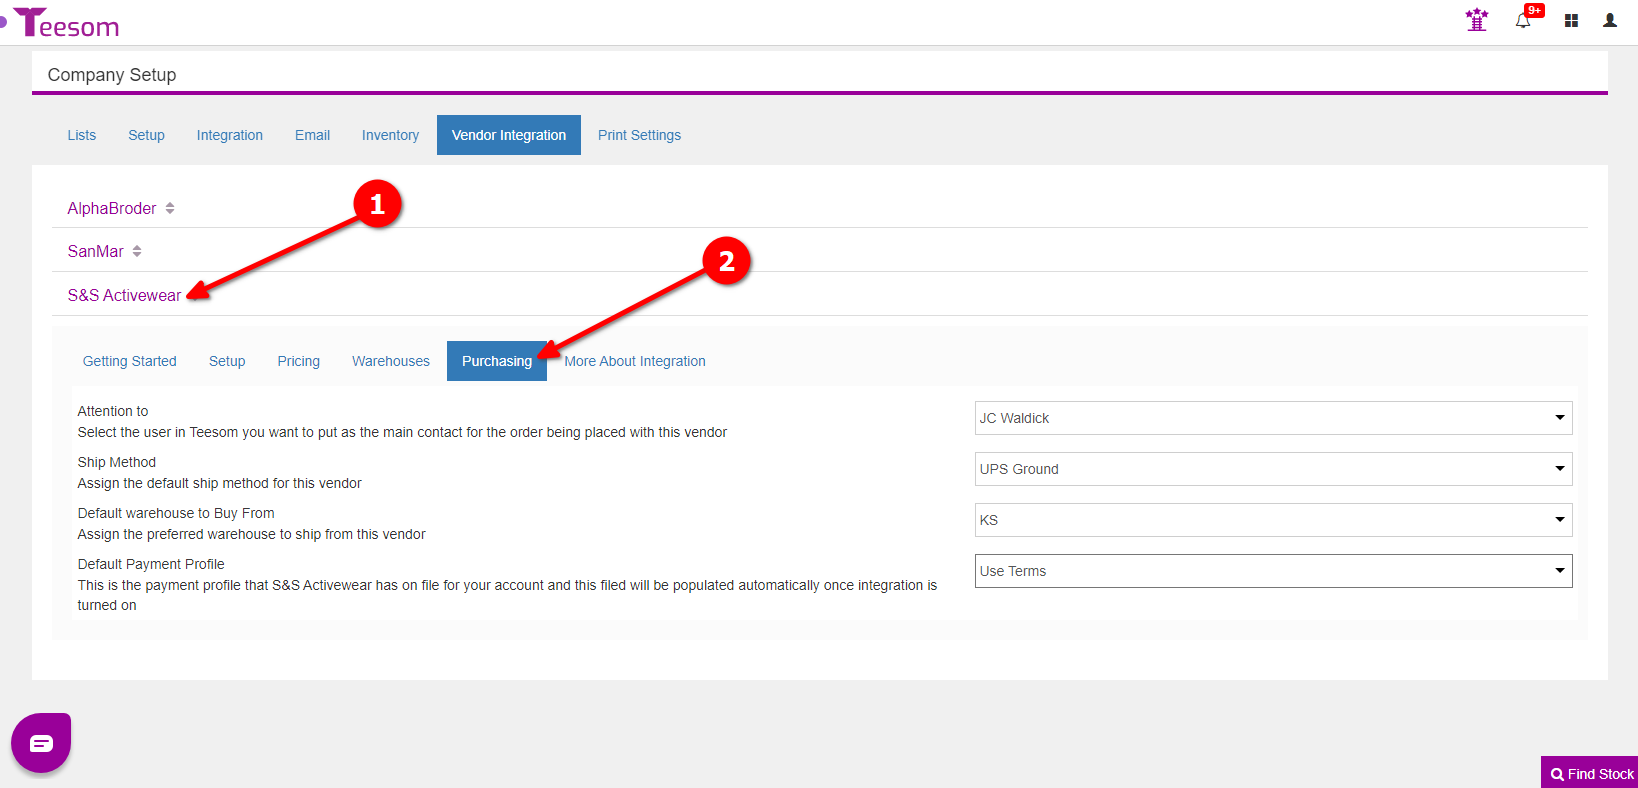
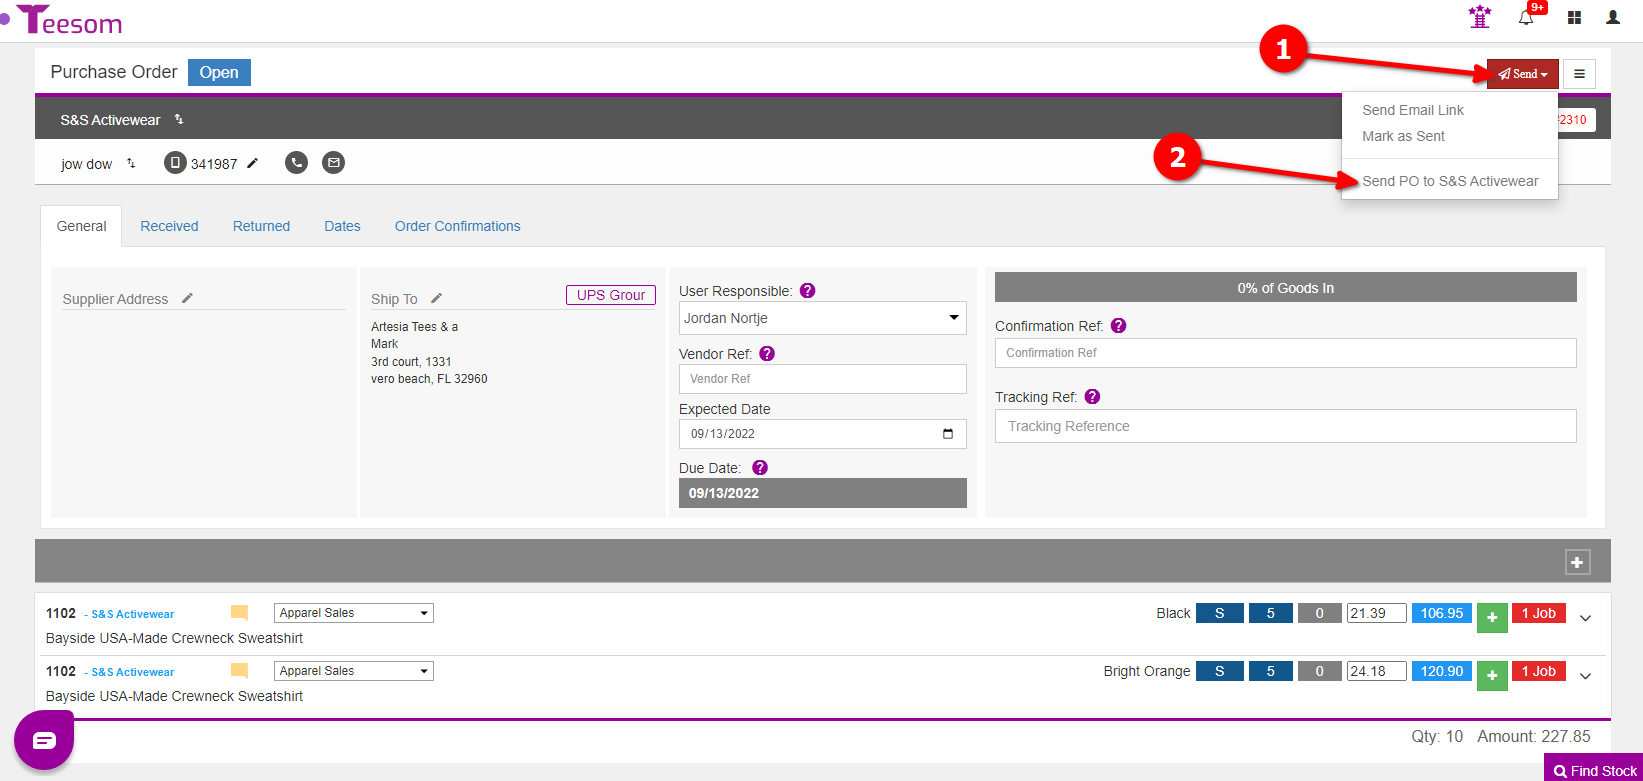
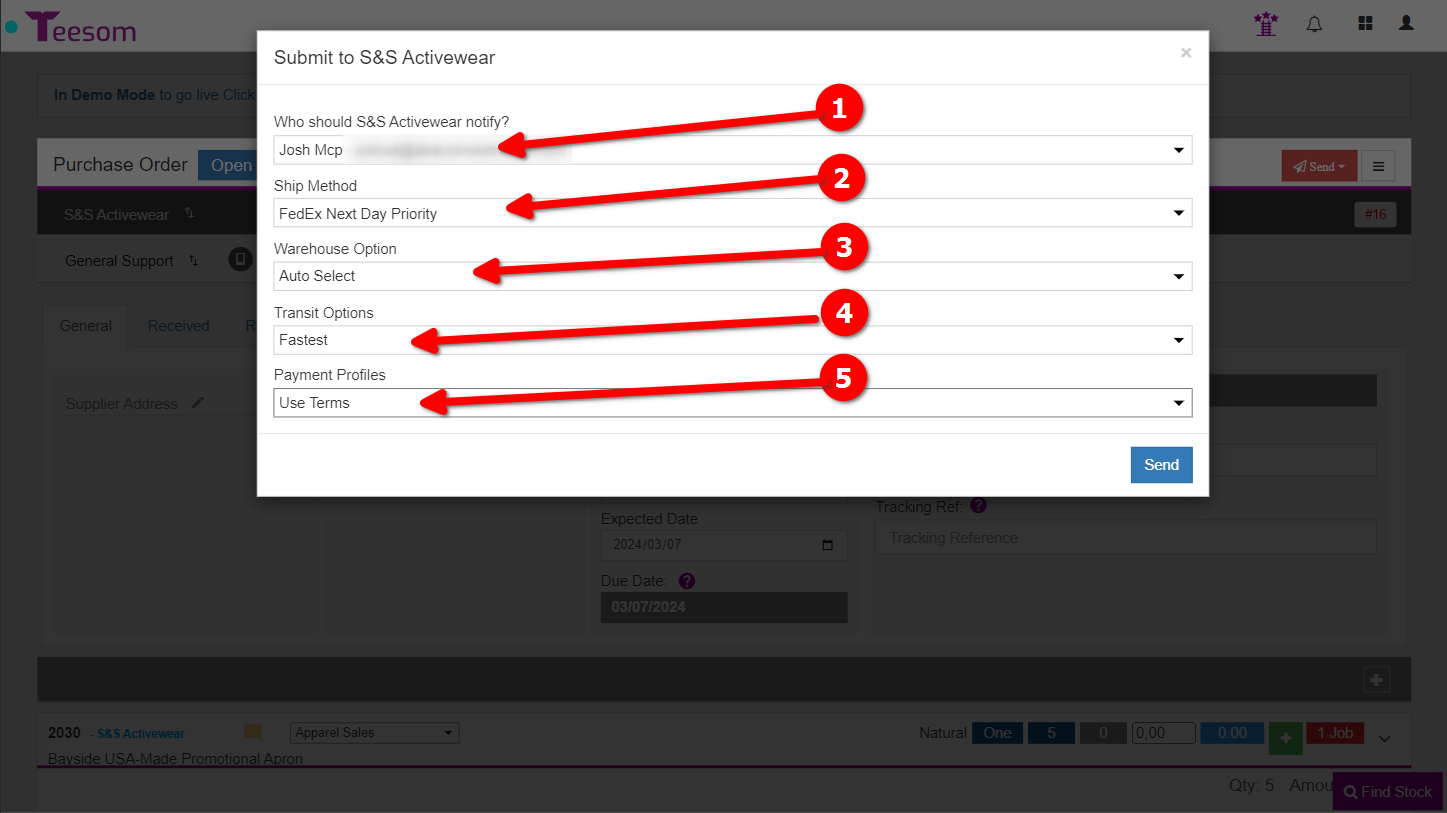
S&S Activewear Purchasing Options
To view and change S&S Activewear’s purchasing options:
Expand S&S Activewear
Click on Purchasing
Under “Purchasing” you will see the different options available:
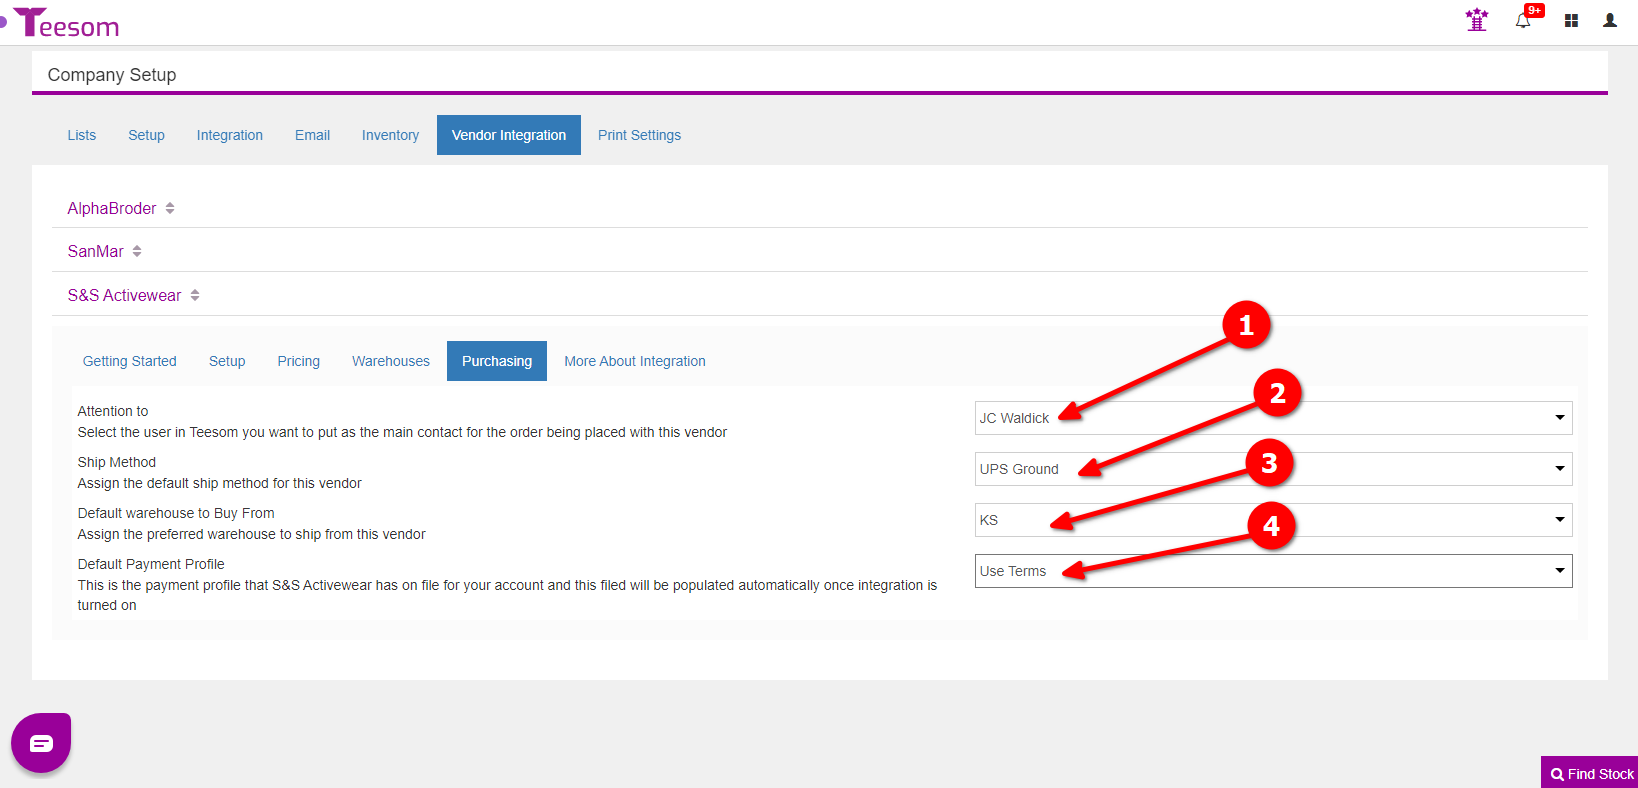
The default “Main Contact” that will be used when you create/send a PO to S&S.
Set the default shipping method that will be used when you create/send POs.
Set the default warehouse that S&S will ship from. The warehouses on this list are provided by S&S and automatically filled in when you activate integration.
Set the default payment profile used with S&S. This is automatically filled in using your S&S payment profile when you activate integration.
When you send a PO the options you set in the “Company Setup” will automatically be chosen but you can change them during the send/submission process of the PO.
The user, in your Teesom company, that will be notified about the PO being sent.
The shipping method being used.
Set the warehouse option between single warehouse and auto select.
If you have single warehouse selected: choose which warehouse the goods will ship from. If you select auto select: select the transit time fastest/fewest.