In this article we will take you through the artwork process of production, from creating it to using it on an order.
This is a brief overview of working with artwork. To learn more about artwork follow our artwork tutorial: Here
Create Artwork
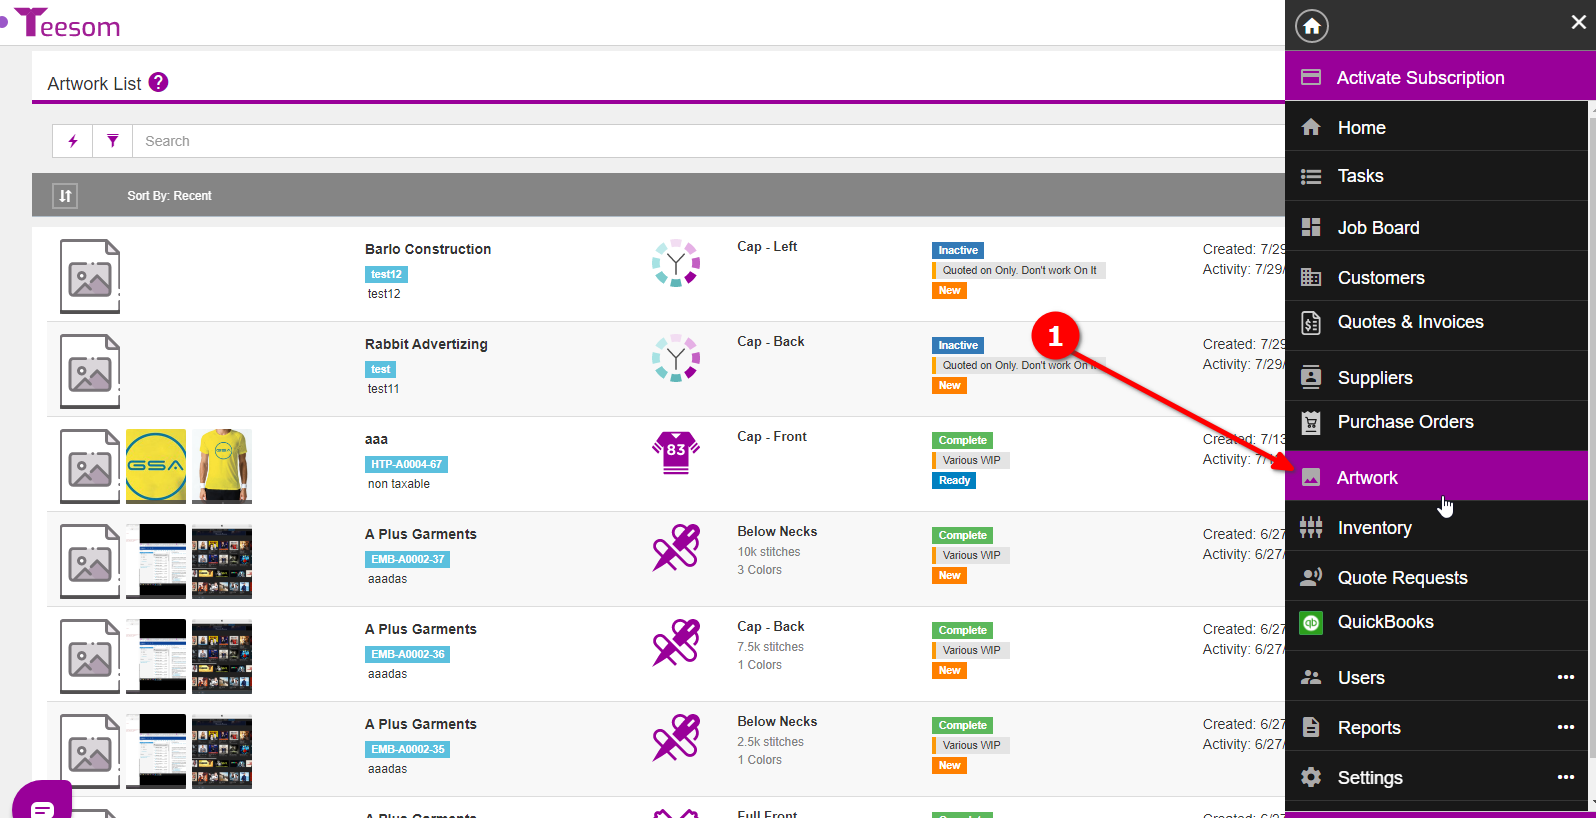
You can create new artwork from the artwork list screen. To get to the Artwork List:
Go to the “Main Menu“.
Select “Artwork“.
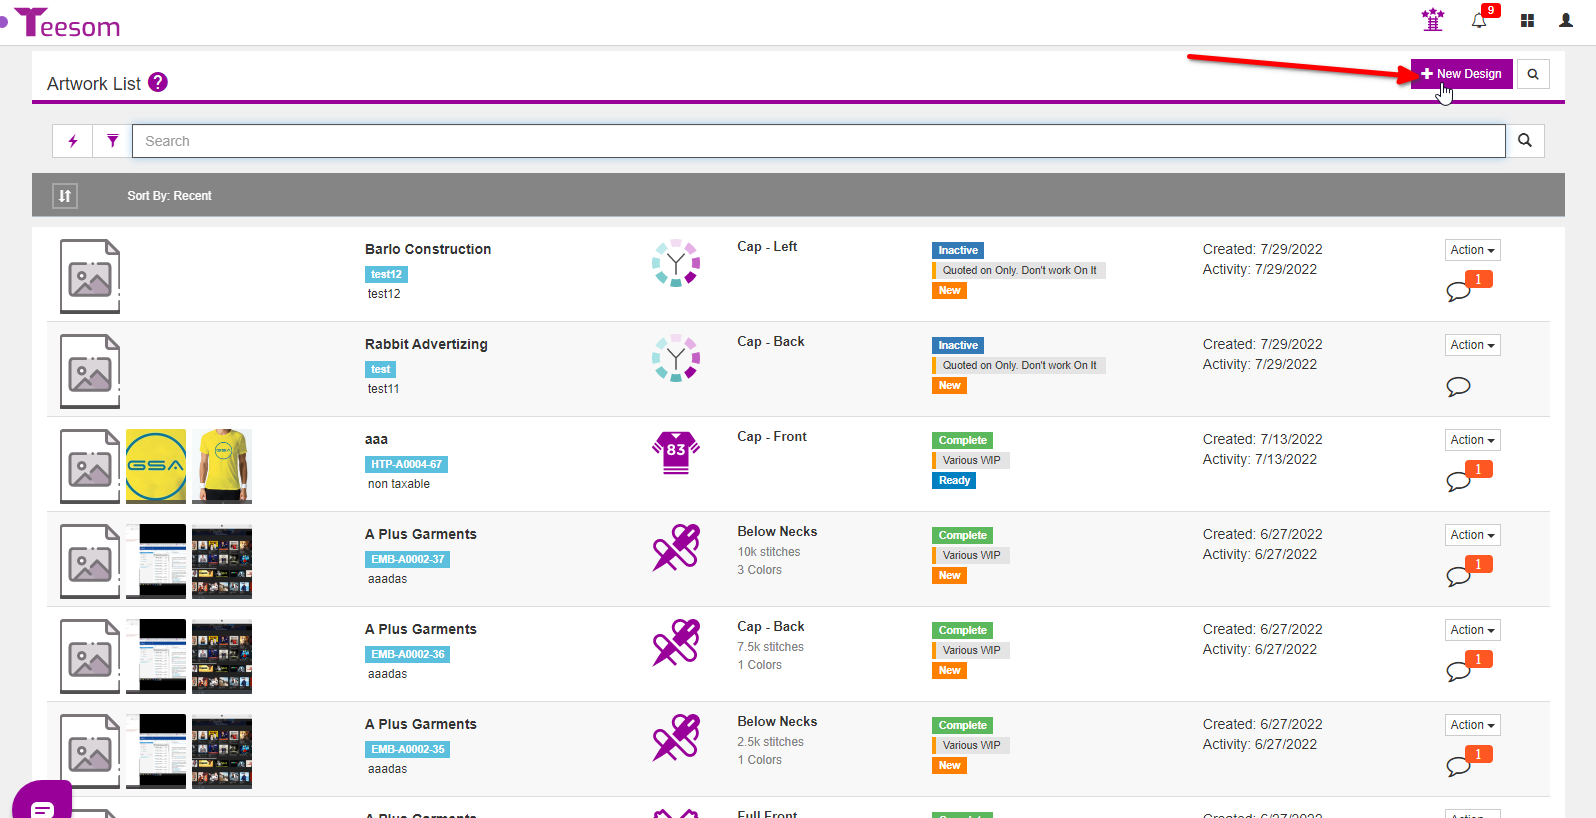
Click on “+ New Design“.
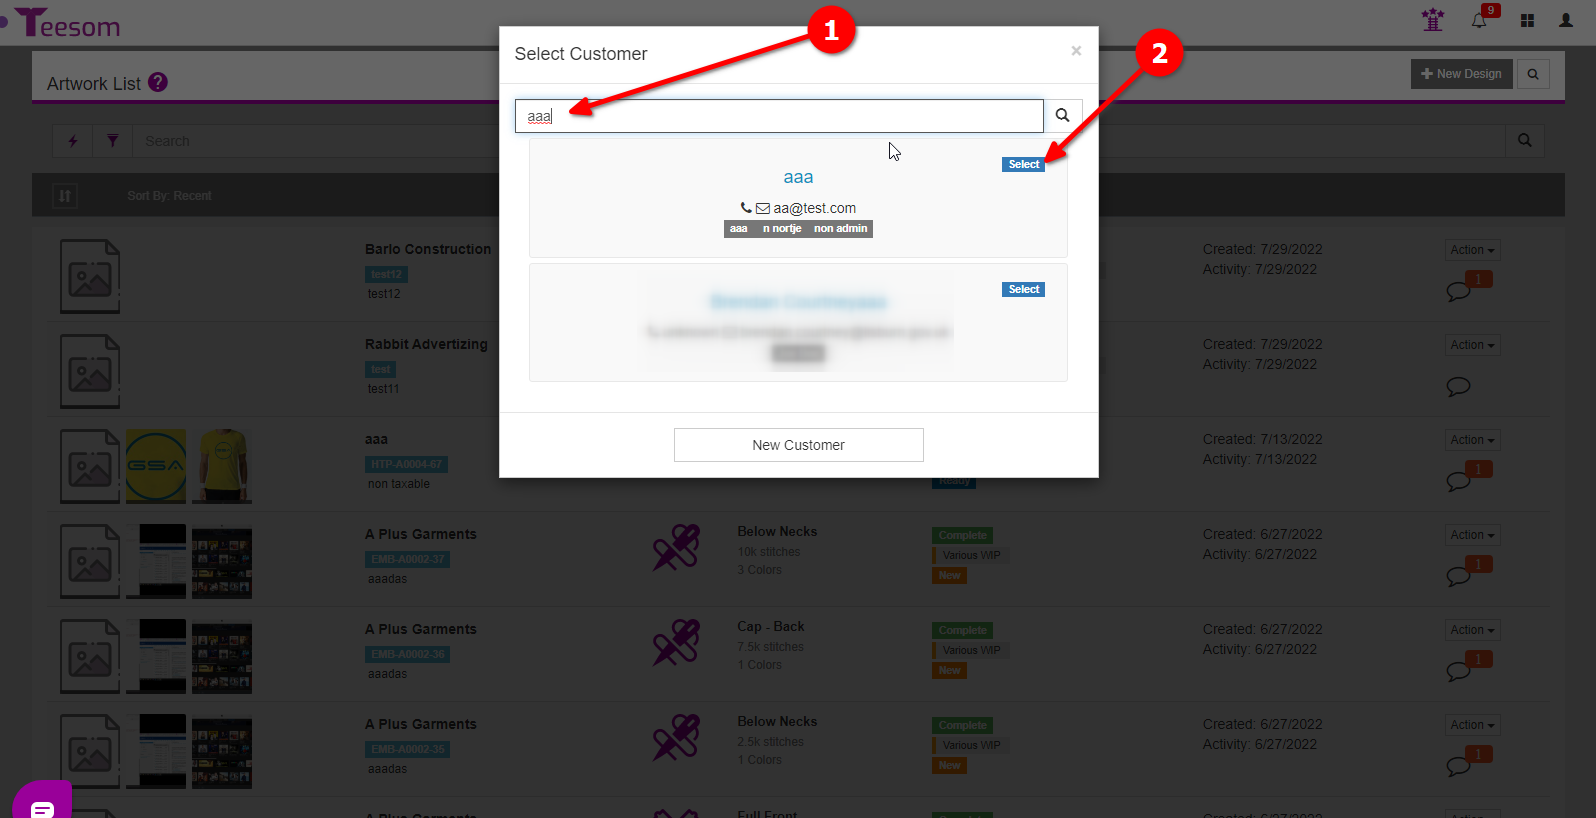
Search for the customer you’re creating the artwork for.
Click on “Select” to choose the customer.
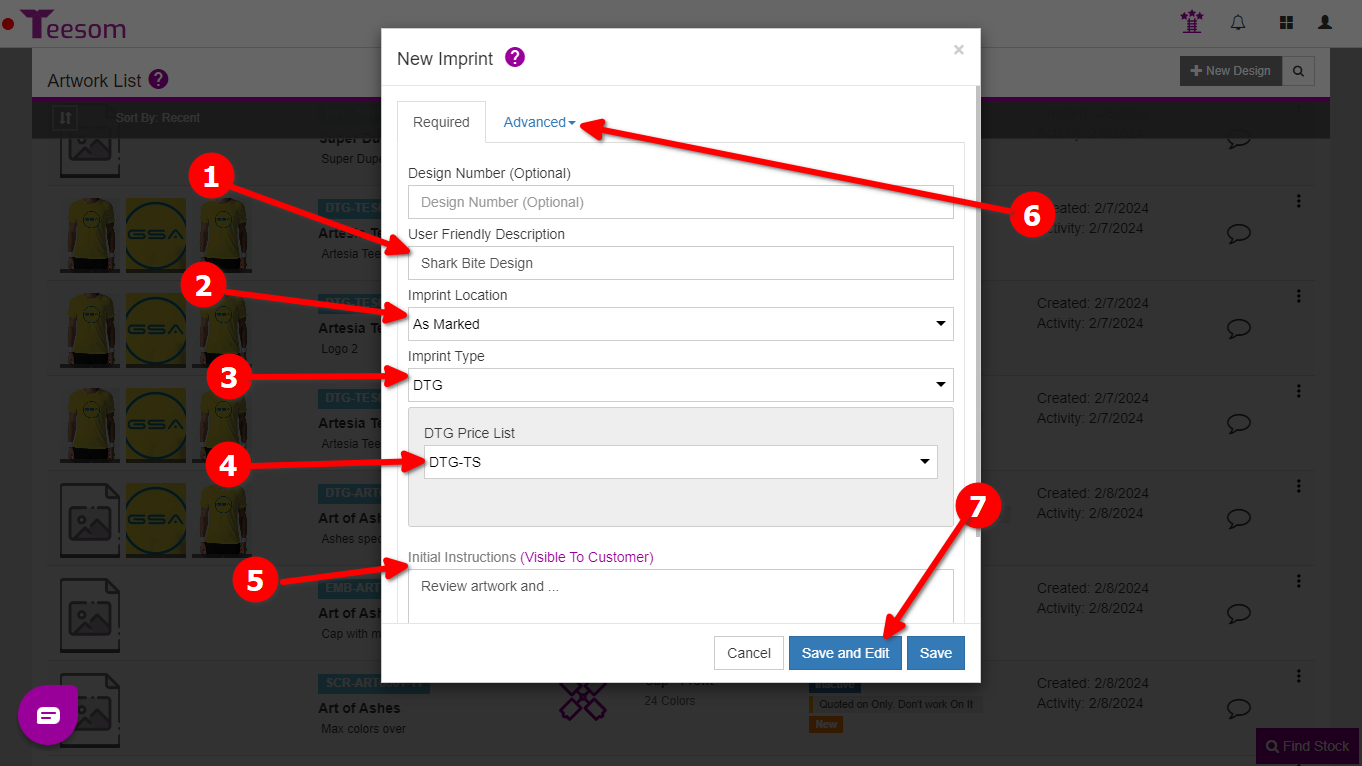
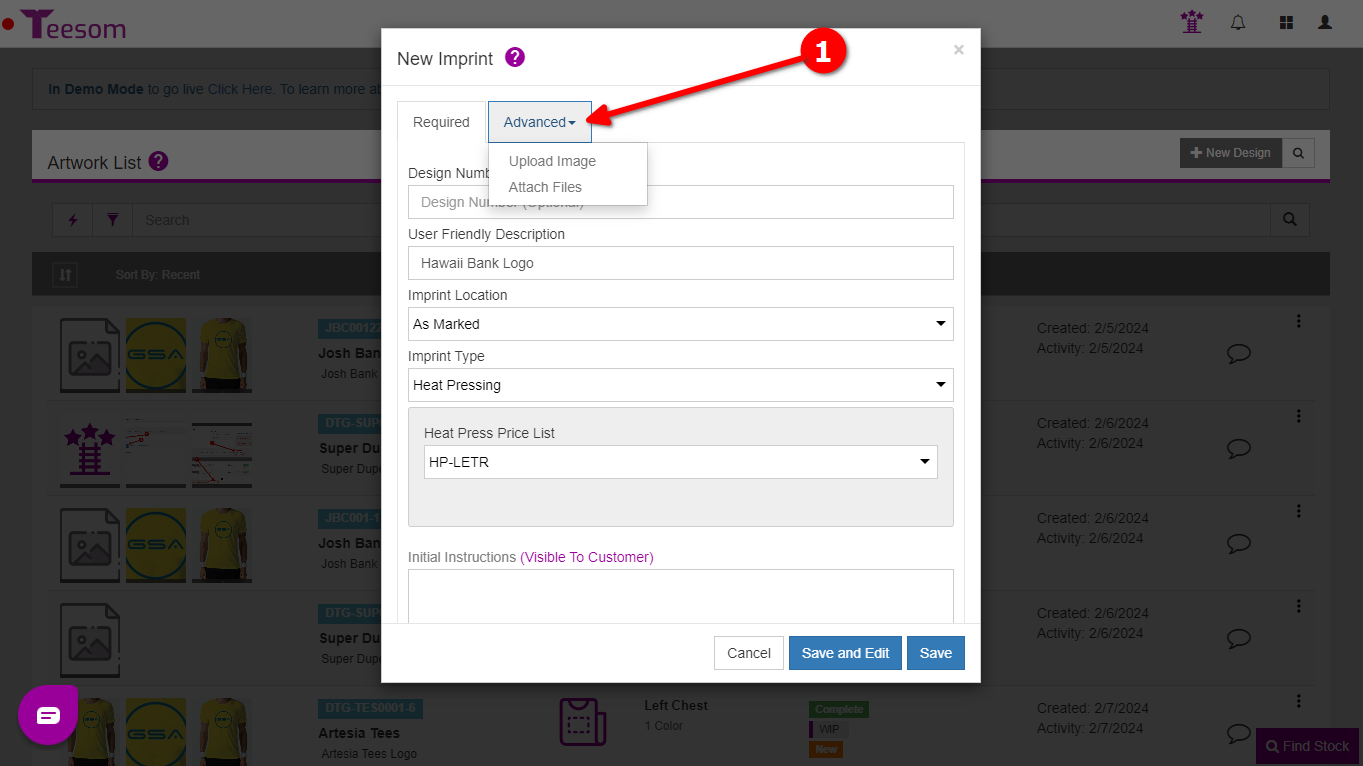
Then enter the required information on the “New Imprint” screen:
Enter a description.
Select the imprint location.
Select an imprint type.
Select which imprint pricelist to use.
Enter initial instructions for the artist. (This will be visible to the customer.)
You can upload an image from the advanced dropdown. (If you don’t you can do it later.)
Click on “Save and Edit” if you want to edit the imprint, or just click on “Save” to add the imprint.
The Design Number can be left empty and Teesom will generate one for you.
Click on the Advanced dropdown to upload the images of your artwork, you can also attach files to the artwork.
After entering the required information:
Click on “Save and Edit” to open the artwork edit screen where you can enter extra information for the artwork.
Click on “Save” to create the artwork.
If you clicked on "Save" you will be able to go back and add the extra information later by editing the artwork.
Using Artwork On An Order
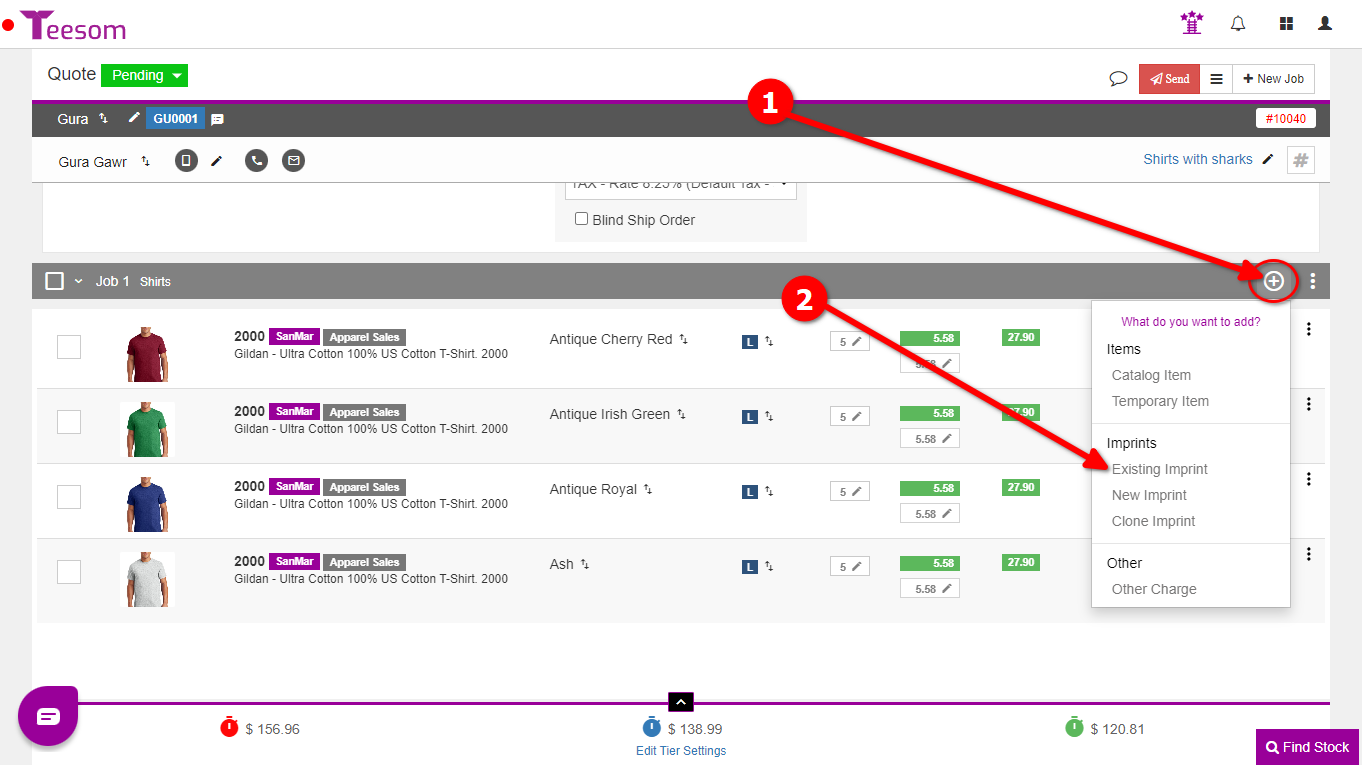
Add the Imprint/s that will be going onto the blank goods:
Click on the “Add Item” button.
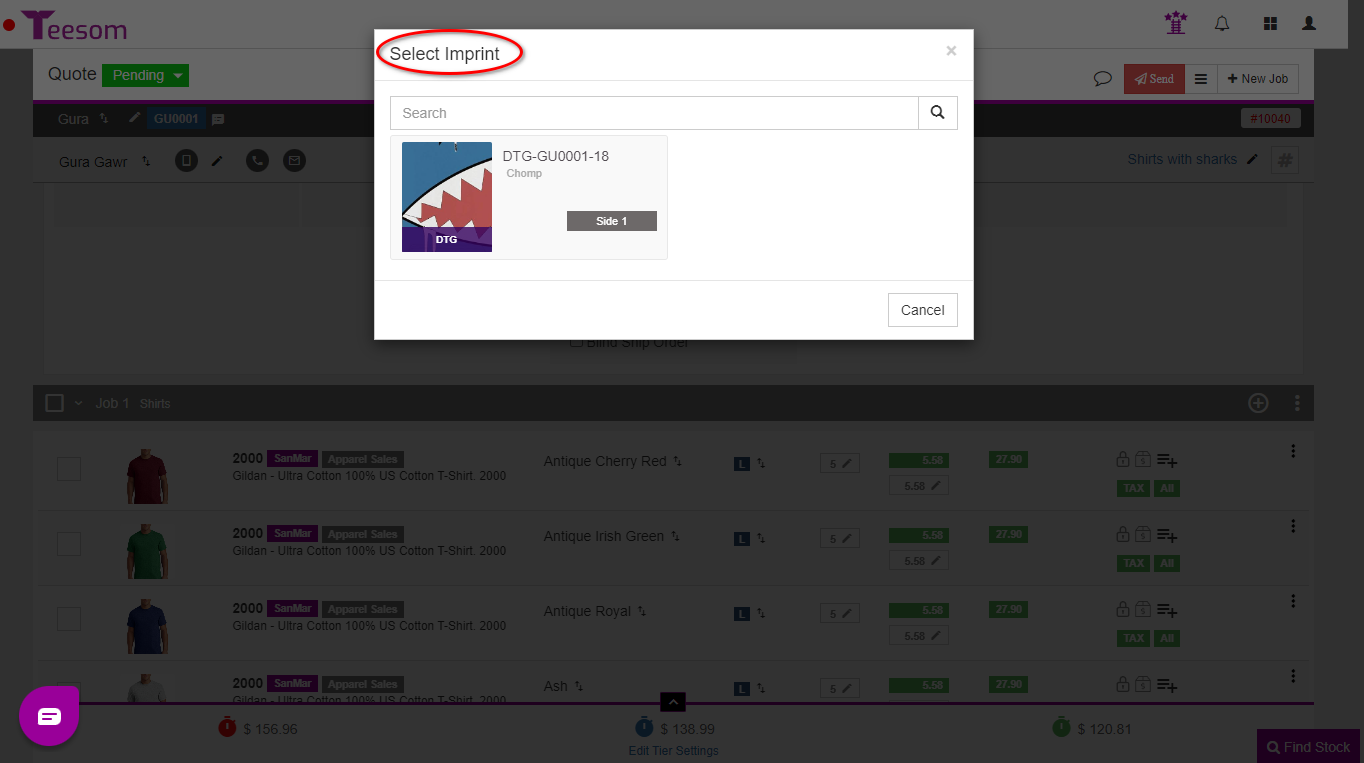
Select “Existing Imprint” and find the artwork we just added.
Create Artwork on the order
If you don’t already have an existing imprint then click “New Imprint” instead.
On the “New Imprint” screen:
Enter a description.
Select the imprint location.
Select an imprint type.
Select which imprint pricelist to use.
Enter initial instructions for the artist. (This will be visible to the customer.)
You can upload an image from the advanced dropdown. (If you don’t you can do it later.)
Click on “Save and Edit” if you want to edit the imprint, or just click on “Save” to add the imprint.
The Design Number can be left empty and Teesom will generate one for you.
Getting Artwork Ready For Approval
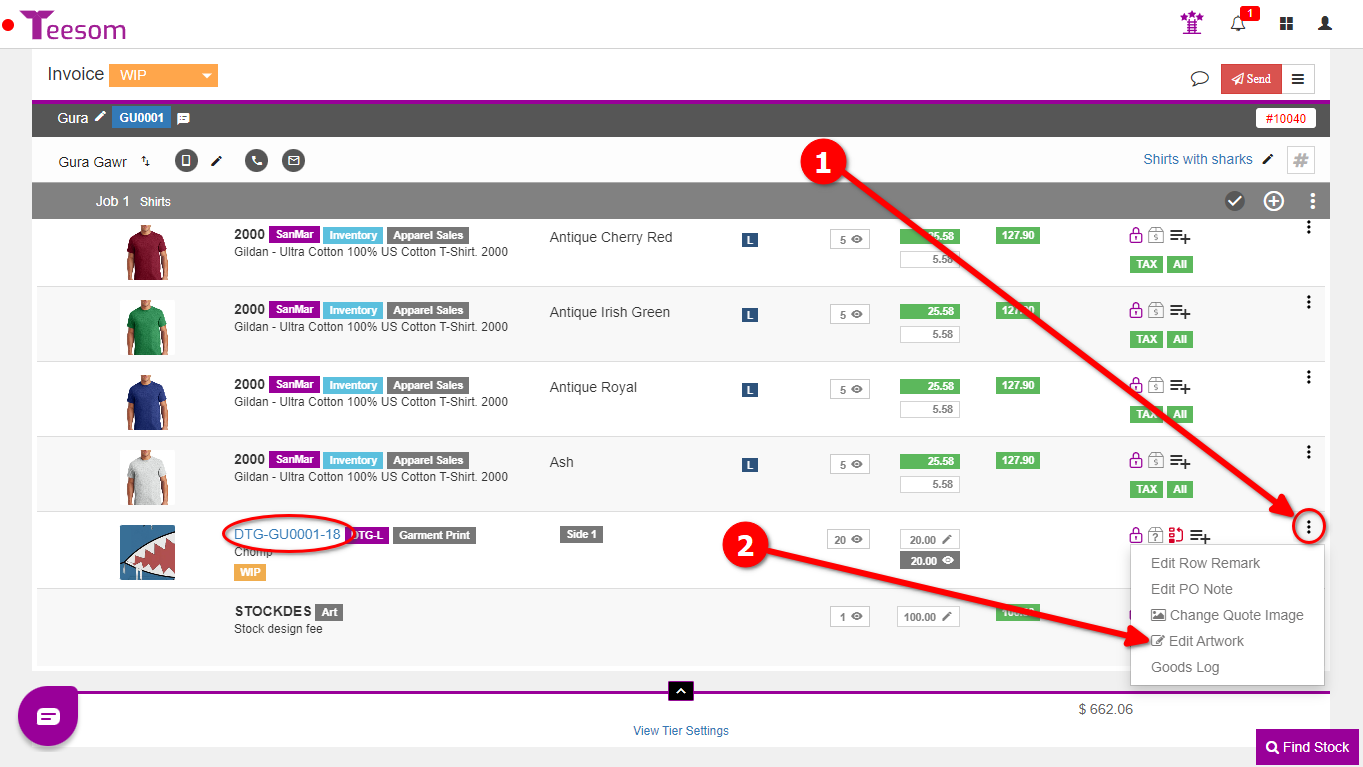
To get your artwork ready for approval, on the order:
Click on the “3 dot” menu of the relevant imprint/artwork row.
Select “Edit Artwork“.
TIP:You can also open the artwork edit screen by clicking on the Design Number of the imprint.
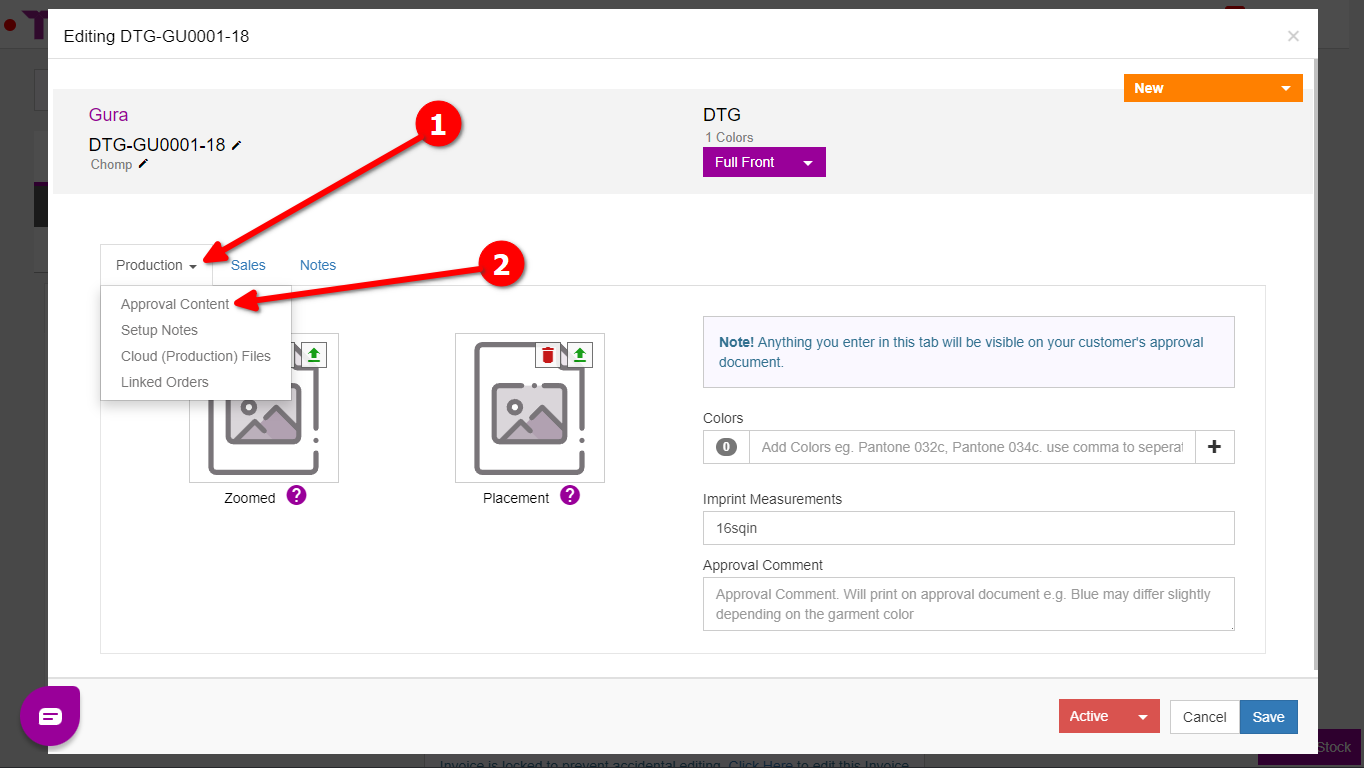
On the “Artwork Edit” screen:
Click on “Production“.
Select “Approval Content“.
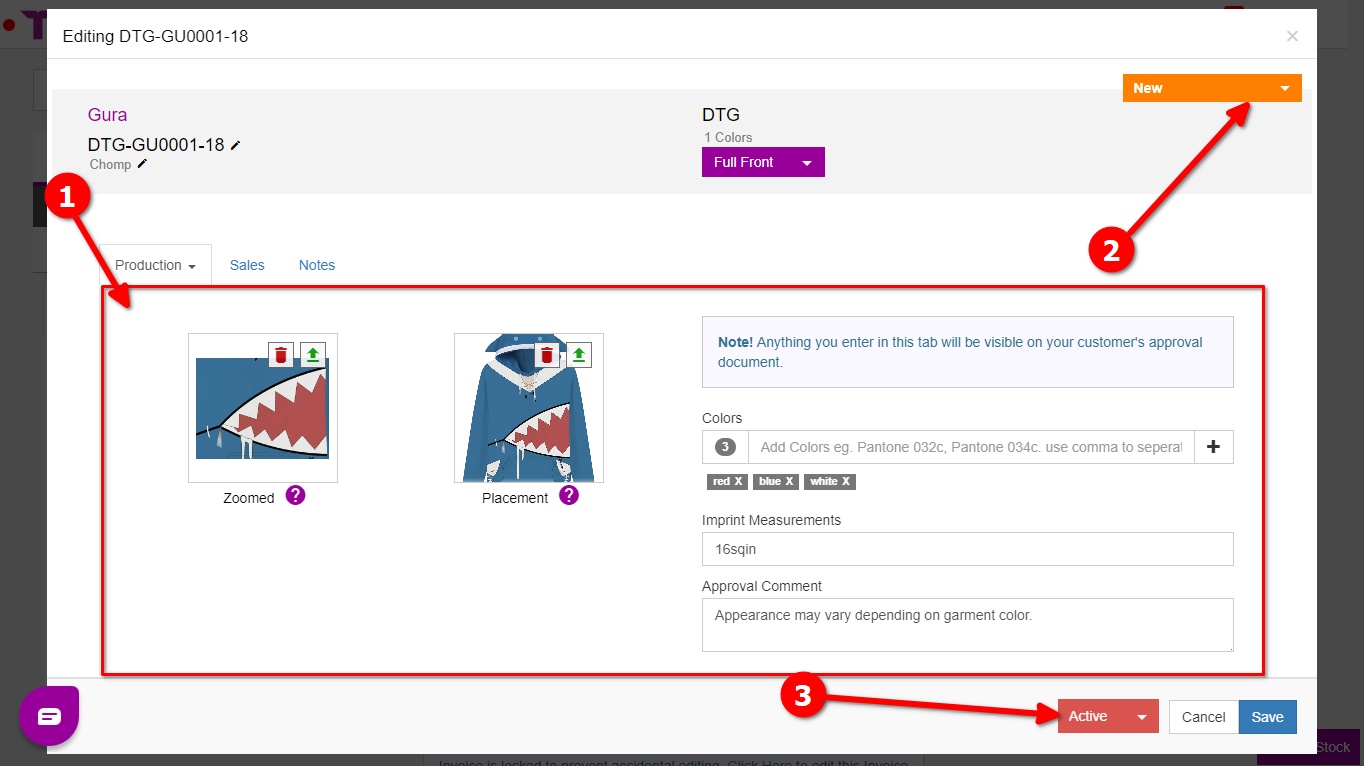
Enter all the necessary information. Upload both a zoomed and placement artwork image, add colors, enter the imprint measurements, and type an approval comment for the customer.
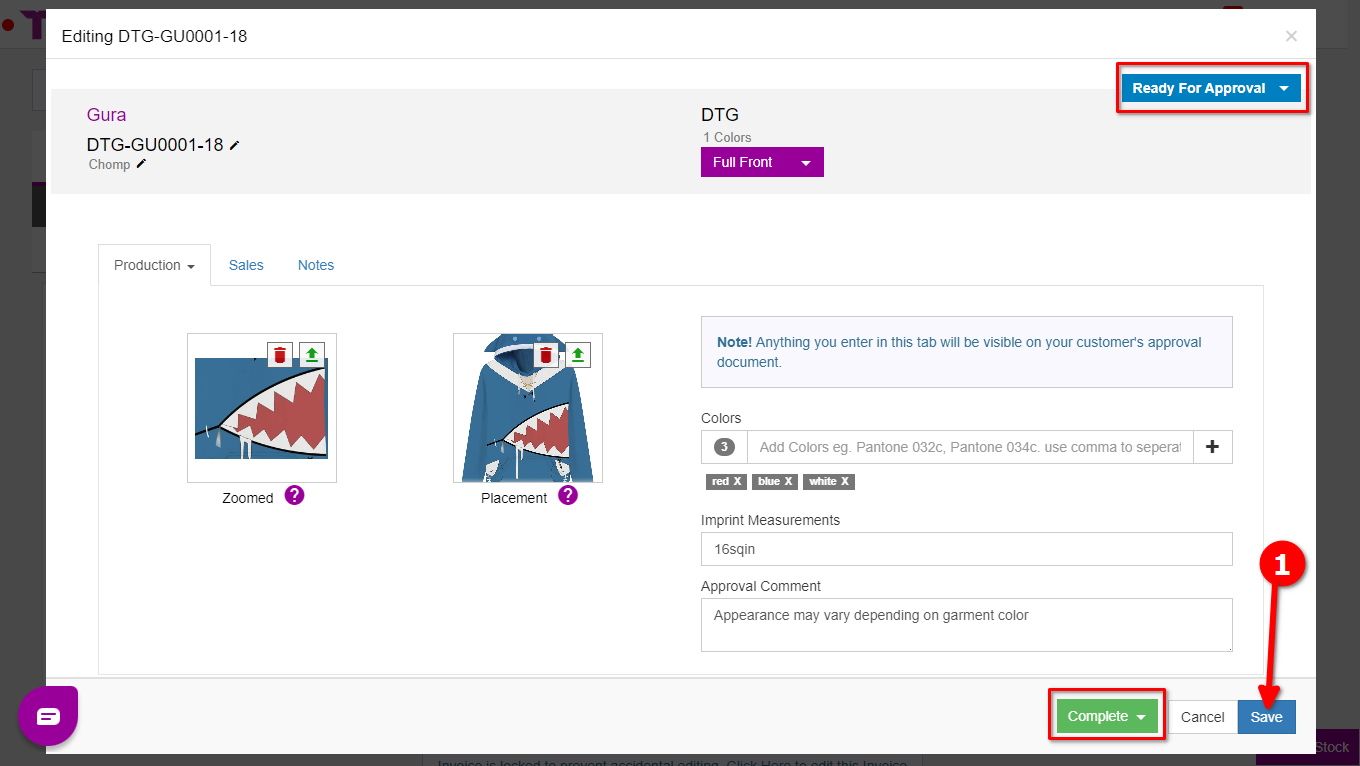
Set the artwork stage to “Ready For Approval”.
Set the artwork status to “Complete”, you can only do this once all the required info is entered.
Click “Save” when you have complete all the steps above.