Looking for help?

< Back
You are here:
Print

Sending Approval Request and Keeping Track Of Production

In this article we will go over how to send a production approval request and the different places you can keep track of production.

Send Approval Request

To send the approval request:

  • Go to the “Job Board” and open the order.
  • Open the artwork by clicking on its design number.

Before you can send the approval request double check that the artwork is complete:

  1. Make sure you have entered all the necessary information.
  2. Set the artwork stage to “Ready For Approval”.
  3. Set the status to “Complete”, you can only do this once all the required info is entered.

On the order:

  1. Click on “Send“.
  2. Select “Send Production Approval Request“.

On the send screen:

  1. Confirm the due date which the customer needs to approve the art by.
  2. Choose whether the customer will be required to only approve once or approve for each individual imprint.
  3. Check “Blind Approval” to generate a link for the approval instead of sending an email. (You can click the ‘?‘ for more info.)
  4. Check “Approve Imprint and Product Rows?” if you want the customer to also approve the product rows.
  5. Show pricing on approval: This will only appear if you check the previous box to also have the customer approve product rows.
  6. Check “Use Secure OTP Verification” if you want to send a One Time Pin to the customer that they will need to enter to approve the order.
  7. Check “Send Reminders” to send your customer reminders to approve the order at dates and time of your choosing by clicking on the calendar icon and clock icon.
  8. Click “Preview and Send” when you are done.
  1. See who you are emailing the approval request
  2. Right click on “View Approval” and open it in a new tab if you want to see the customer view of the approval request.
  3. Click on “Send” to email the approval request.

After your customer has approved the request you will see the art circle is now green and the artwork itself, on the order, now says “Approved“:

Keeping Track Of Production

Now that you have sent a production approval request we will cover the two areas, besides the Job Board, where you can keep track of production.

They are:

  • The Task Board
  • The Production Calendar

The Task Board

Every customer’s order that you create in Teesom will have several tasks associated with it. The purpose of the Task Board is to keep all “hands” that touch the job on top of their specific Tasks.

You can get to the Task Board by using the Shortcut icon in the upper right hand corner of Teesom.

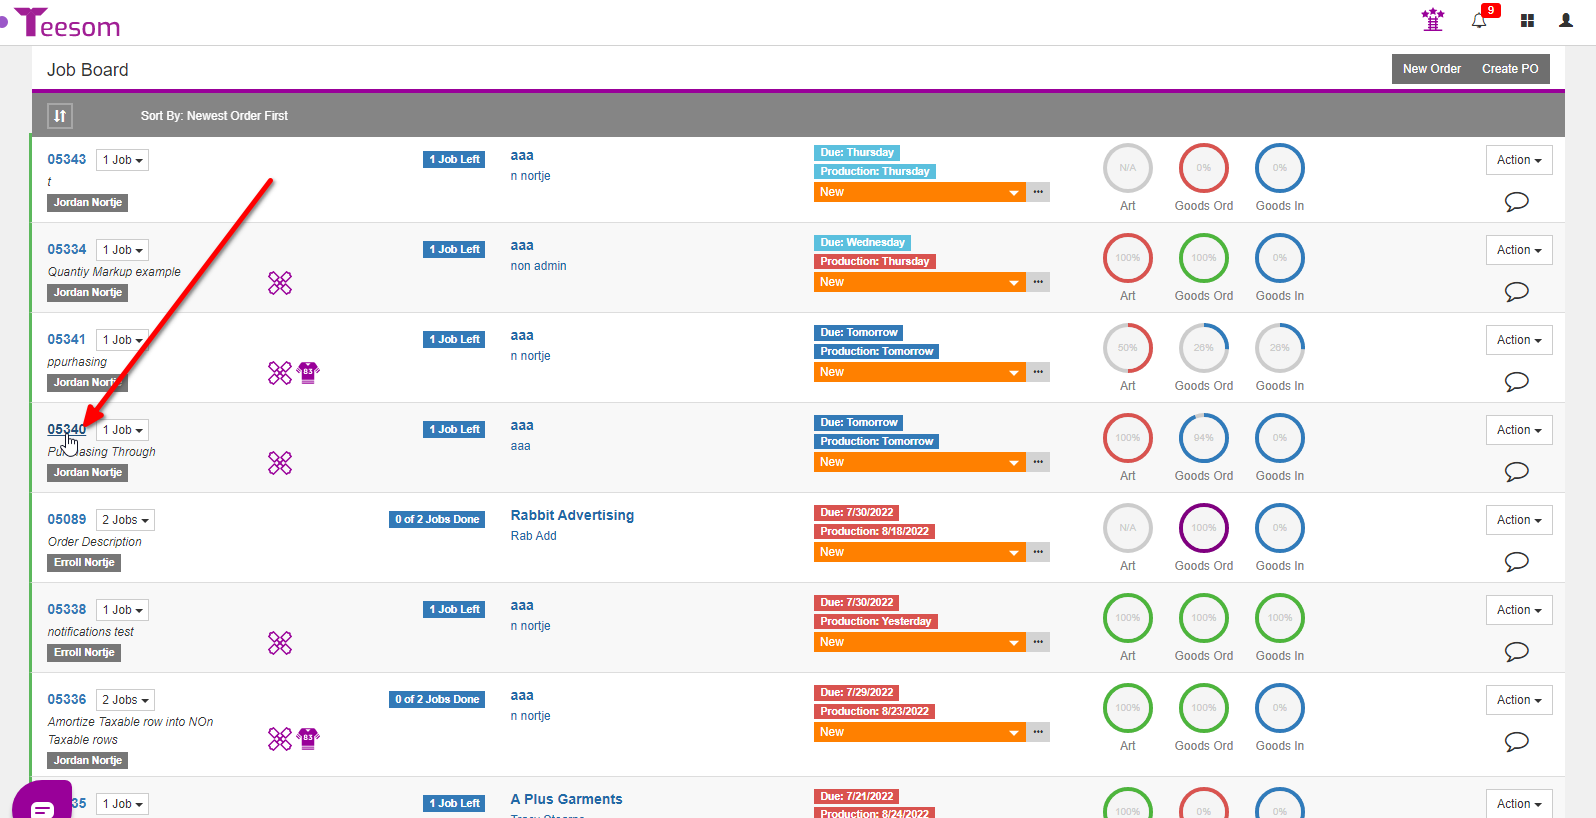
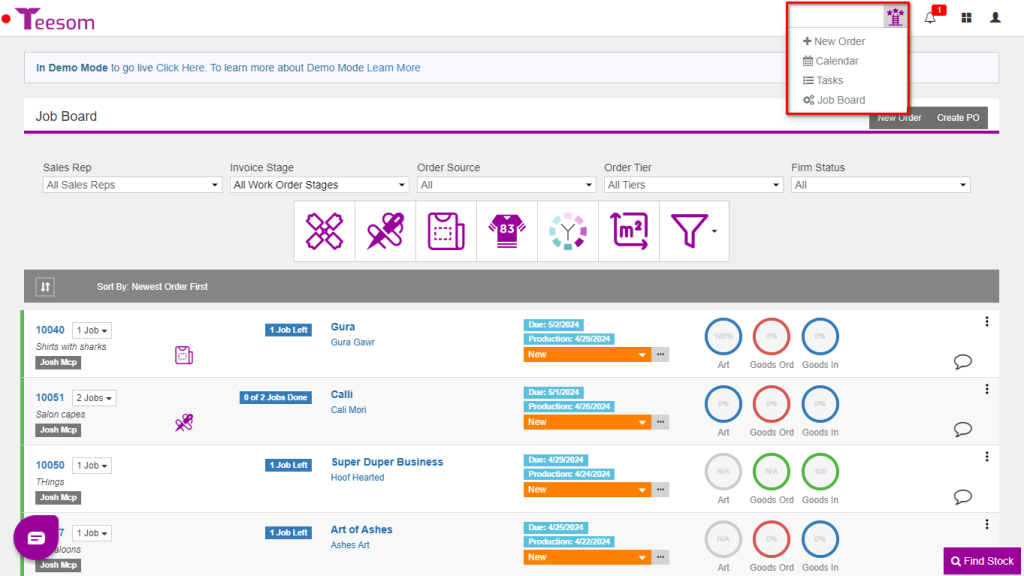
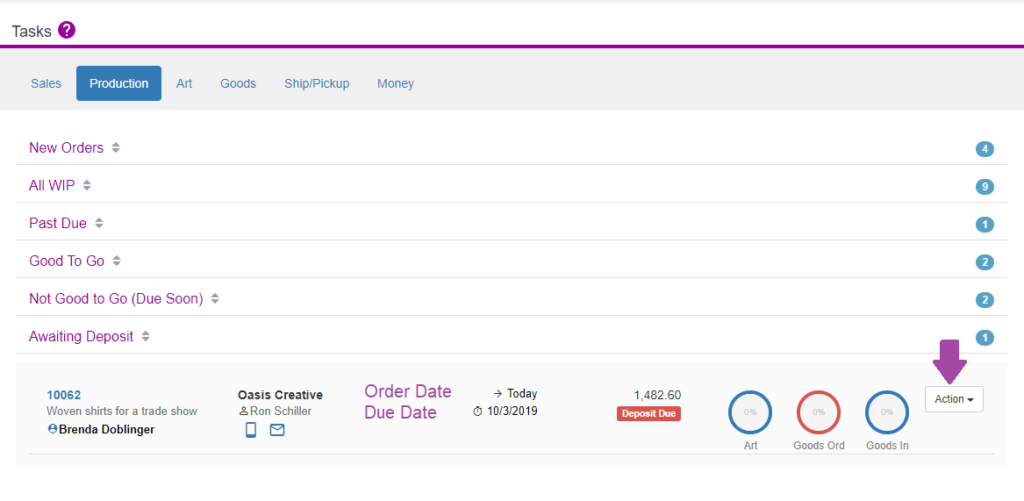
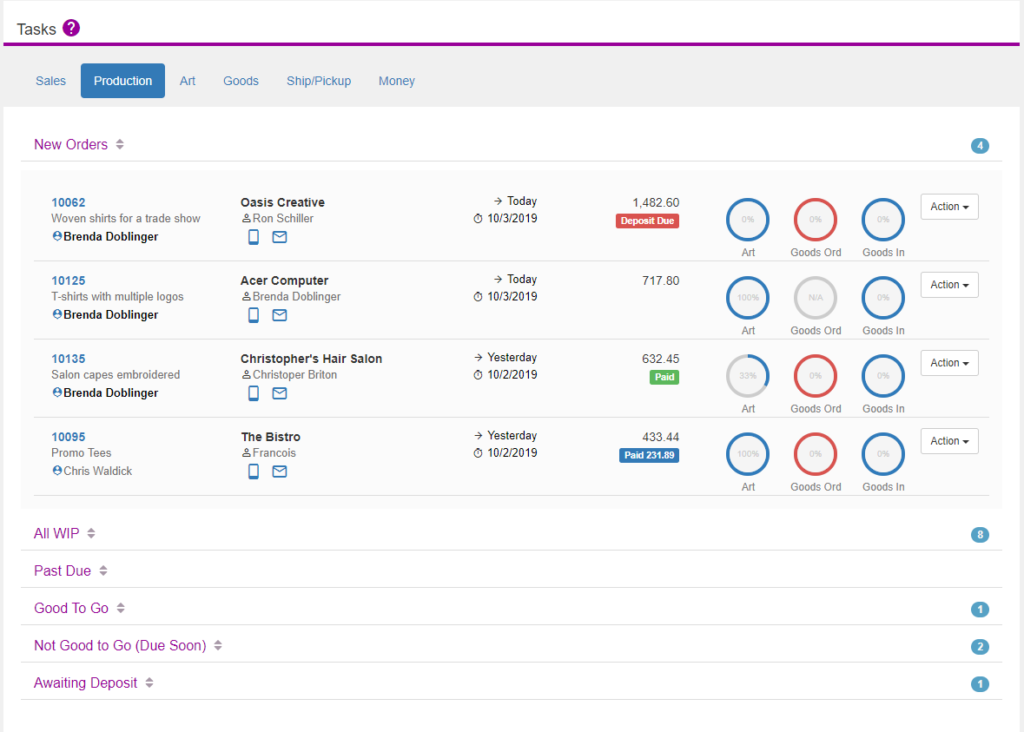
In the below image, you can see that there are several “tabs” to click on. The image shows that the Production tab is currently selected. The numbers on the far right represent the amount of orders within the sub categories. For example, if the “All WIP” is expanded, then 8 orders will appear. There will be 4 orders in “New Orders” and 1 in the “Good to Go”.

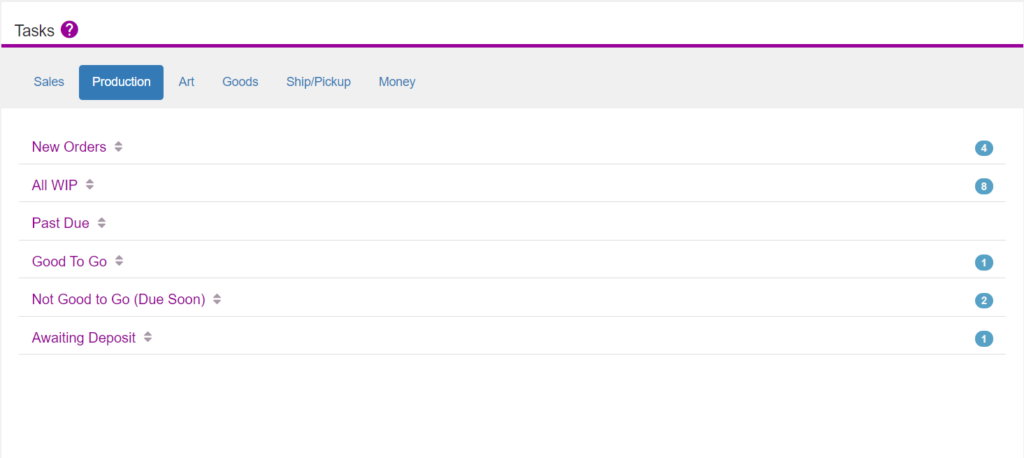
  • New Orders: The orders that appear here will all be at the Invoice Status of WIP, with a date of Yesterday or Today. The Work Order stage is not relevant.

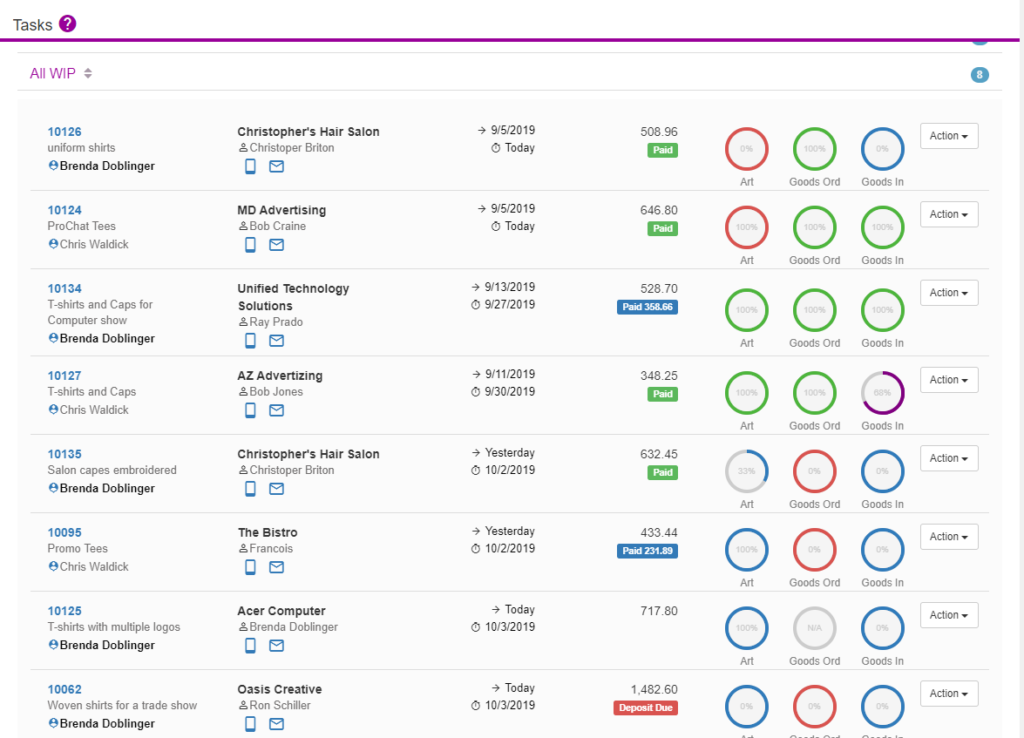
  • All WIP: Orders that are at the Invoice status of WIP will appear here.


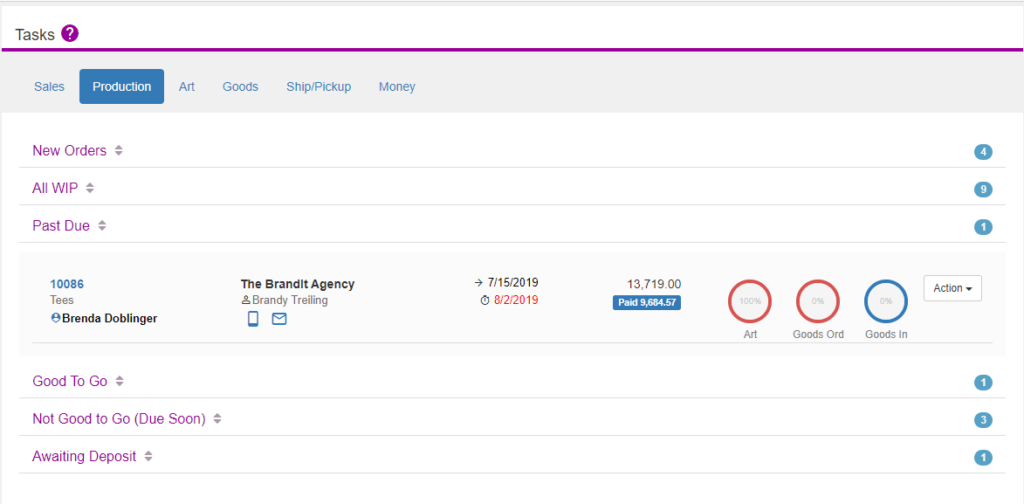
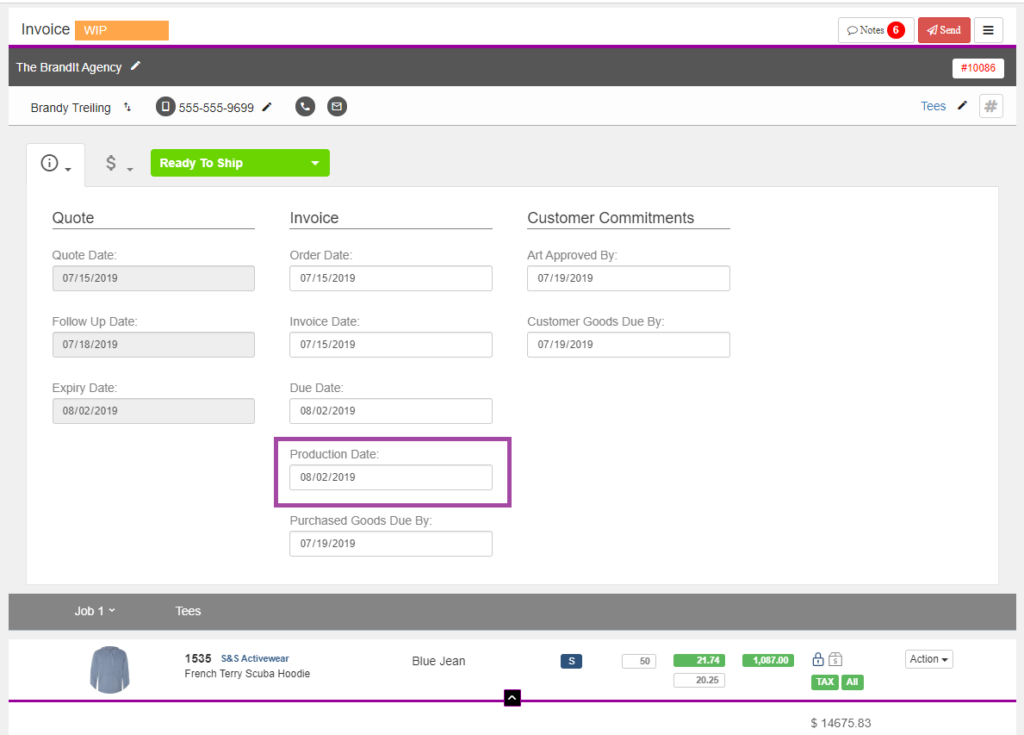
  • Past Due: The past due here refers to production not payments. If an order is still at the WIP Invoice status and is past its production date, then it will appear here.


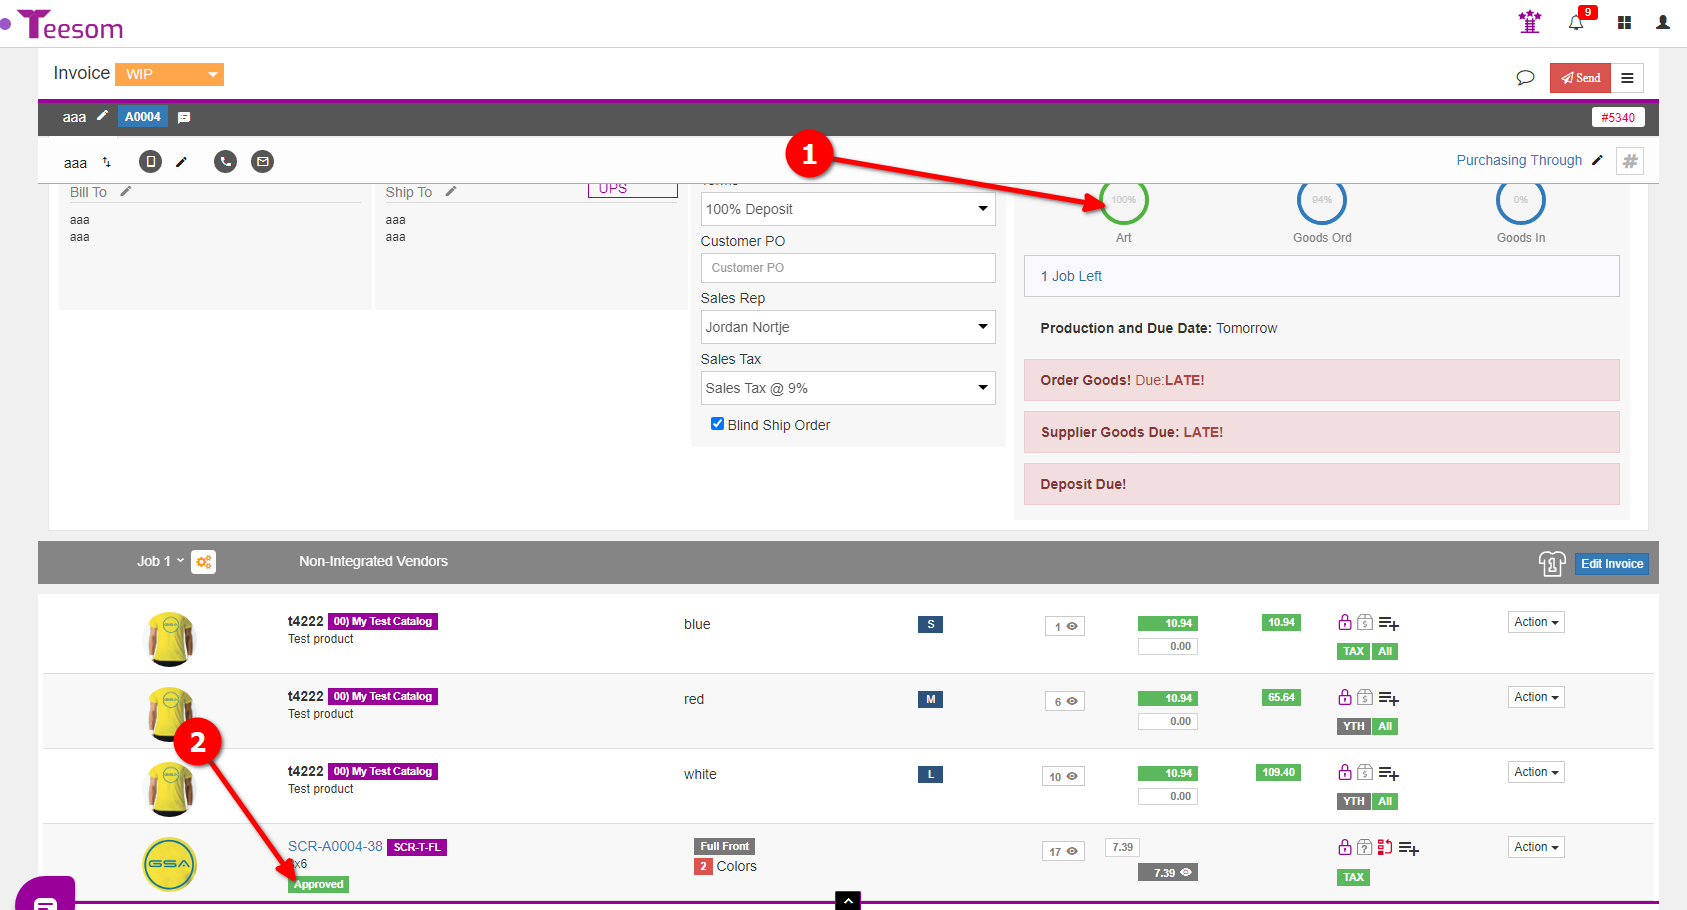
  • Good To Go: The orders that appear here, will have the three production circles at 100%, as well as having them all green.


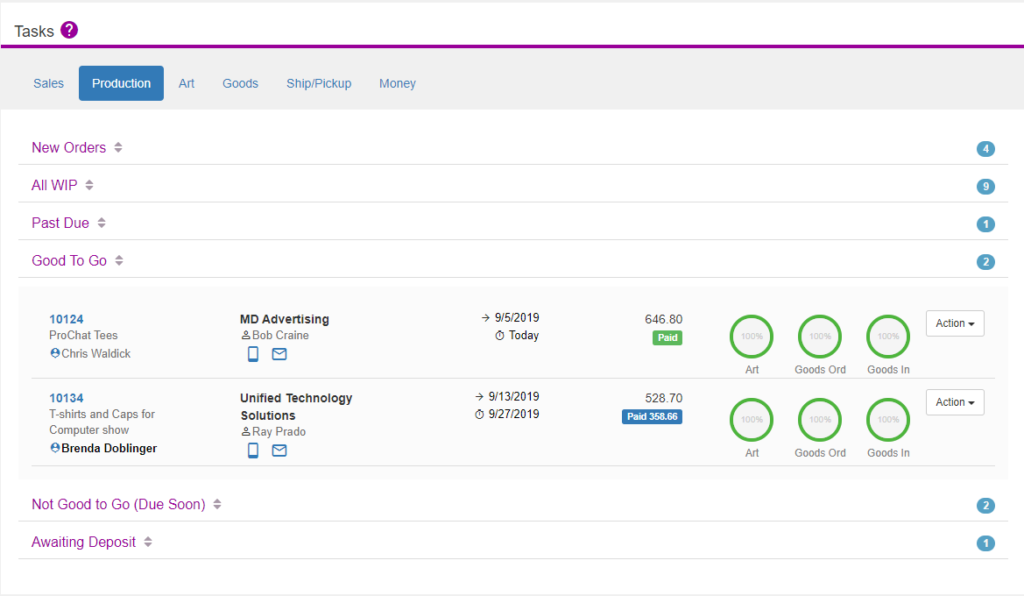
  • Not Good to Go (Due Soon): The purpose of this option is to not let you miss a deadline! The orders that appear here either have a due date of Today or it is past the due date. **Please note that this ignores the Production date, it only uses the Order Due Date.


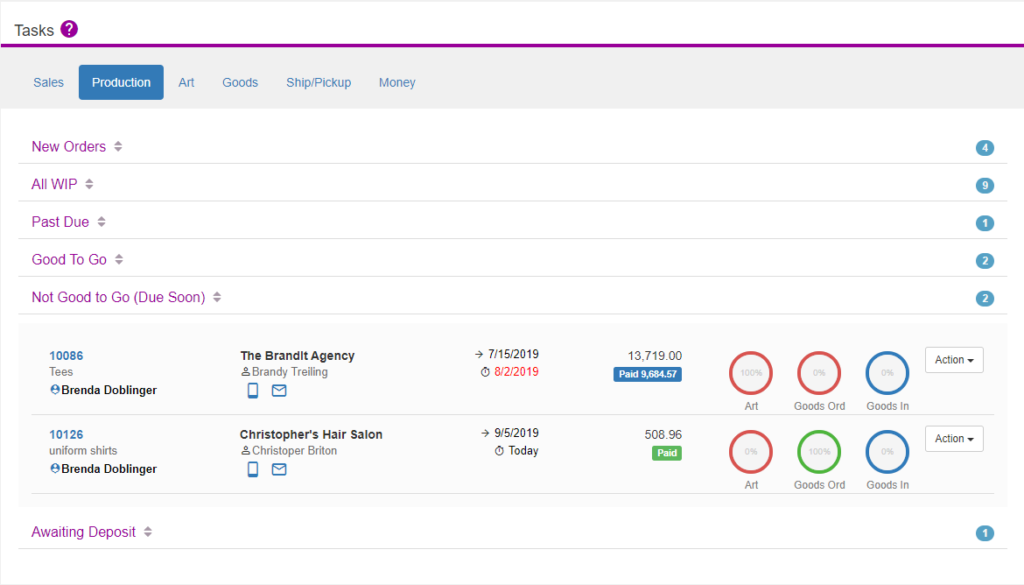
  • Awaiting Deposit: Any order that appears here should be held off doing the production until the deposit is received. You can easily see the order date and the due date and use the Action drop down to message the customer to make the deposit, letting them know you will not proceed with production until you have received the deposit. The only reason this job appears here is that it required a deposit, and it is at the WIP Invoice status.

The Production Calendar

To open the calendar:

  1. Click on the “Shortcuts” icon.
  2. Select “Calendar“.

On the production calendar you are able to:

  1. Set it show show orders for the month or week.
  2. Set the calendar to automatically refresh when changes are made elsewhere.
  3. Filter options.
  4. Manually refresh the calendar.
  5. Click on the order to view extra information on it, you can also drag the order to change the production date. (You can not place order behind the current date.)
  6. Click on either of the “<”  “>” symbols to navigate between different months.

You can move orders from month to month by dragging and dropping them onto the date you want:

You will notice three different icons next to the orders on the calendar:

  1. The alert icon is shown when the order is past the production due date.
  2. The numbered purple box shows you how many orders are on that day.
  3. The colored circle represents the orders status:
    1. Red: Goods and Art Aren’t Ready.
    2. Blue: Art is approved but no goods are in.
    3. Orange: Goods in but art is not approved.
    4. Green: The order is ready to start production.

You can click on the date to expand it to view a list of the orders assigned to that date:

Table of Contents