In the first part of this article we will walk you through creating a set of cost based markup tables.
Each table representing a different markup for goods at a different cost brackets.
Create The Markup Tables
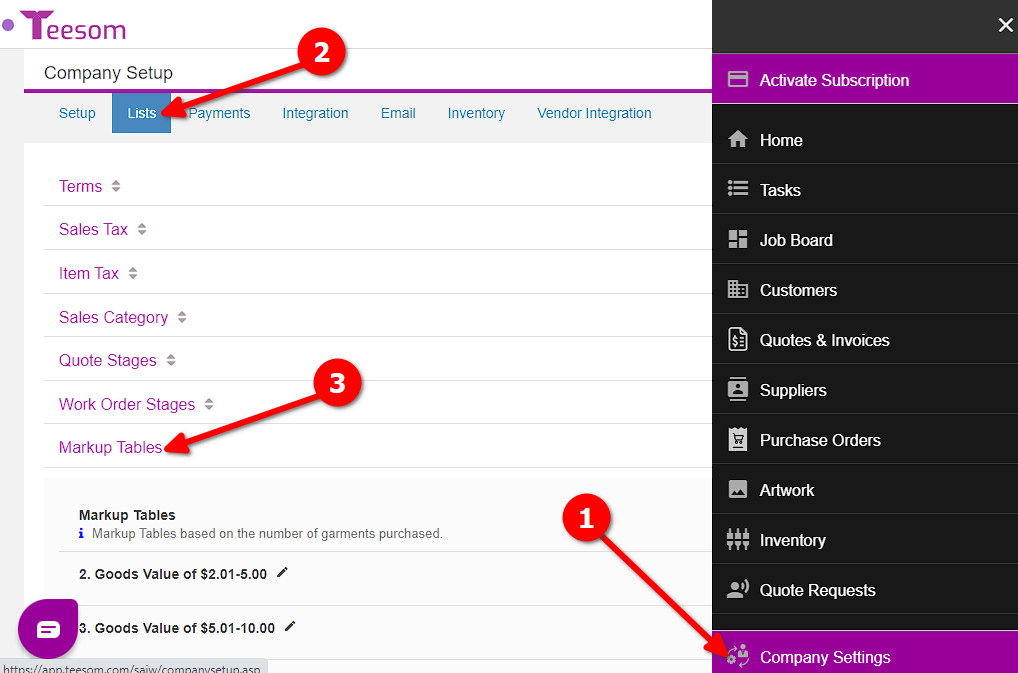
Go to “Company Settings” -> “Lists” -> “Markup Tables“
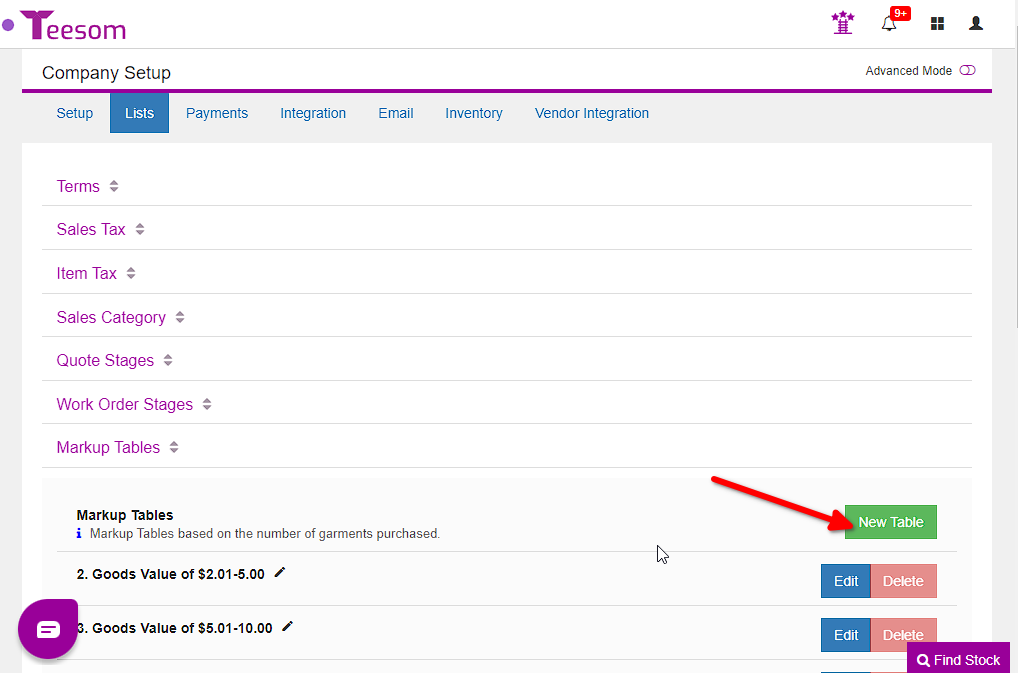
Click on “New Table“
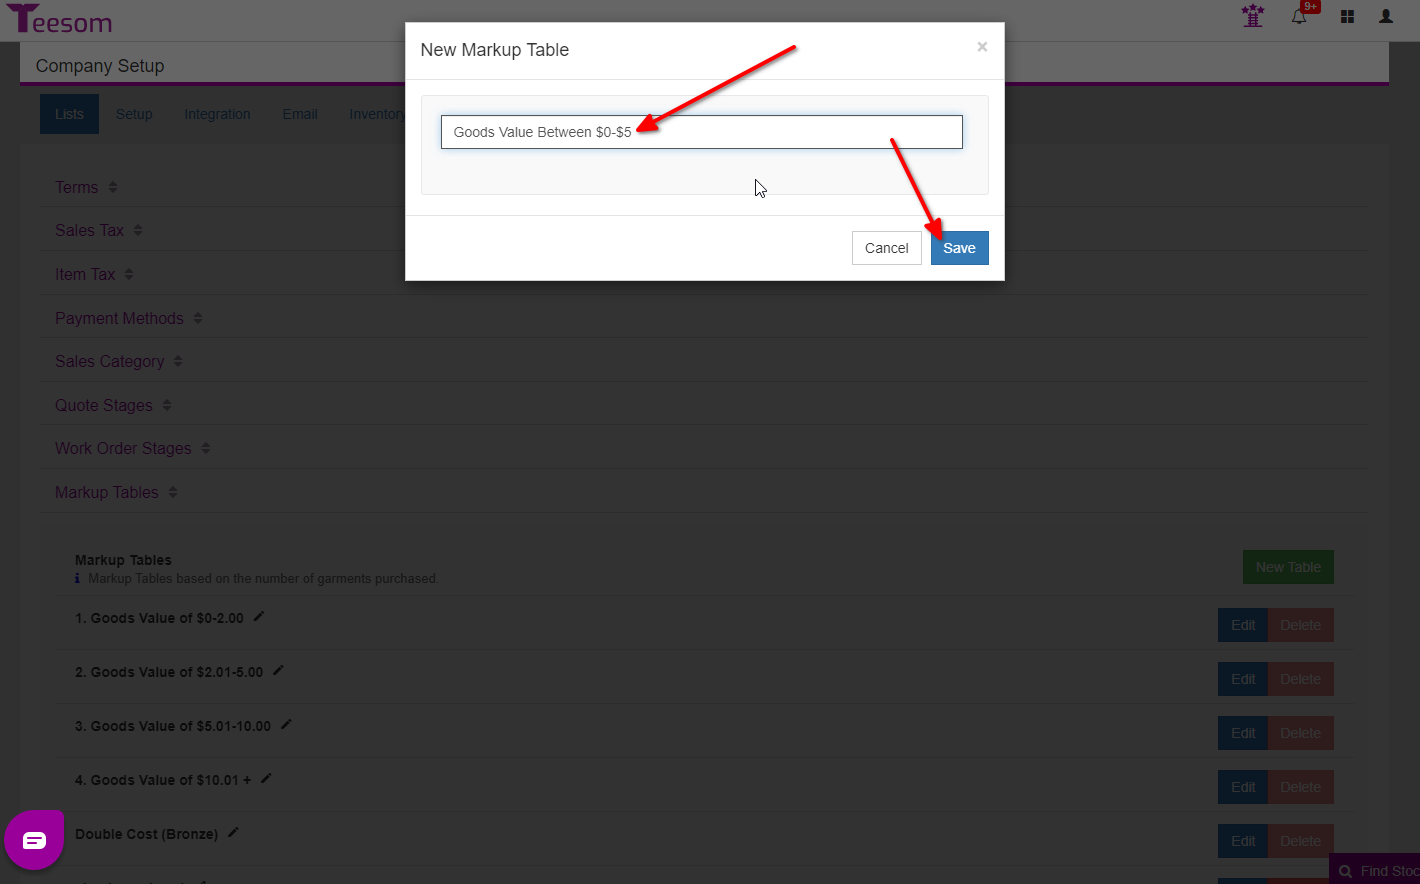
Give your markup table a name, for example: we have called ours “Goods Value Between $0-$5”:
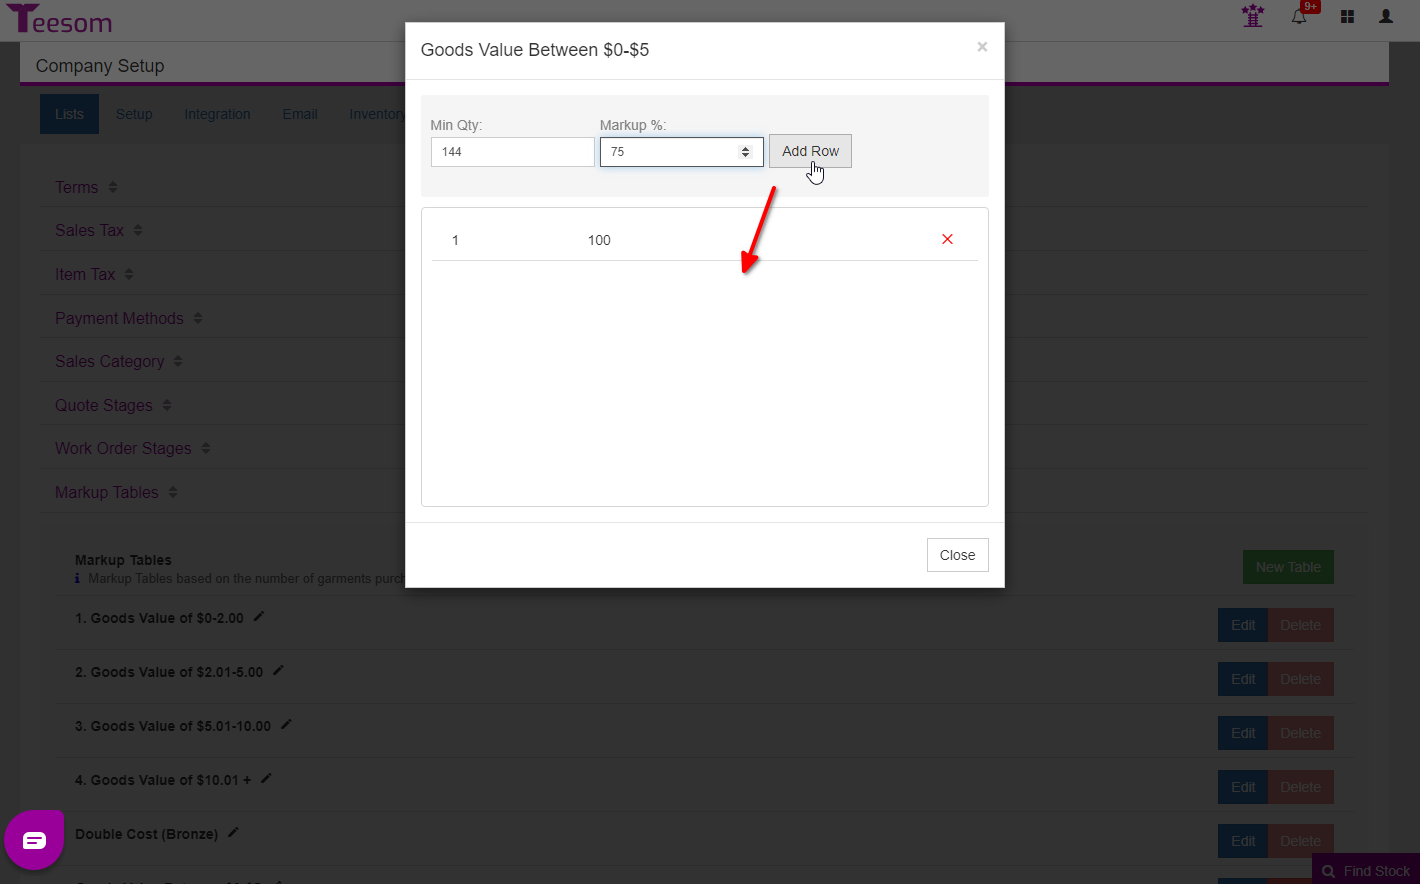
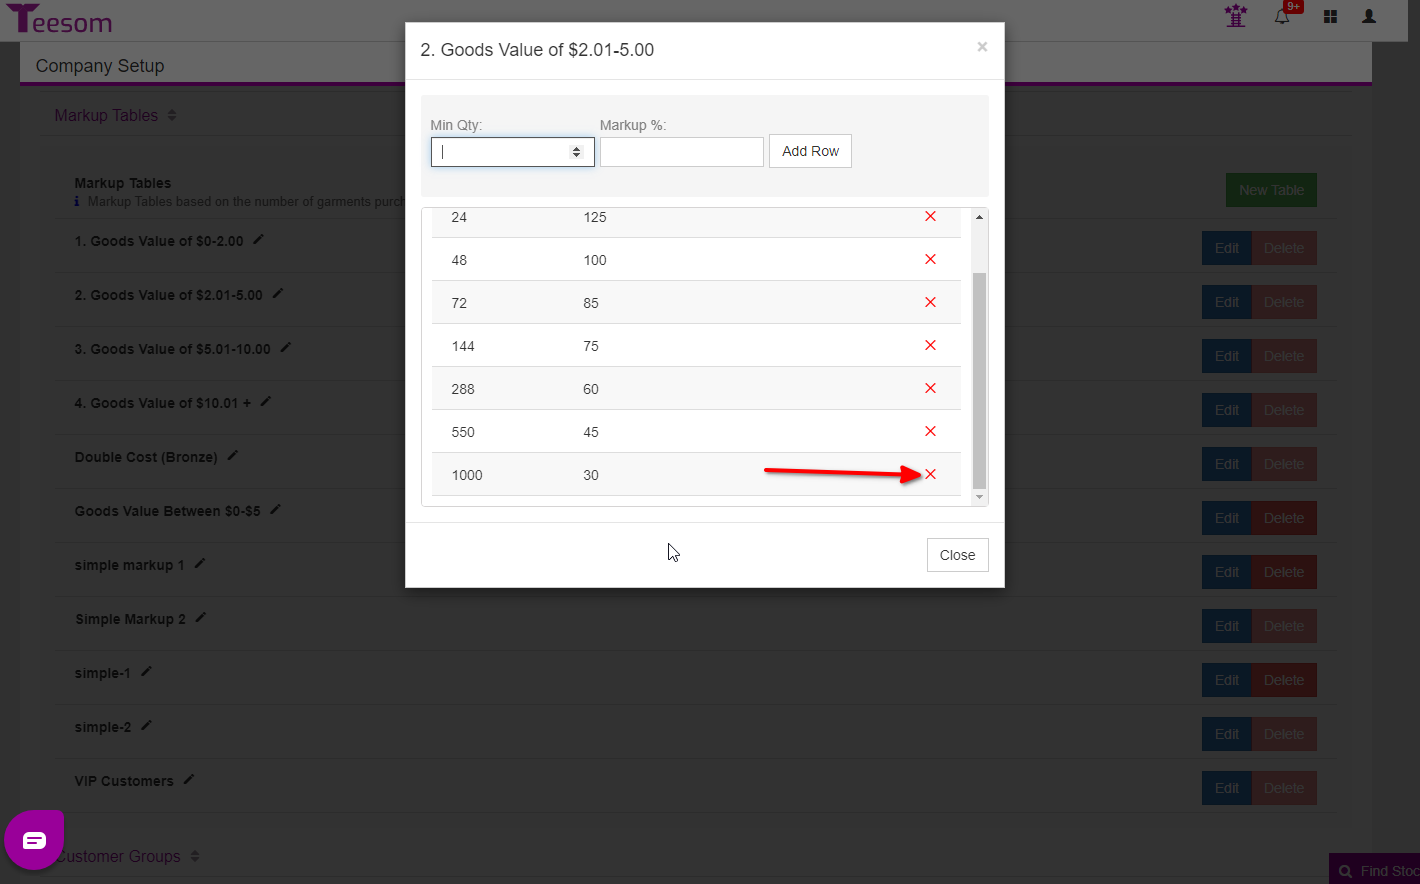
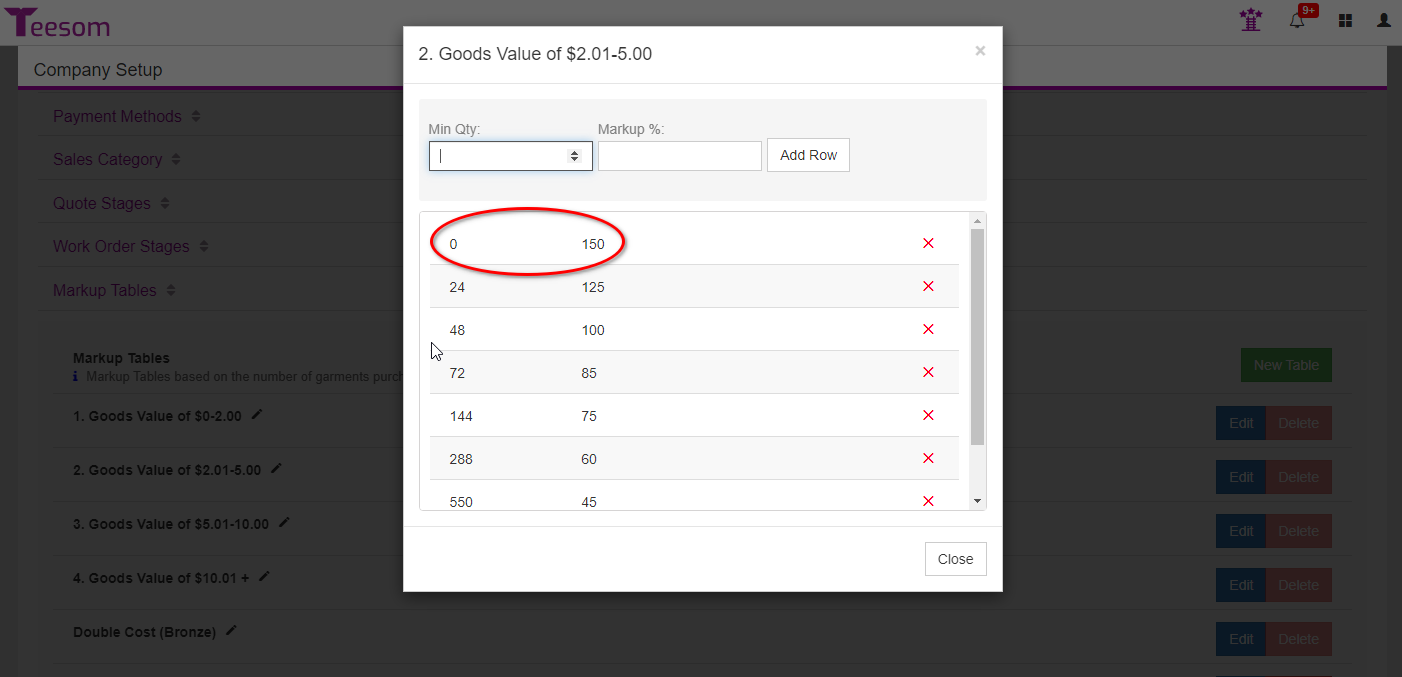
Enter the quantity breaks and the required markup percentage at each quantity break:
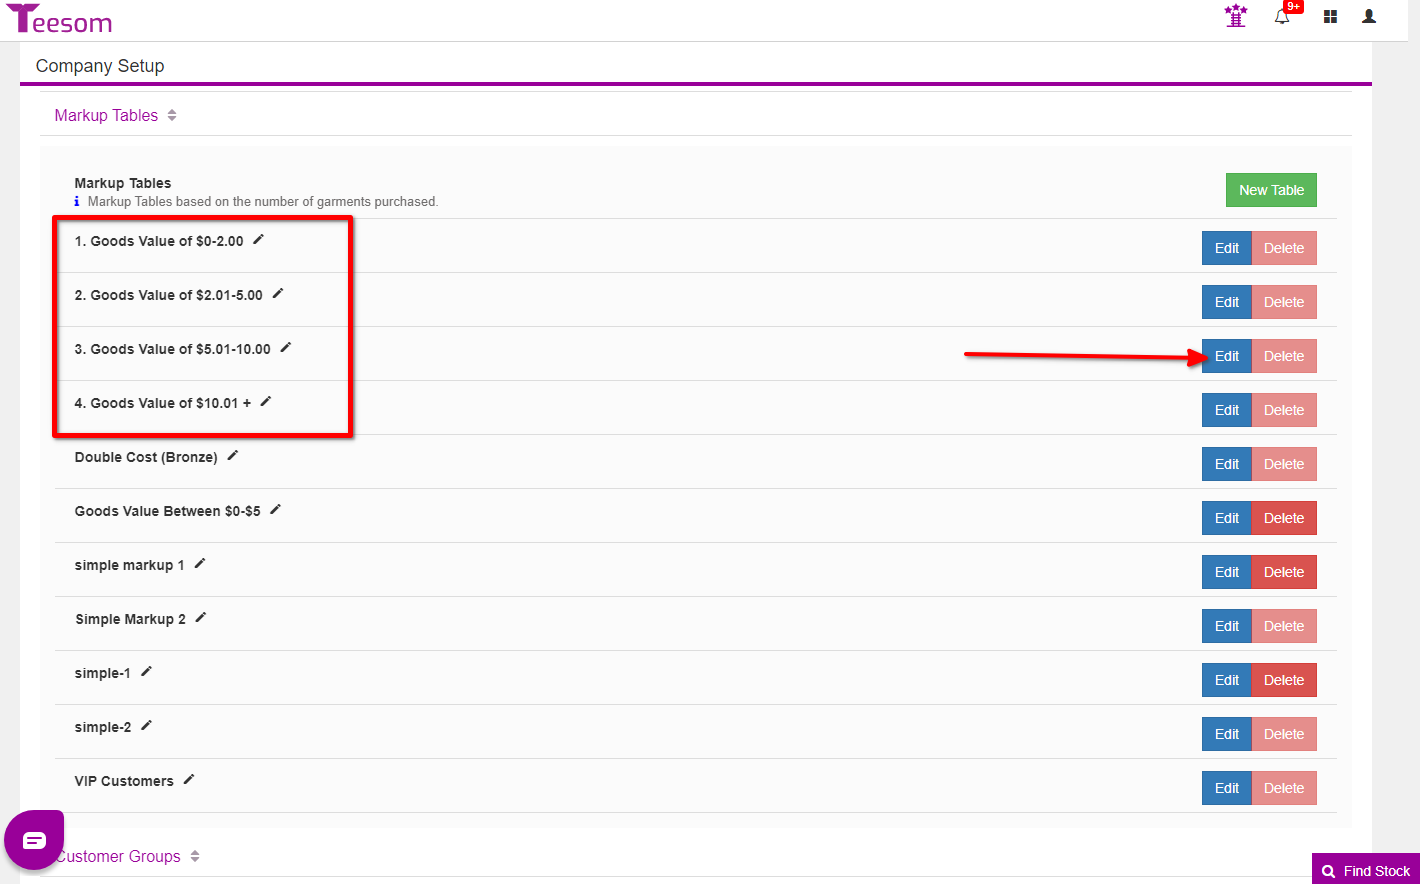
You should end up with a series of markup tables, each intended for use with products at different cost levels.
Feel free to edit the existing sample tables that are shipped with Teesom:
Remove unwanted rows with the red “X“:
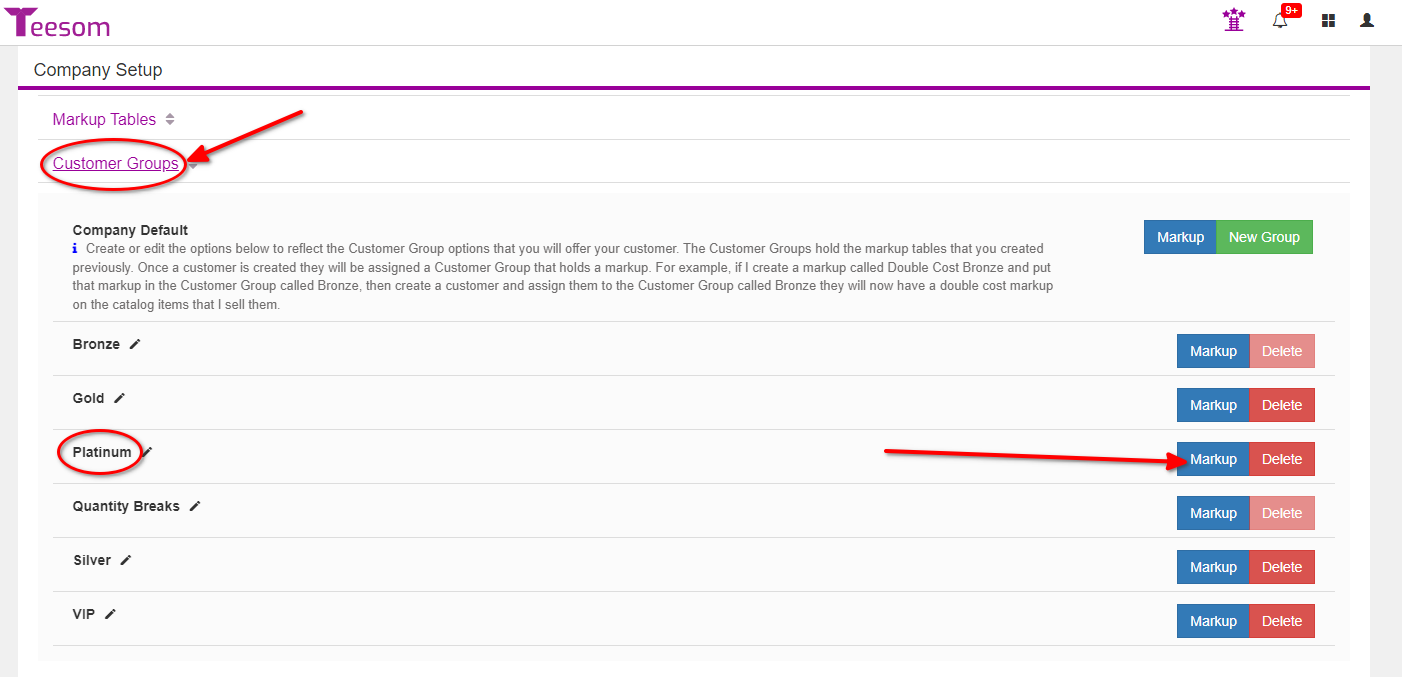
Assign Markup Tables To Customer Group
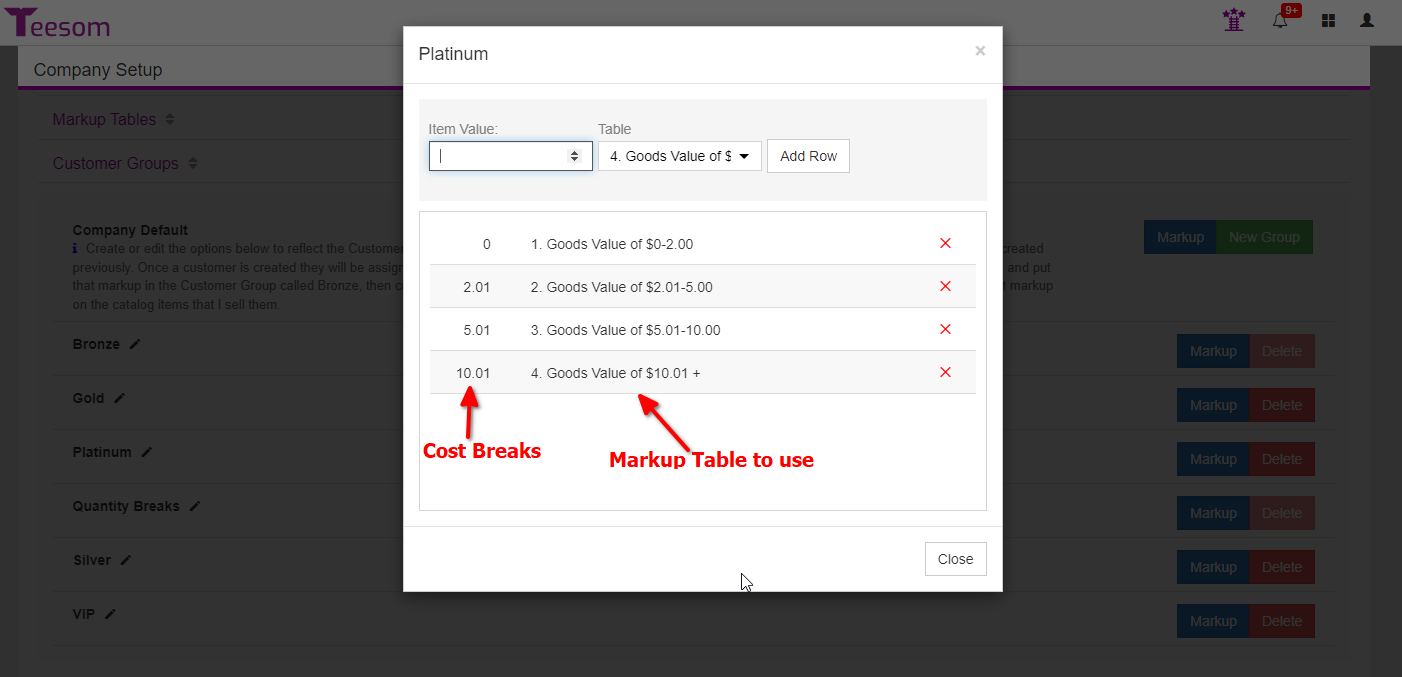
Now we will assign a set of markup tables to a customer group. The customer group is where you actually set the “Cost breaks”.
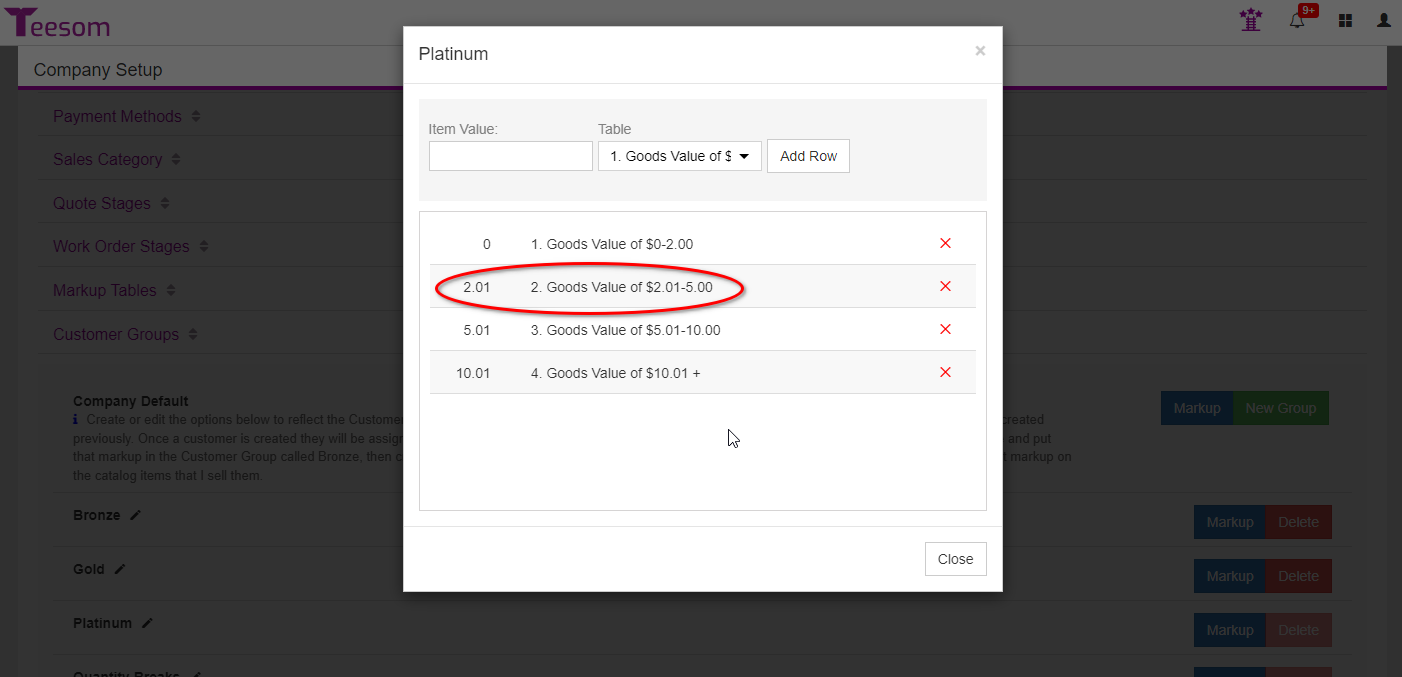
Expand “Customer Groups“, then next to the group name click on “Markup“:
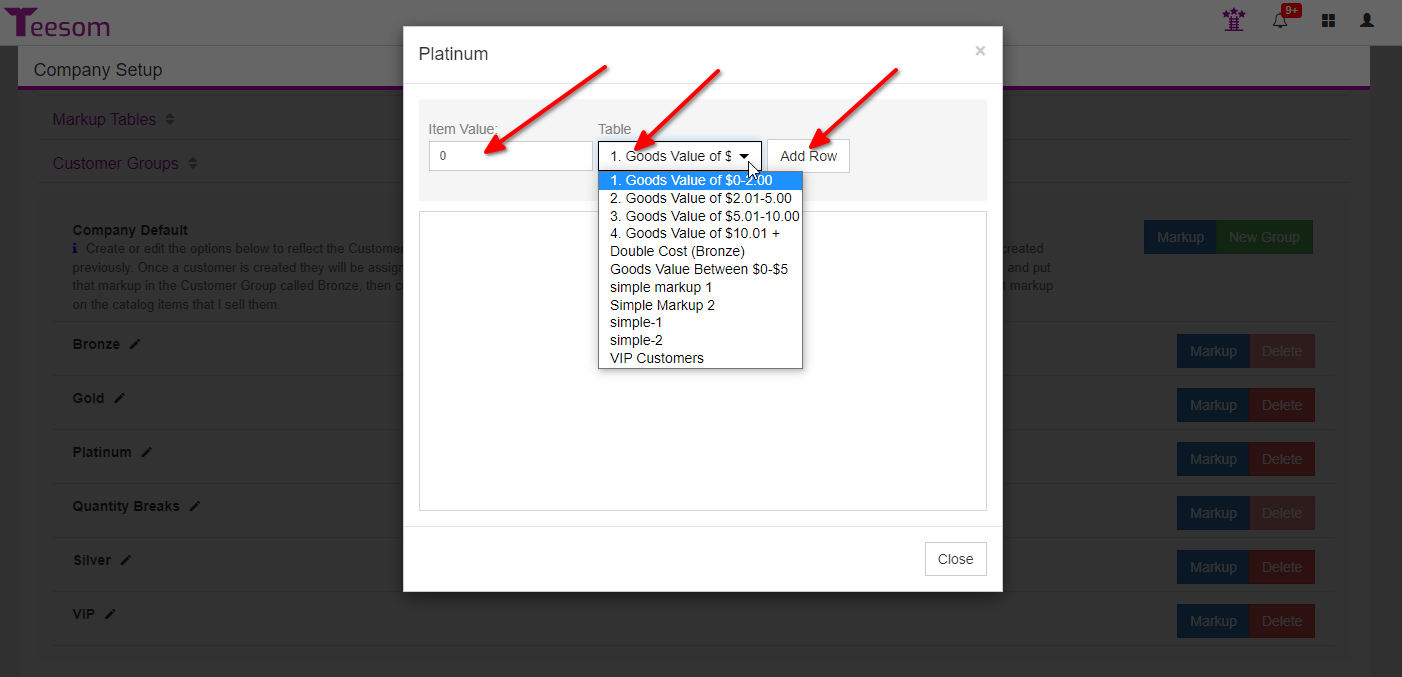
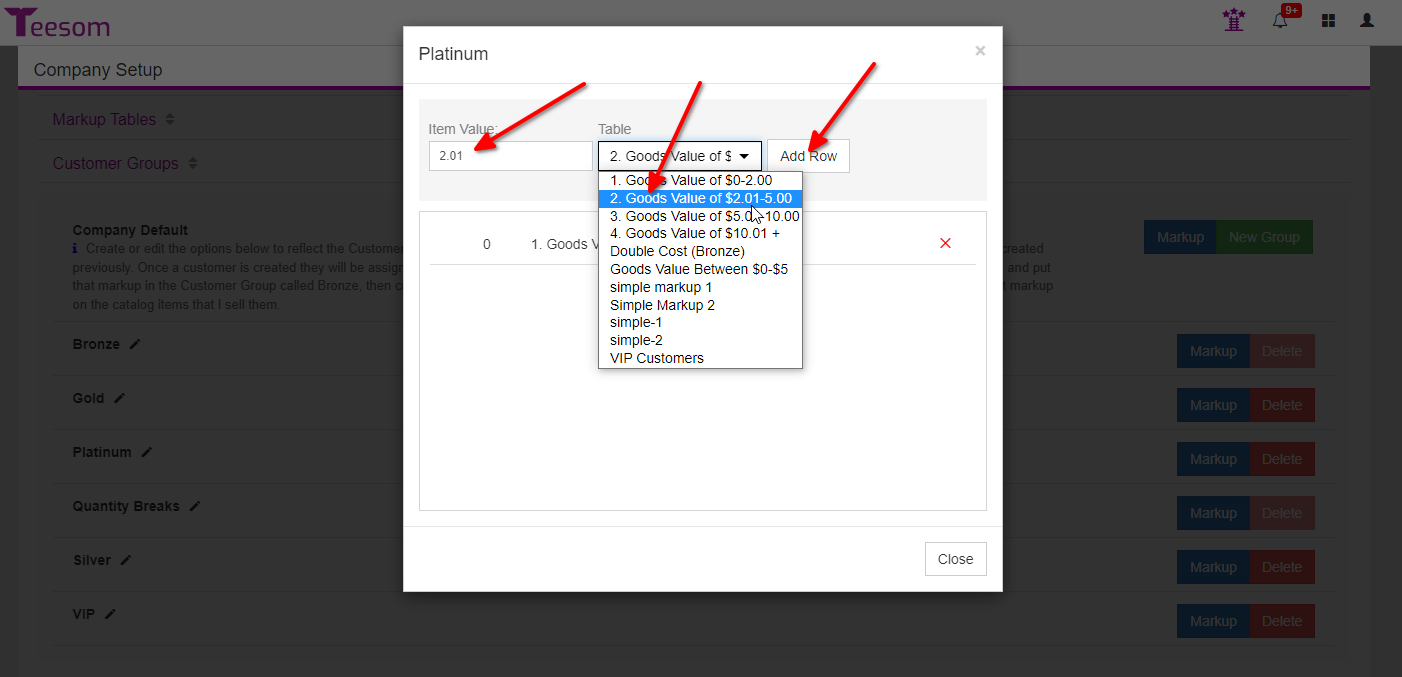
Enter the starting cost amount under “Item Value”, then select the markup table which will be used for those goods. (Always start with a minimum item value of 0 for your first cost break row.)
Now enter the starting value of the next cost break and select the appropriate markup table.
NOTEIn the example below, if the cost of the item is $2.01 or more, Teesom will select the second markup table from this list and then look at the quantity to determine the final markup.
Assign A Customer To The Group
Good Job.
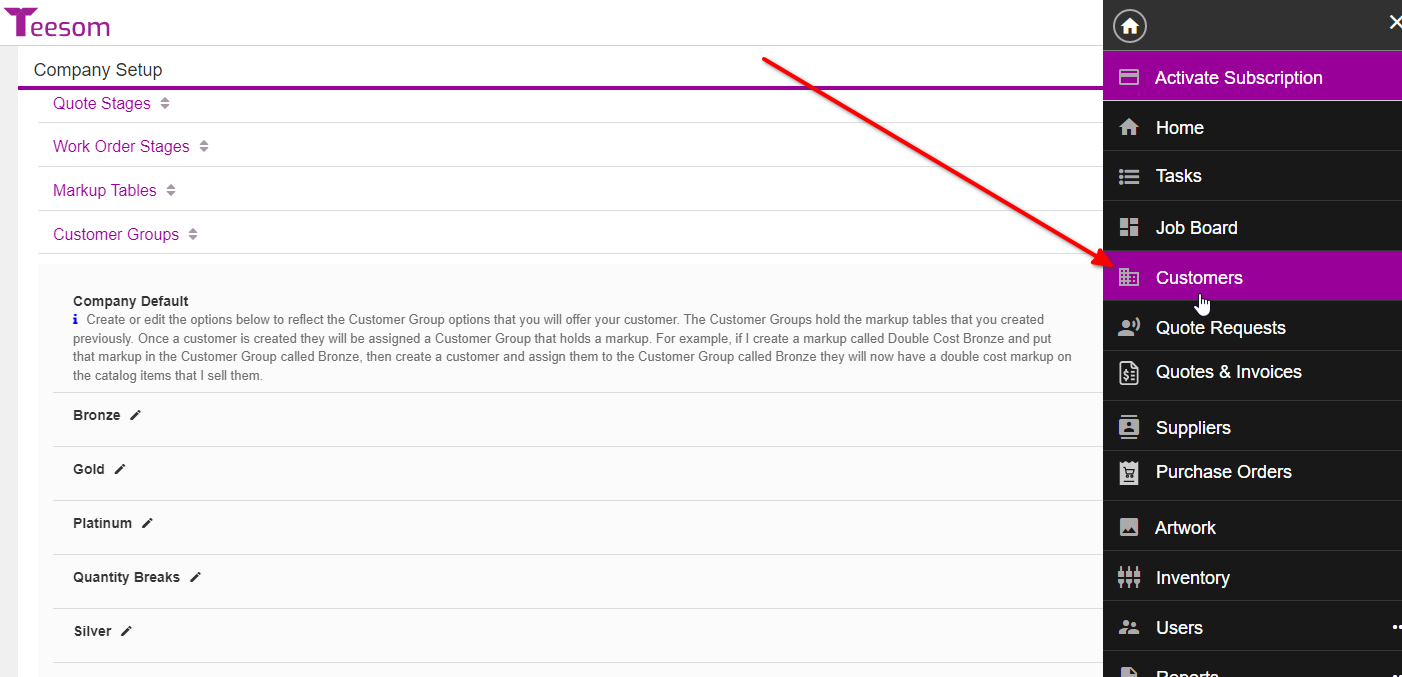
Now let’s assign a customer to this customer group:
Go to the ‘Customers’ page via the main menu.
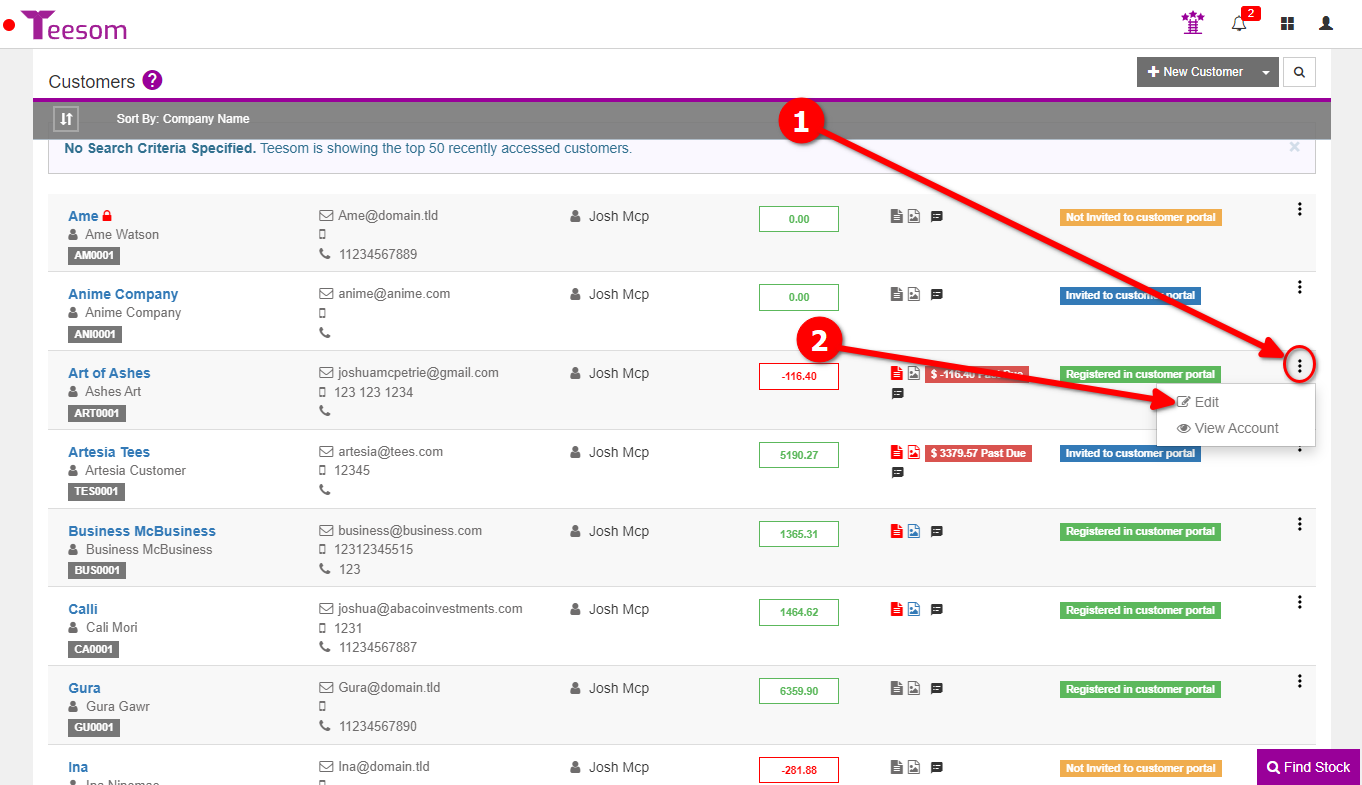
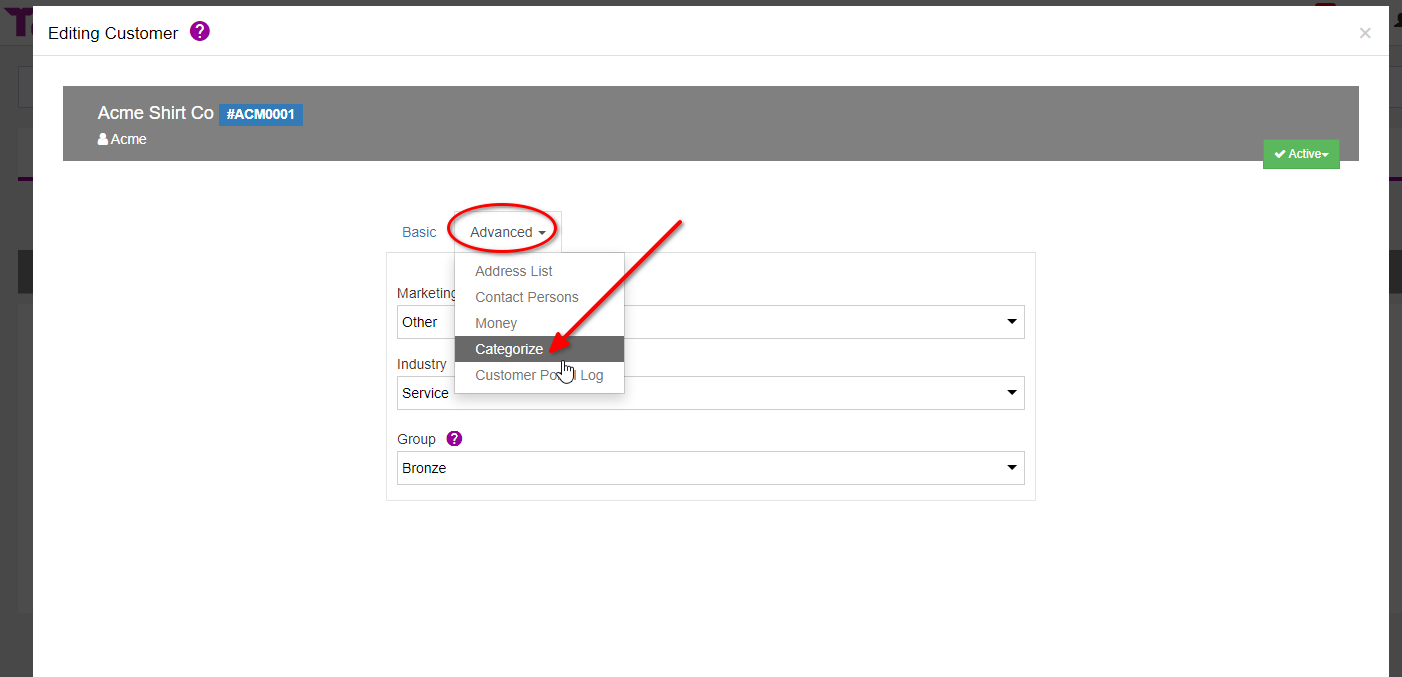
Click the ‘3 Dot’ menu for a customer and select ‘Edit’.
Click the ‘Advanced’ dropdown and select ‘Categorize’.
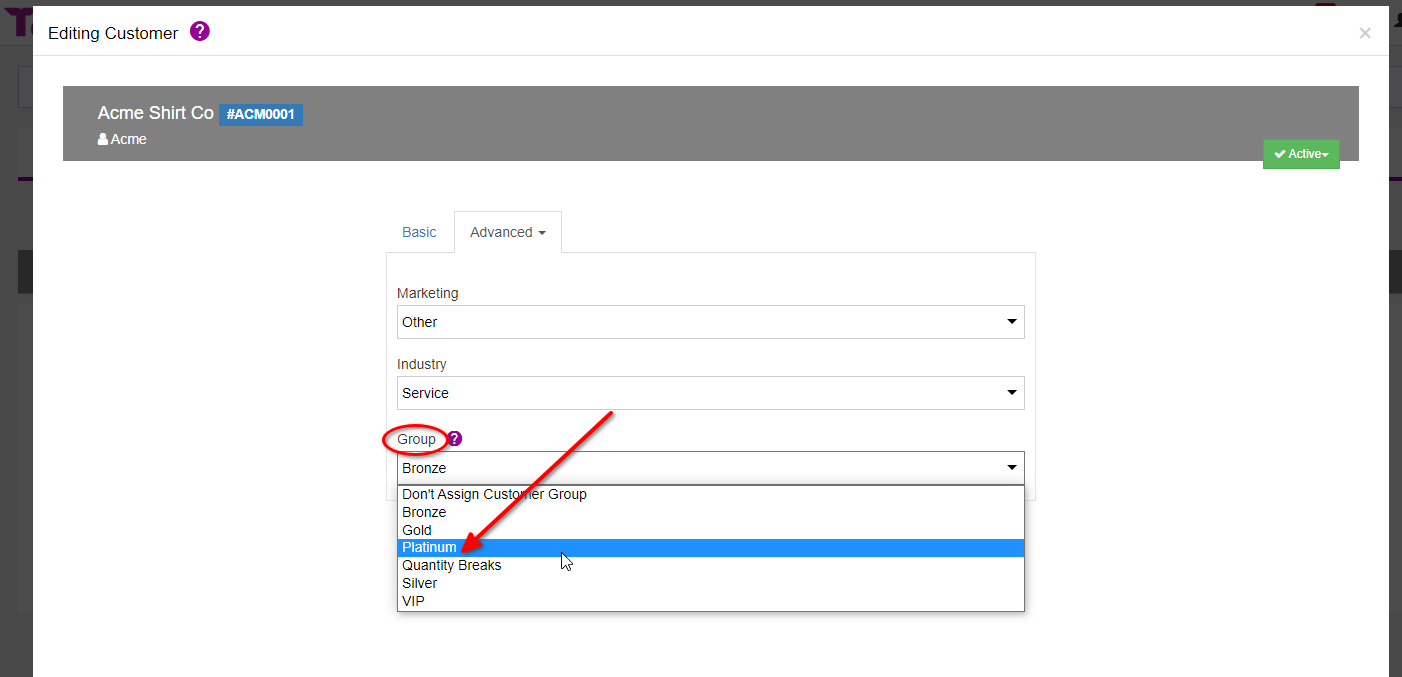
Then under ‘Group’ use the dropdown to select your customers new group.
You can also change the default 'Customer Group' on the 'Company Setup' page under defaults.
Test It Works Correctly
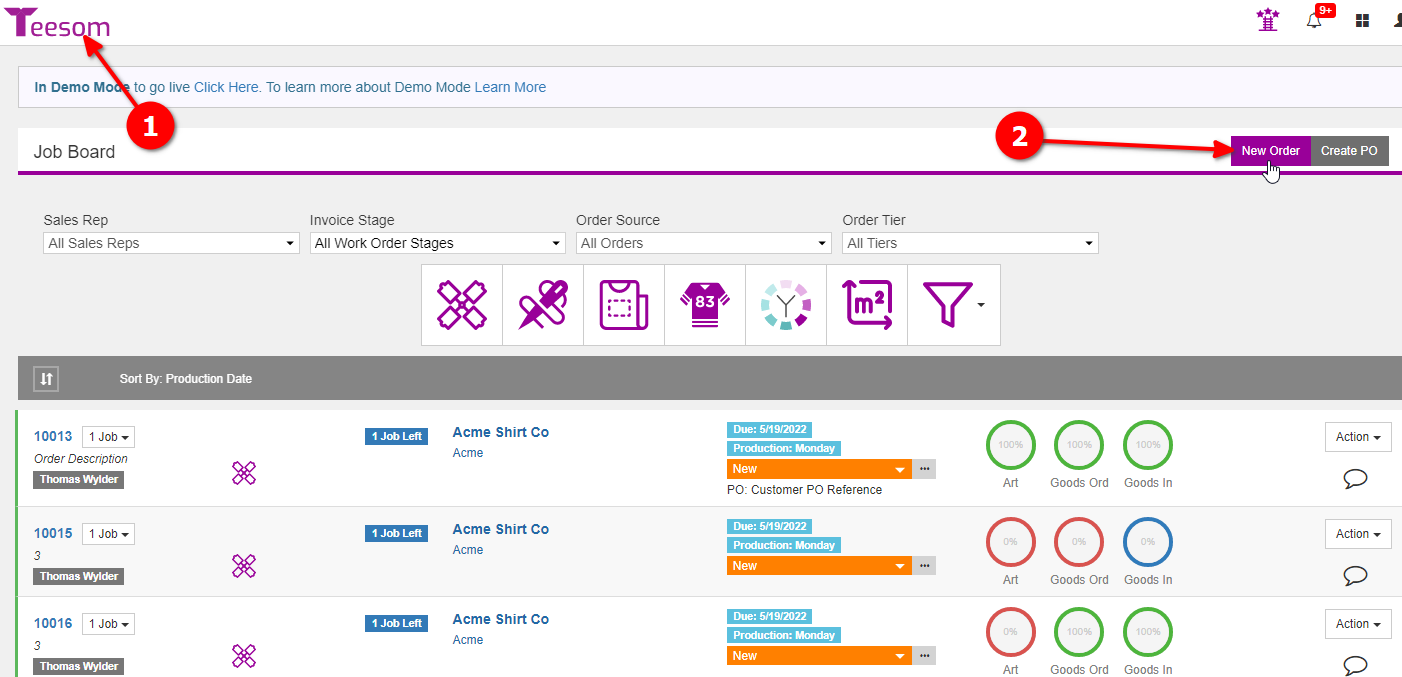
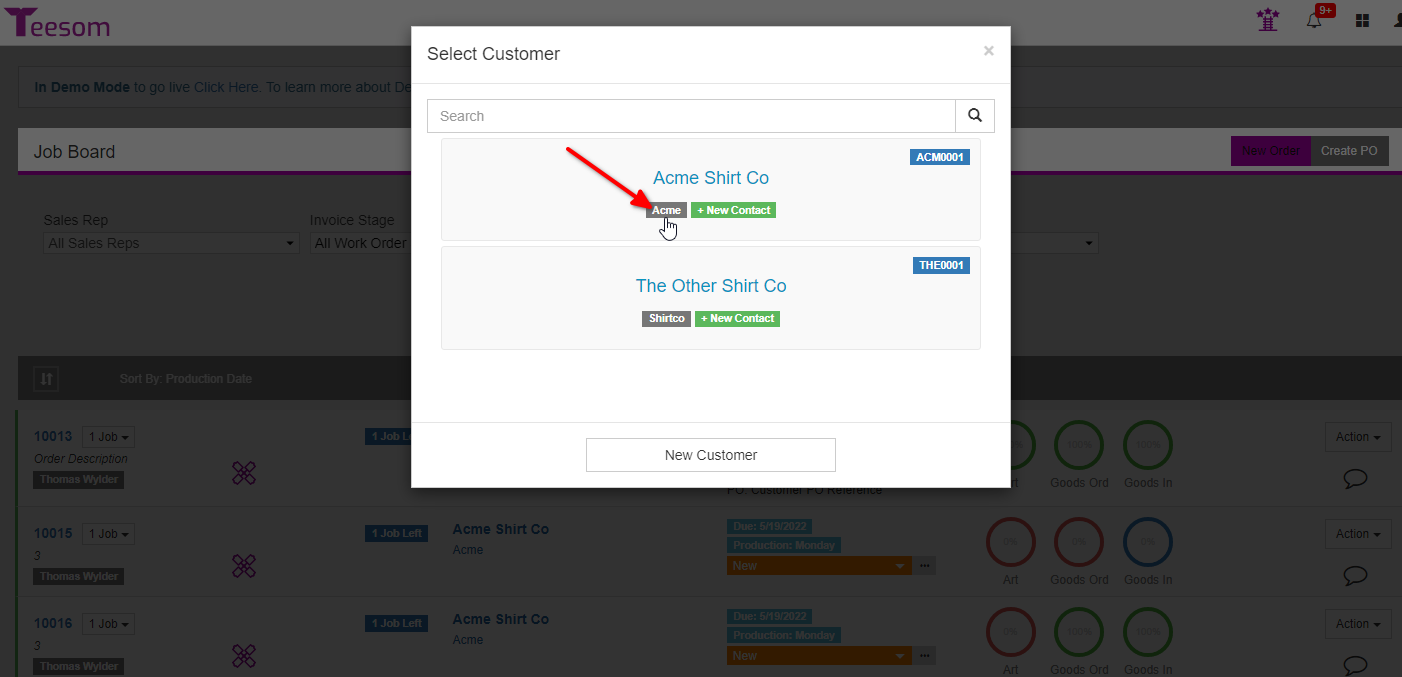
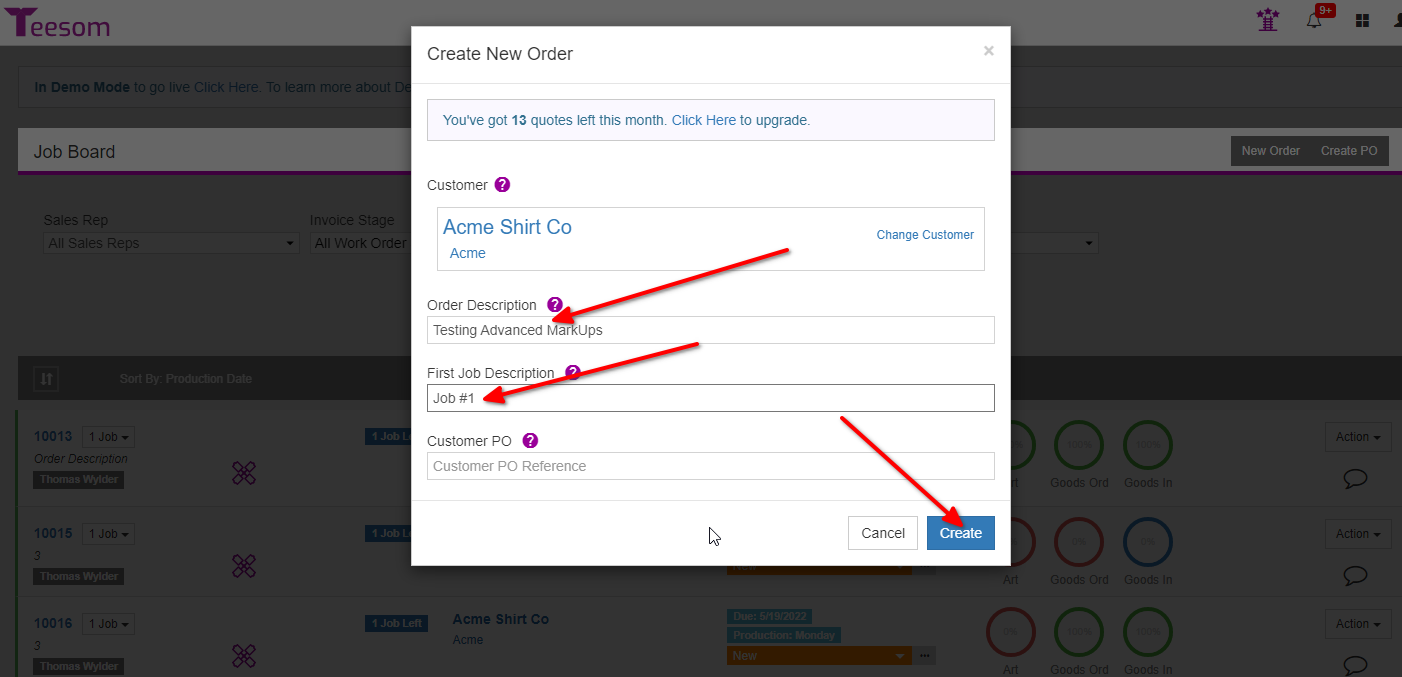
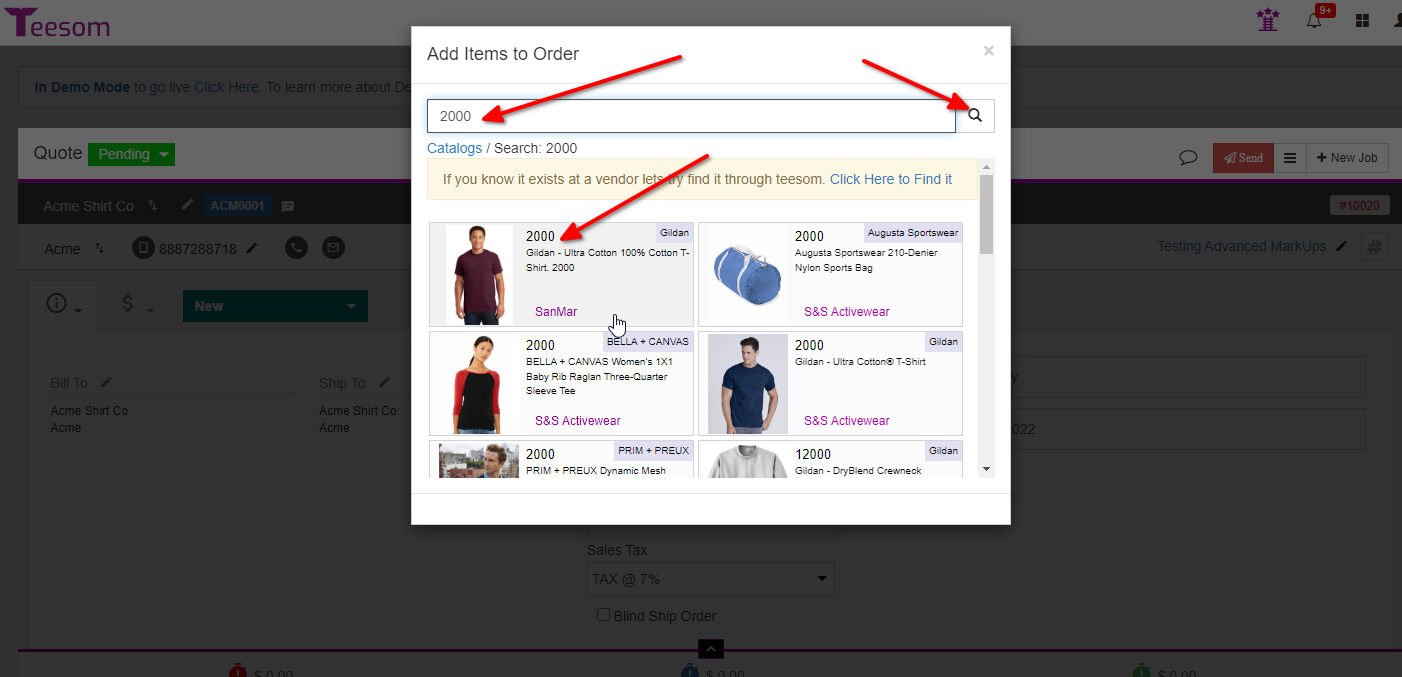
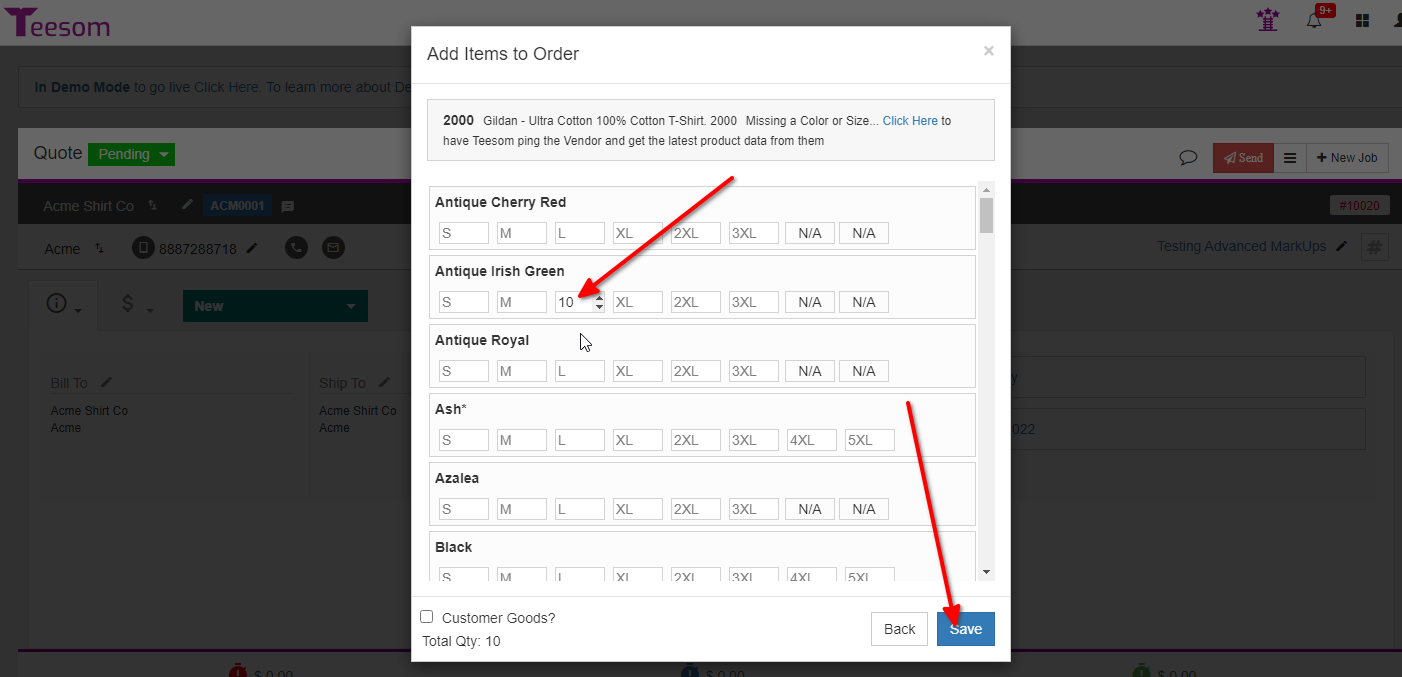
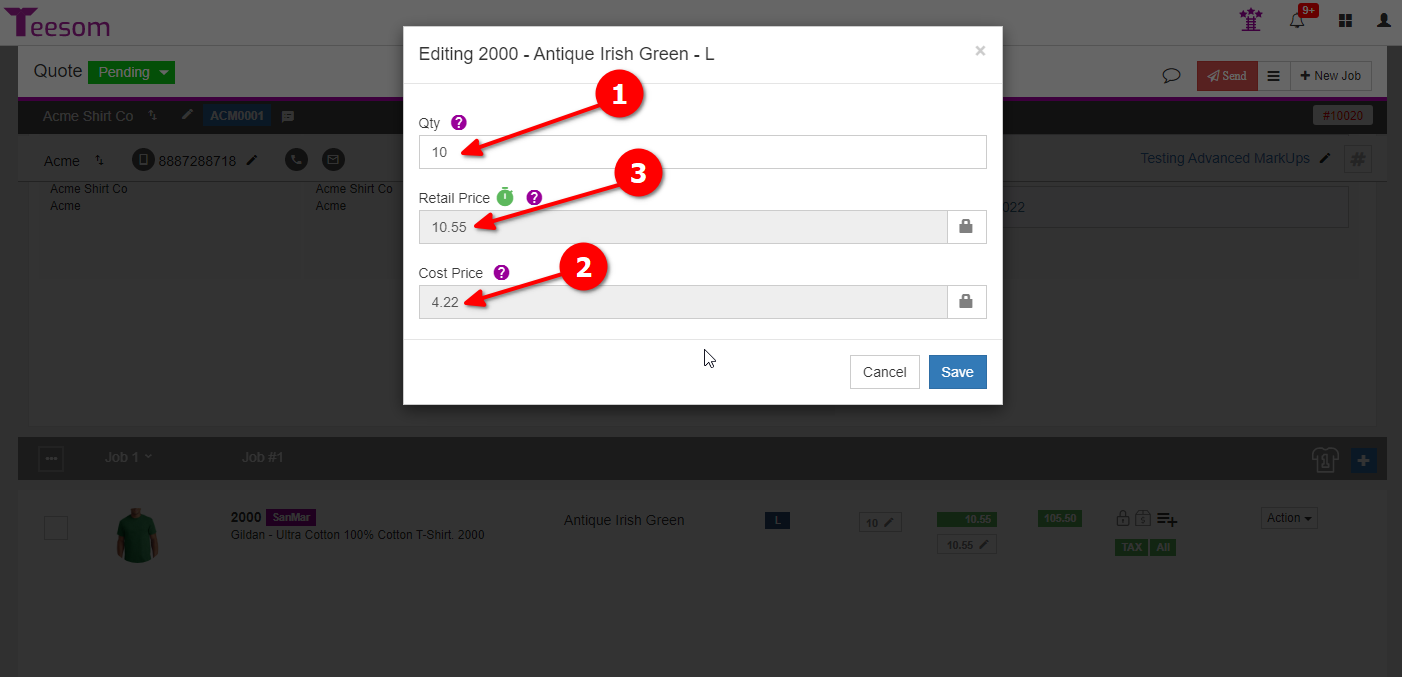
And now we will create a new order for this customer:
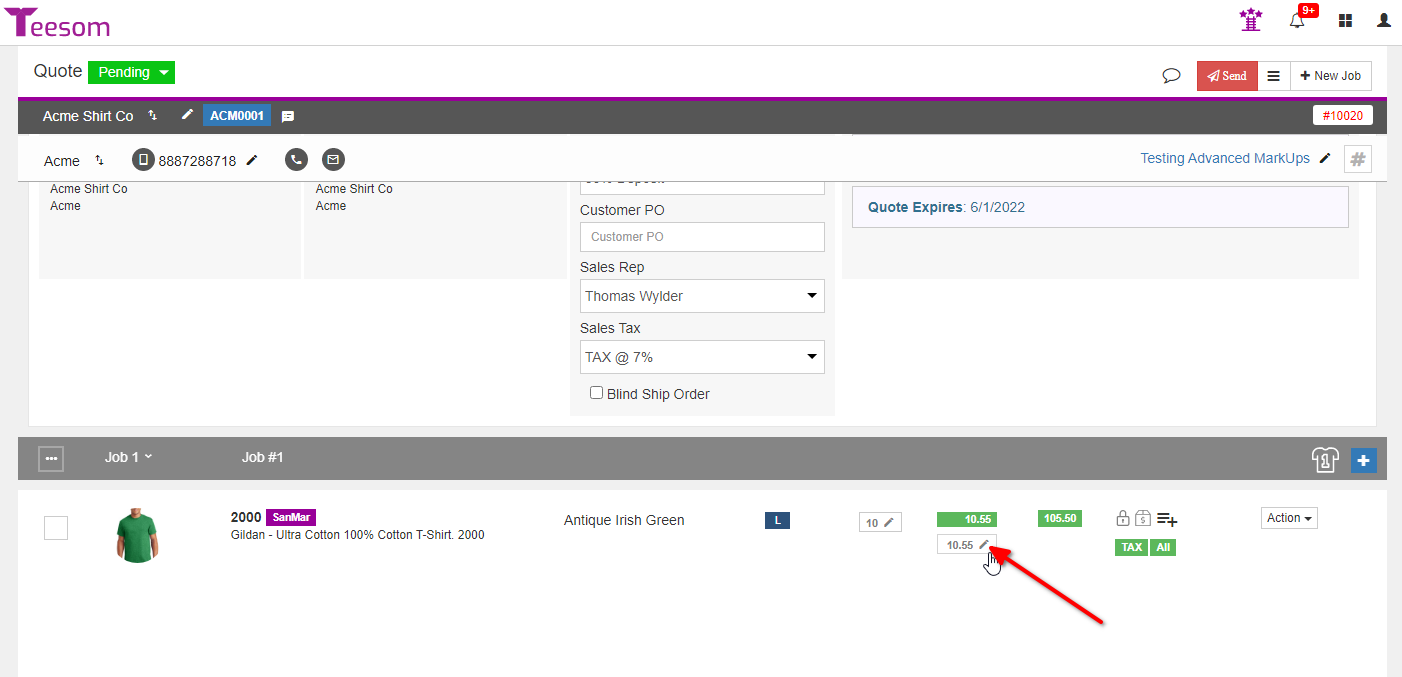
Lets calculate what the markup on this item was:
In this example, at a cost of $4.22, Teesom should select the table called: “Goods Value of $2.01-$5.00”.
And at a quantity of 10 the final markup should be: 150%
So – $4.22 + 150% = $10.55
It Works!
NOTE:It chose the quantity of 0 markup due to it representing the 0-23 quantity break. So any item with a quantity between 0 and 23 will use that row and any item with a quantity between 24 and 47 will use that row etc.