There are two places that you can create artwork from, they are the order and artwork list.
We will show you how to create artwork from both places in this article.
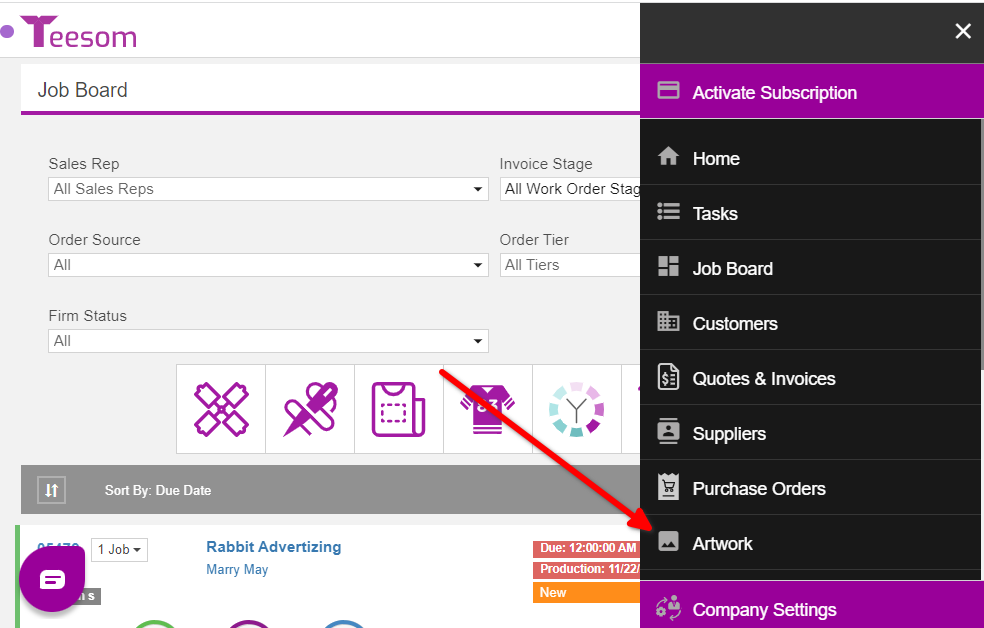
Create Artwork From The Artwork List
To create artwork from the “Artwork List”, go to the “Main Menu” and select “Artwork”:
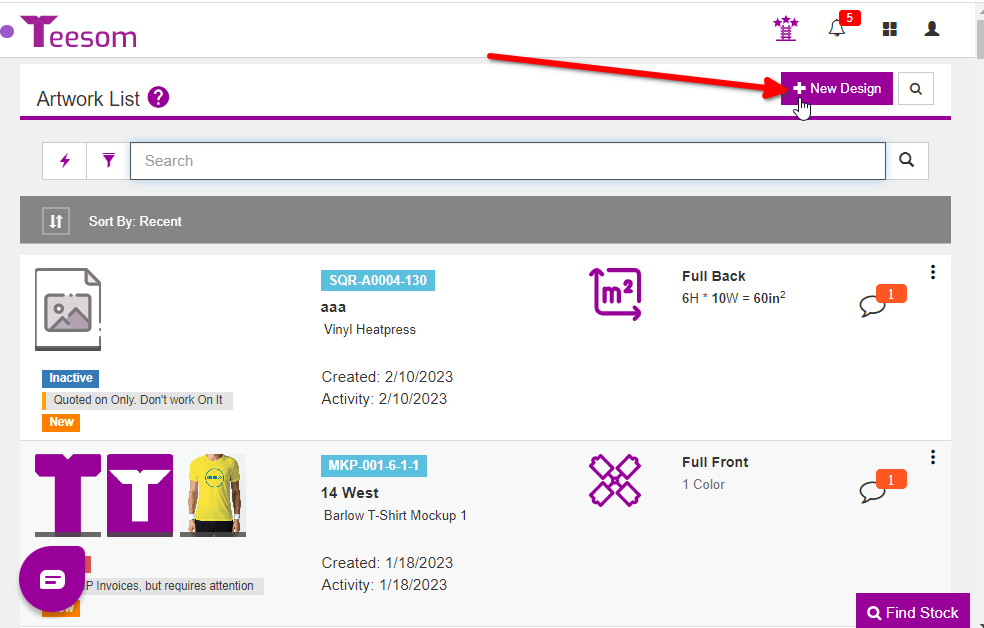
On the “Artwork List” click on “+ New Design“
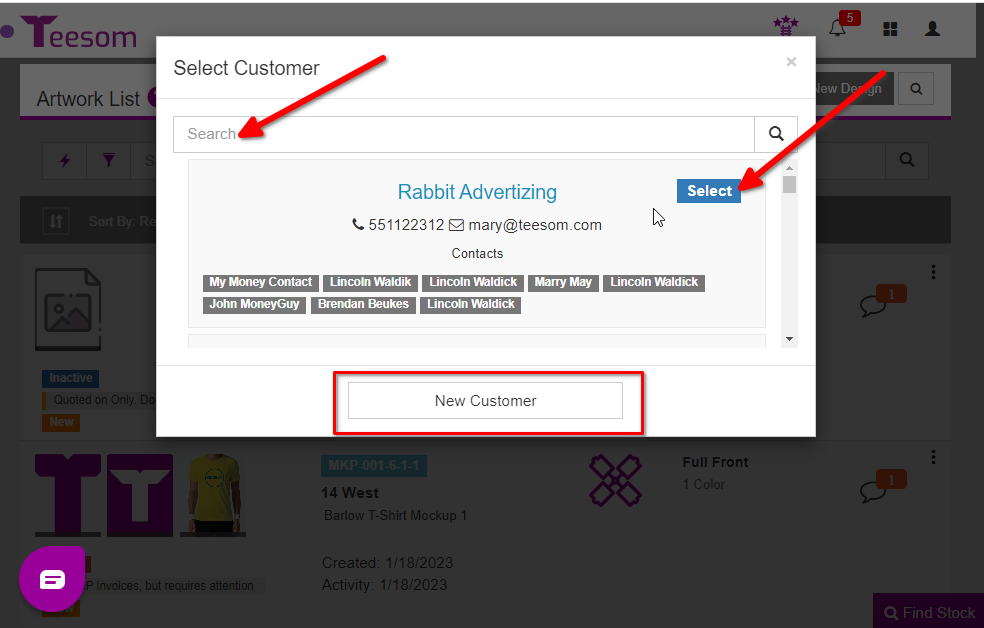
Before creating the artwork you must first link it to a customer. This is because each artwork is unique to the customer. (Though derivative/clone artworks can be made.)
You can enter the customers name into the search bar to find them, then click on “Select“.
Or if you need to click on “New Customer” to create a new customer first.
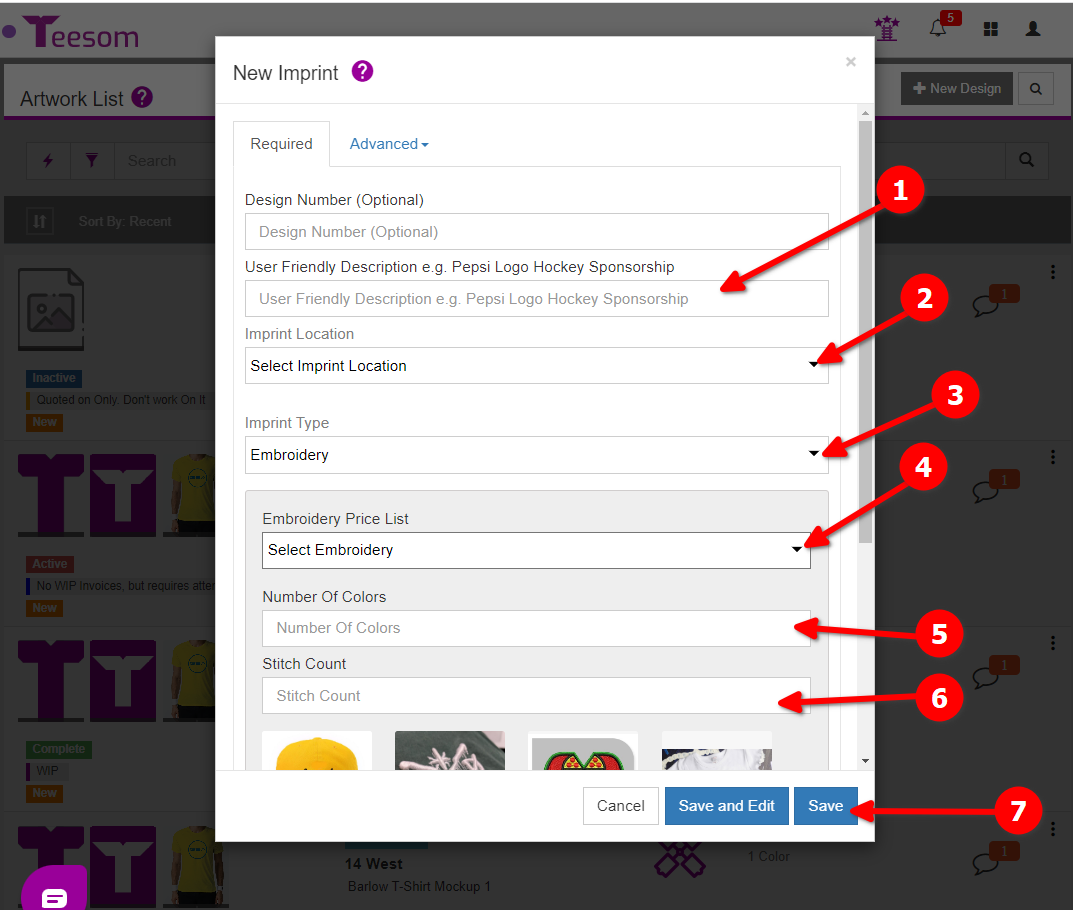
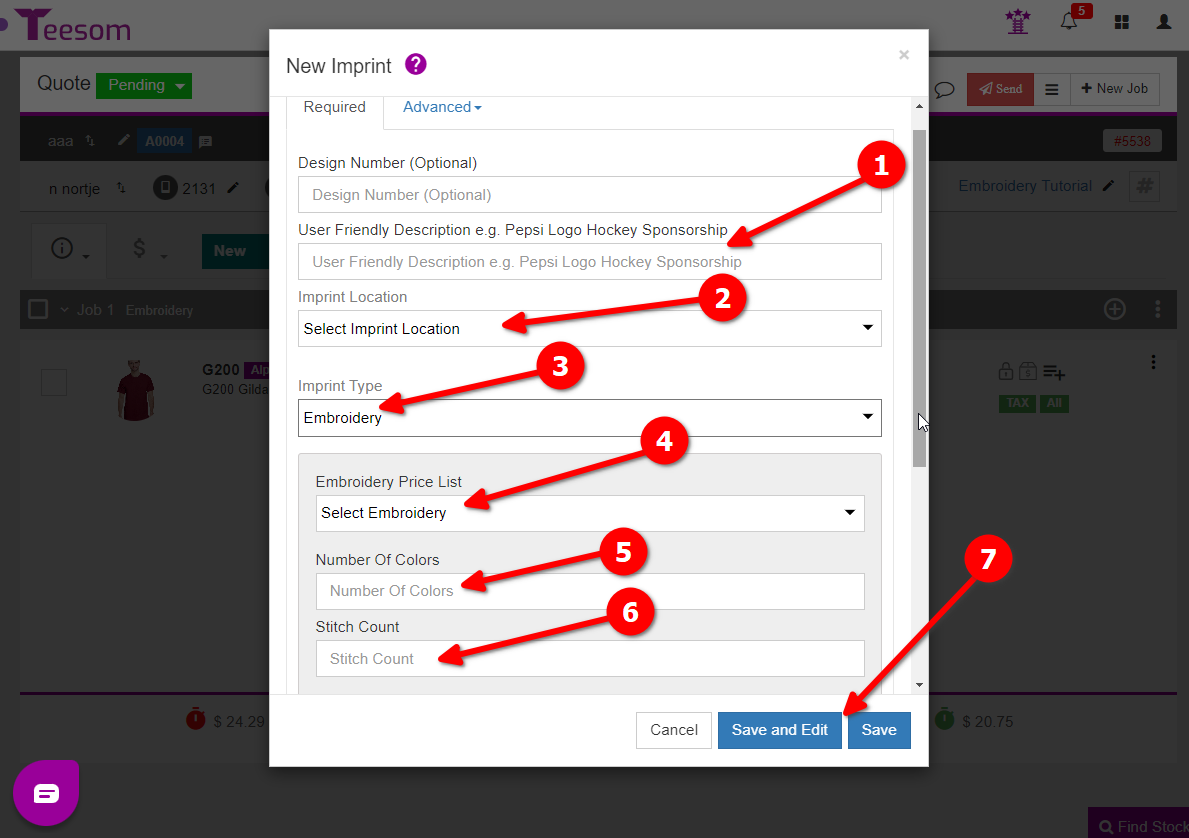
On the “New Imprint” screen:
Enter a description for your imprint.
Select the location of the imprint; front, back, sleeve, etc.
Set the “Imprint Type” to Embroidery.
Select the Embroidery price matrix to use.
Enter the number of colors the imprint is going to have.
Enter the stitch count.
Click “Save” or click “Save and Edit” to add more information to the imprint.
You can enter your own "Design Number", but if you choose not to Teesom will generate one.
To use this artwork on an order you must use the same customer that the artwork is linked to.
Create Artwork From The Order
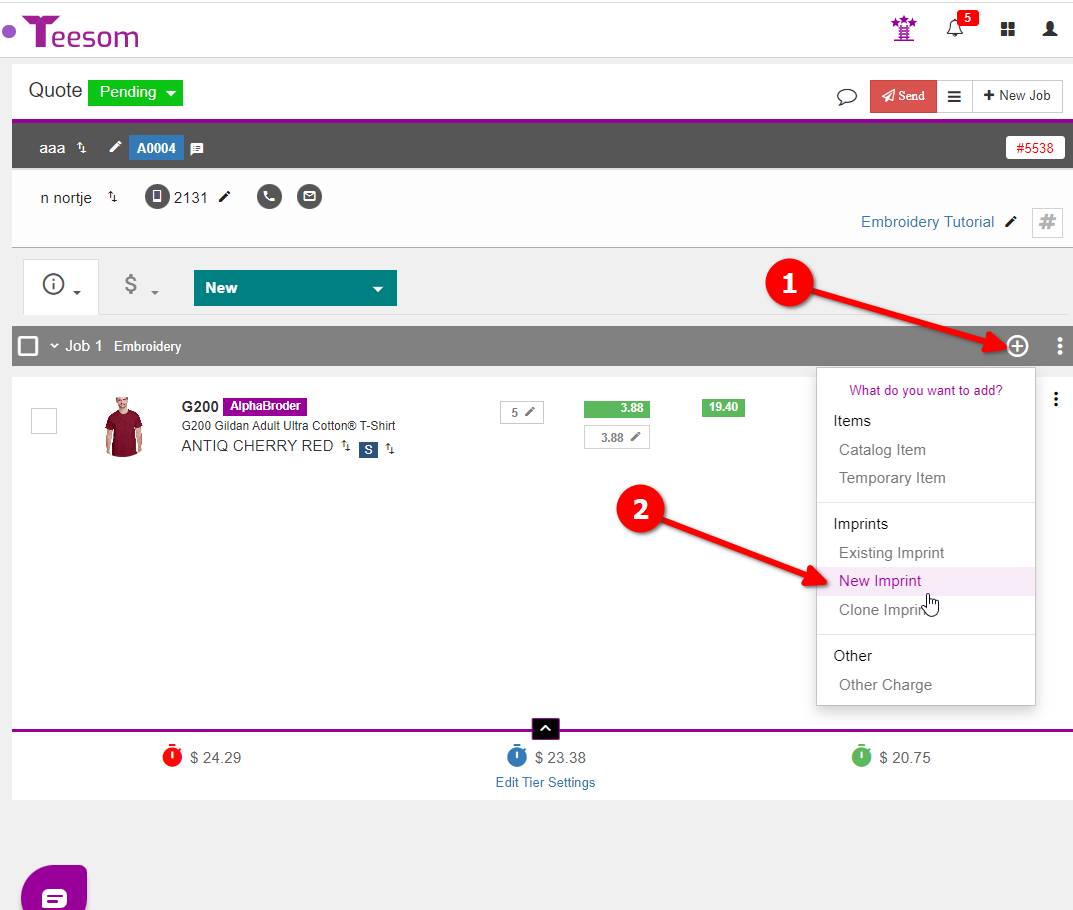
To create artwork on an existing order:
Click on the (+) on a job.
Select “New Imprint“.
On the “New Imprint” screen:
Enter a description for your imprint.
Select the location of the imprint; front, back, sleeve, etc.
Set the “Imprint Type” to Embroidery.
Select the Embroidery price matrix to use.
Enter the number of colors the imprint is going to have.
Enter the stitch count.
Click “Save” or click “Save and Edit” to add more information to the imprint.
Now that you know how to create your artwork we can go ahead with creating the order.