There are times when a customer has a unique item that they will supply rather than purchasing the item from you. Or, maybe it is a contract printer that will be supplying the product to you. Either way it is quite easy to manage these items within Teesom.
When adding Customer Supplied goods Teesom will automatically zero out the price, meaning you would have to manually enter it.
Catalog Item As Customer Supplied Goods
To set a catalog item as a customer supplied good:
Click on the + icon.
Select “Catalog Item”.
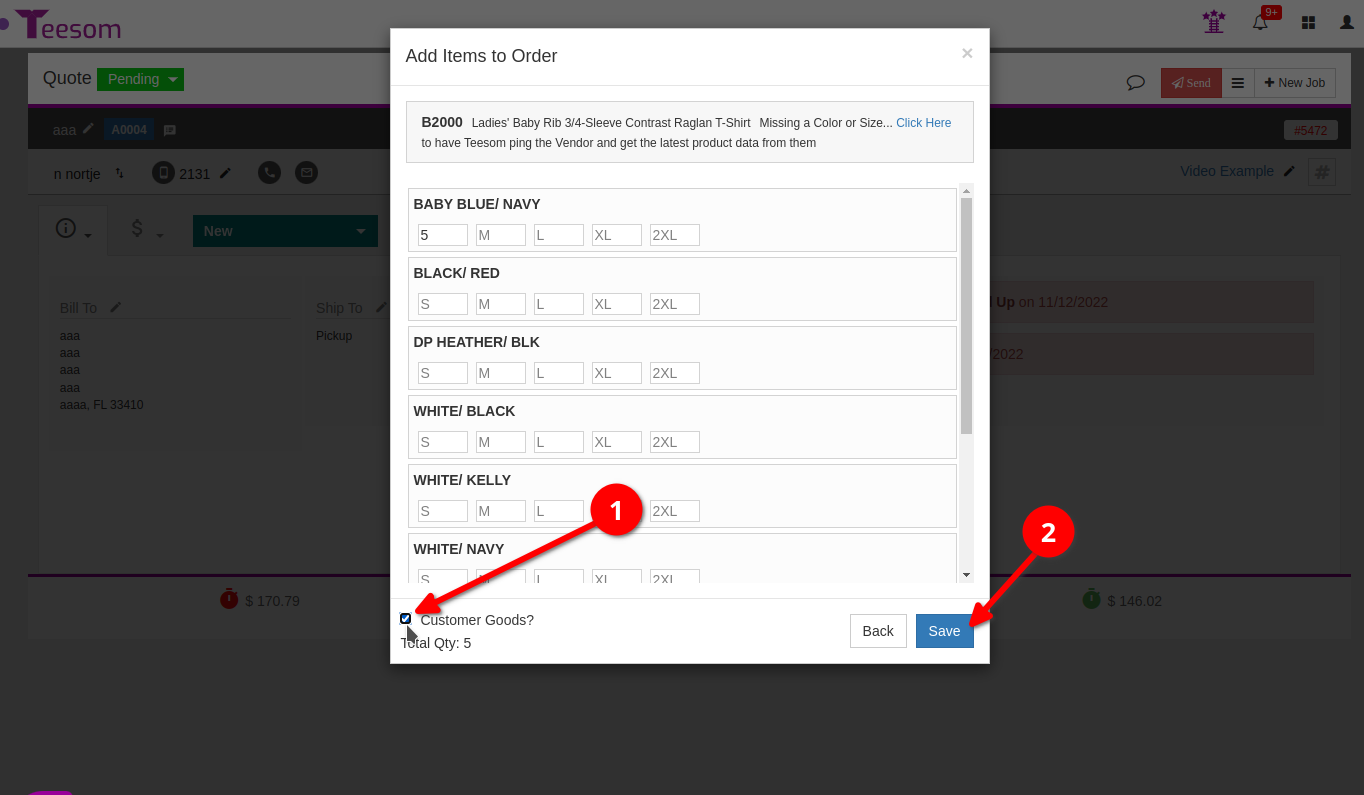
When adding the product:
Check the box “Customer Supplied”.
Click “Save“.
TIP: You can also add your "Own Products" from your own "Custom Catalog" and mark them as 'Customer Supplied' on the order.
It is also possible to mark your Own Catalog as "Customer Supplied" so that when you add any products from it they are immediately set without you having to change it.
Temporary Item As Customer Supplied Goods
To use temporary items as customer supplied goods:
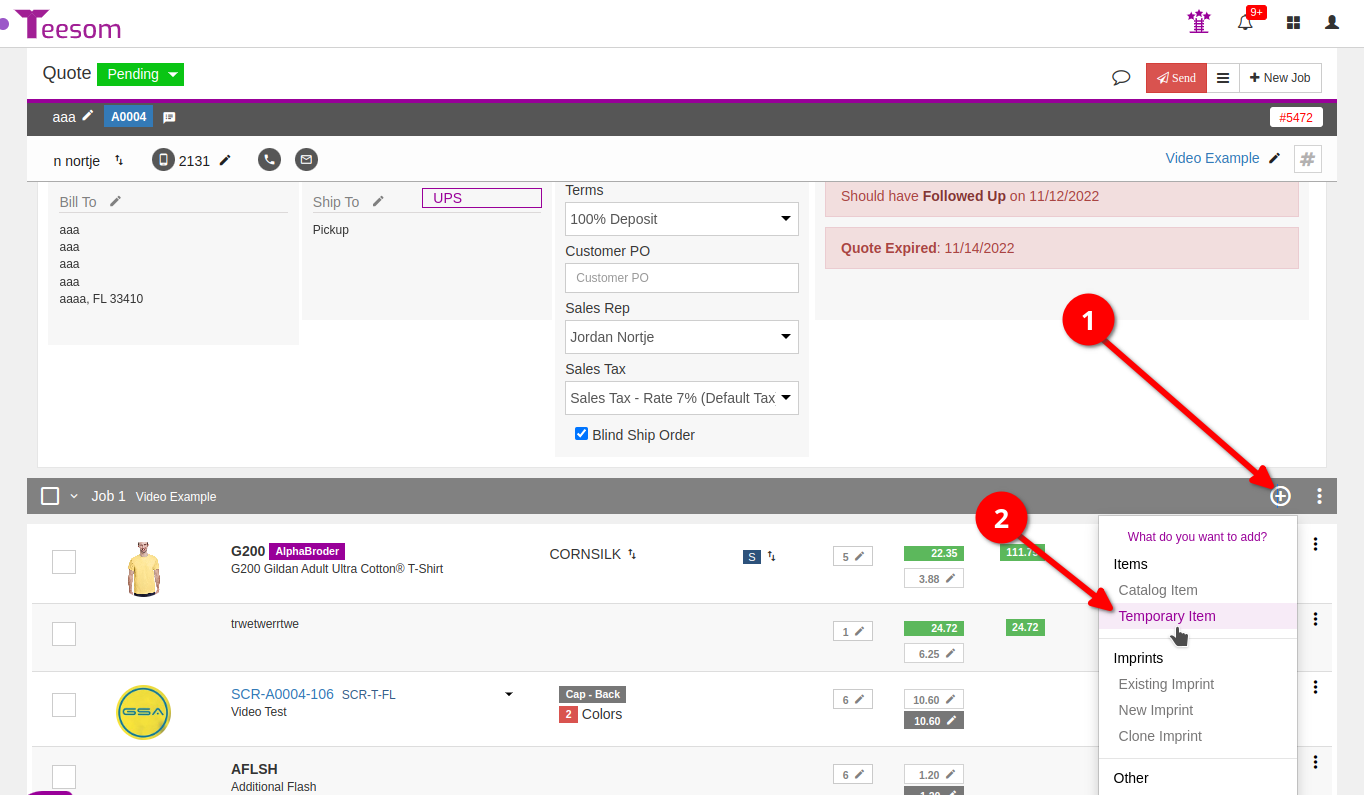
Click on the ‘+’.
Select “Temporary item”.
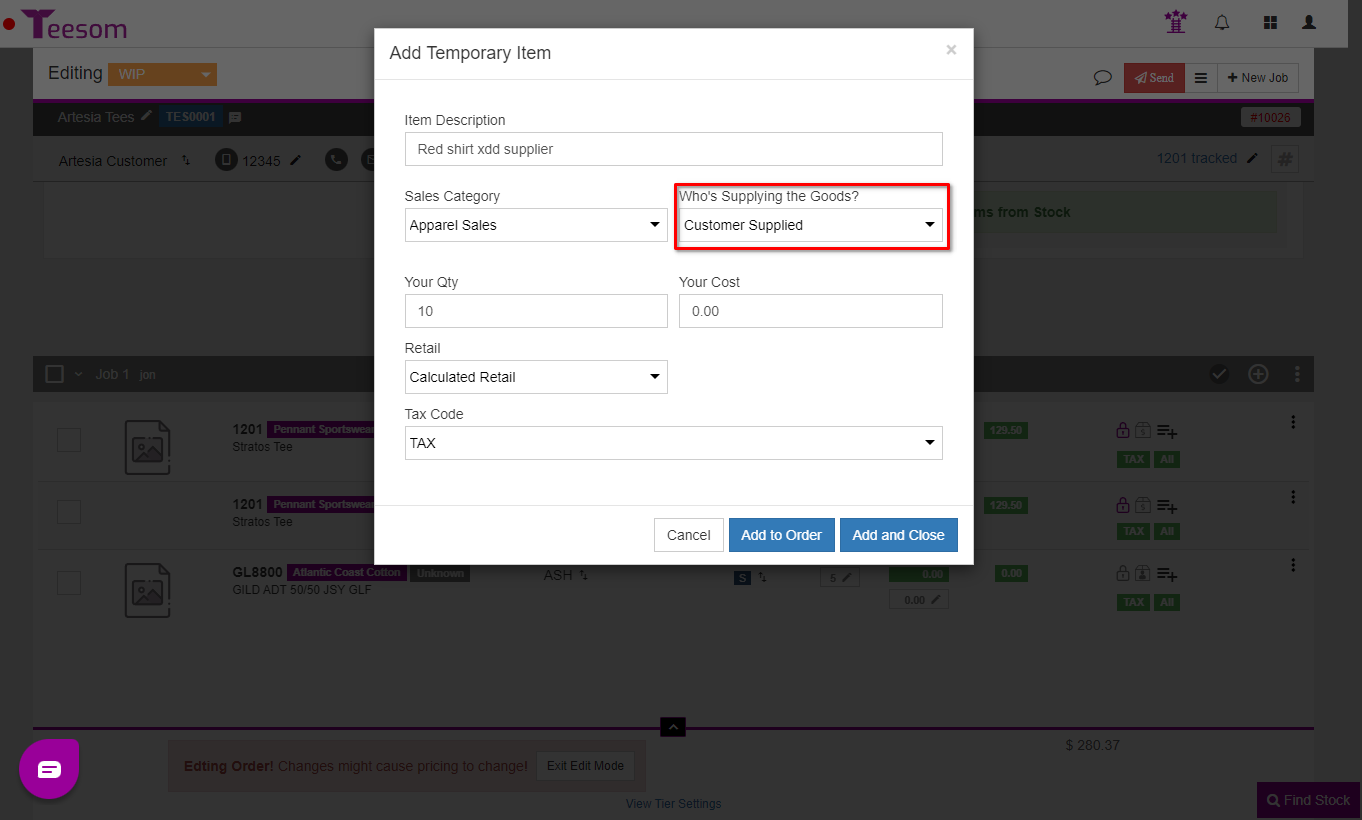
Add the temporary item to the order and set ‘Who’s Supplying’ to ‘Customer Supplied’:
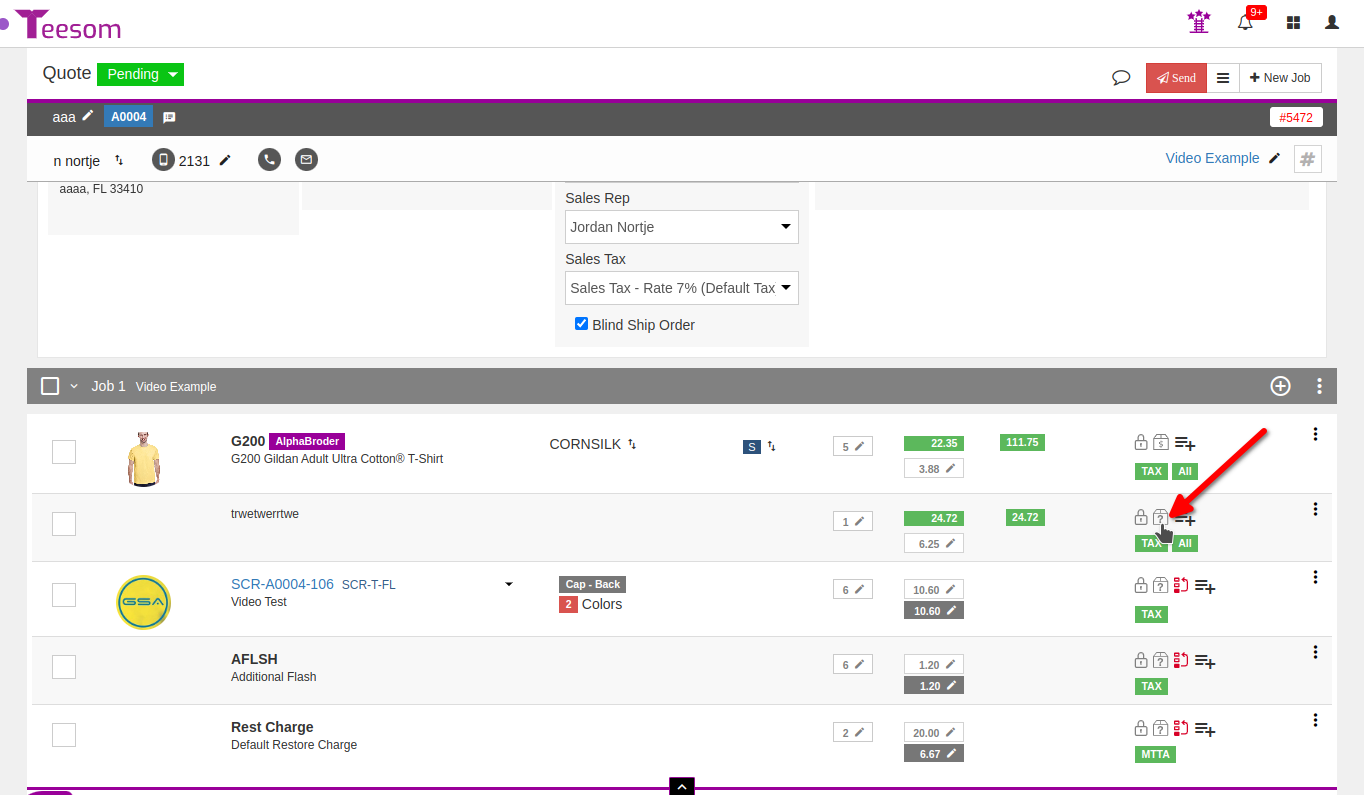
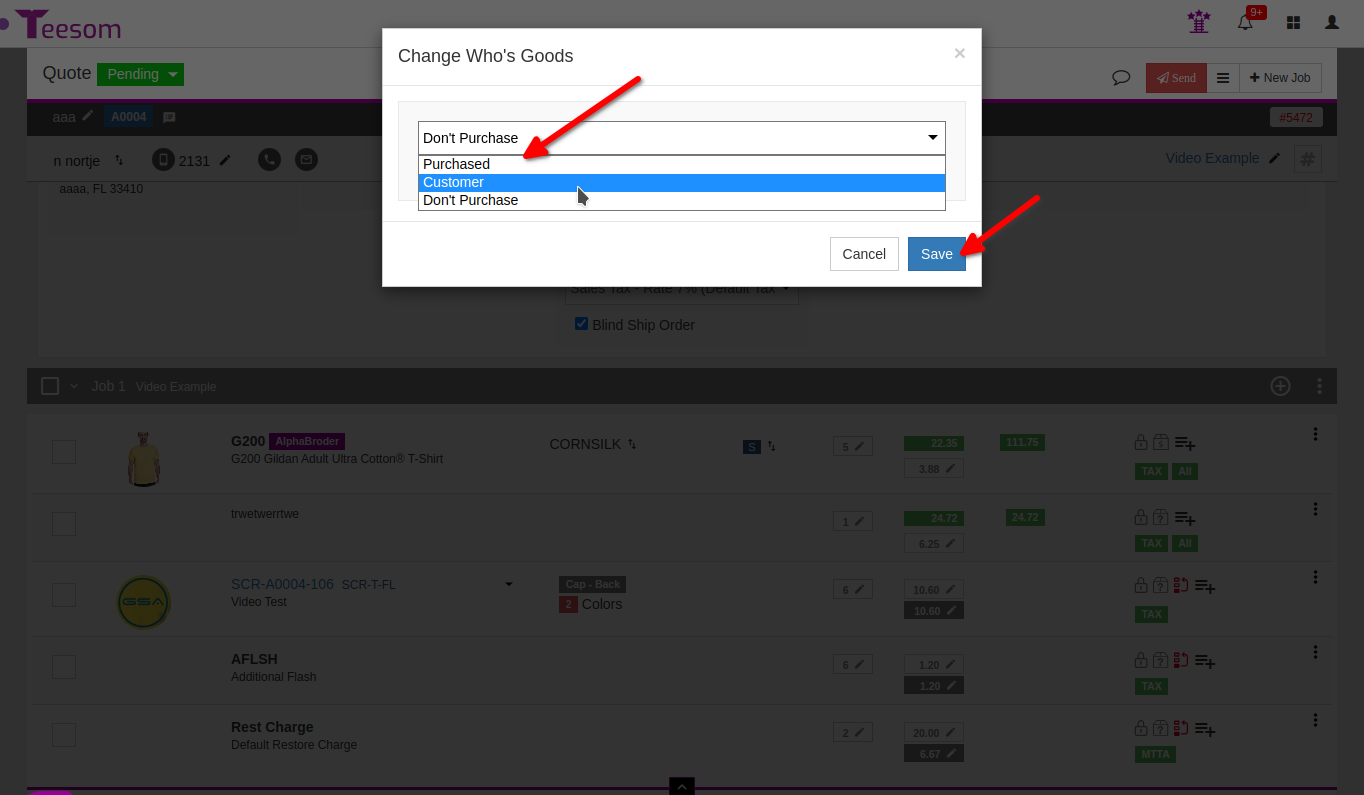
The "Purchasing" Icon
TIP: You can adjust the option in the "Purchase" box on any product, including Catalog Items and Own Products. See below:
Click on the box icon and set the product to “Customer”:
Receiving The Customer Supplied Goods
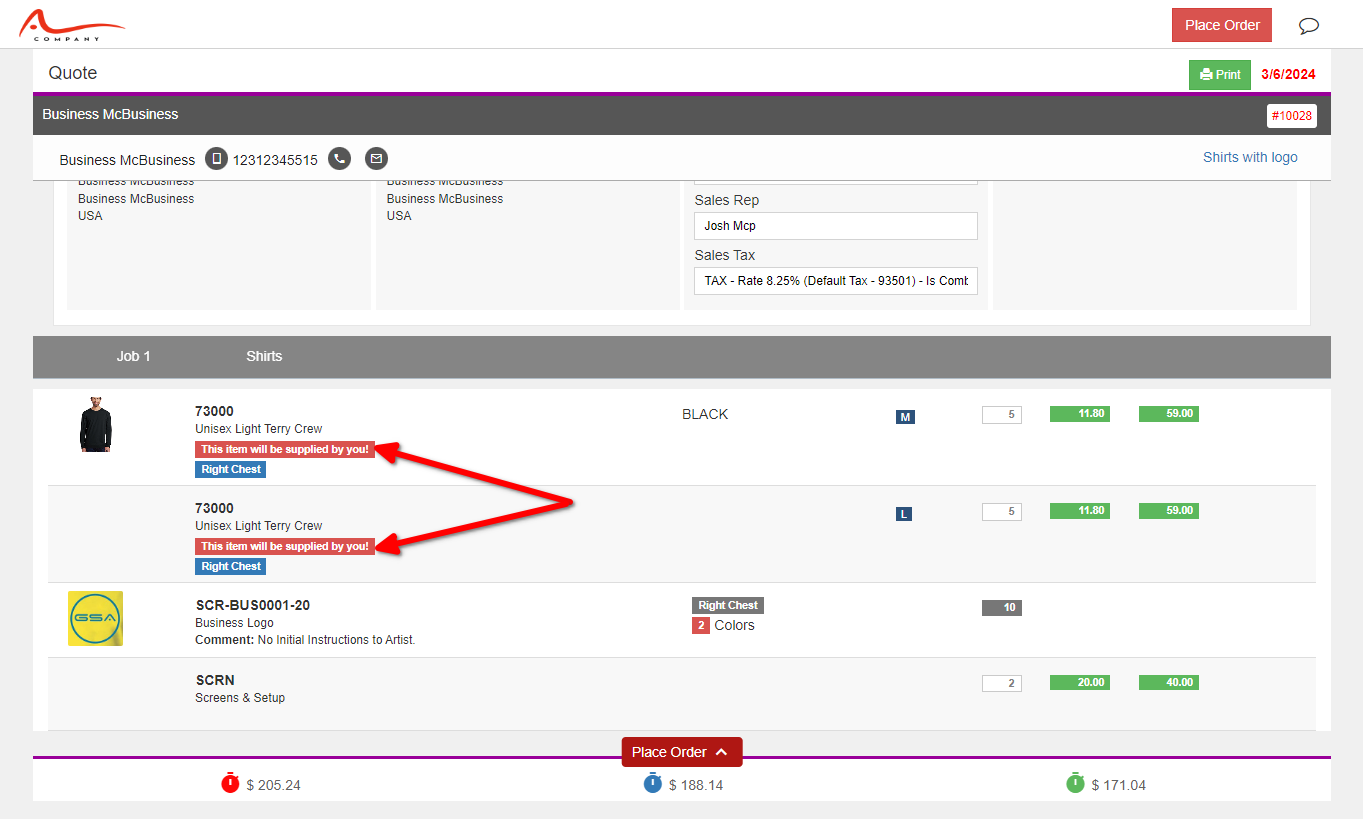
When emailing a customer’s quote, that has customer supplied goods, the customer will be able to clearly see which items are being supplied by them and which items are being purchased for the order.
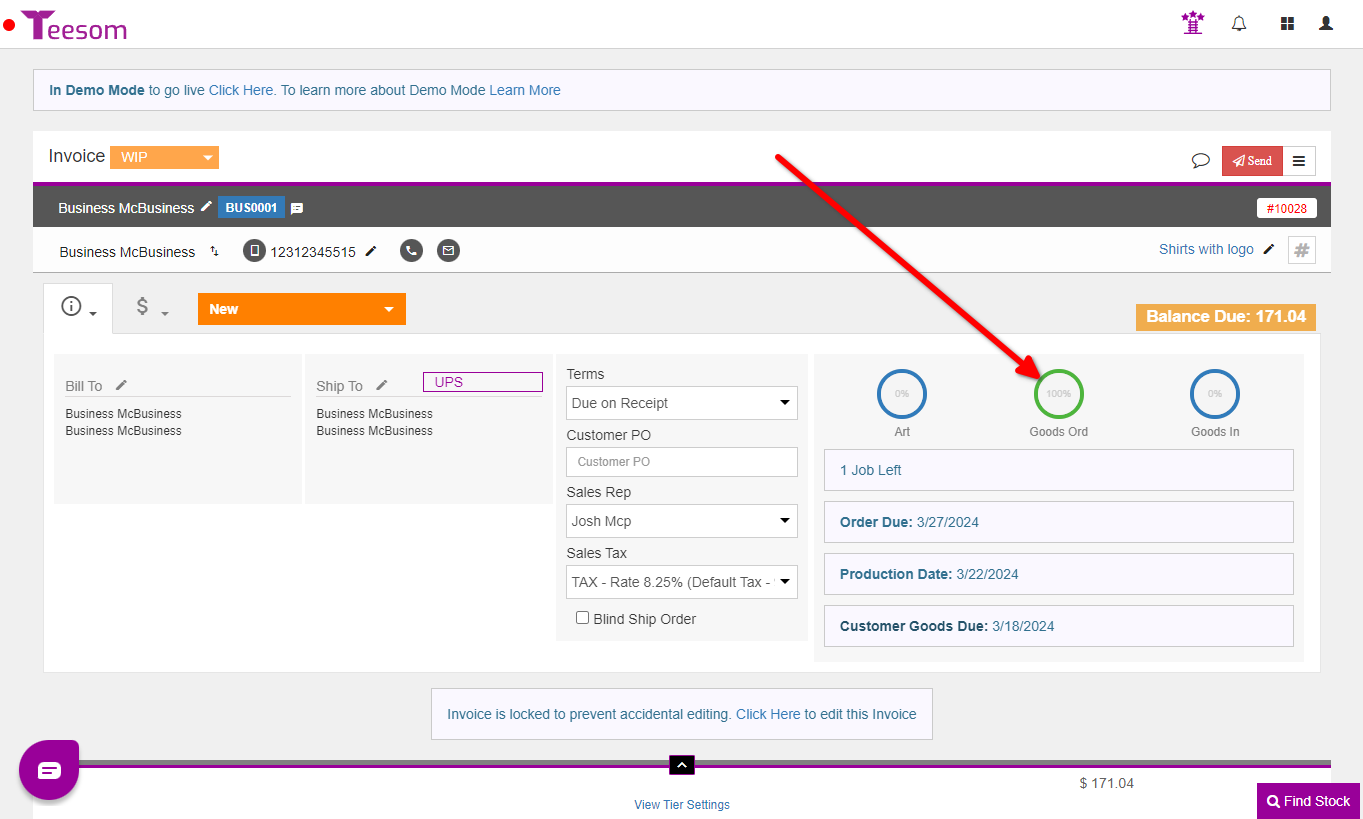
Now that the job is an actual order we must ensure we receive the items from the customer in time. If you click on the Goods Ordered Circle, as seen in the image below, it will take you to a screen that will show you what the customer is supplying and what you are purchasing.
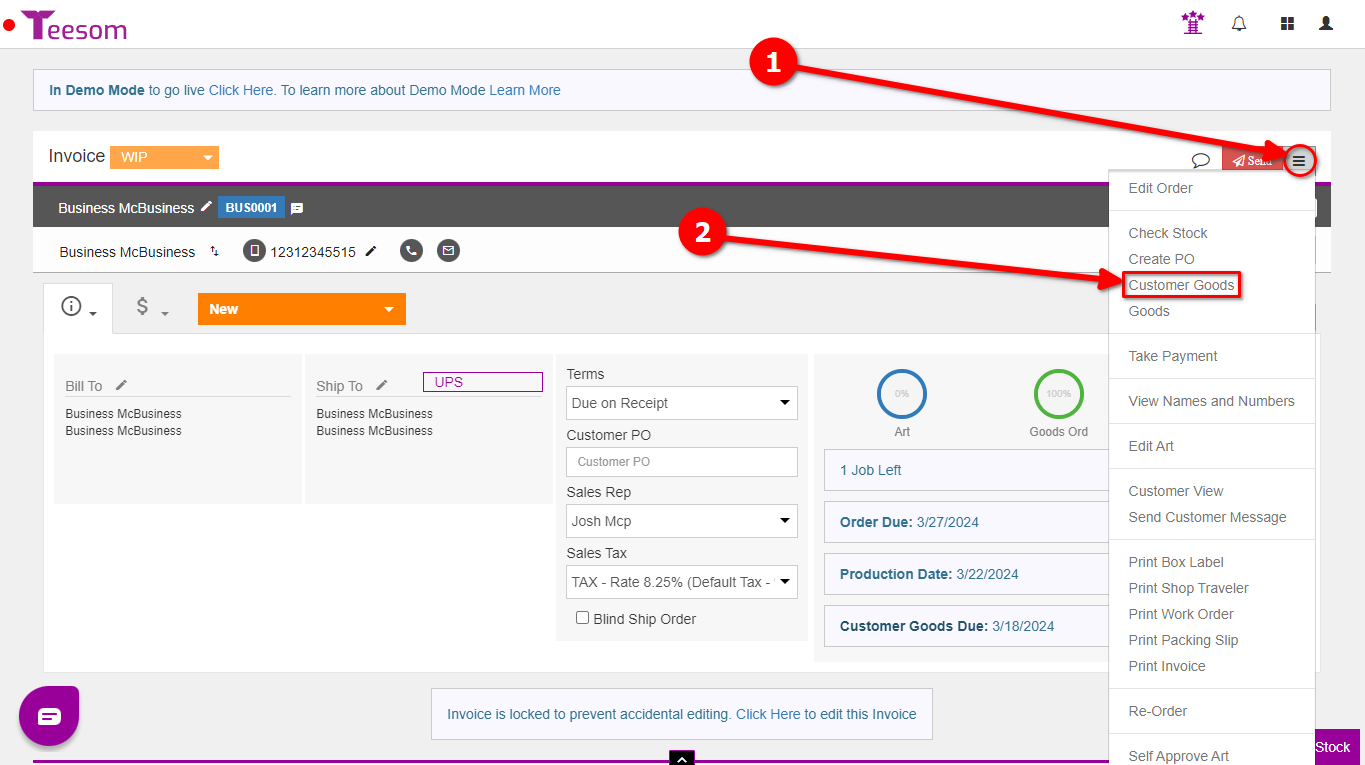
When you have received the goods, to check them in on the order:
Click the “hamburger menu”.
Select ‘Customer Goods’.
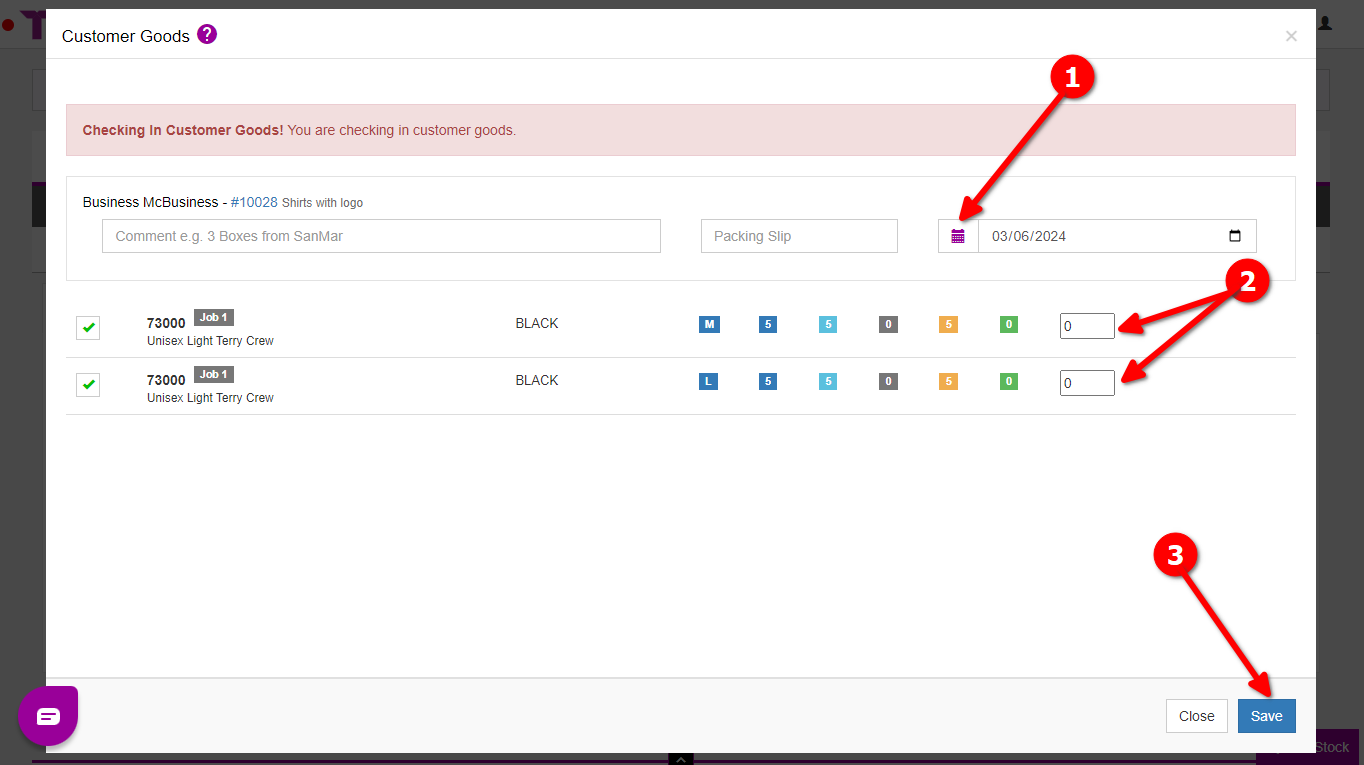
This will bring up the ‘Customer Goods’ check-in screen where you can:
Change the date goods were received.
Enter the quantity of goods received.
Click save to check the goods in.
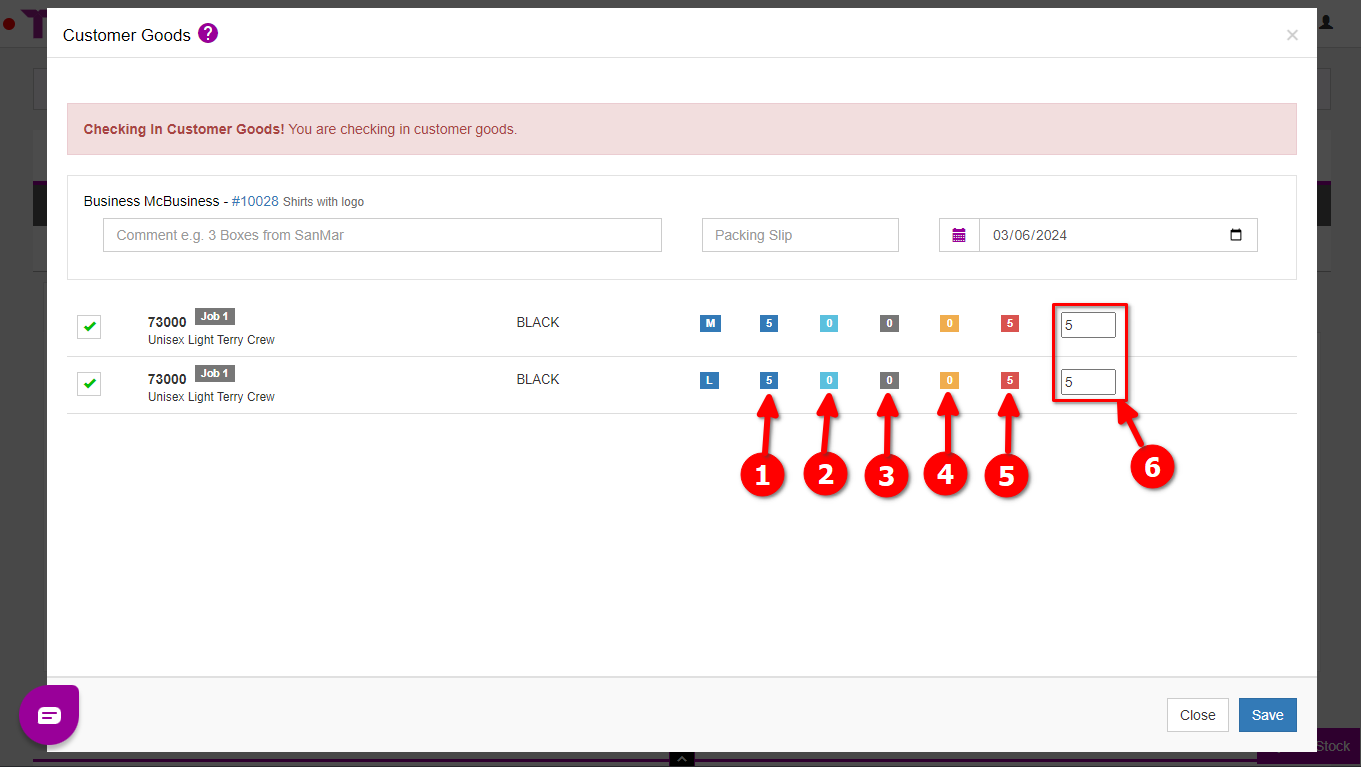
Here’s a quick reference to what the colored boxes mean:
Quantity you need.
Quantity that is in.
Quantity out.
Quantity received.
Quantity still due. (Red when items due, green when all items received)
The actual quantity of customer supplied goods you are checking in.