A basic embroidery price matrix does not use stitch counts or stitch count breaks, it simply uses a flat rate for a single design at different quantity breaks, regardless of the number of stitches.
This can be useful for companies that don’t produce a lot of products at once and only have a select few designs, with set stitch counts.
In this article we will go through the process of creating a basic price matrix.
Create an Embroidery Pricelist
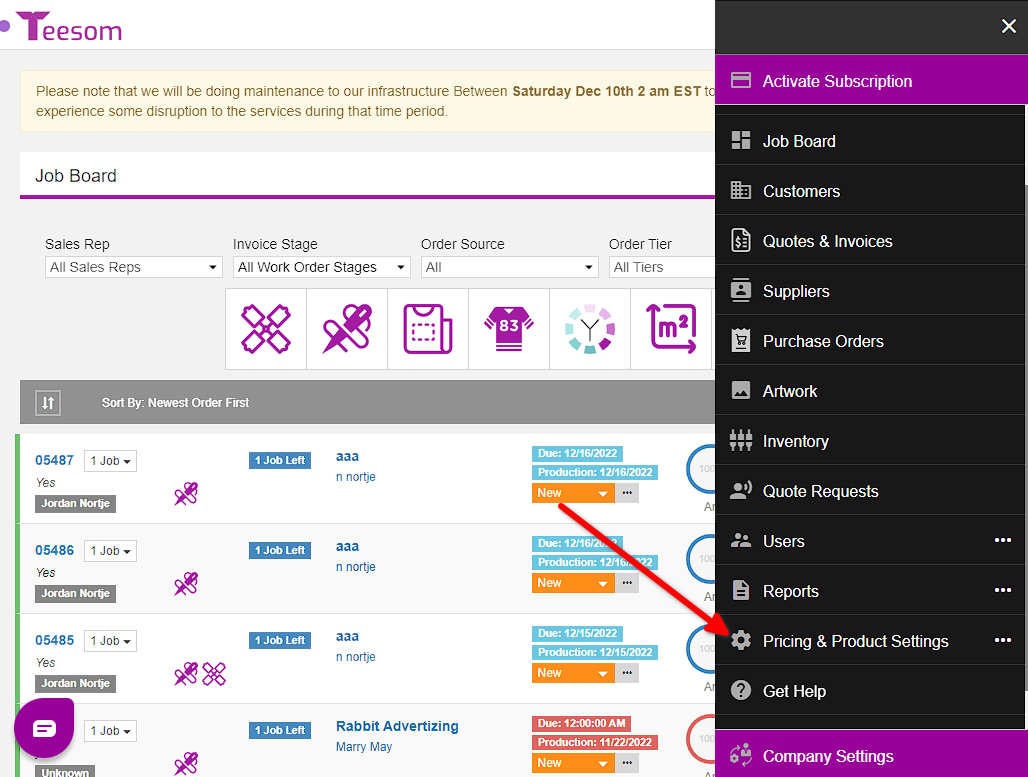
Go to the “Main Menu” -> “Products & Pricing Settings”
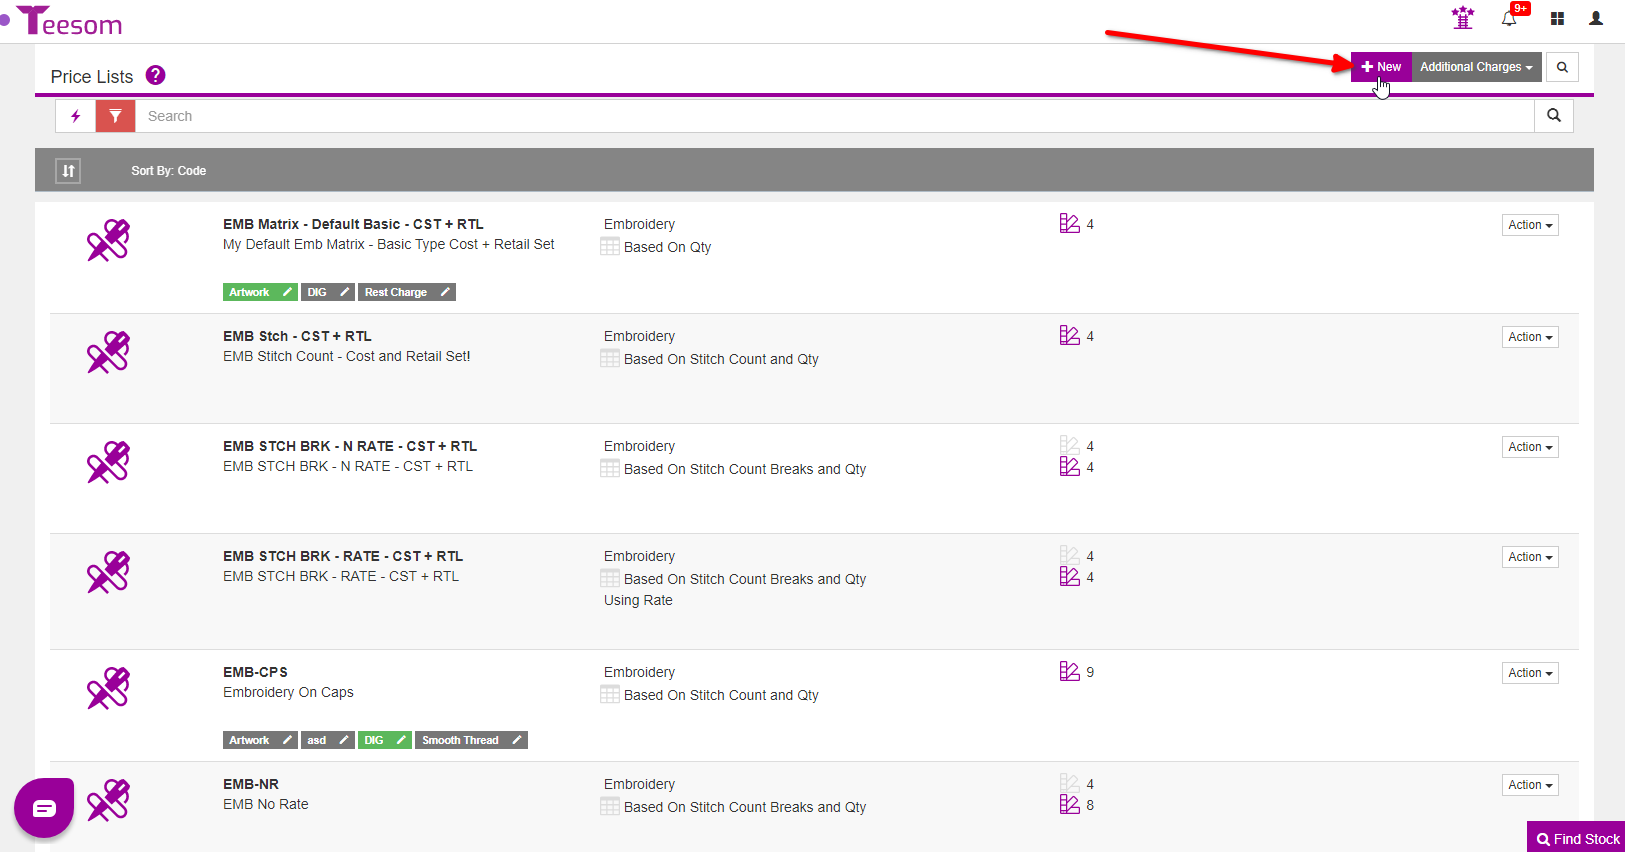
Click on “+ New“
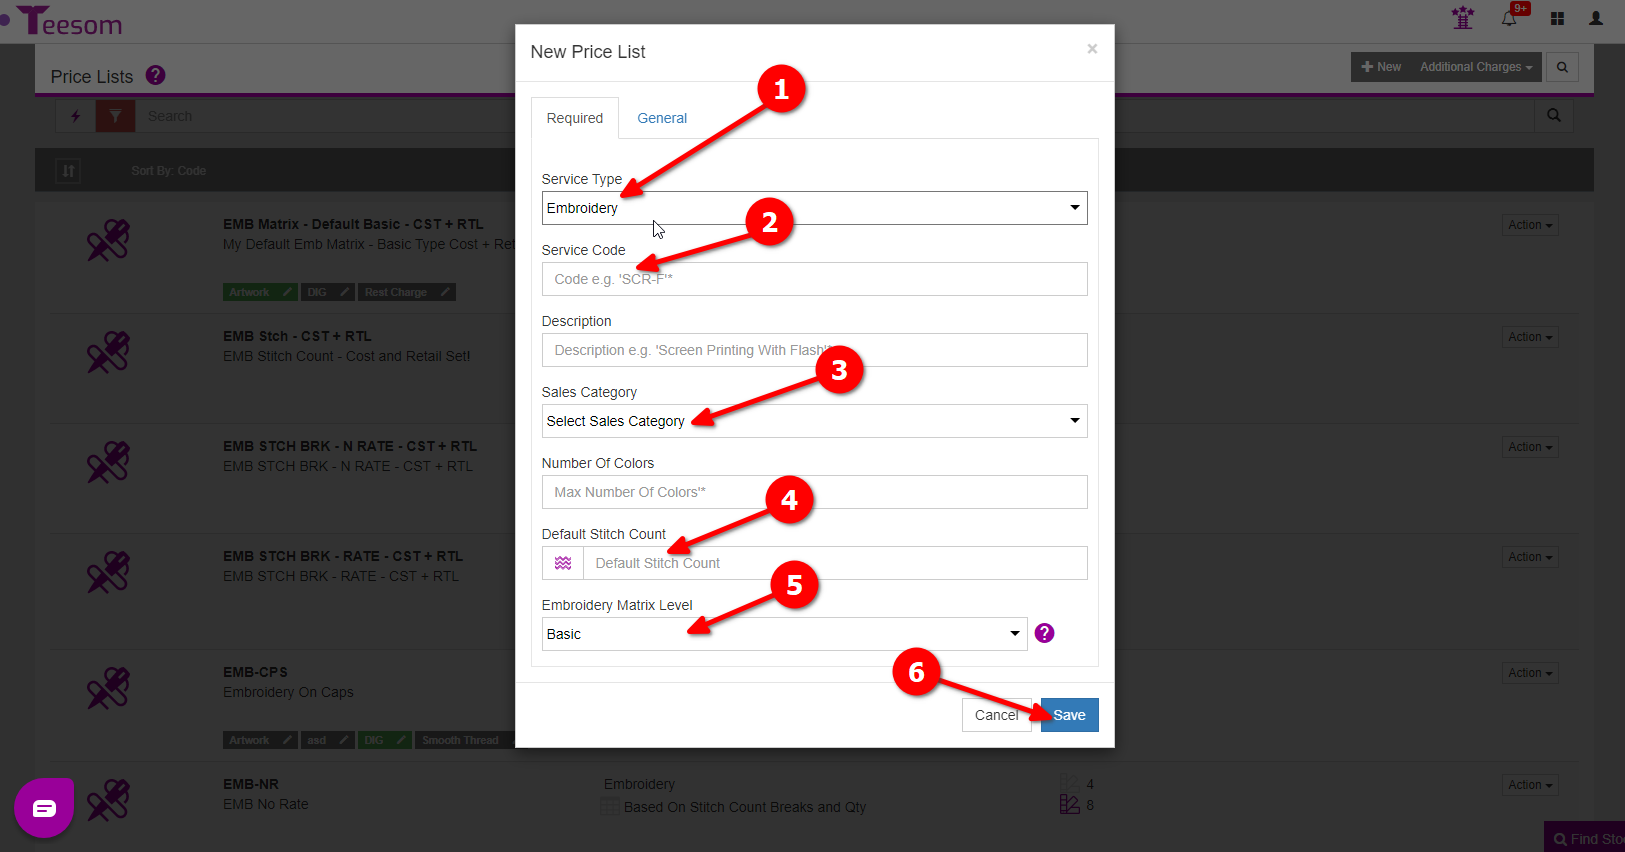
Set the service type as “Embroidery”.
Enter the “Service Code”. (This is like an item code and helps to identify this price list when searching for it to add it to an order.)
Select the sales category.
Set the default stitch count.
Select the matrix level – in this example we’ll be selecting: ‘Basic’.
Click “Save” to create the pricelist.
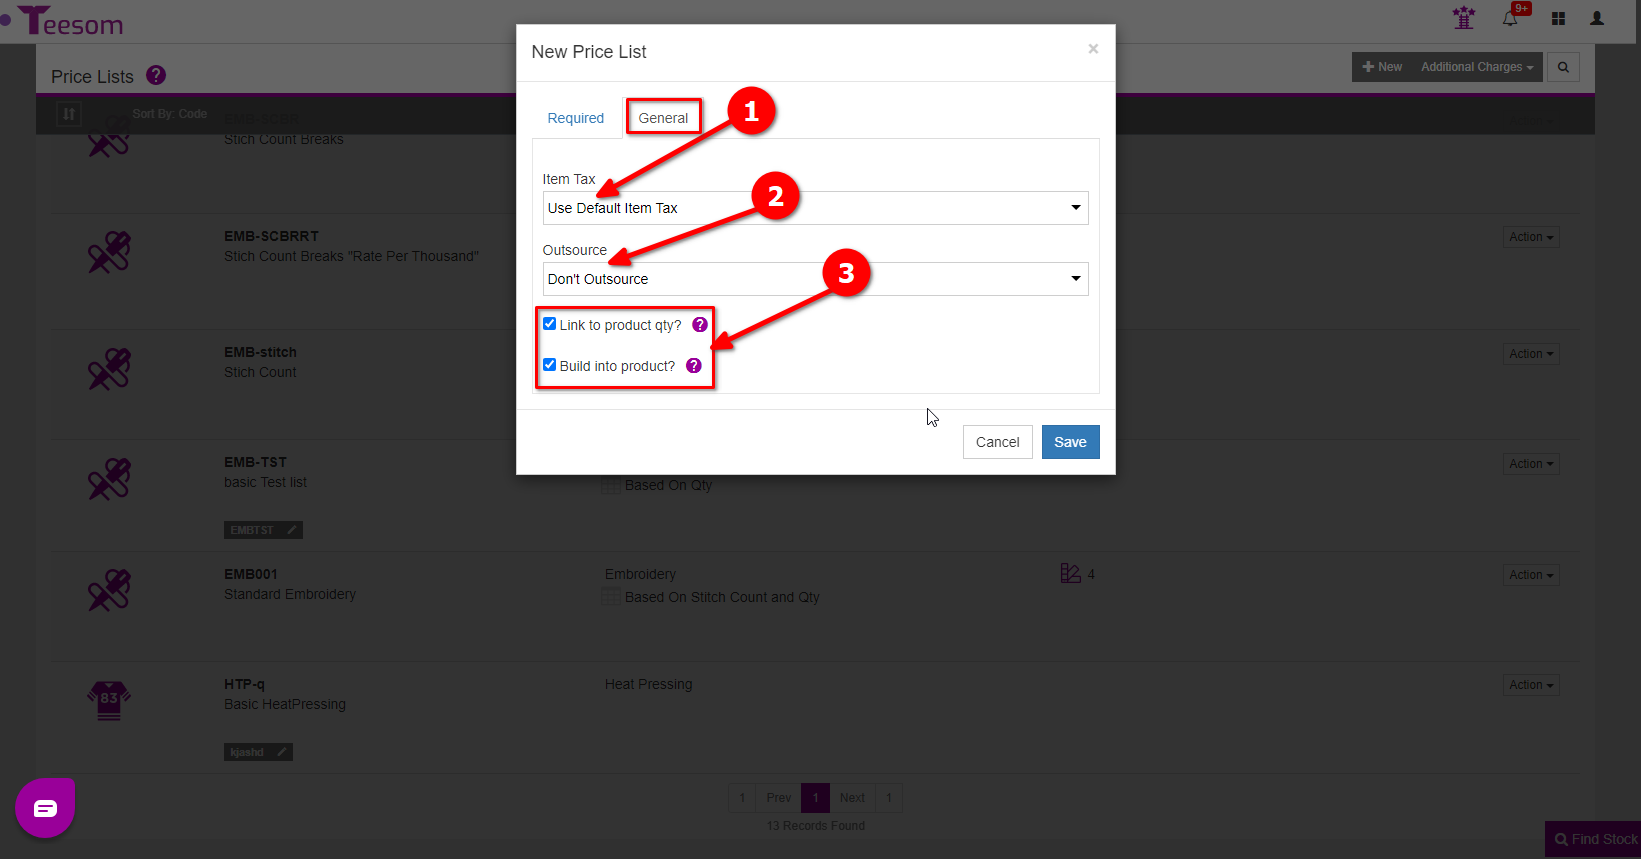
On the general tab you can:
Set the Tax.
Choose to outsource the imprint or not.
If you check the box “Link To Product Qty” then the number of imprints will be determined by the total quantity of products on the order.
If you check the box “Build Into Product“, whenever you add the imprint onto the order it will automatically build the price into the product rows.
Click on Save to create the new item.
Next we will create the “Cost” and “Retail” price matrices:
Create a Cost Matrix
You do not need to setup a cost price table if you do not outsource your imprints. Instead you can just make a retail matrix.
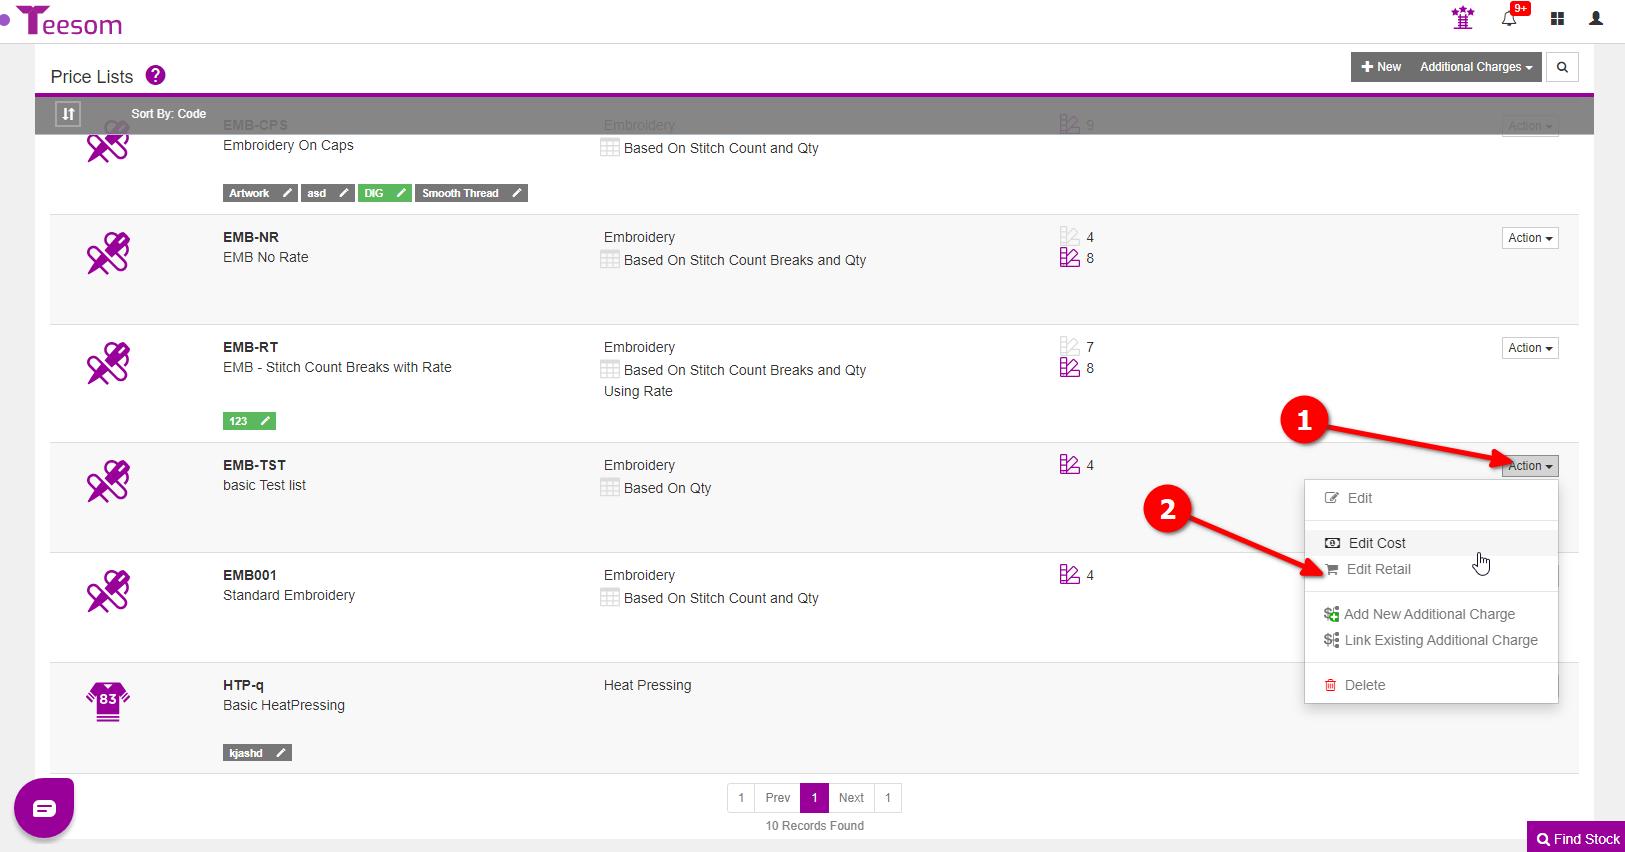
Back in your Imprints Pricelist, find the Embroidery item you just created and select “Edit Cost” from the “Action” menu:
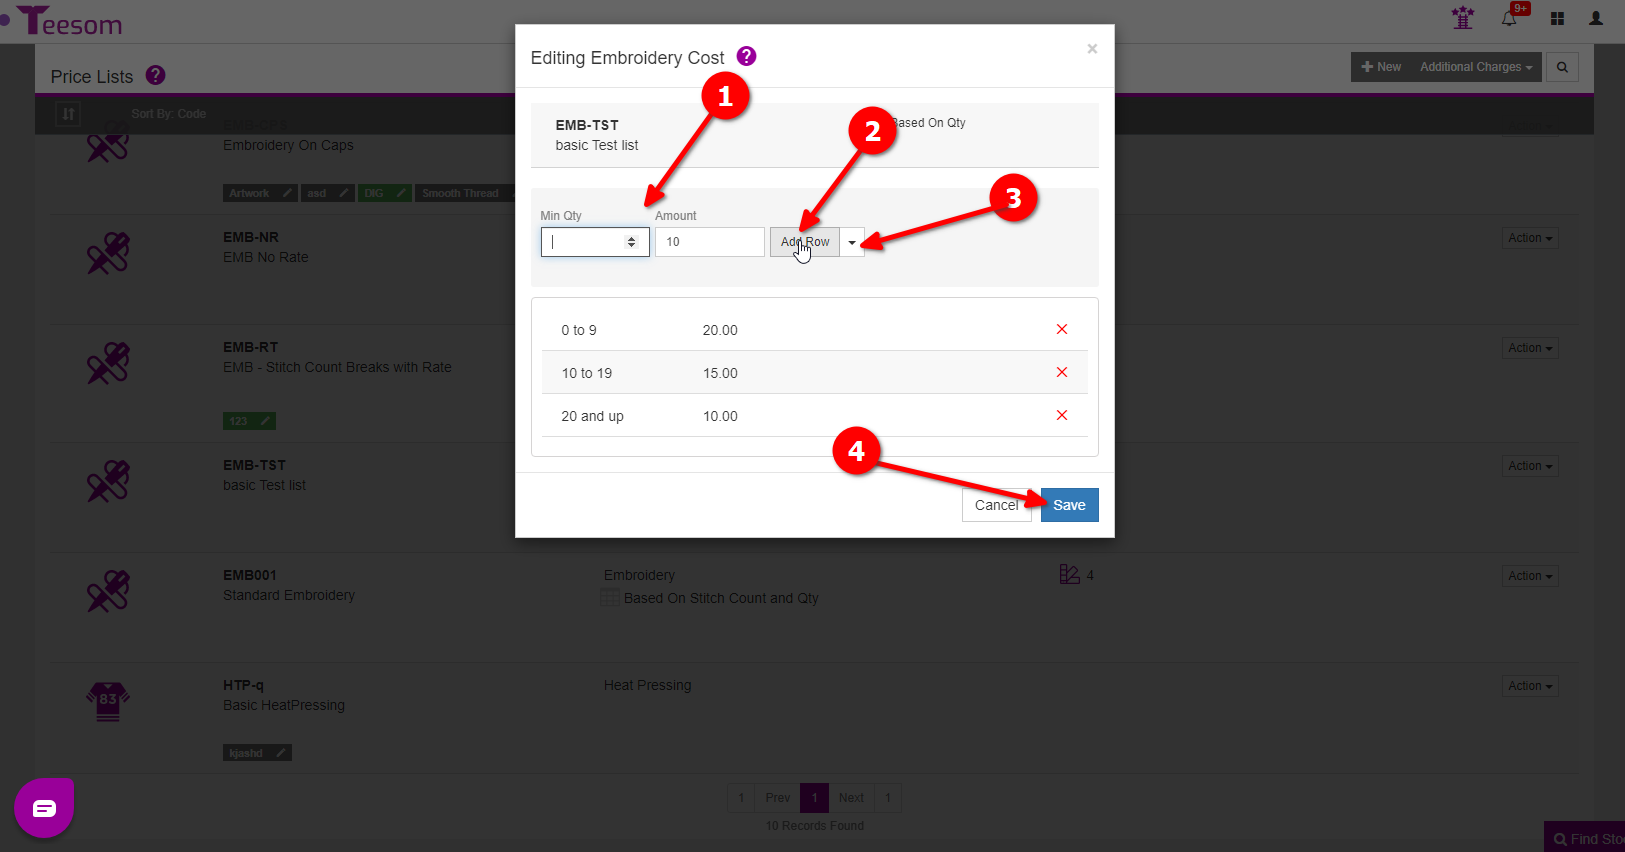
This will bring up the Cost Matrix screen where you can enter multiple quantity breaks with a cost for each quantity:
Enter the minimum QTY and amount ( the first row must always start at 0 min QTY )
Click “Add Row” to add the row
The dropdown arrow allows you to copy the retail price table or the cost table from another pricelist. You can also import a csv or export it as a csv.
Click on “Save” to create the cost pricelist
Create a Retail Price Matrix
To create the retail price table:
Go to the “Action” drop down again
Select “Edit Retail“
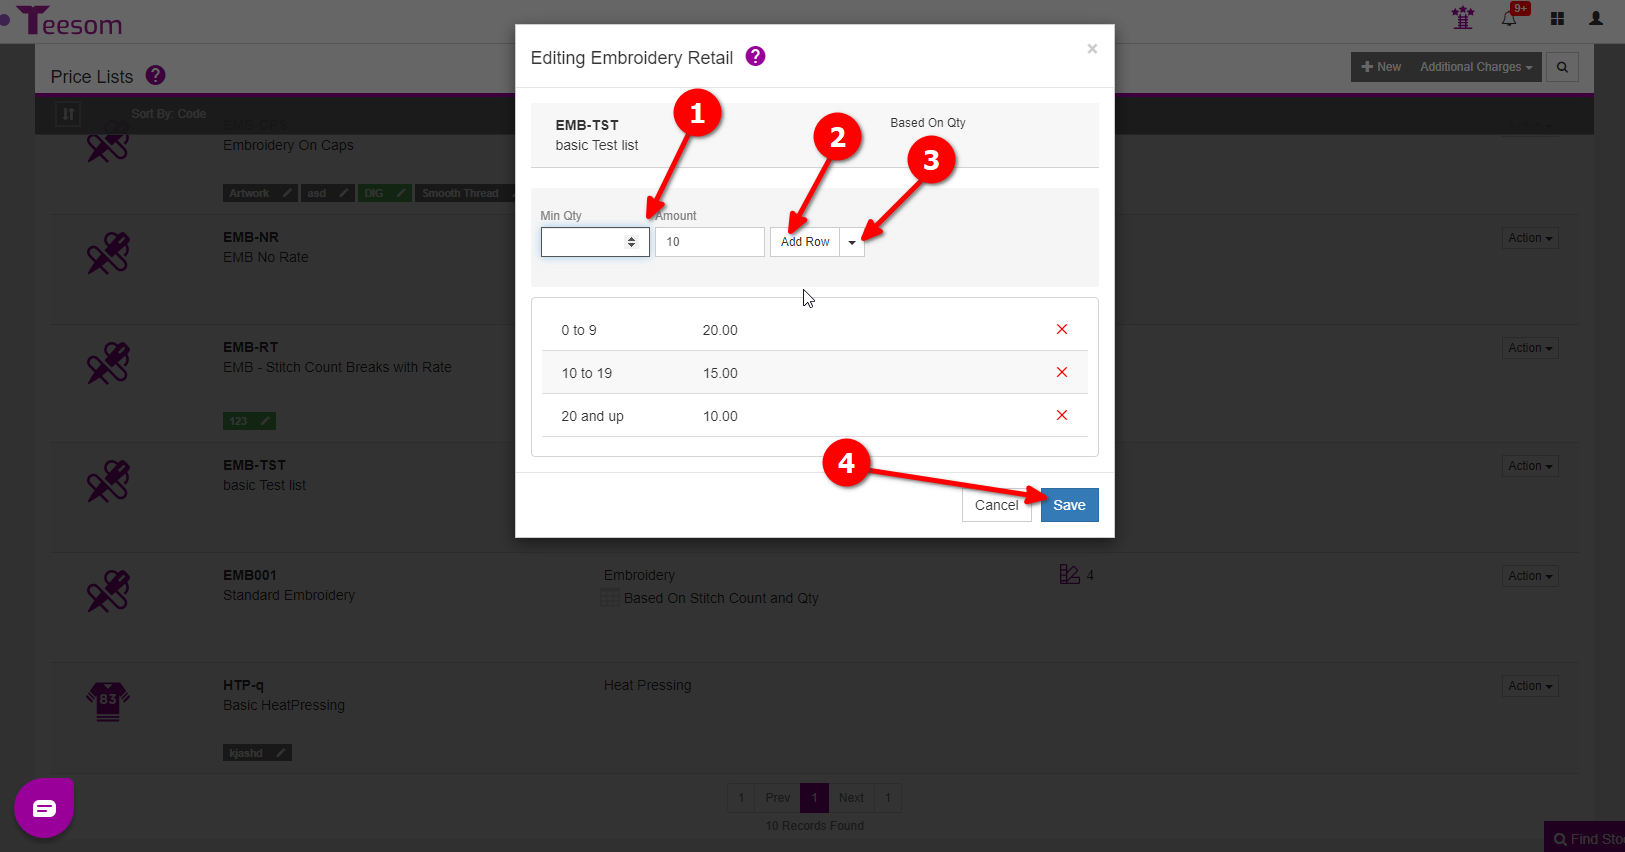
This will bring up the Retail Matrix screen where you can enter multiple quantity breaks with a price for each quantity:
Enter a min QTY and amount ( the min QTY must always start at 0 )
Click “Add Row” to add the row
The dropdown arrow allows you to copy the cost price table or copy the retail price table from another pricelist.
You can also import a csv or export it as a csv
Click “Save” to create the table
Use your Price Matrix on an Order
Now that we have created the price matrix we can go and test it on an order.
Either create a new one or go to an existing order then:
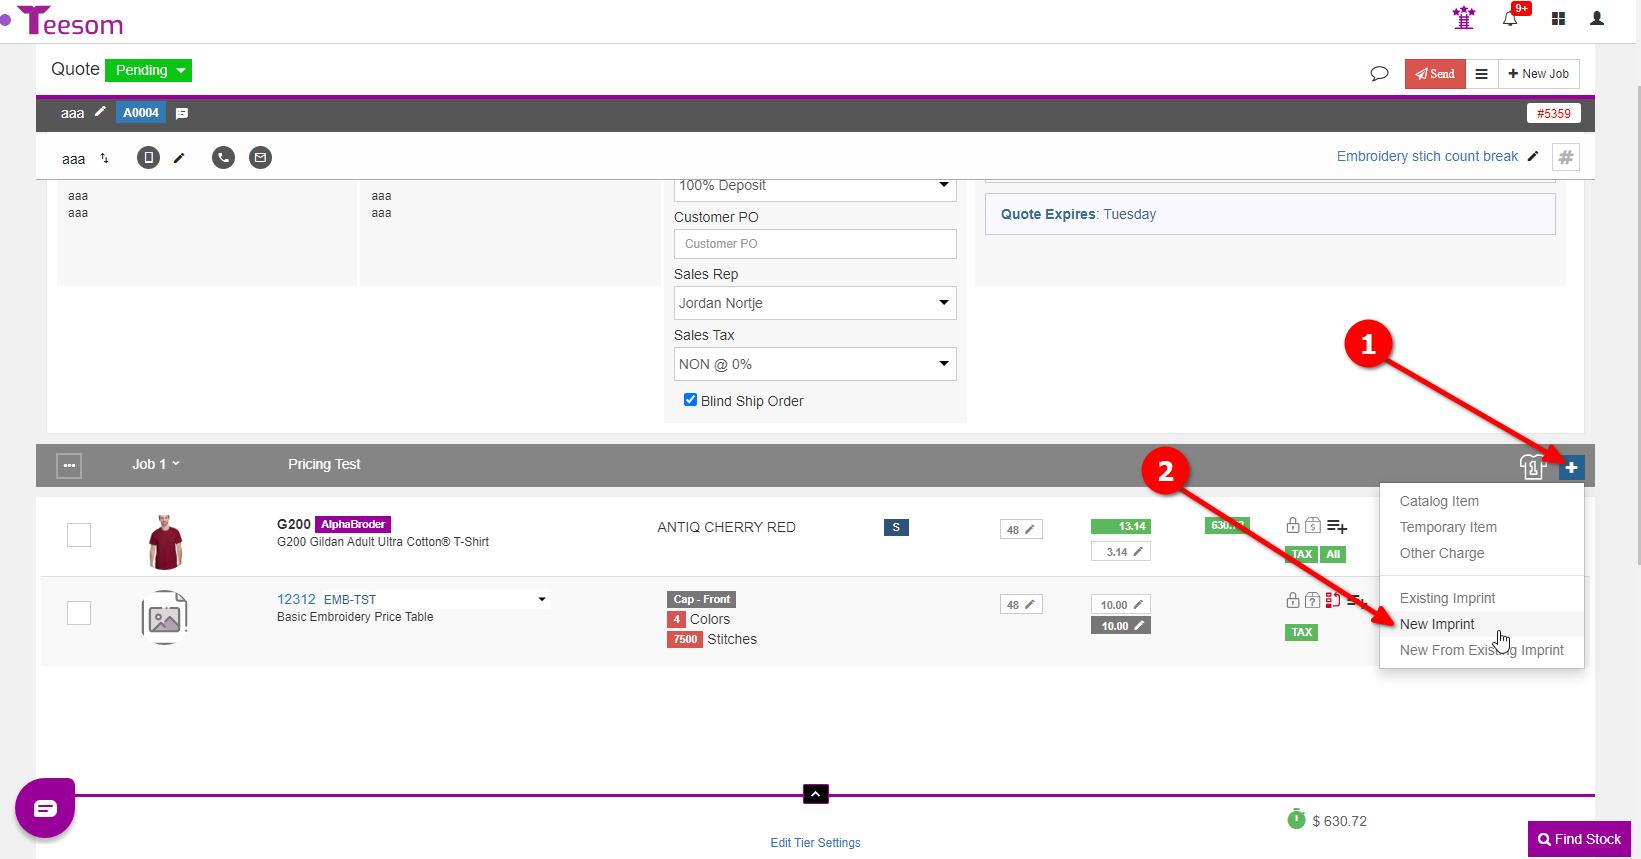
Click the “+” and select “New Imprint“.
Enter a design number, if you don’t Teesom will generate one for you.
Set the imprint type as Embroidery.
Select the basic embroidery pricelist you created.
Enter the number of colors and stitch count.
Click “Save” to add the imprint.
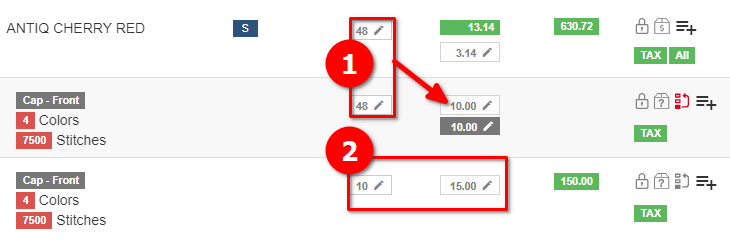
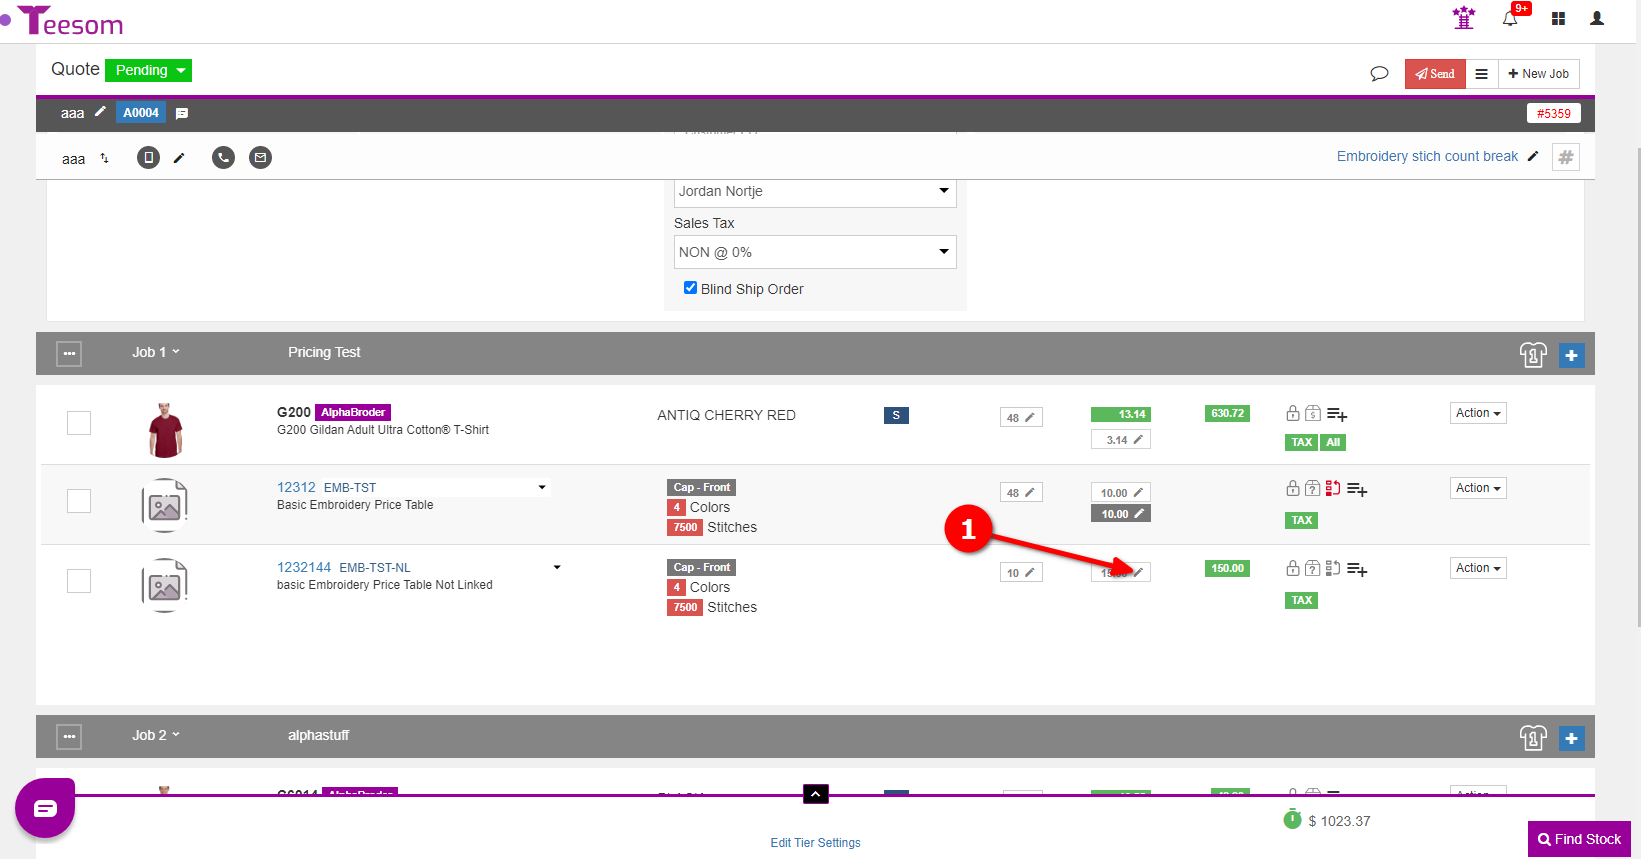
Below is an example with 2 imprints using the same price matrix.
One is linked to the product QTY and one is not:
This imprint is linked to the product QTY
This imprint is not linked to the product QTY
If you want to change what the imprint is synced to on an order:
Click on the pencil icon.
Then select “Sync Qty to”.
And now you know how to create a Basic Embroidery Price Matrix.
Next we will look at how to create a “Stitchcount Based” price matrix for embroidery: