“Stitch-count based” pricing provides a flat rate for each of various Quantity breaks, and adds an additional “rate per thousand” if the total stitches goes above the “included stitches” value.
Create A Stitch Count Price matrix
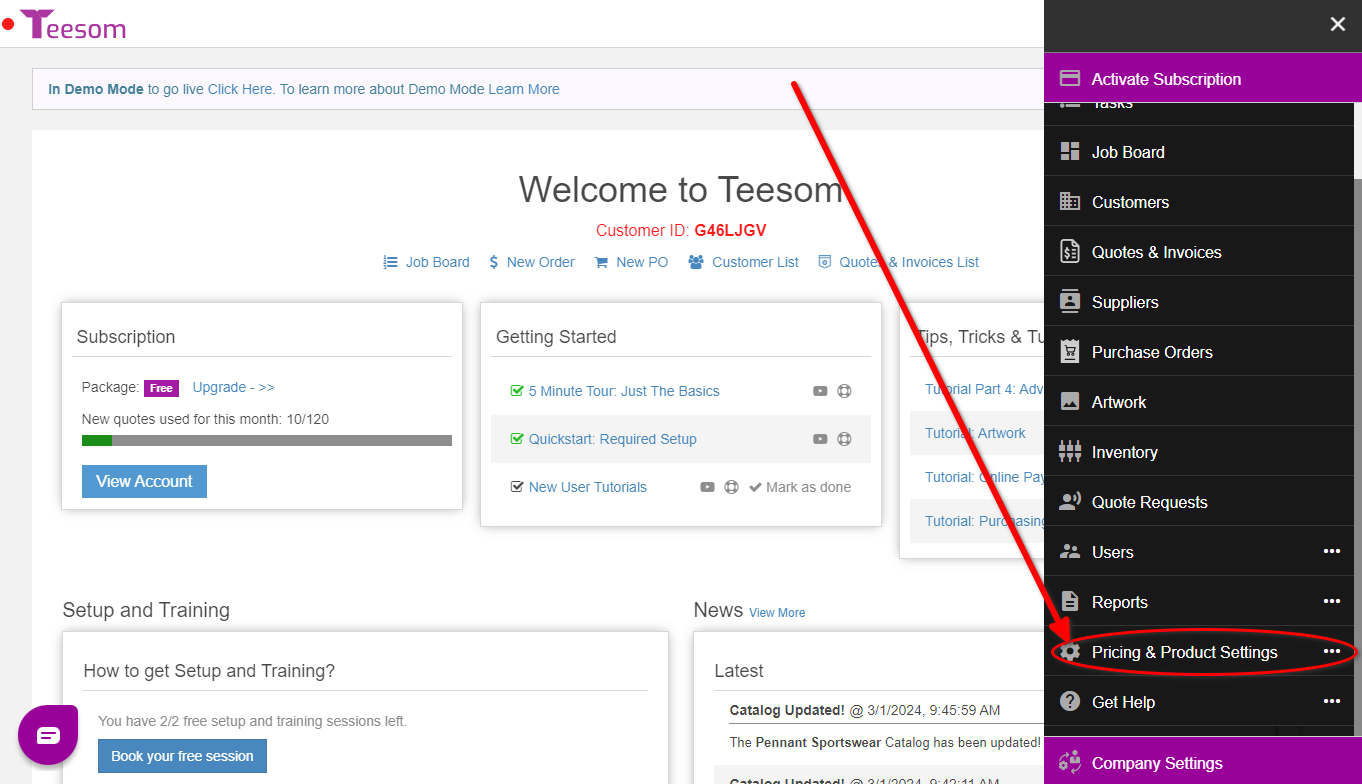
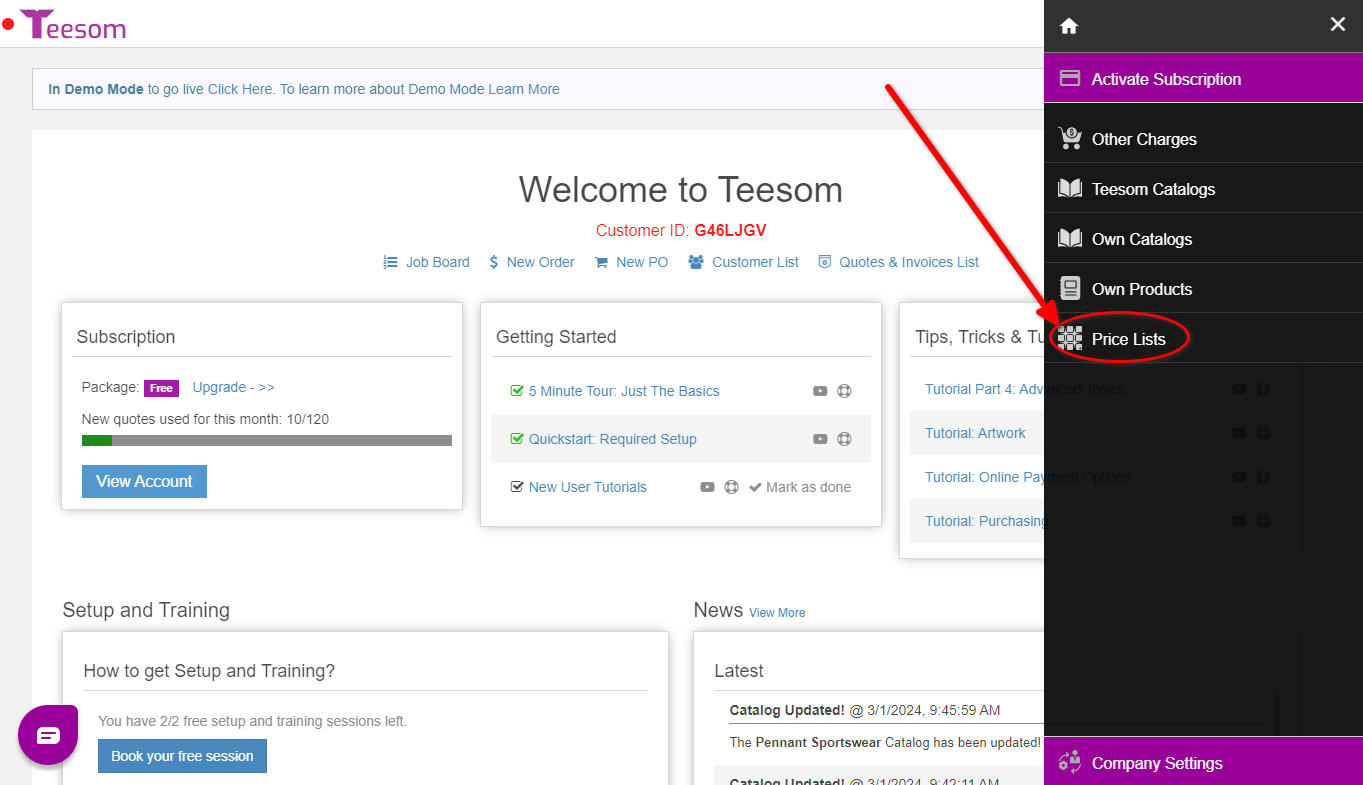
First naviage to the Price Lists page, open the main menu and select ‘Pricing and Product Settings‘ then select ‘Price Lists‘:
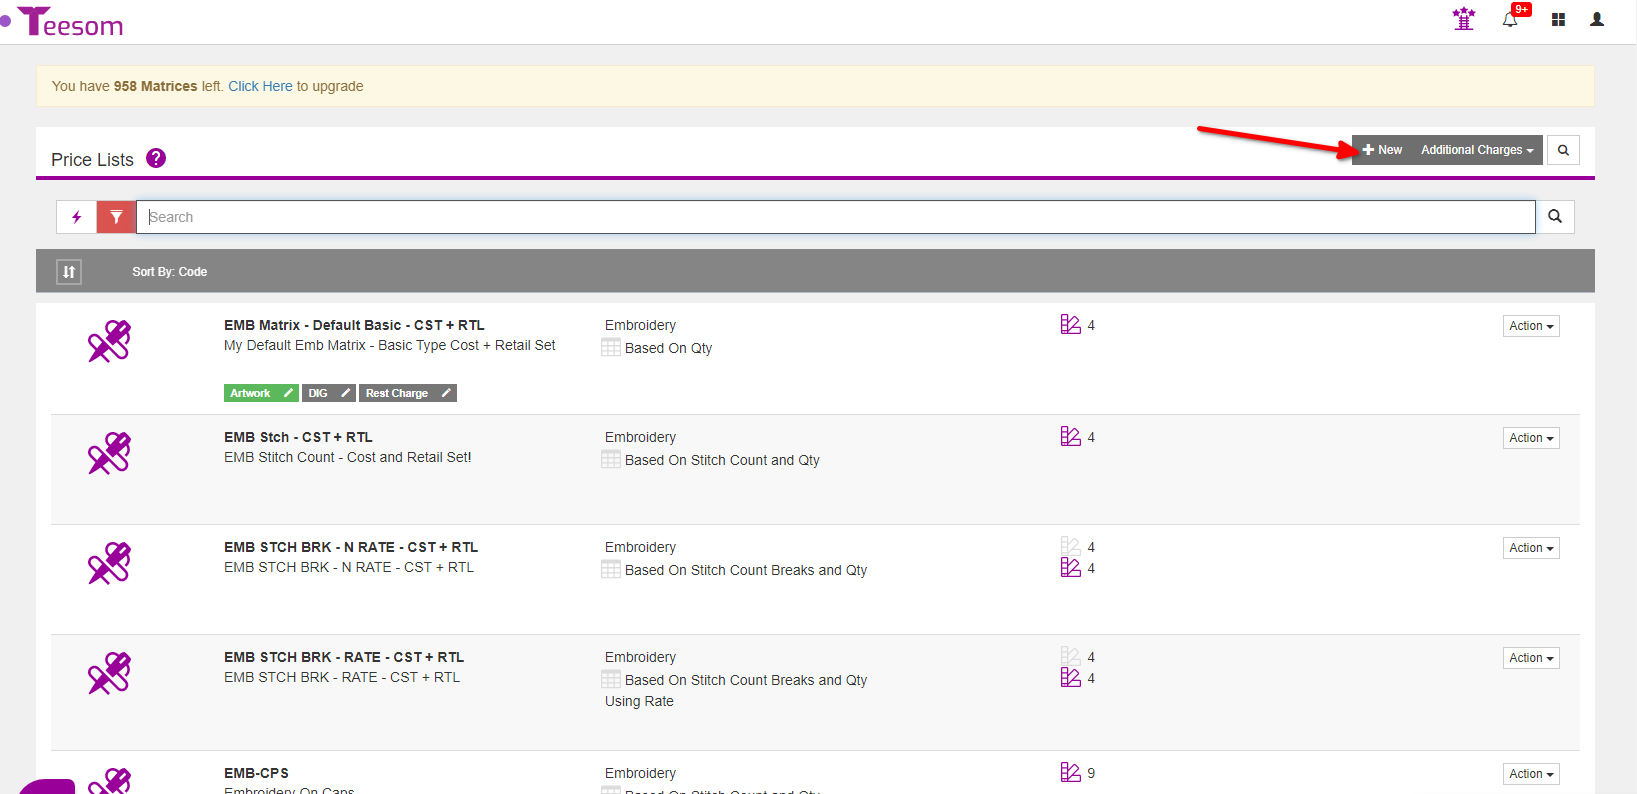
On the Price Lists page click ‘+ New‘:
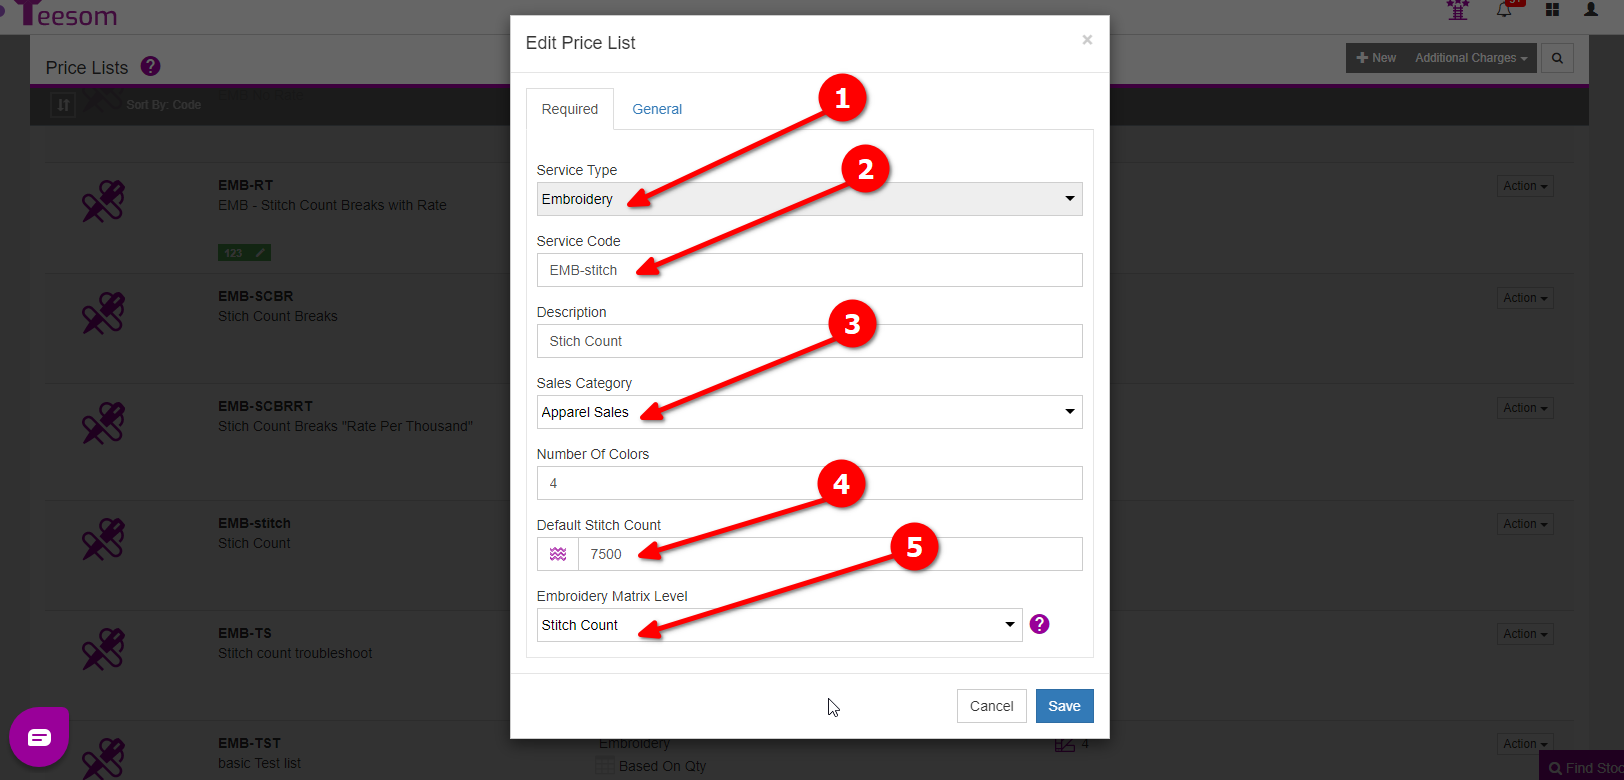
Set the service type as “Embroidery”.
Enter the Service Code. (this is like an “item code”)
Select a Sales Category.
Enter a default stitch count. (This will be used as the ‘Included Stitches’ value for Stitch Count price matrices.)
Set the “Embroidery Matrix Level” to “Stitch Count“.
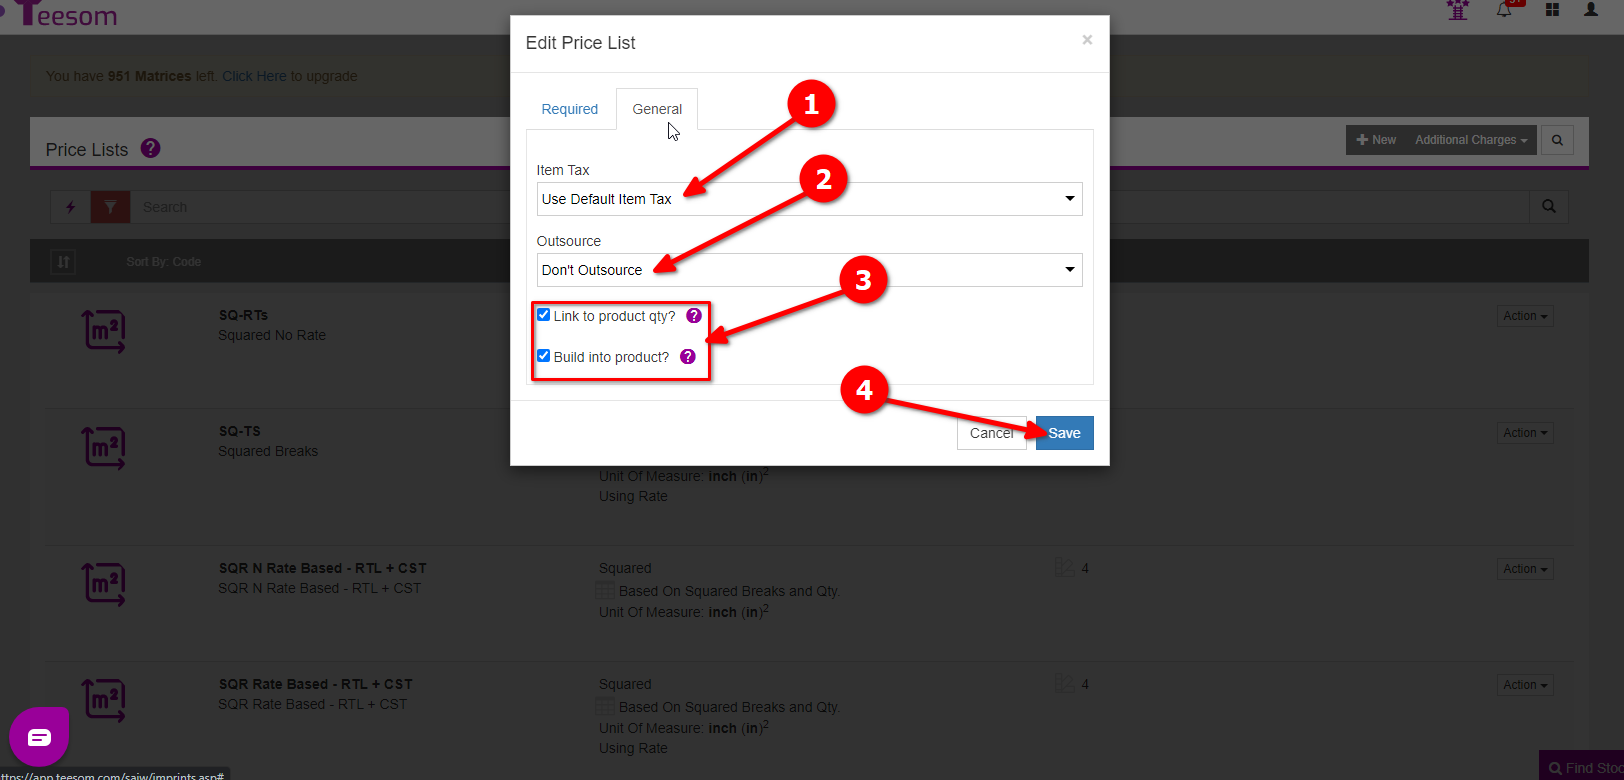
On the general tab you can:
Set the Tax.
Choose to outsource the imprint or not, this will decide what price matrix you use. The cost matrix for outsourced imprints, the retail matrix for non-outsourced imprints.
If you check the box “Link To Product Qty” then the number of imprints will be determined by the total quantity of products on the order.
If you check the box “Build Into Product“, whenever you add the imprint onto the order it will automatically build the price into the product rows.
Finally, click on Save to create the new item.
Next we will create the price matrices.
Retail Price Matrix
A retail price matrix is used when you don’t outsource your imprints and do them in-store. If you outsource your embroidery then create a cost price matrix instead. (The process is the same, just select ‘Edit Cost’ instead of edit retail.)
A stitch count retail price matrix uses quantity breaks along with set ‘included’ stitch counts, and a rate per thousand for any order that exceeds the included stiches. (This is charged for every 1000 stitches past the set amount).
We will go over how to create one below.
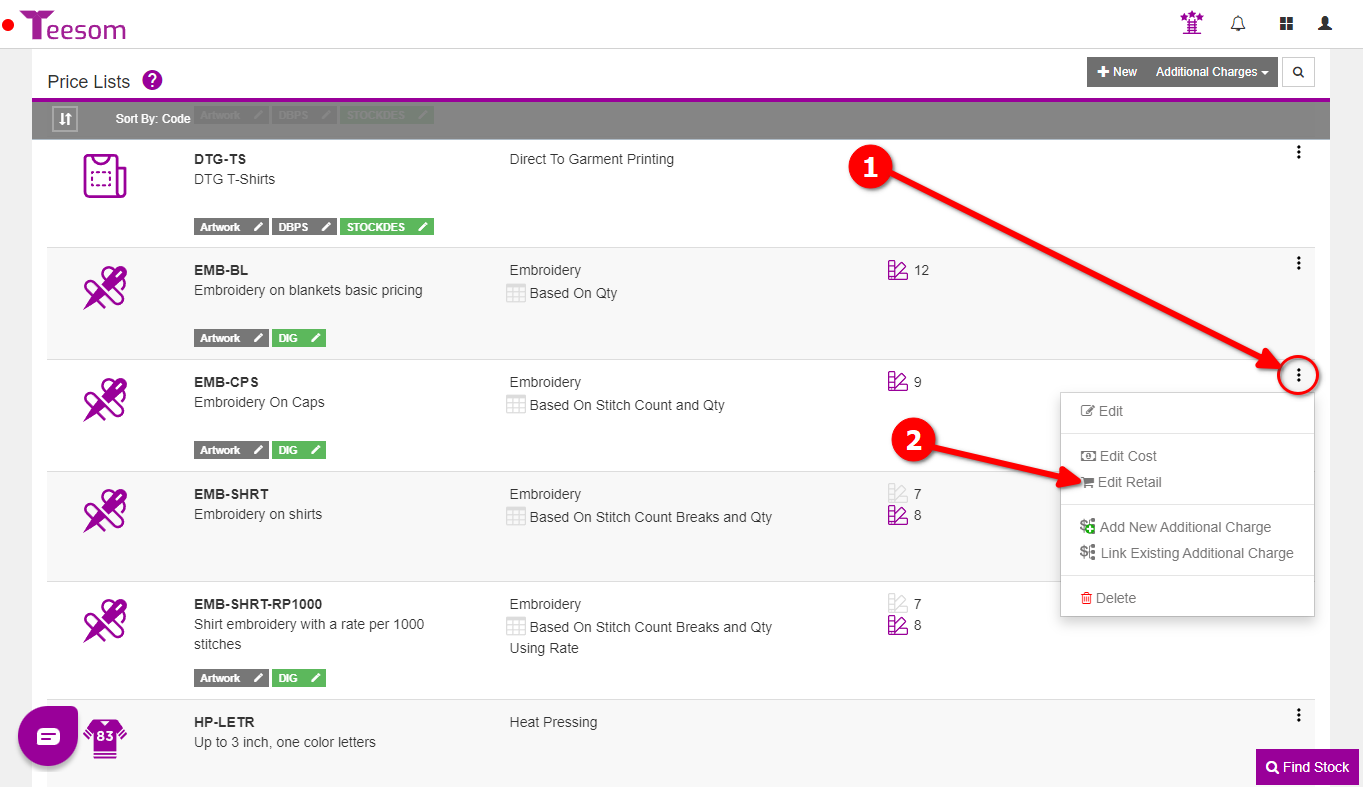
To create the retail price matrix:
Click on the “3 Dot” menu.
Select “Edit Retail“.
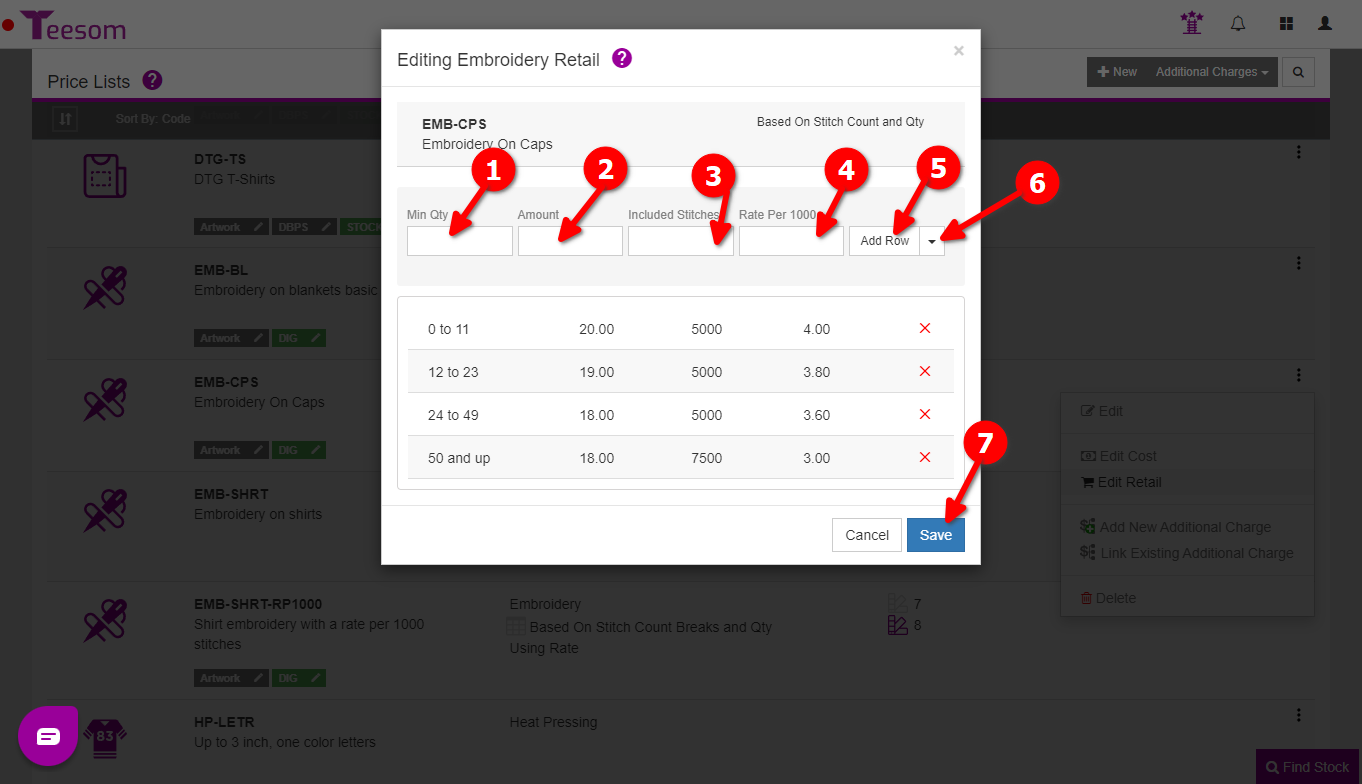
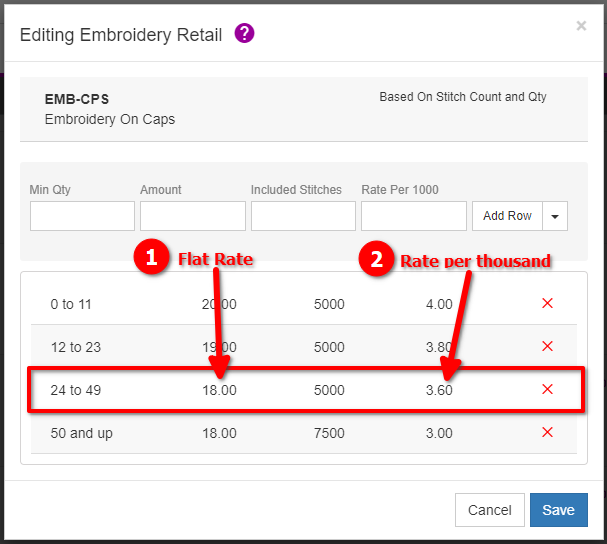
Enter a minimum quantity for this row / quantity break. (Always start at 0.)
Enter the amount. (The flat rate you charge.)
Enter your set amount of included stitches.
Enter the rate per 1000 stitches. (If the stitch count on the artwork exceeds the included stitches it switches to a rate per thousand stitches.)
Click “Add Row” to add the quantity break. (Optional: Repeat for more quantity breaks.)
From the dropdown arrow you can; copy from your cost price table, copy another price table from a different pricelist, and you can also import a CSV or export as CSV.
Click on “Save” to create the table.
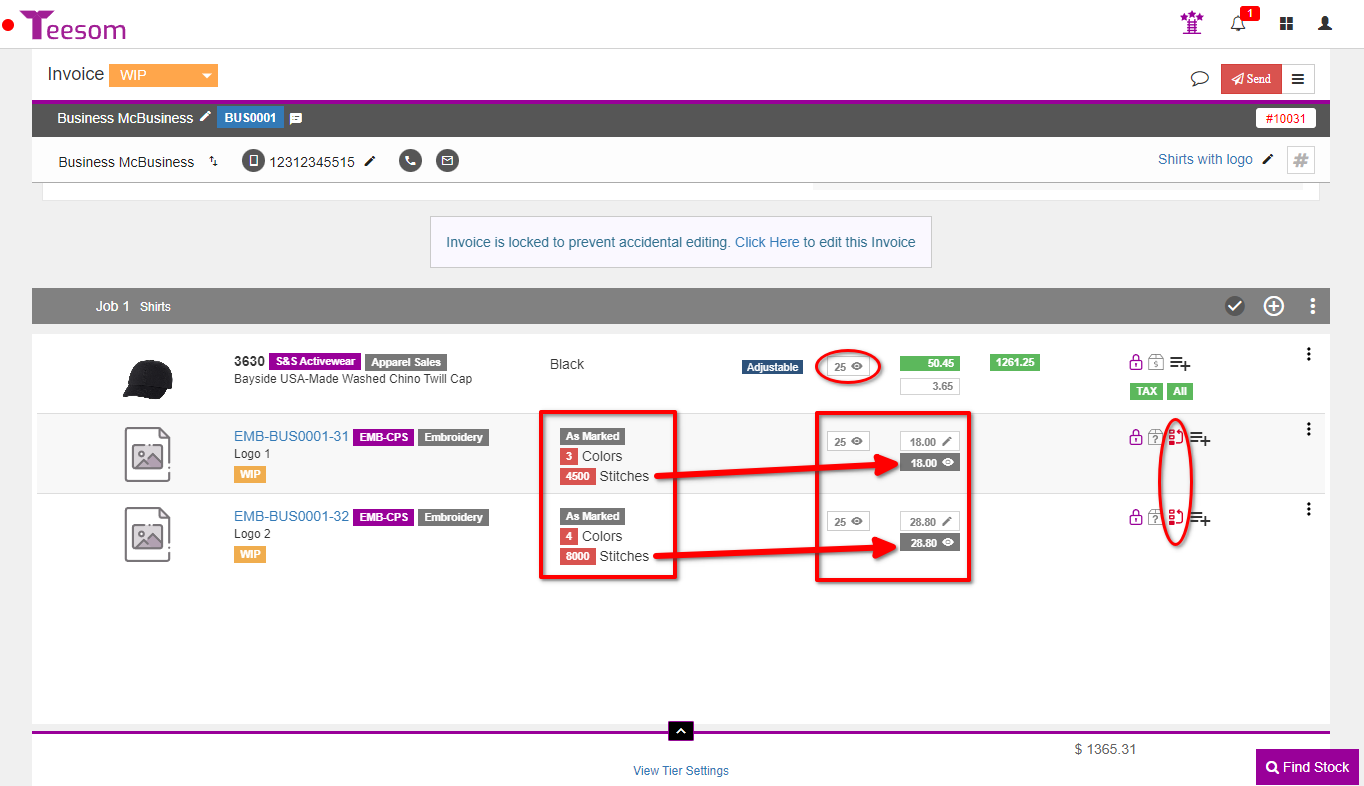
The stitch count price matrix uses the quantity of either the product (if you have the imprint linked to product qty) or the imprint (if you don’t have it linked to product QTY) to determine which pricing row to use. In turn that also decides what rate per 1000 will be used if the stitch exceeds the included maximum.
Order Example
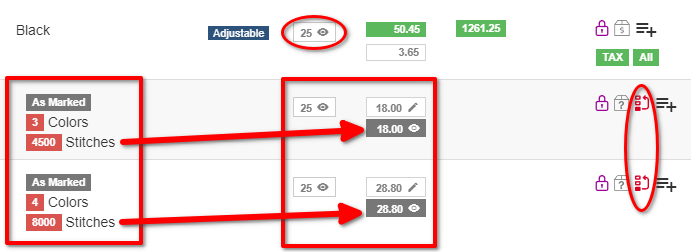
In the image below there are two different imprints using the same price table but at different stitch counts.
They are both linked to the product quantity, which determines what price row / quantity break from the price matrix will be used.
The above order is using the price list/matrix below. Let’s look at how it works in this example.
The highlighted row is used for quantities between 24 and 49. So the example order above, with a product quantity of 25, fits into this quantity break:
Any order at or below the ‘Included Stitches’ count will use a flat rate. In this case we have an included stich count of 5000 and a flat rate of $18.
Any artwork on an order that exceeds the ‘Included Stitches’ will switch over to a rate per thousand stitches. In this case a rate of $3.60 per thousand stitches for any artwork with a stitch count greater than 5000.