If you have followed the Quickstart tutorial series then your basic setup should be complete but lets make sure! In this article we will be going over some key things you’ll want to ensure are setup before you turn off “Demo Mode” or in other words “Go Live” with your company on Teesom.
Before You go Live
Before you “Go Live”, double check that the following is properly setup and working:
If you have any questions or need help with the above steps please don’t hesitate to get in contact with our support via the purple chat widget:
Turn Demo Mode Off
Now that you have confirmed everything is working correctly, we can “Go Live”.
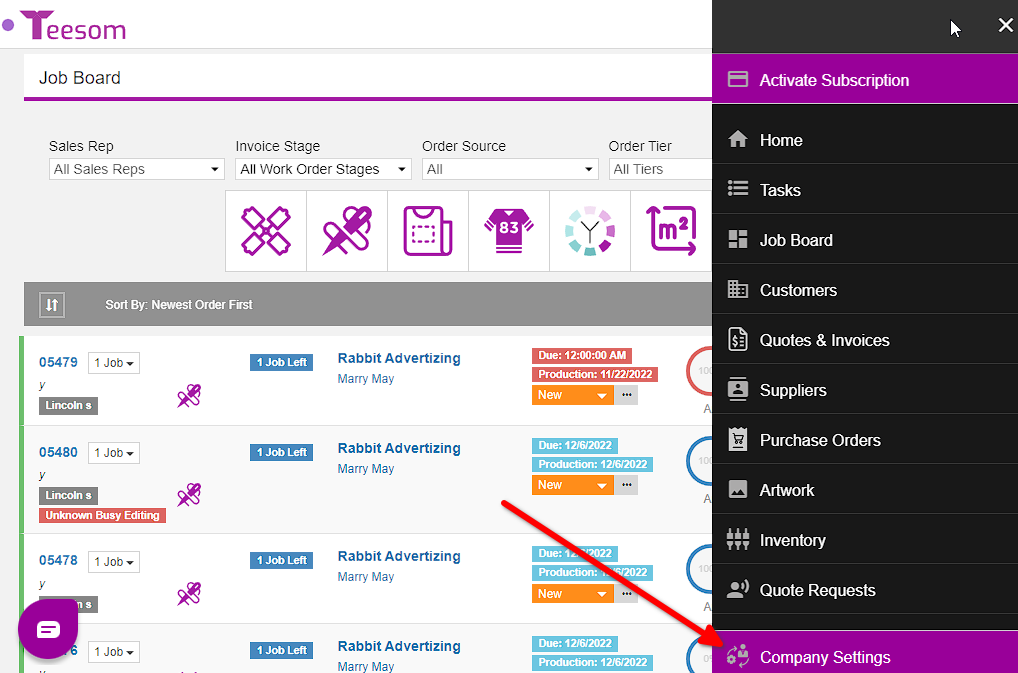
To do this go to the “Main Menu” then select “Company Settings“.
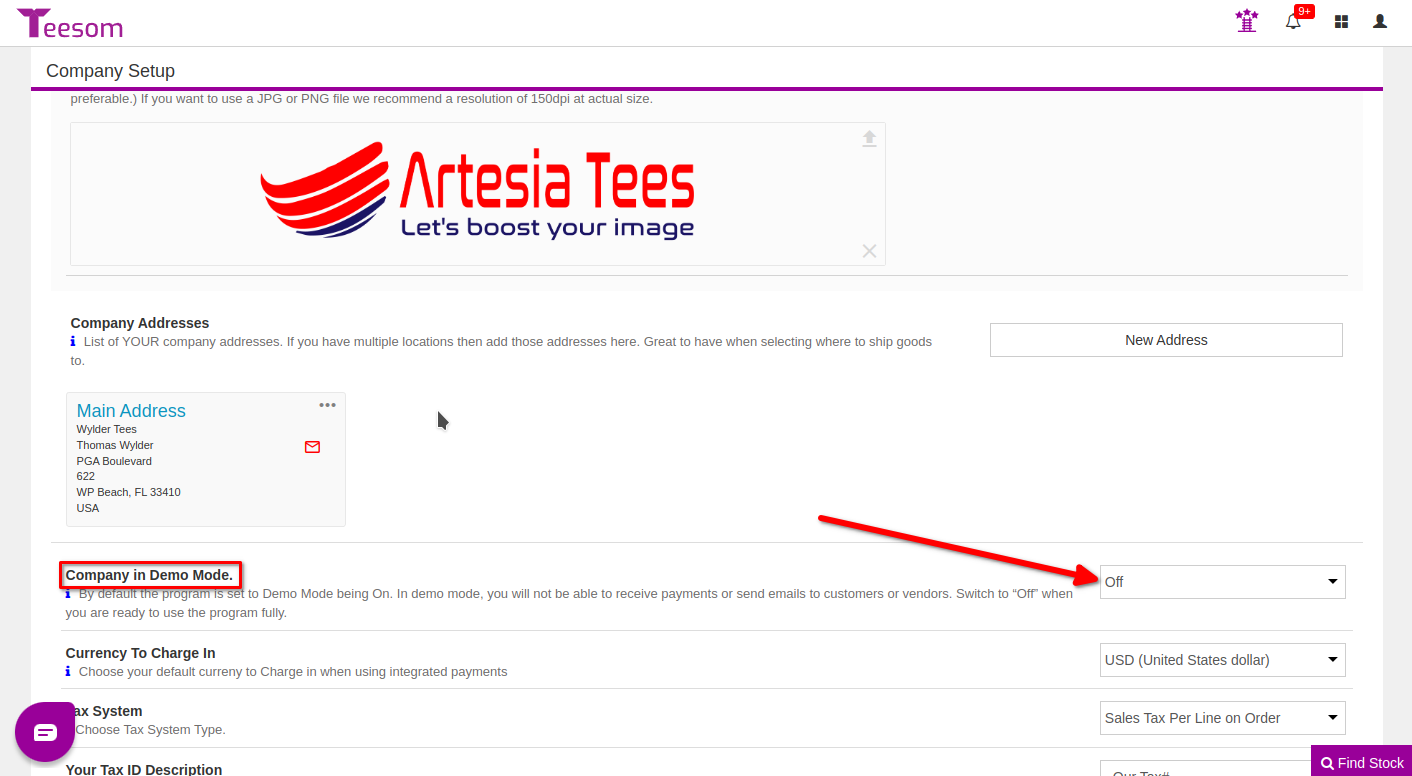
In the “Setup” tab under the “My Company” section scroll down until you see the row named “Company In Demo Mode” click on the dropdown and select “Off“
Congratulations! You are now in “Live” mode – emails will actually be sent to your customers and online payments will work normally.