This tutorial will focus on completing your basic company info.
Check out the video tutorial below or go further downfor for a step by step guide:
Company Settings
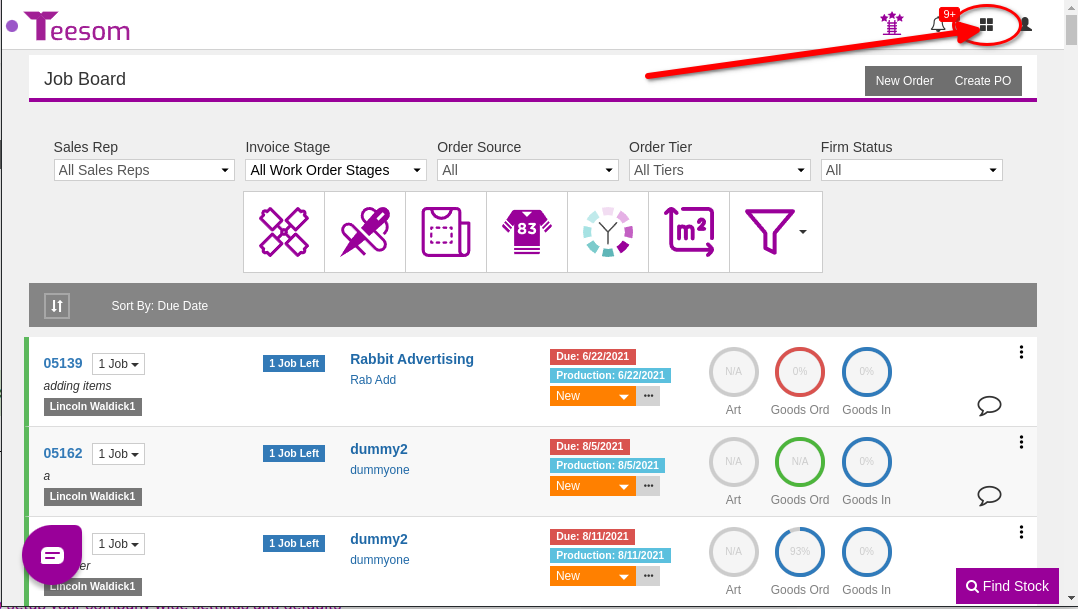
You can access your Company Setup area from the Main Menu =>
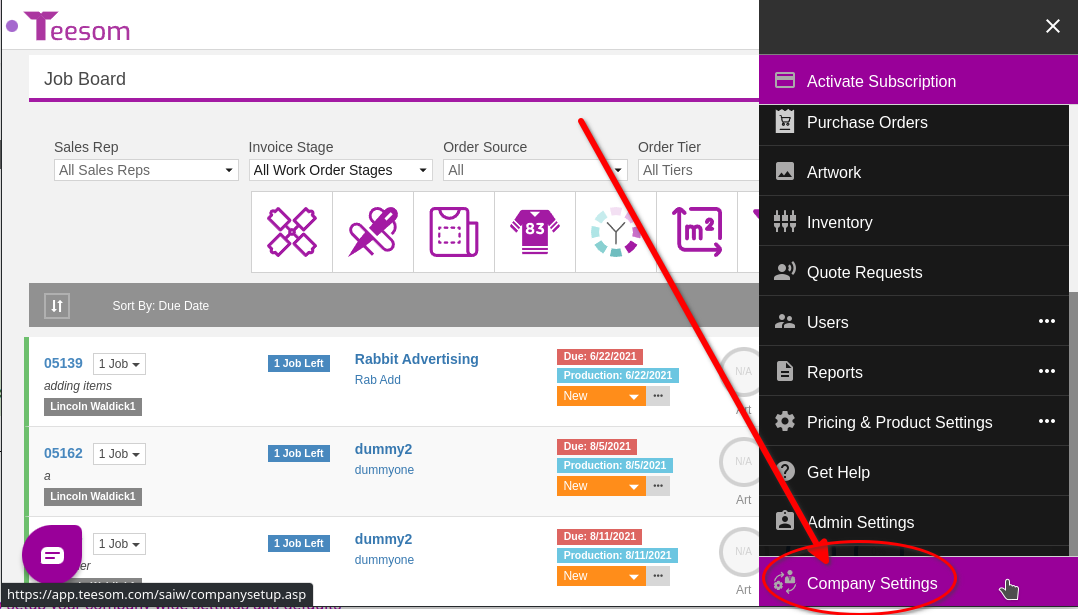
Click on the Main Menu and then select Company Settings:
My Company
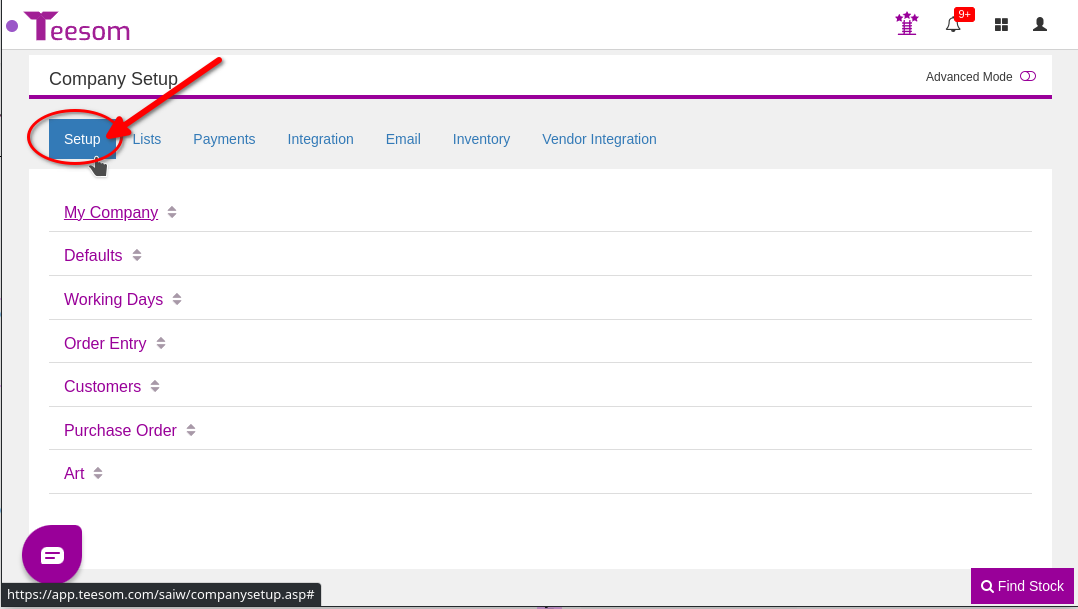
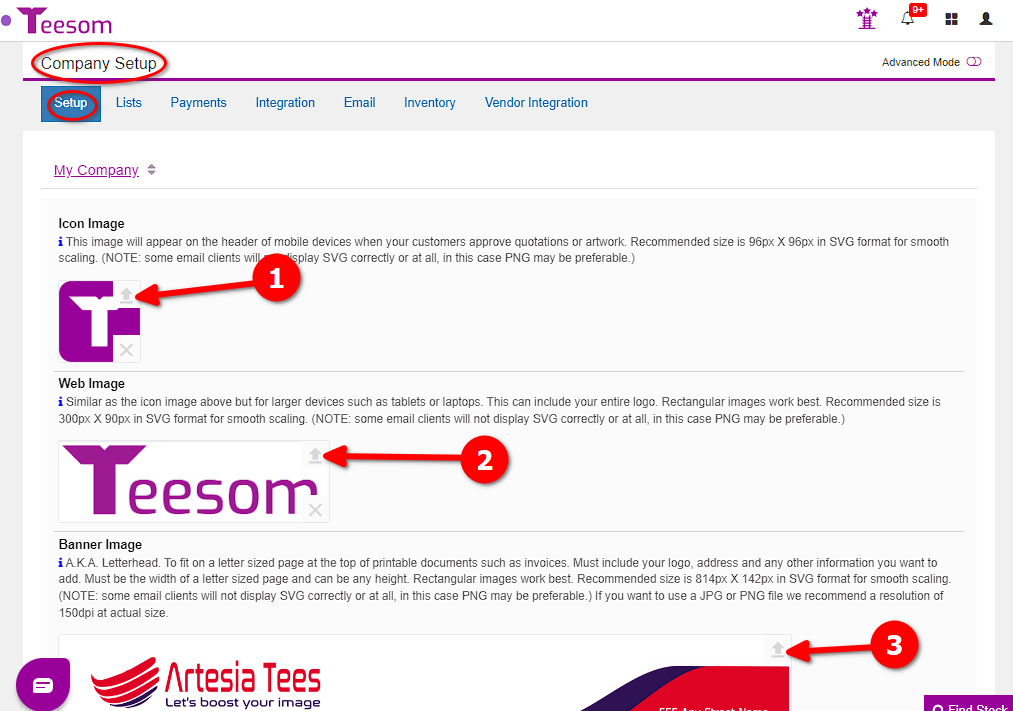
When you open the ‘Company Setup‘ page you should land on the ‘Setup‘ tab:
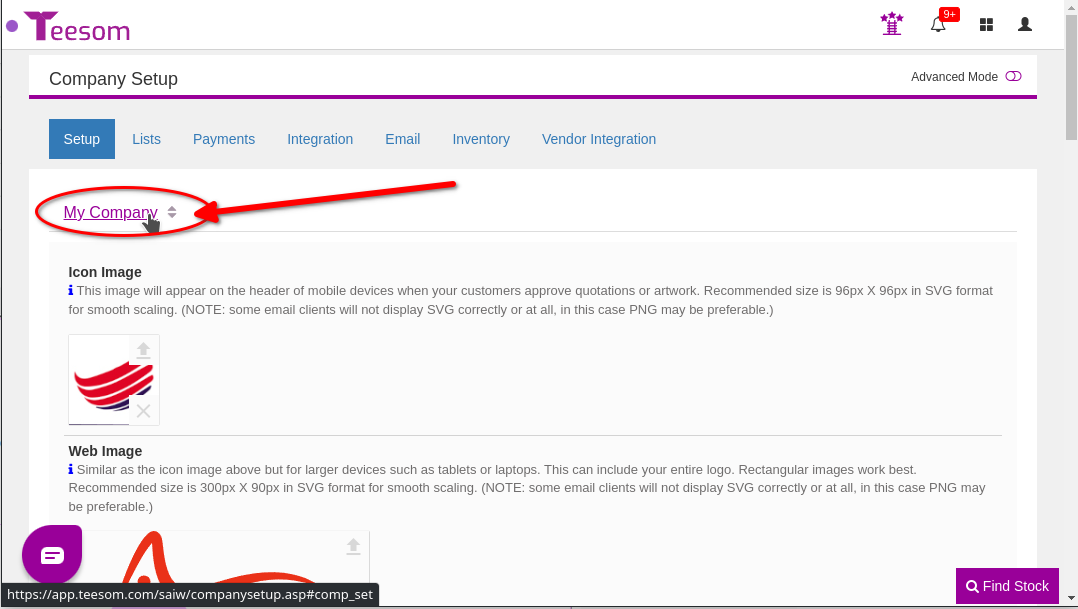
Click on ‘My Company‘ to expand the section. In this section you can add custom logo and banner images for your company and you can view and edit your company’s contact and other details:
Logo and Banner Images
NOTE: You can only load an "image" file type, such as JPG, PNG or SVG. You cannot load a PDF or any other kind of document
Also note that some email clients do not display SVG images correctly (or at all) - it may be preferable therefore to use PNG for these images.
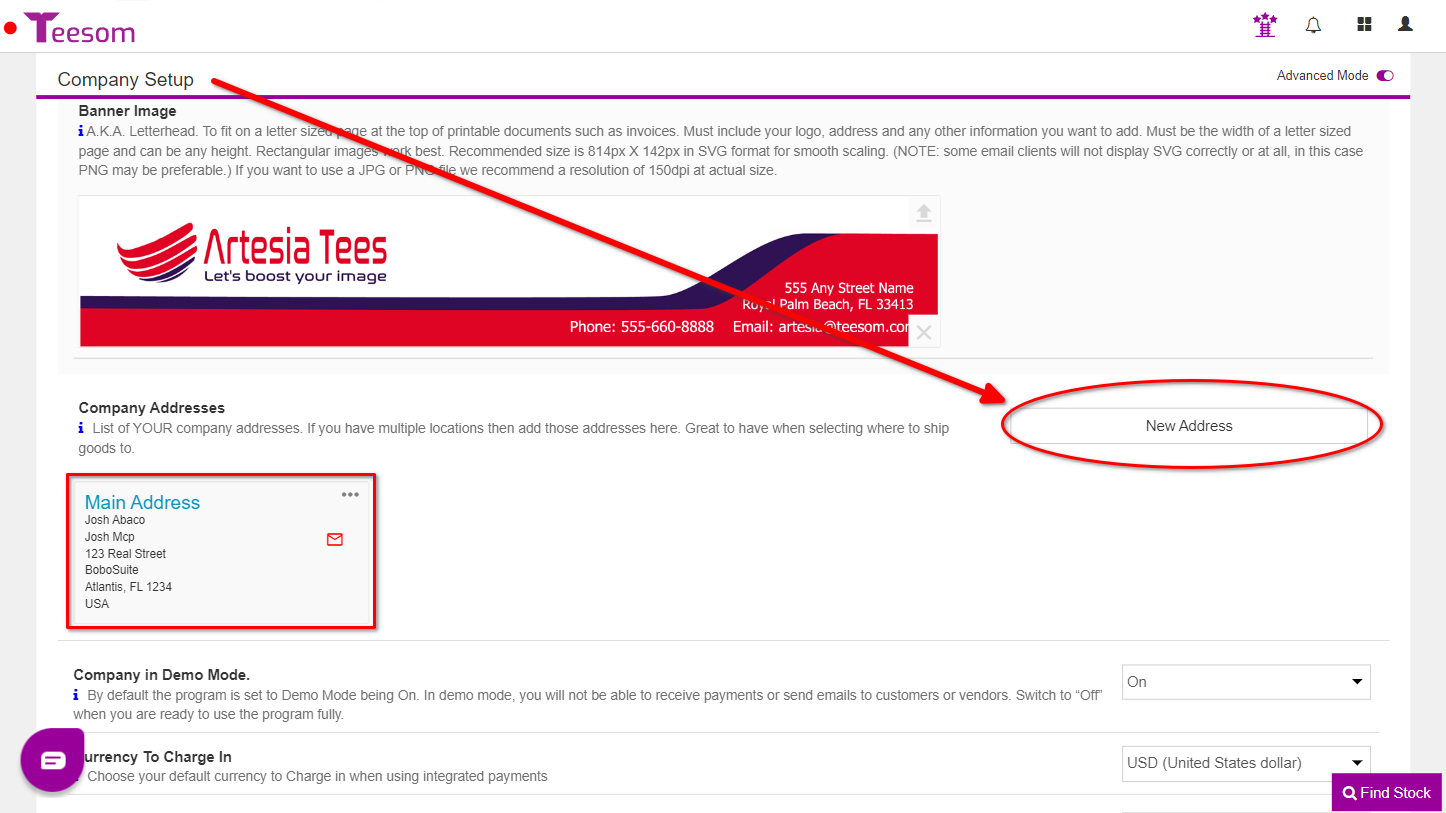
Company Addresses
Under “Company Addresses” Click on “New address“:
IMPORTANT:You can add multiple addresses however one must be set as the default. This address will appear on all your quotes/invoices.
The first address that you add will be set as the default “Mail To” address for billing and all other communications.
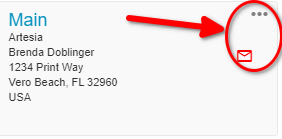
You can click on either the envelope icon or the “3 dots” menu to set or change the default “Mail To” address:
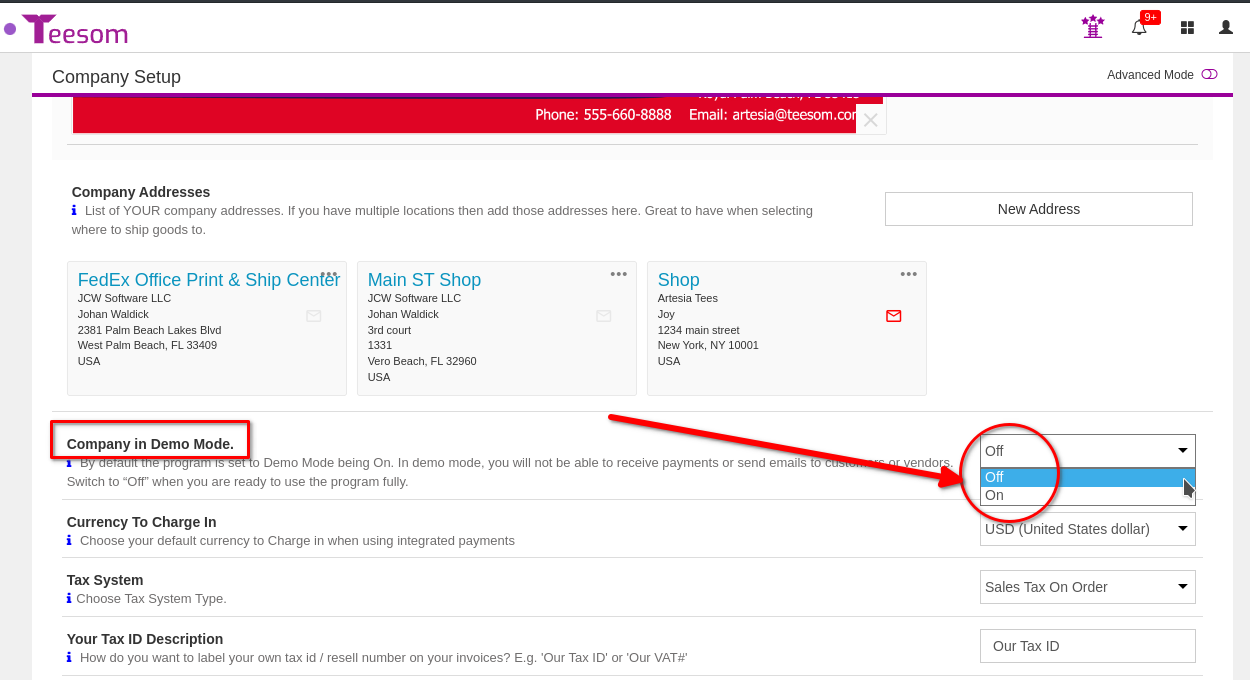
Demo Mode
Demo mode is not like a “free trial” – all it does is prevent emails, messages and notifications from actually going to your customers or suppliers.
Understanding if Teesom is the ideal match for your business is our top priority. That’s why we strongly encourage you to book a demo. It’s the most efficient way to see if Teesom is a fit for your business.
When you initially subscribe to Teesom you are immediately able to use all the features, HOWEVER, while you are in “Demo Mode” you will not be able to receive payments or send emails to your customers (any email you send will instead be sent to your own email address.)
Here is a list of the things you can and can’t do in demo mode:
Things you can do:
Create orders
Connect to (*setup*) integrated payment gateways
Create customers
Set up email account
Things you can’t do:
Send out emails ( All emails will be redirected to your own email)
Send out orders to customers
Take online payments ( You can take test payments to ensure that your payment integrations are working but you cannot take actual payments from customers)
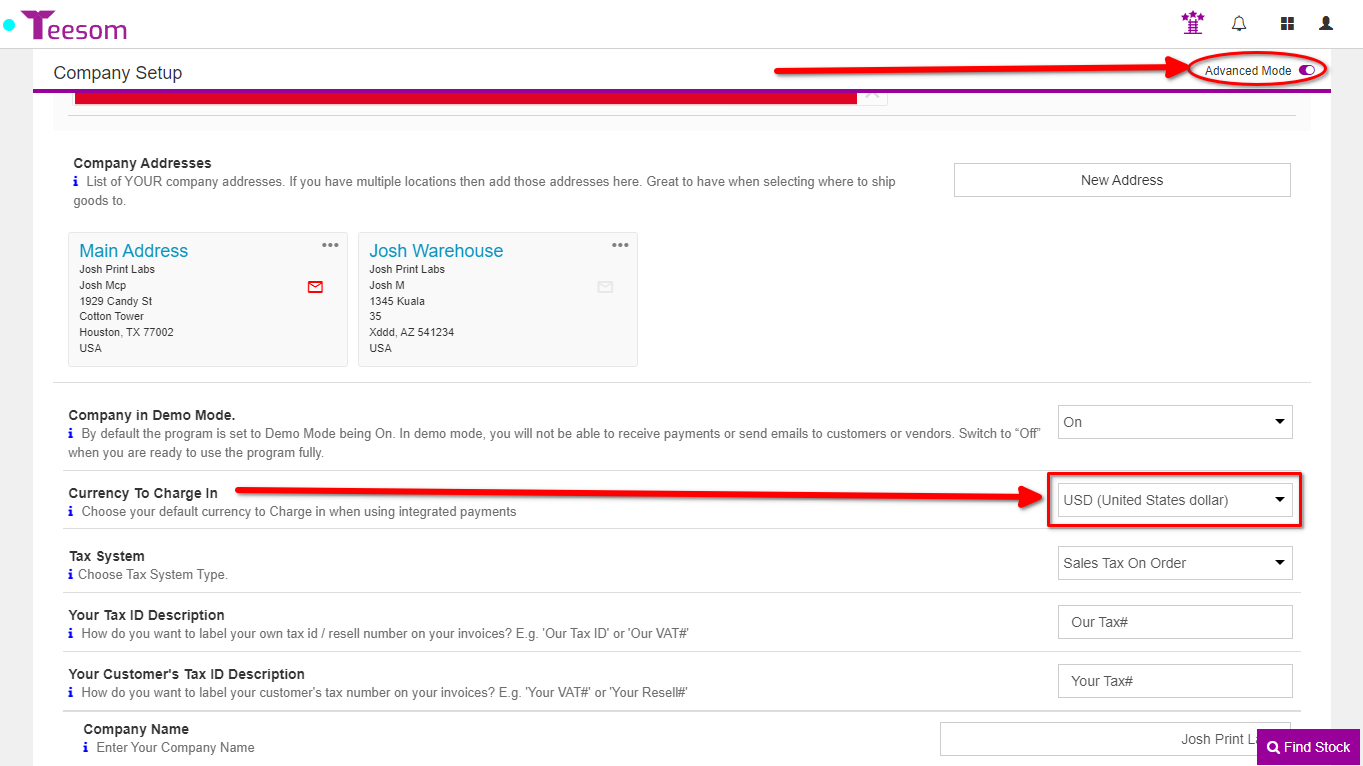
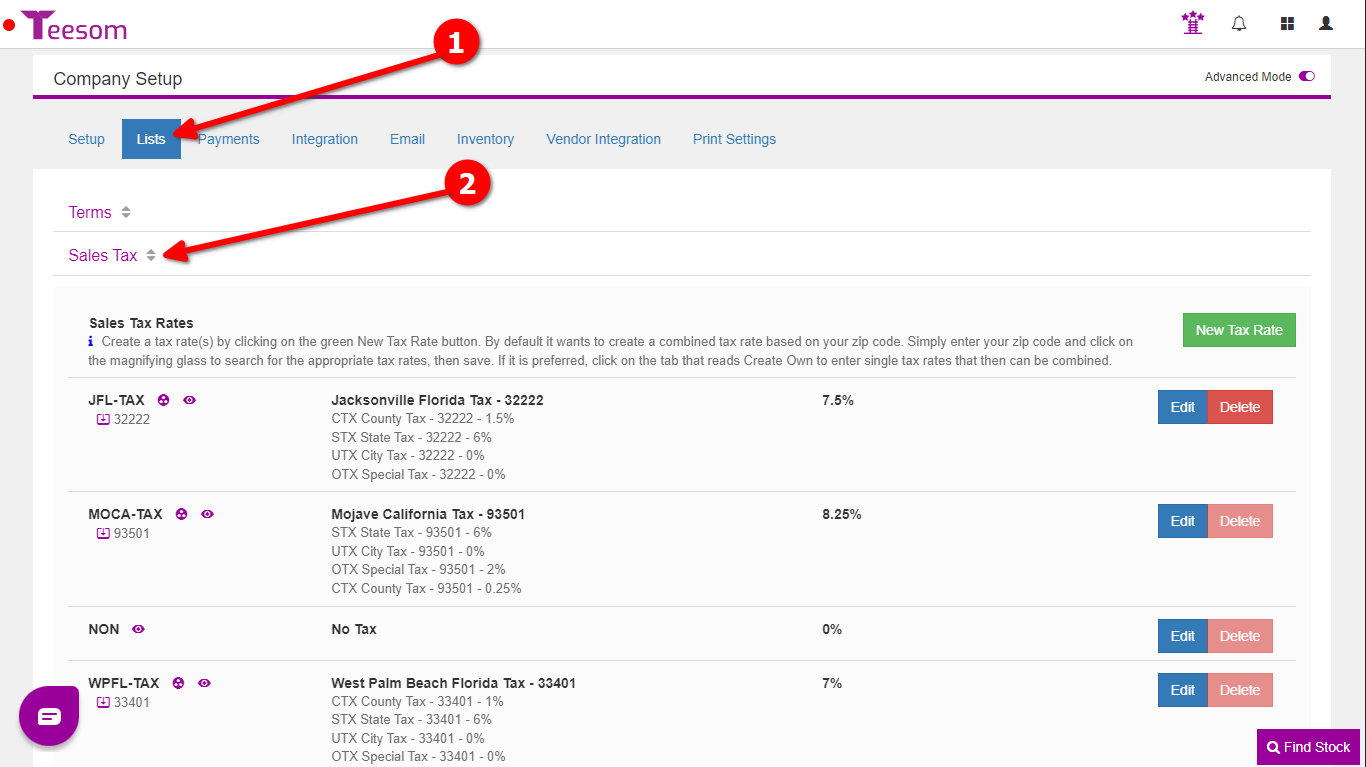
Under ‘Company Setup‘ go to the ‘Lists’ tab and expand ‘Sales Tax’:
Important for QuickBooks Users: When setting up your Sales Tax Codes/Rates, they should be setup exactly as they are in QuickBooks!
i.e. If you have a combined tax that is broken out in QuickBooks you should do the same in Teesom, using the Zip Code should work in this case. If you have a single tax rate/code in QuickBooks then you should setup a single tax code in Teesom, you should create your own tax rate instead of using the "By Zip Code" function.
It is important that both your QuickBooks and Teesom tax rates match up and reflect how you pay your taxes in reality. Check with your accounting professional if you are unsure.
Here you can create your company’s tax codes.
Teesom has 2 ways of doing this:
1. Automatically by ZIP code. (For QB users: Only use this if you want a Combined Tax Rate that is broken out by it’s combined tax components.)
2. Manually, use this option if you just have a single tax rate in QuickBooks. (Which may be combined but is not broken out into components.)
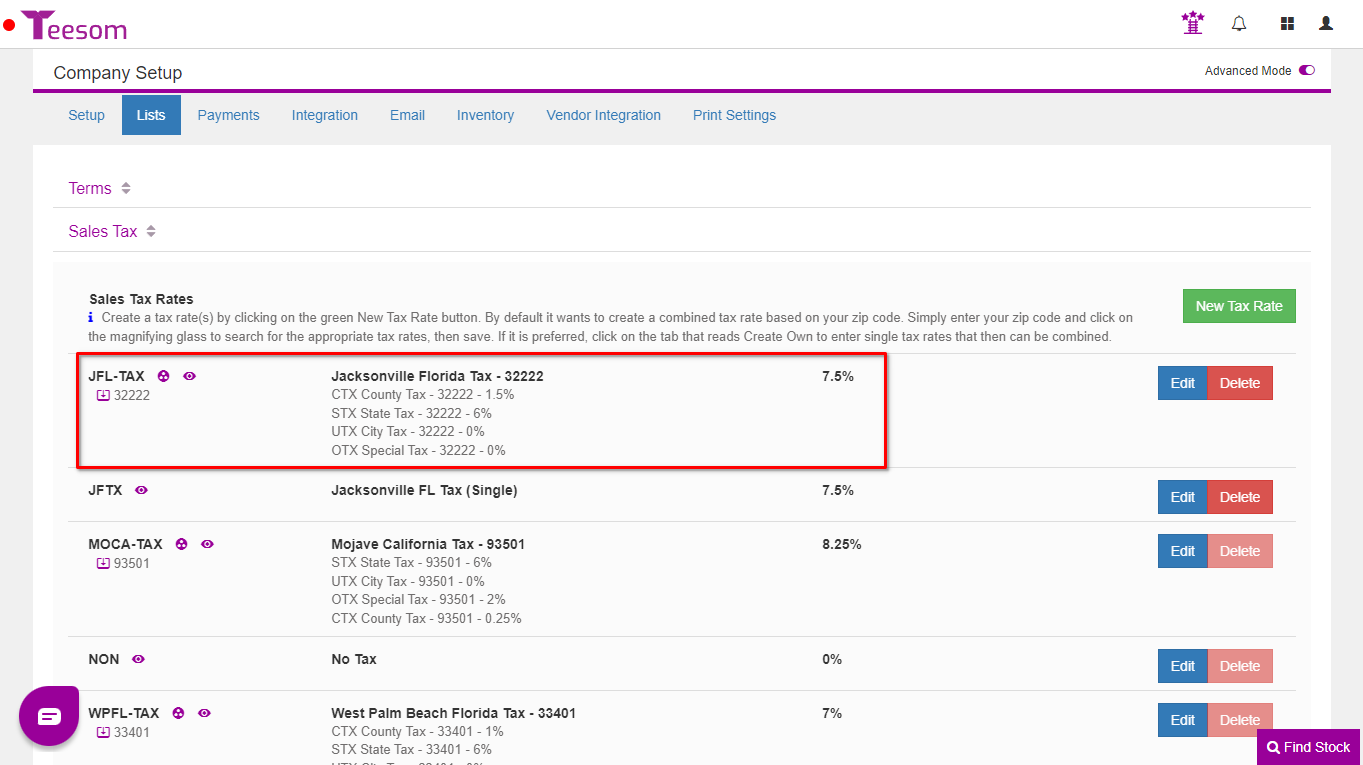
Create Tax Codes from ZIP code
Creating a tax rate by Zip Code will create a combined tax that is broken out. If that is not how it’s setup in your QuickBooks then create your own single combined tax rate instead.
Check out this quick video tutorial to see how to setup your tax codes By Zip Code:
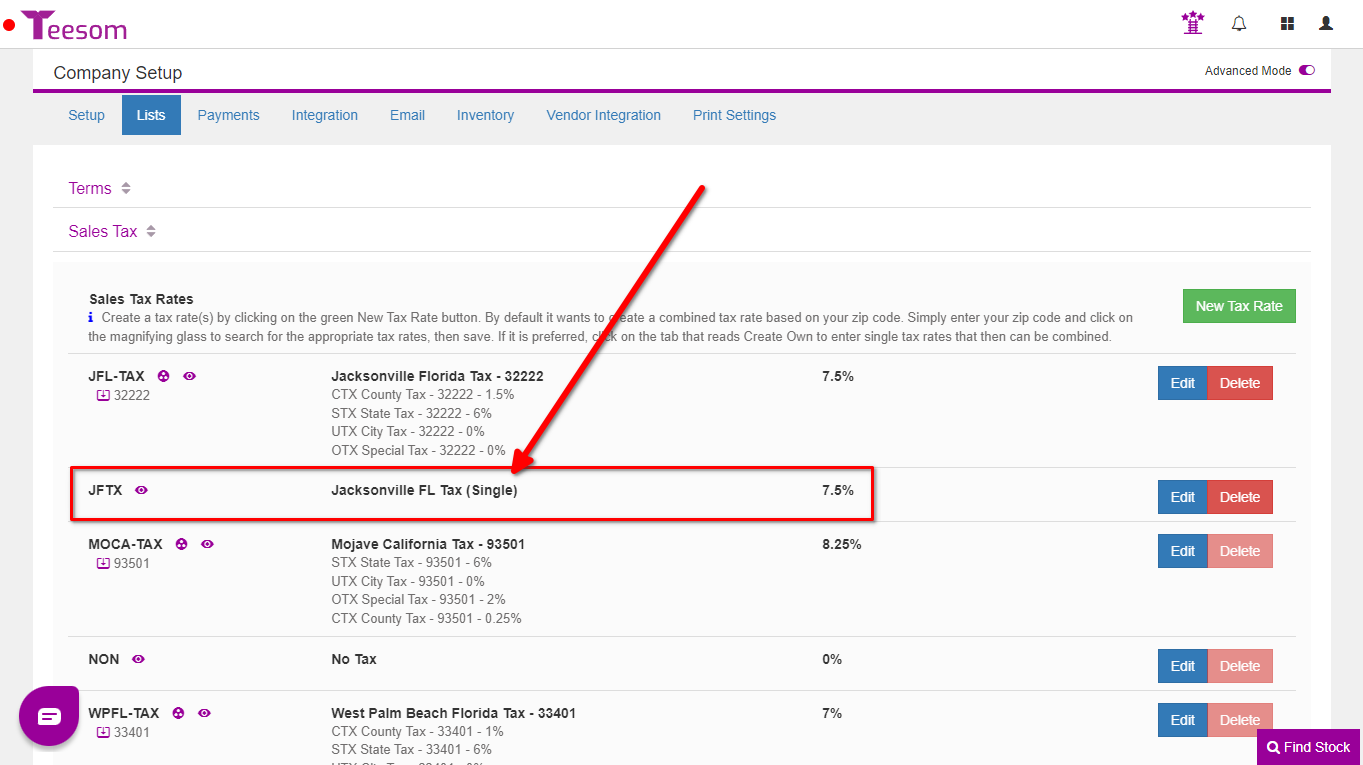
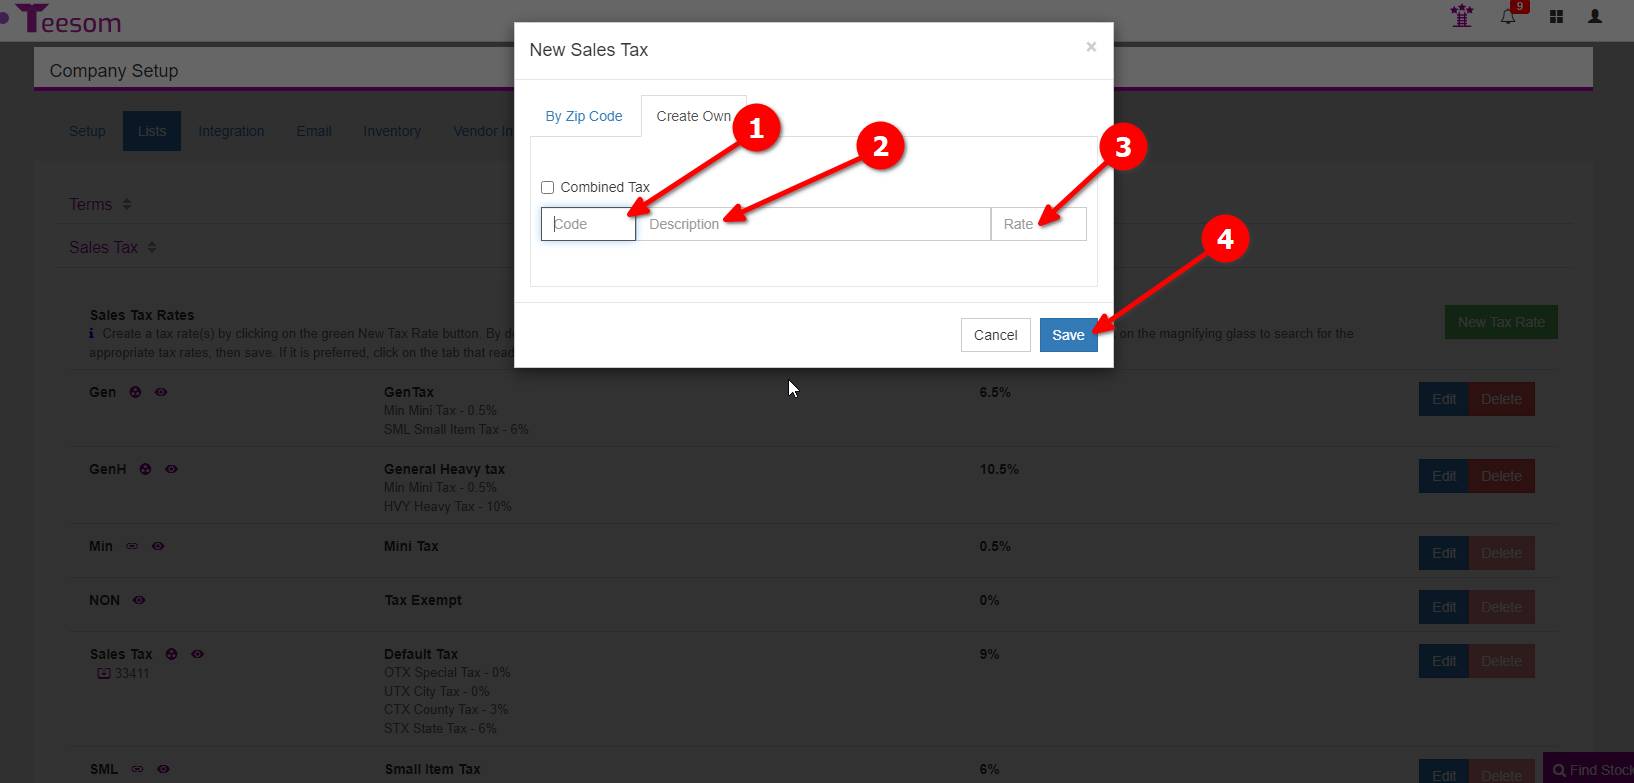
Create A Sales Tax Code Manually
If you are going to connect to QuickBooks, and you don’t have it broken out in QB, then just create a single code manually instead of using the By Zip Code.
To manually create a tax code:
Click on “New Tax Rate“
To create a single tax code:
Enter the tax code. (Abbreviated Description.)
Enter a description of your tax code.
Enter the rate. Ex: 5.5
Click “Save“.
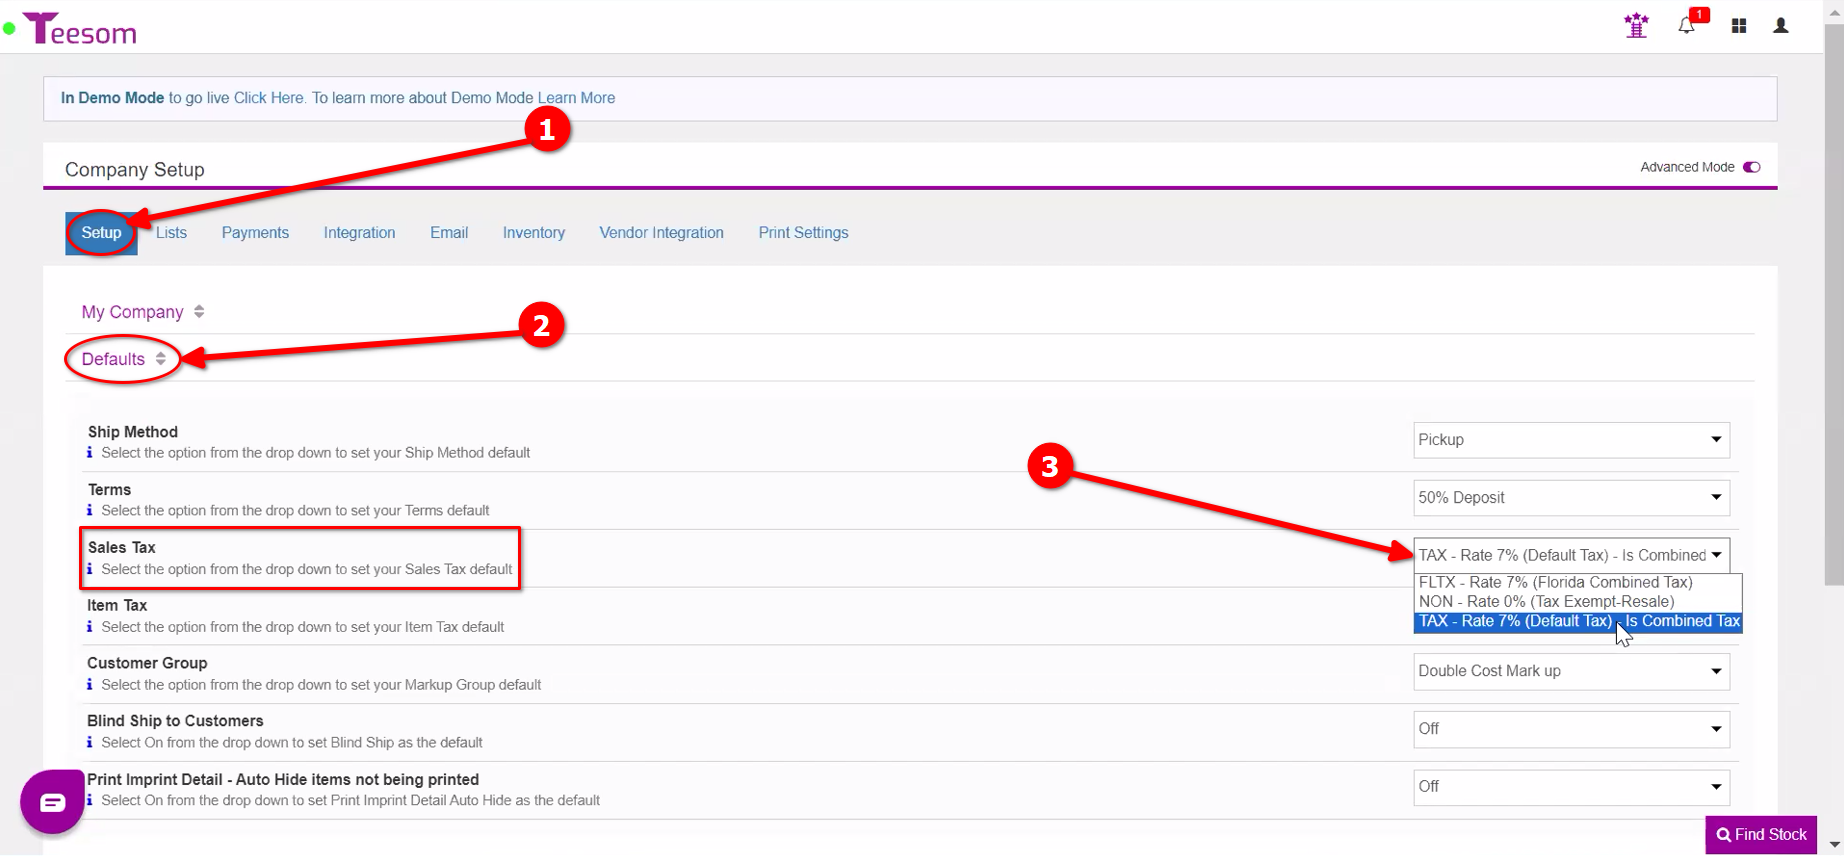
Set Default Tax
Remember to change the "Default" Sales Tax that should be used on new orders.
Next up in the Quickstart tutorial series will be an overview look at the Teesom order workflow; from Quote to work in progress (WIP) invoice to Completed: