There are 2 different types of purchase orders you can create, a consolidated PO and a single order PO.
Single order POs are created from the order itself and are used to purchase goods for that order alone.
Consolidated POs are created either from the “Purchase Orders” screen or the job board and are used to order goods for multiple orders or POs unrelated to any orders.
In Teesom POs are created using the 'PO wizard'. For an overview of the PO Wizard see: Introduction to the PO Wizard
Places Where You Can Create Purchase Orders
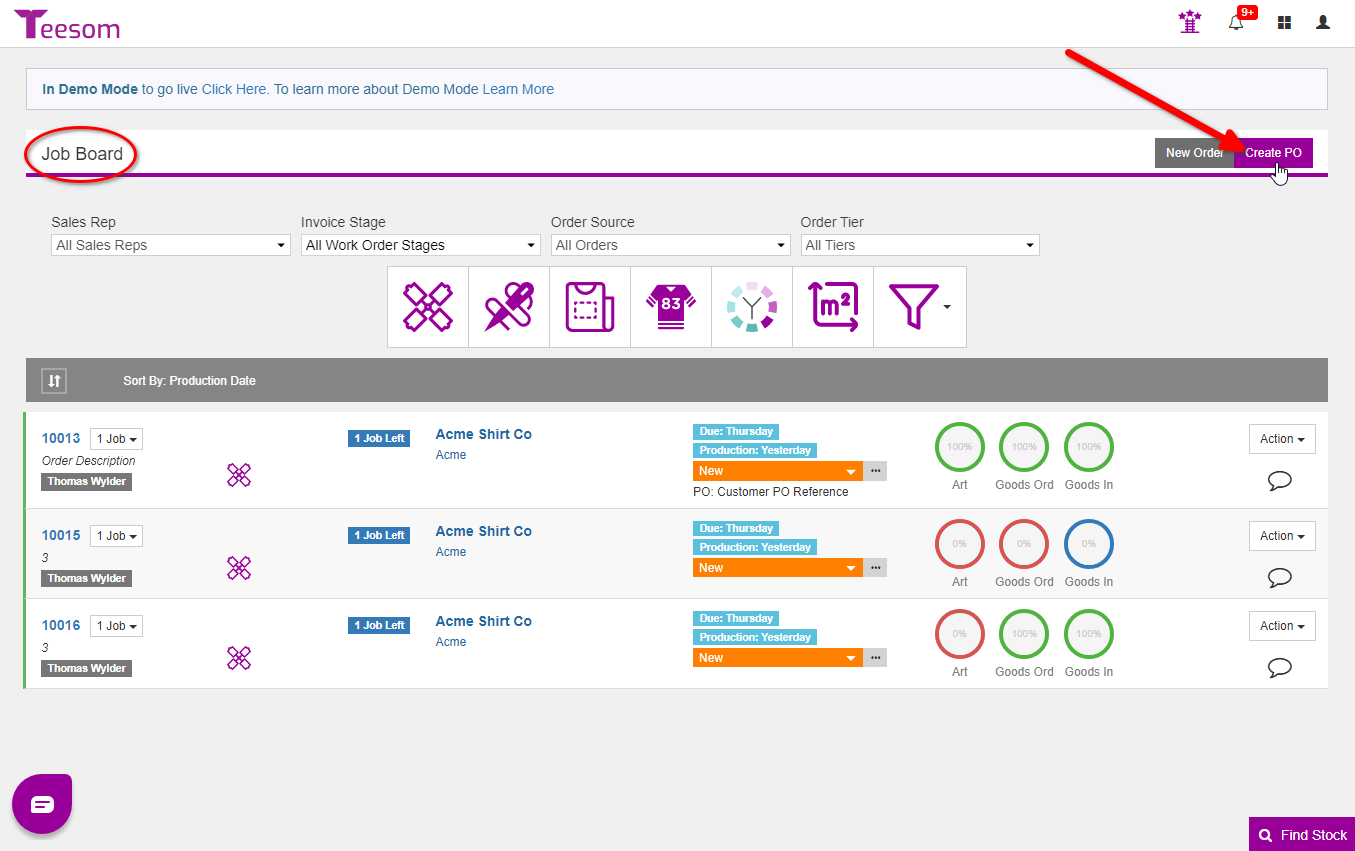
The Job Board
From the ‘Job Board’ you are able to create single and consolidated purchase orders.
To create a consolidated PO:
Click on “Create PO” at the top right of the page.
To create a single order PO:
Click on the “3 Dot” menu next to the relevant order.
Select “Create PO“.
The Task Board
To create a PO from the task board first open the task board:
Click The “Shortcut” icon and select “Tasks“
On the task board:
Click on the “Goods” tab.
Select “Order These Goods” to expand the section.
For a consolidated PO, click on the “Create PO” button in the upper right hand corner.
To create a PO for a specific order, click the “Action” dropdown next to the order and click “Create PO“.
The Purchase Order List
When creating a PO from the “Purchase Order” screen it will be a consolidated PO.
To create a PO from the ‘Purchase Order List‘ screen:
Go to the “Main Menu” and select “Purchase Orders“.
Click on “New PO“.
Create A Single Order PO
To create a “Single Order PO”:
Open the order.
Click on the Hamburger Menu and select “Create PO“.
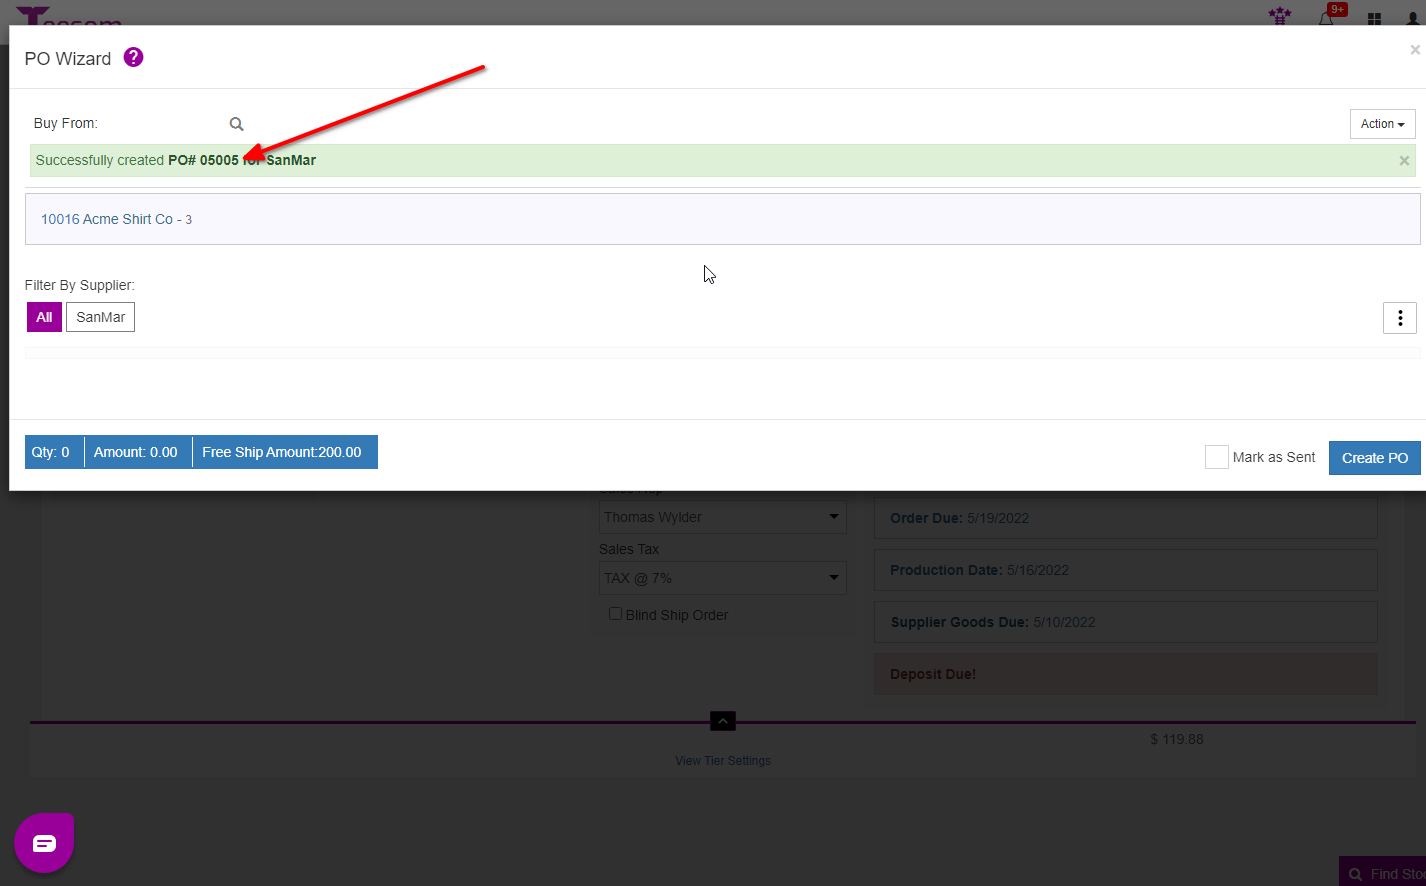
This will open the PO Wizard:
Click on the magnifying glass then enter the name of the supplier and select them.
Click on “Create PO“.
You can also check the box “Mark as Sent” if you don’t want to actually send the PO to the supplier.
Create A Consolidated Purchase Order
You can create a "Consolidated" purchase order from the 'Job Board' or the 'Purchase Order List.'
A “Consolidated Purchase Order” is for ordering required items for multiple jobs at once.
We will be creating the PO from the job board in this example:
Go to the Job board then click on “Create PO“.
This will bring up the “PO Wizard” which will now show you all the items that need to be ordered for all your open WIP Invoices. (Excepting invoices in ‘Edit Mode’)
Search for the supplier you want to ‘Buy from’ and select them.
Click on the supplier name to filter the goods to only those that come from that suppliers catalog.
If any invoices are in ‘Edit Mode’ the PO Wizard will warn you in red at the top.
Click ‘Create PO’ when you’re ready.
TIPYou are able to add extra goods to your order even after you have received the goods. Click here to learn how
After clicking “Create PO” you can click on the PO number to open it:
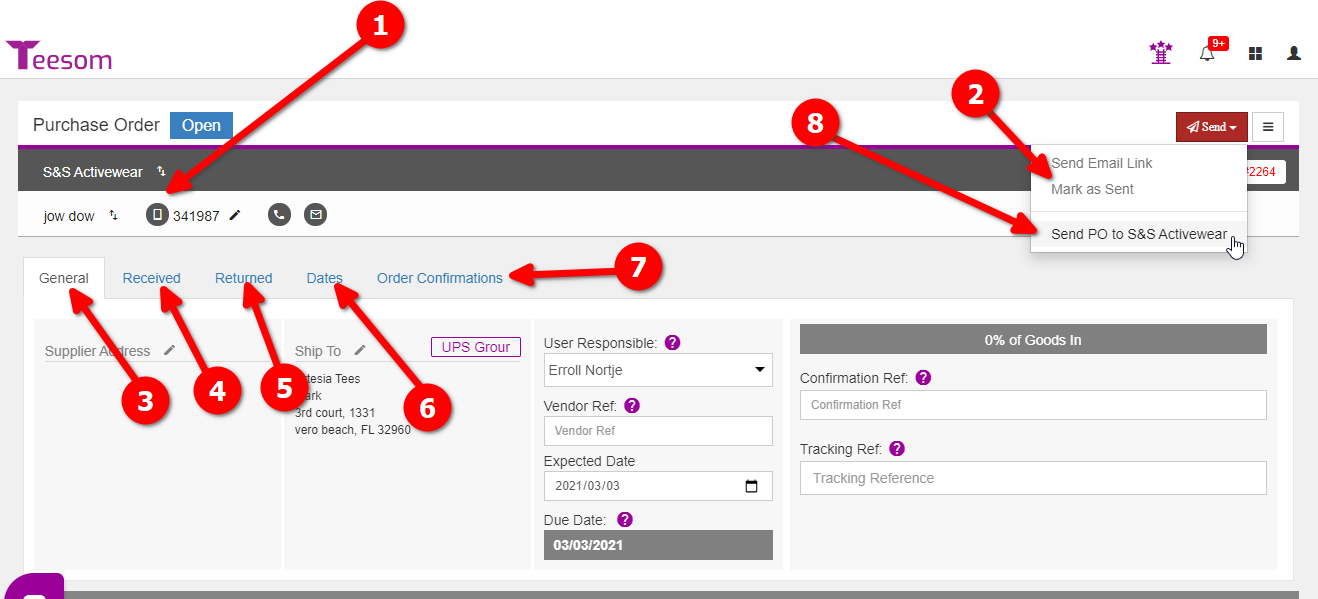
Send The PO To The Supplier
With the purchase order open, review all the information to ensure that it is correct.
Then you can click on the ‘Send‘ button to send the PO the supplier.
"Mark as sent" will NOT send the PO at all.
"Mark as sent" will only flag the PO as having been sent without actually sending it.
"Send PO to Vendor" vs "Send Email Link"
“Send PO to-” is only for integrated vendors and will submit the purchase order electronically to the supplier directly.
“Send Email Link” will send an email to the supplier containing a link for them to view the PO in a browser.
NOTE: By using 'Send Email Link' to your outsourced vendor they will now be able to update the Expected Date, the Confirmation Reference and the Tracking Reference.
Purchase Order Overview
1.) The Suppliers contact Name and information.
3.) The General Tab: Here you can see/edit the General information of the order.
5.) The Returned Tab: Here you will see what Goods have been/need to be returned.
7.) The Order Confirmations Tab: When you submit a PO electronically the vendor will automatically send you an ID this is where it is listed. (Integrated Vendors only)
2.) Send the PO via email to the supplier or mark it as Sent.
4.) The Received Tab: Here you will see what goods have been received.
6.) The Dates Tab: Here you will see the different dates. The Order Date, Sent Date, Expected Date, and the Received Date.
8.) Click Send PO to (supplier) to send the purchase order directly to the supplier. (Integrated Vendors only)
You can click on the hamburger menu and select “View PO” to view what the supplier will see.
The supplier will now be able to update the Expected Date, the Confirmation Reference and the Tracking Reference.
The supplier does not need to be logged into Teesom to update the information on the PO.
You can see how the information is automatically updated on the PO in Teesom.
Viewing Goods on the Order
Open the WIP/Invoice again and look at the 3 circles on the right hand side.
To view what goods have been ordered you can click on the Goods Ordered circle.
To see what goods have been received you can click on the Goods In circle.