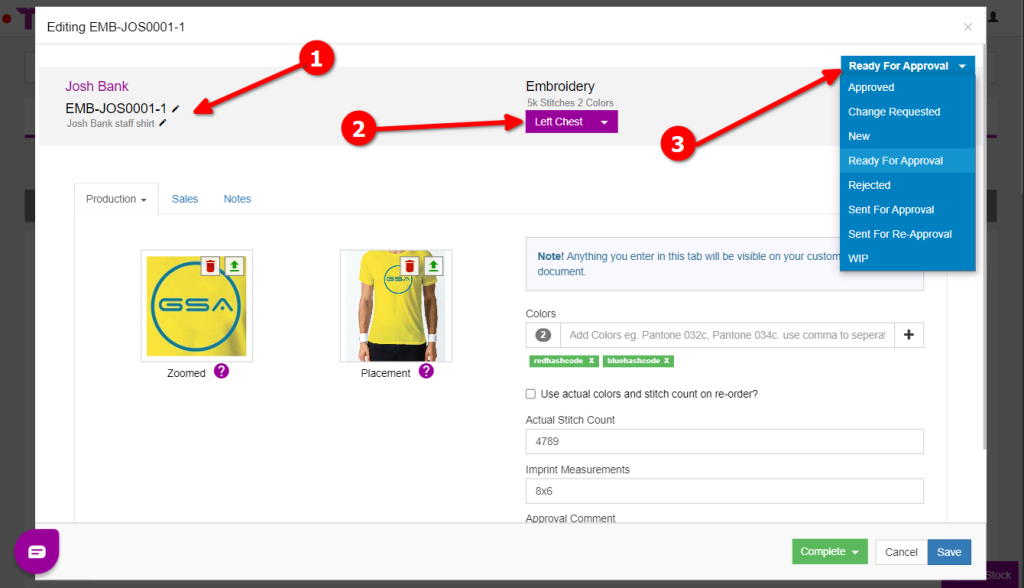
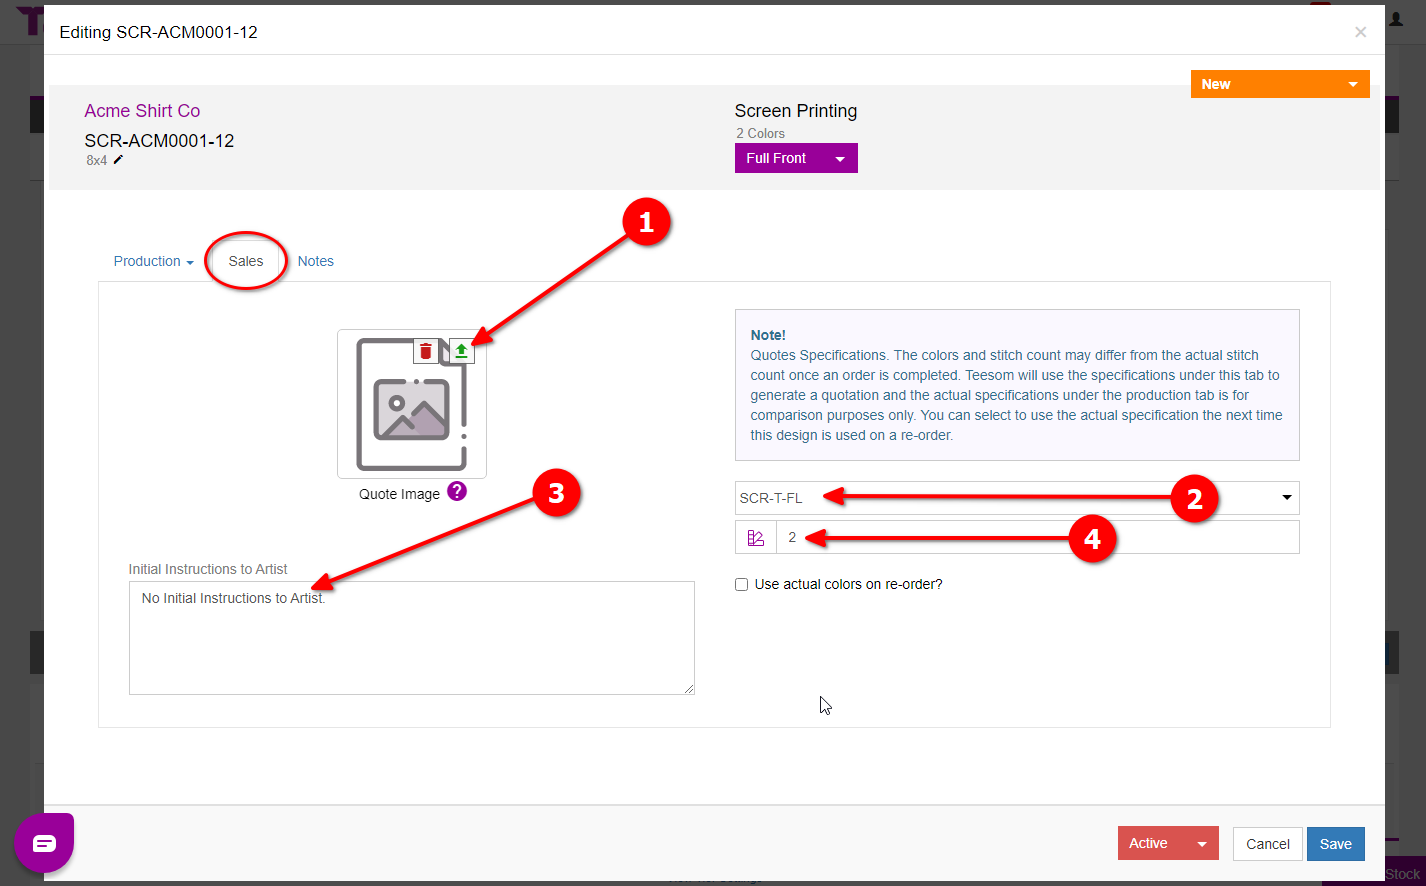
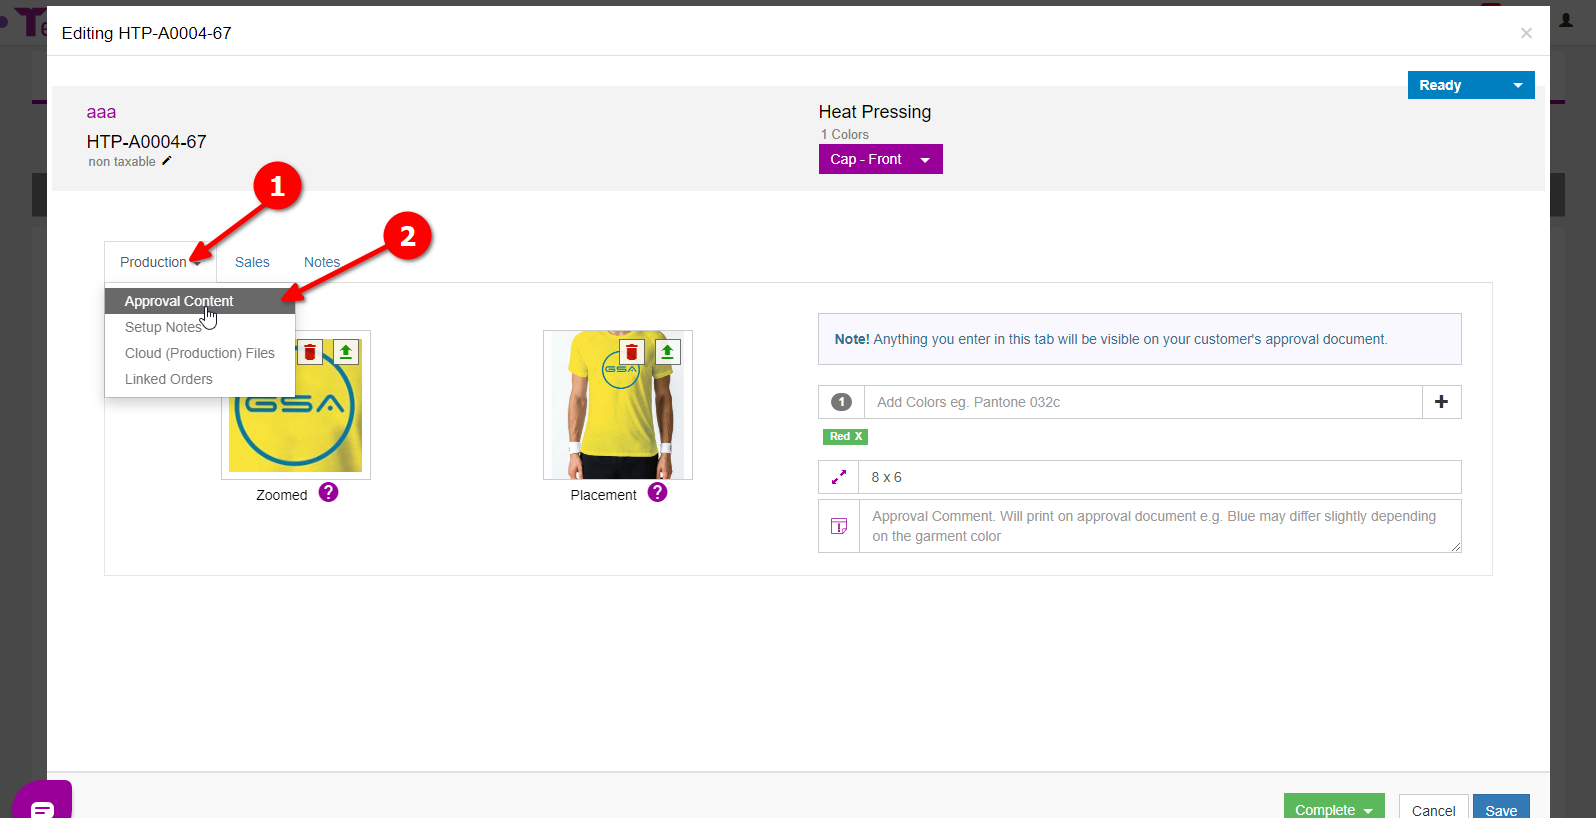
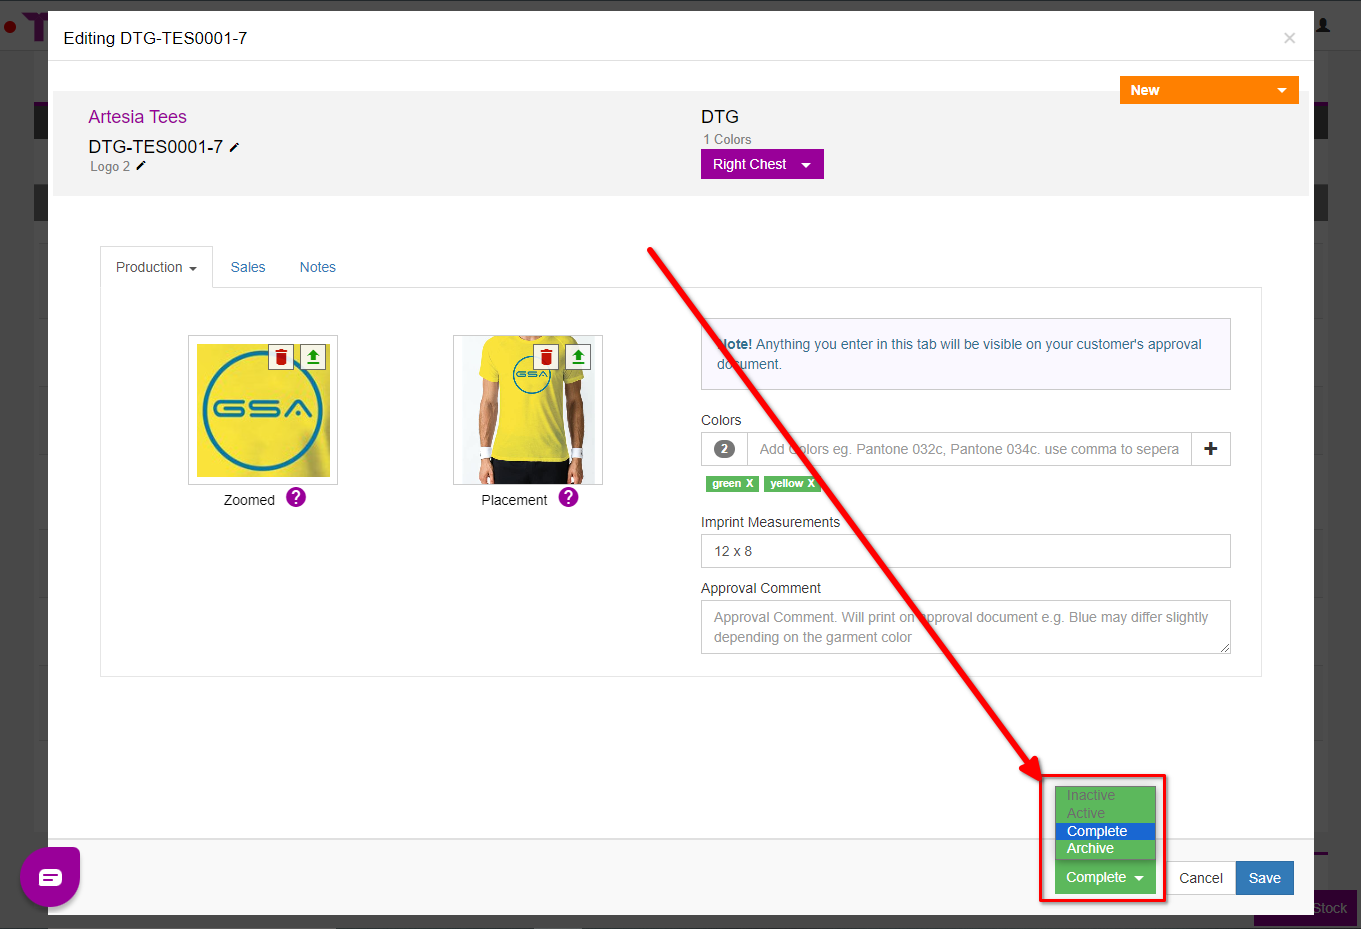
In the Approval Content Section you will be adding the information that will appear on the Production Approval Request.
To get there:
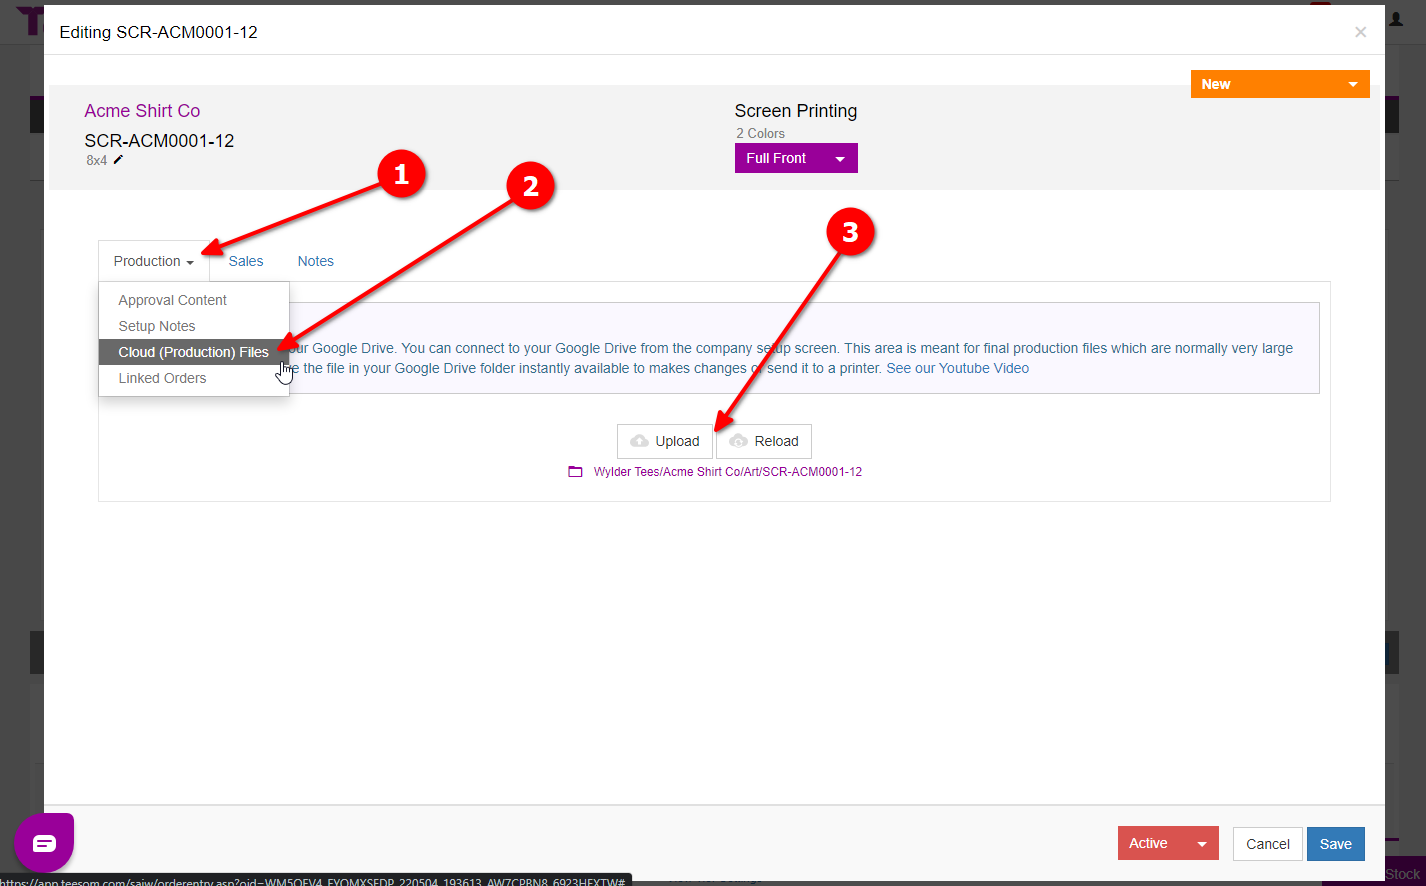
Click on “Production“.
Select “Approval Content“.
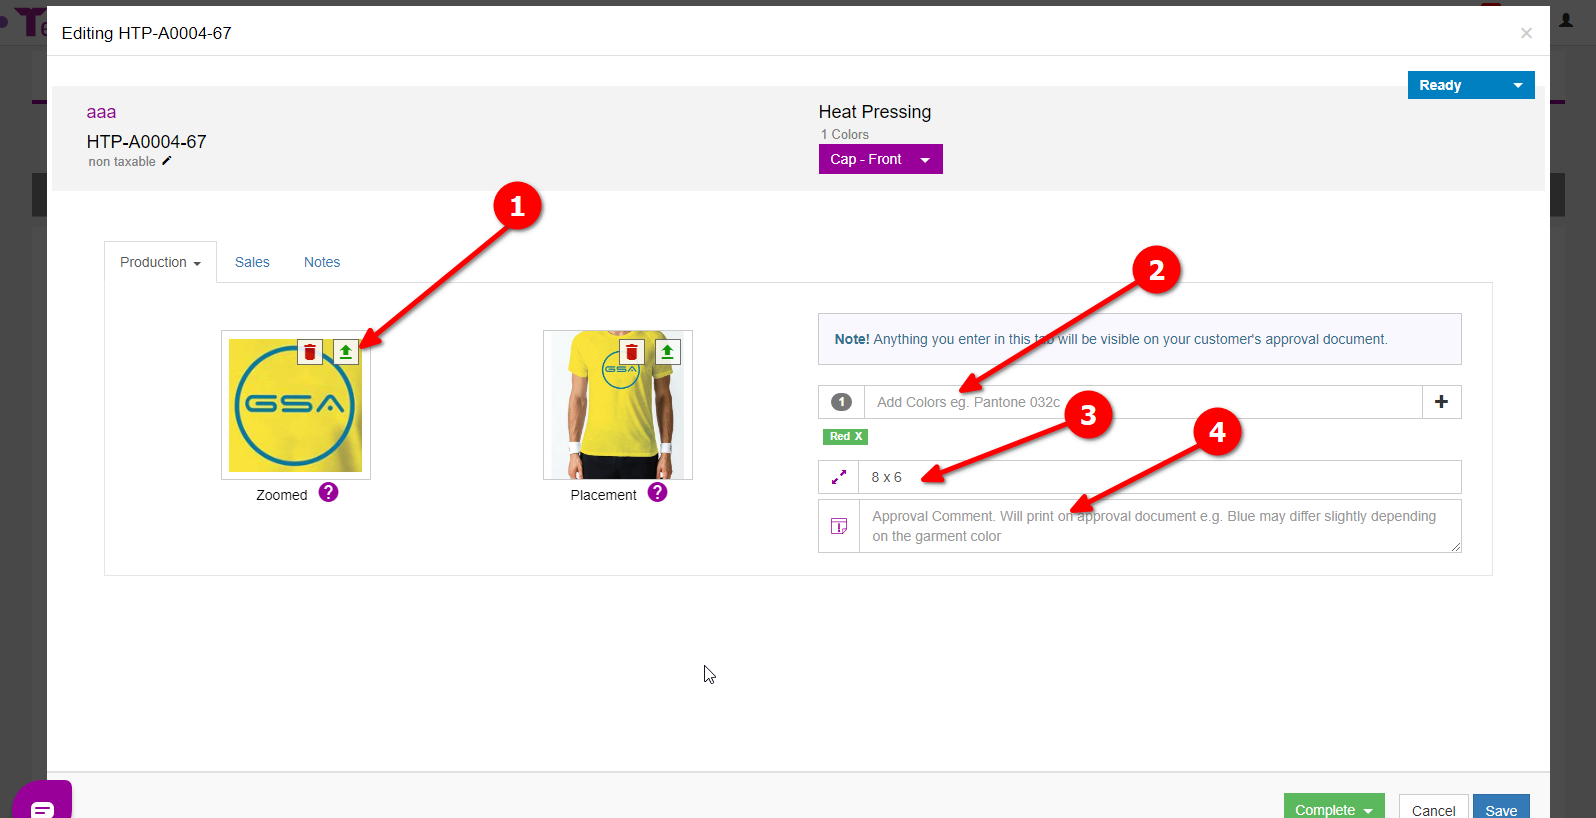
On the approval content section you can:
Upload two different images one showing the placement of the artwork and another showing a zoomed in picture of the artwork.
Enter the colors that will be used the artwork.
Enter the measurements of the artwork.
Add a comment on the approval request. (optional)
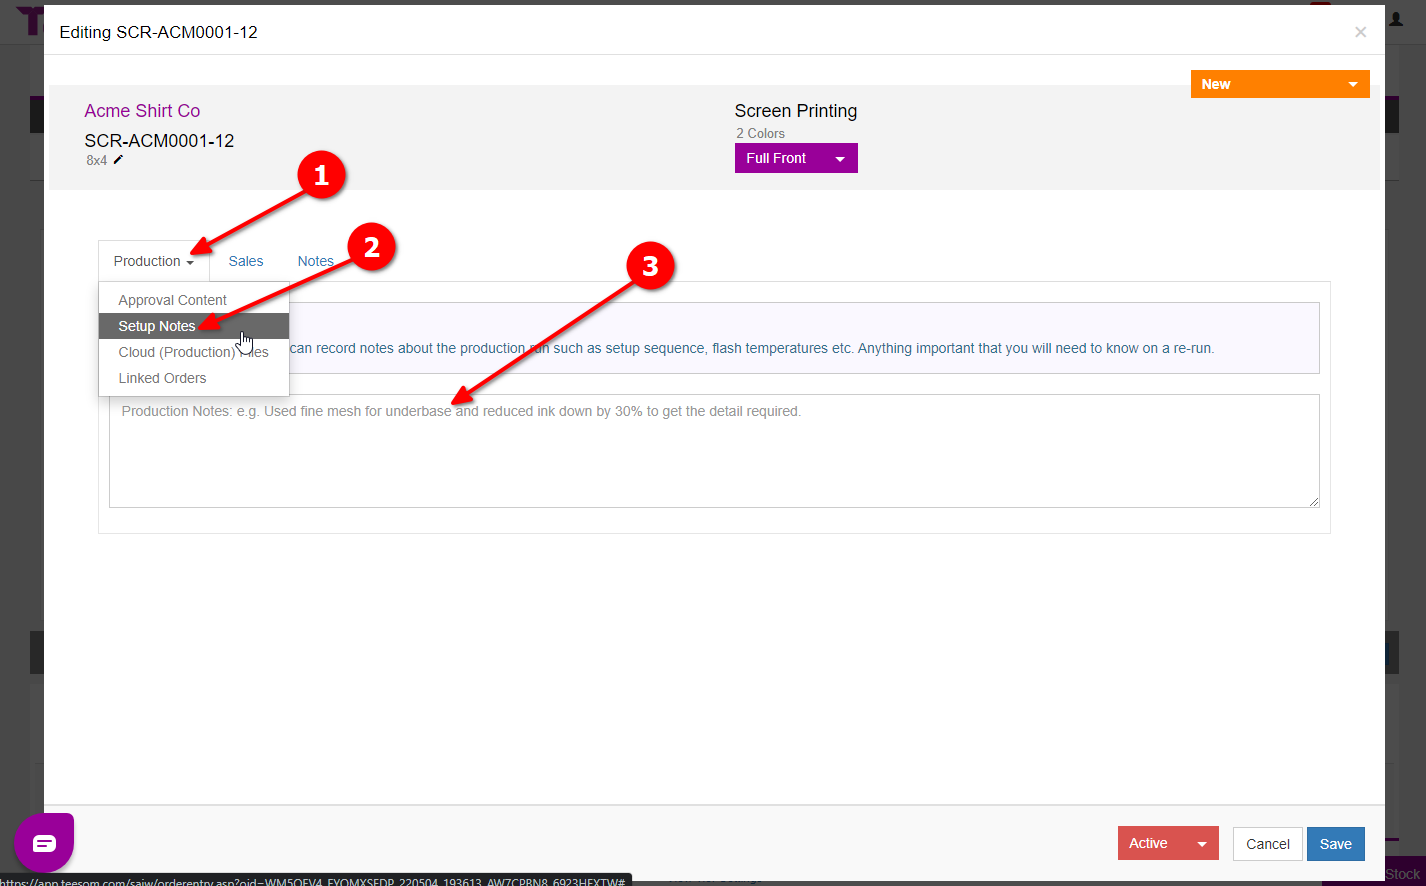
Production: Setup Notes
The Setup Notes section is a free input field where you can record notes about the production run such as setup sequence, flash temperatures etc. Anything important that you will need to know on a re-run: