In this article we will walk you through creating a simple order and briefly discuss the various components of an order in Teesom.
This is a very important step that should not be skipped!
It will help you to understand where all the "pieces" from the rest of this setup tutorial "fit in".
Creating your Order
Checkout this video walkthrough of the entire order creation process from start to process:
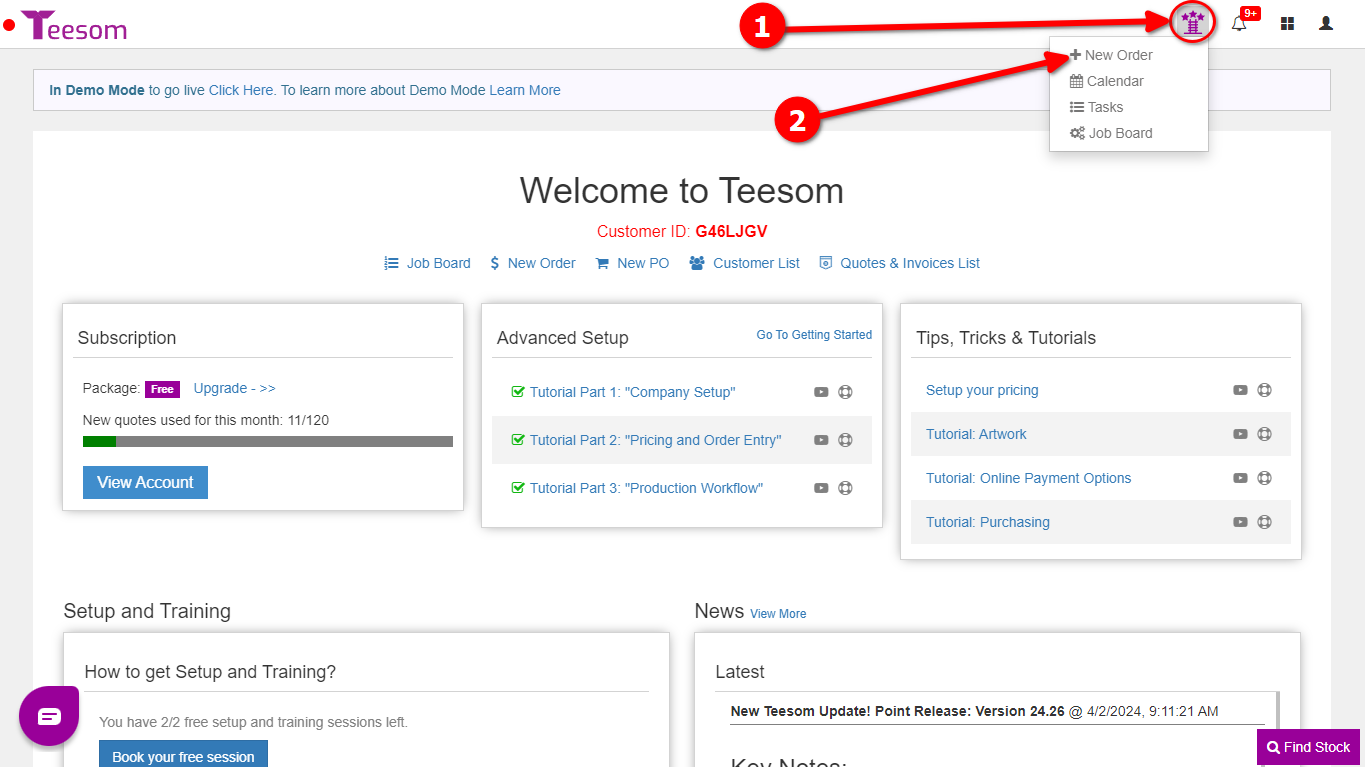
Click on the “Quick Shortcuts” icon and then select “+ New Order” to create a new order at anytime:
Select (or create) the Customer
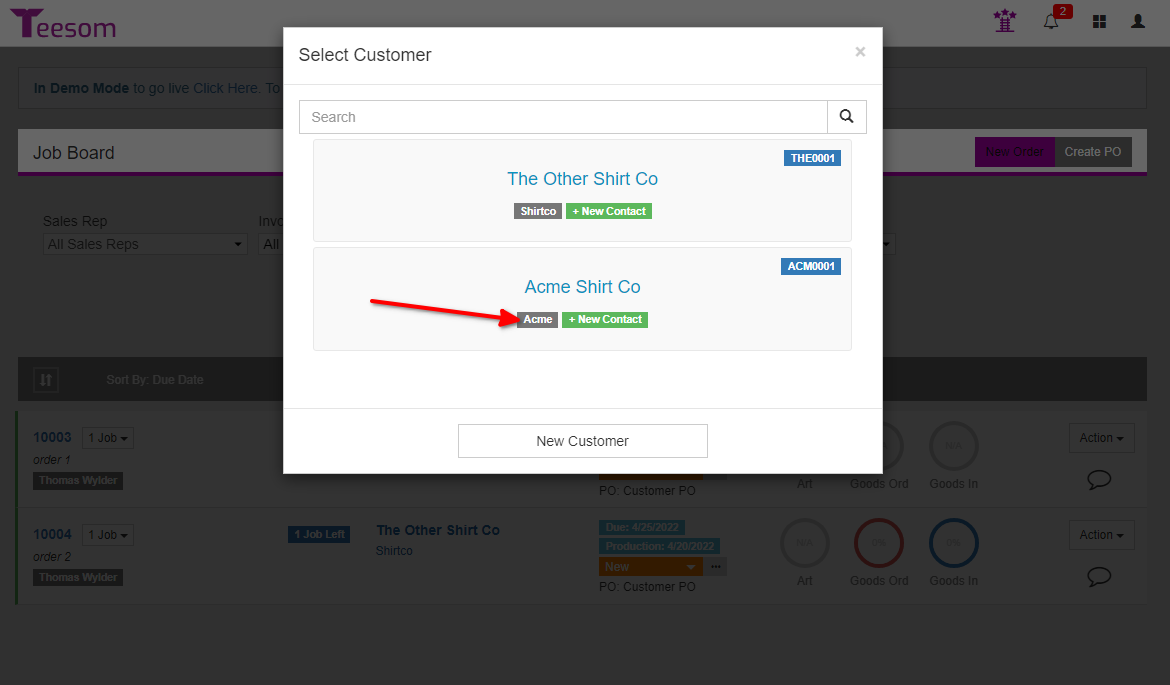
Select a contact from an existing customer or click on “New Customer“:
If you don't have any customers of your own added you will need to add a customer, click on New Customer to add one, you only need to enter the basic required information for now.
NOTE: Click on the contact name not the customer name.
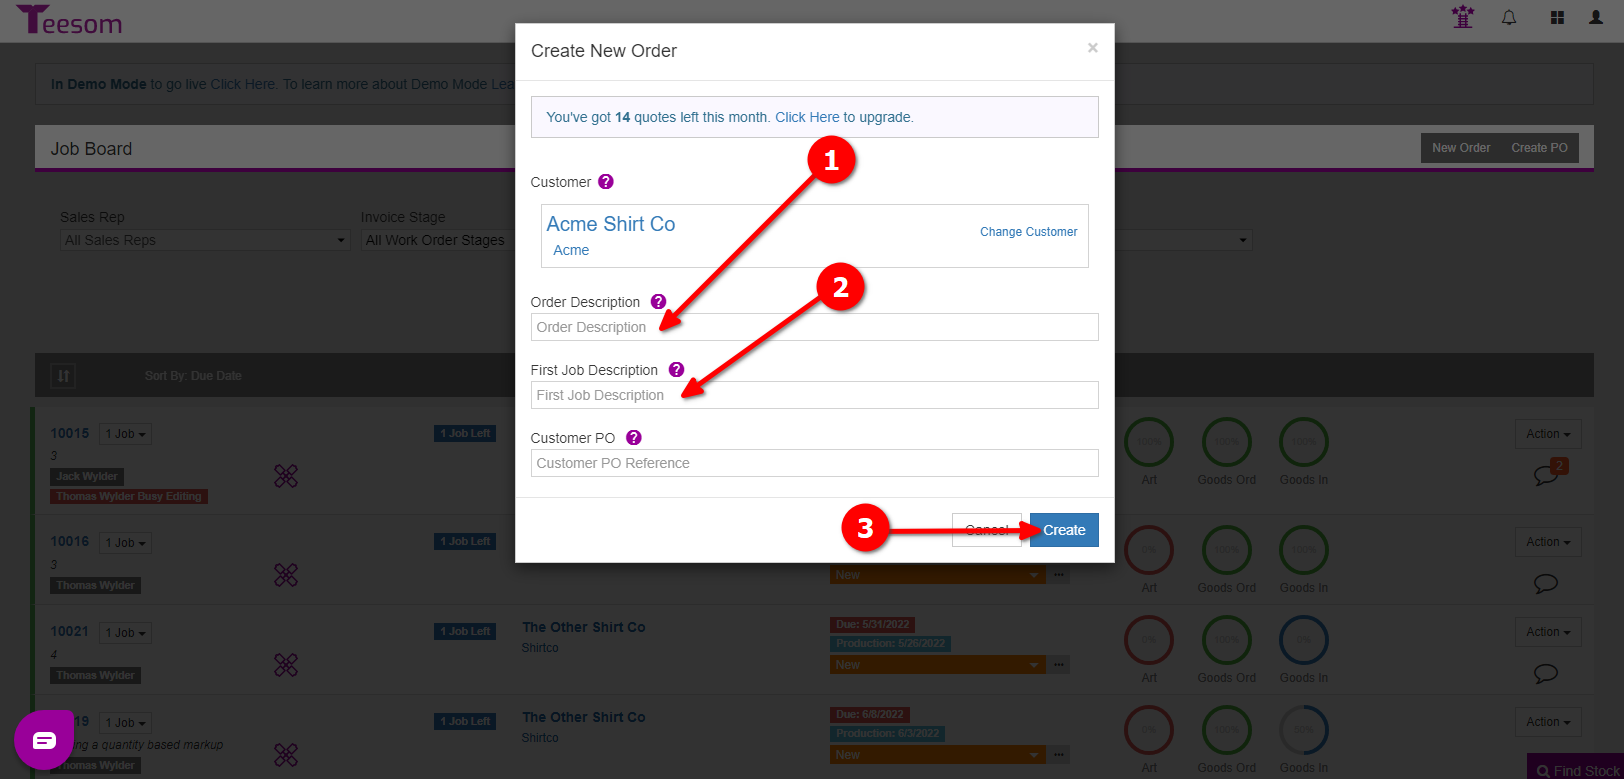
After you have selected your customer fill in the:
Order Description.
Job Description for the first job.
When you are done click on “Create“.
Difference Between Job Description and Order Description: You can have multiple jobs for one order in Teesom. The Order Description will describe the order as a whole. The Job Description will only describe that specific job on the order.
Adding Products
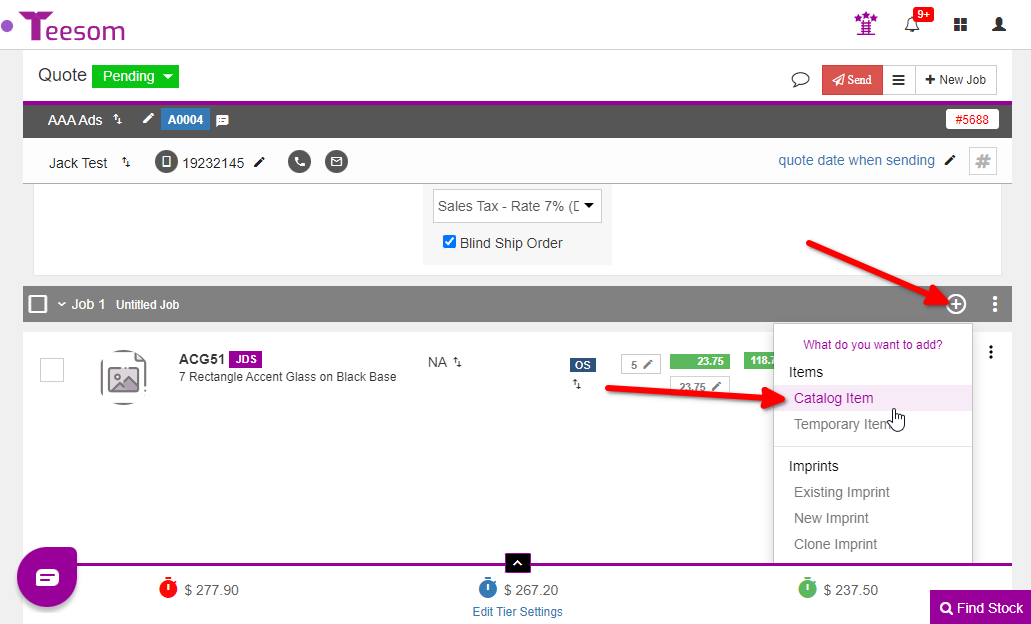
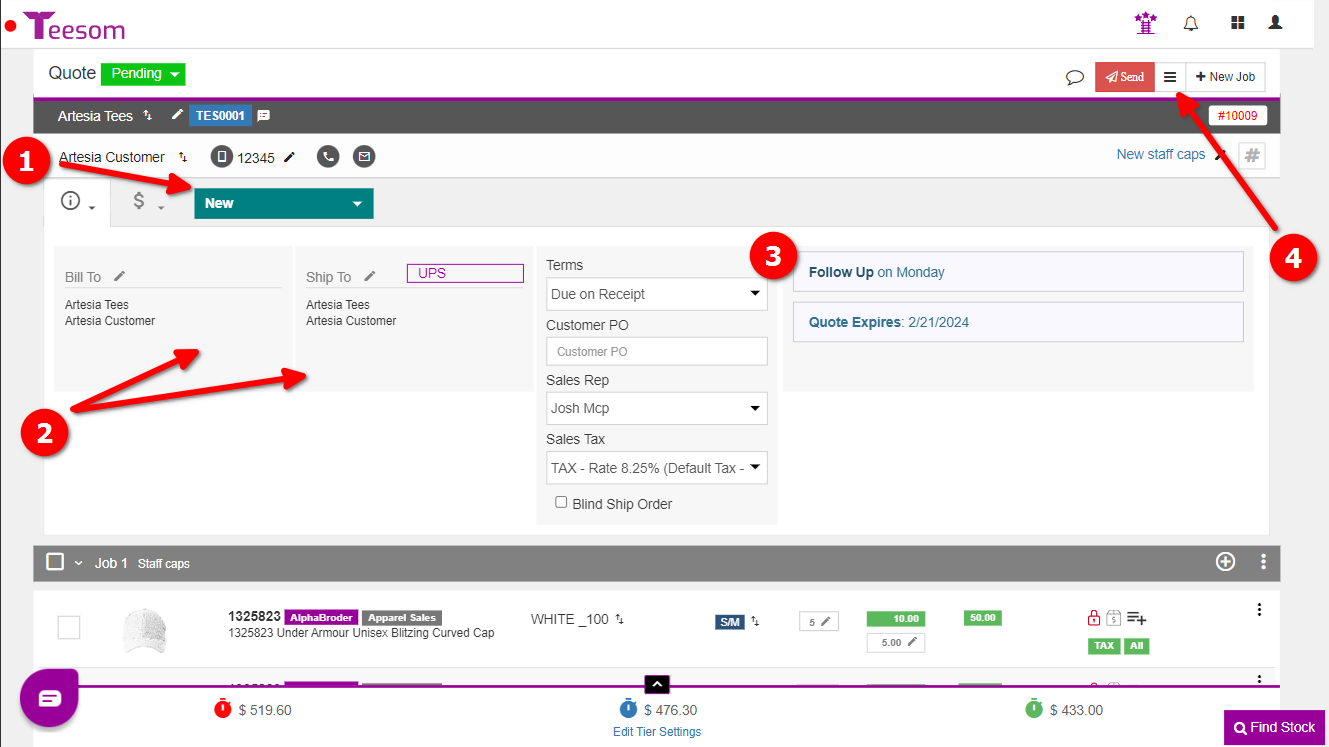
After creating an order a new browser tab should open with your order or ‘Quote‘. You can now add products to the first ‘Job‘:
Click the (+) icon.
Select “Catalog Item” to add a product to your order.
All Orders / Quotes / Invoices in Teesom must have at least 1 Job. You can create multiple Jobs on an order to logically separate the different products / services being provided. For this example we have just 1 job on the order.
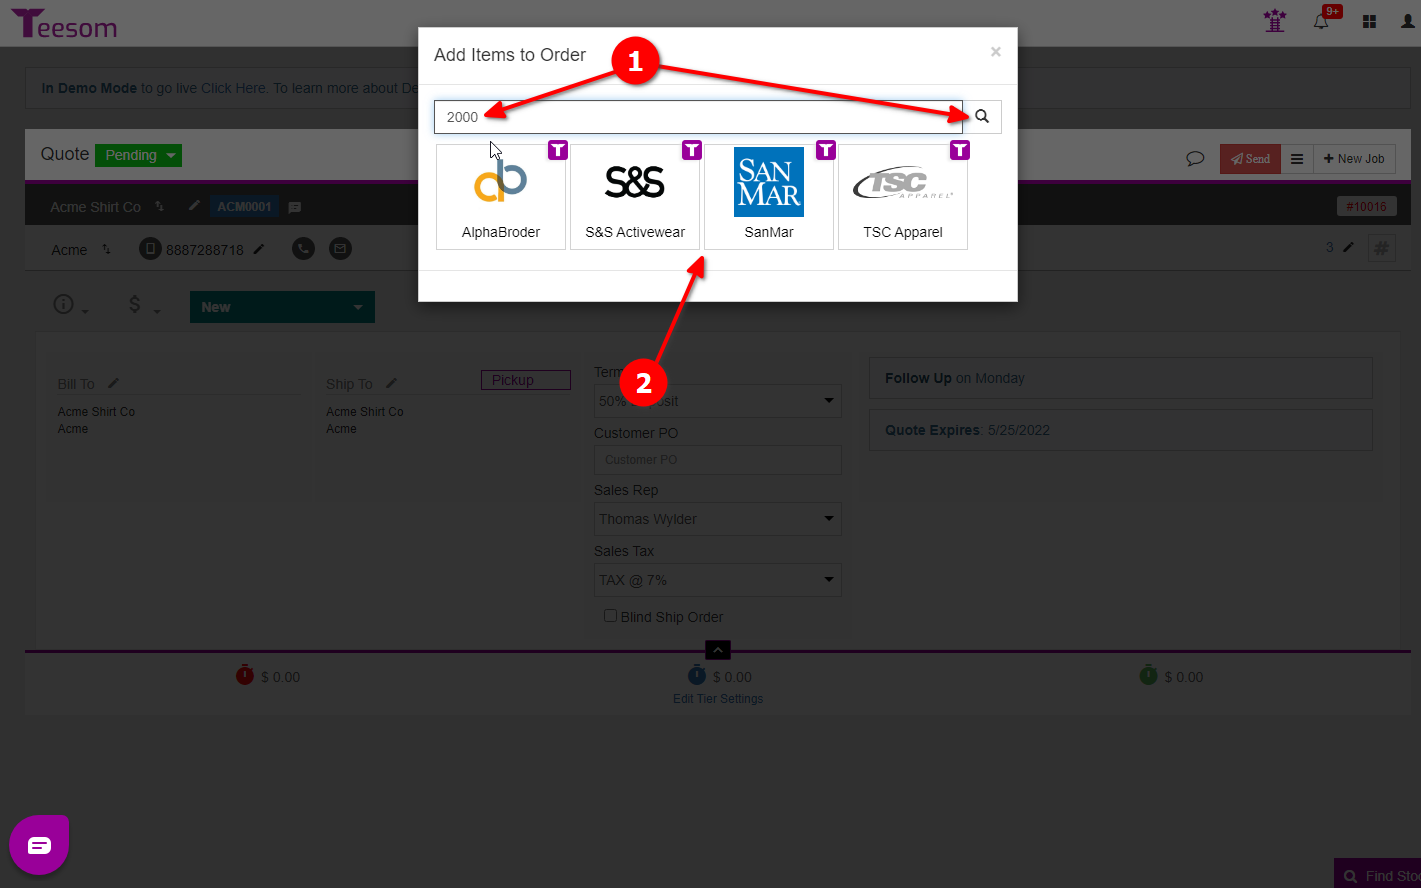
Finding a Product or Item
If you know the Style number of the product you’re after type it into the search bar and click the magnifying glass, or hit ‘Enter’ on your keyboard, to search.
Otherwise, you can click on a Vendor Catalog to browse the products available:
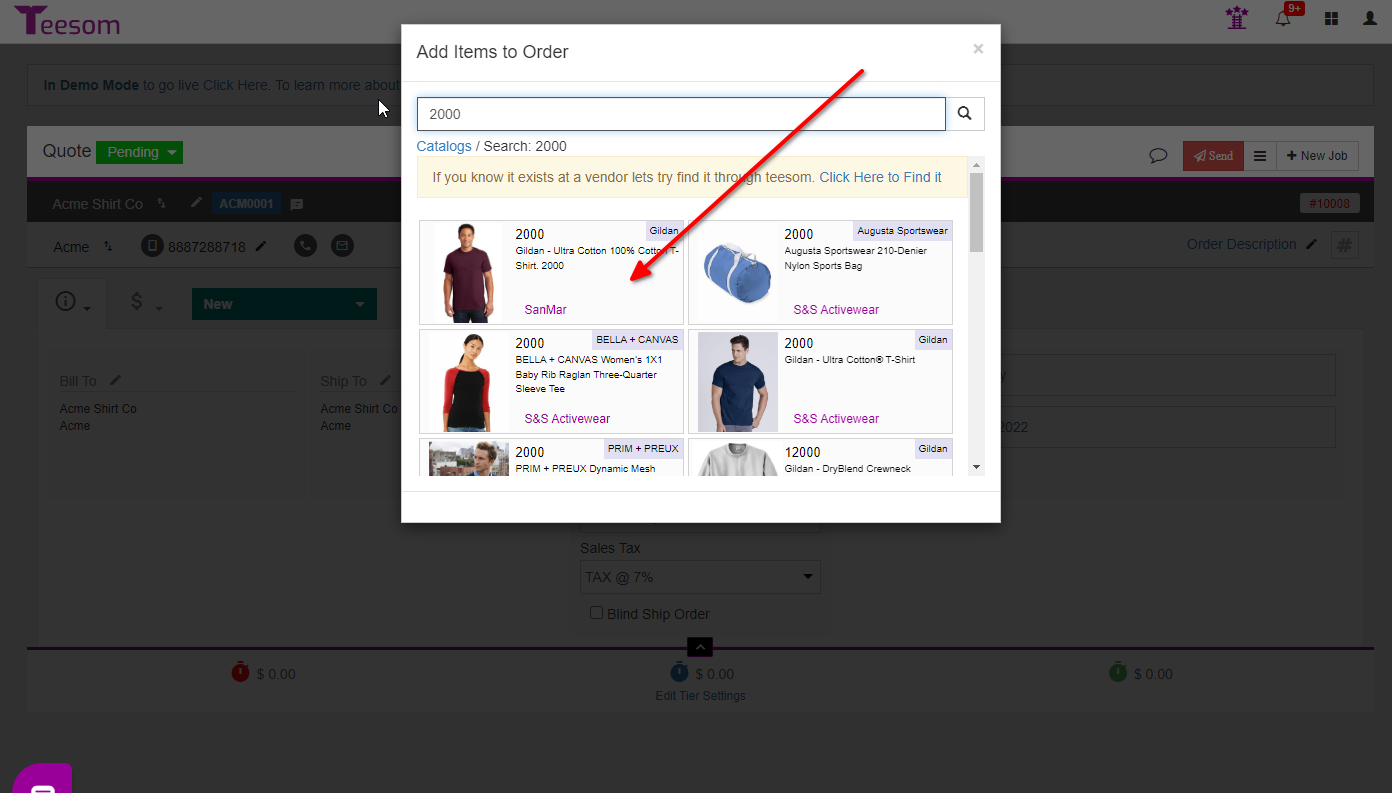
Once you have located the item you want click on it to add it to your order:
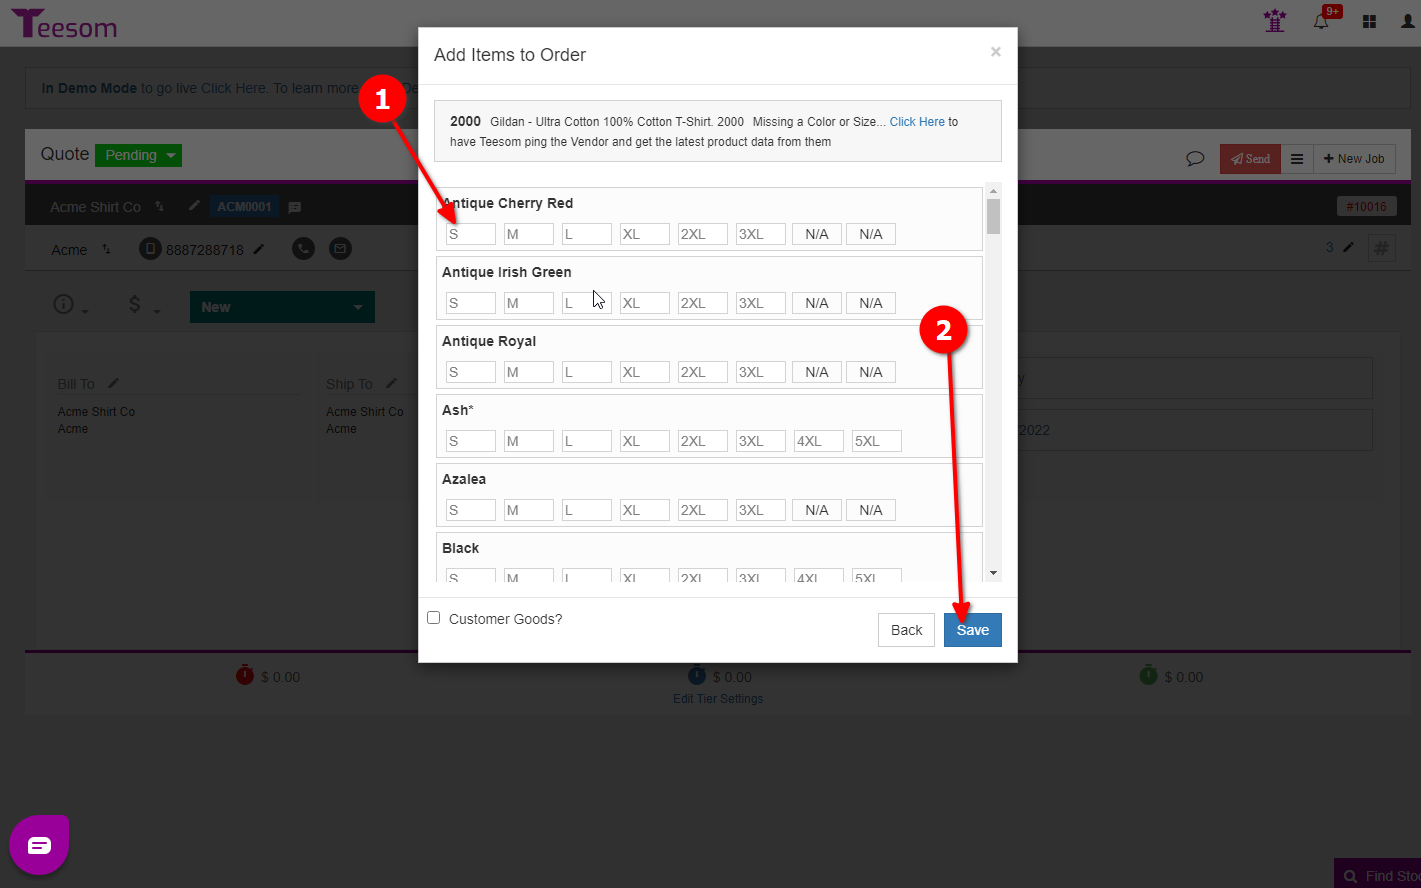
Next – enter the quantities you want for each style and size directly into the box indicating each size.
Click “Save” and the product(s) will be added to your Order.
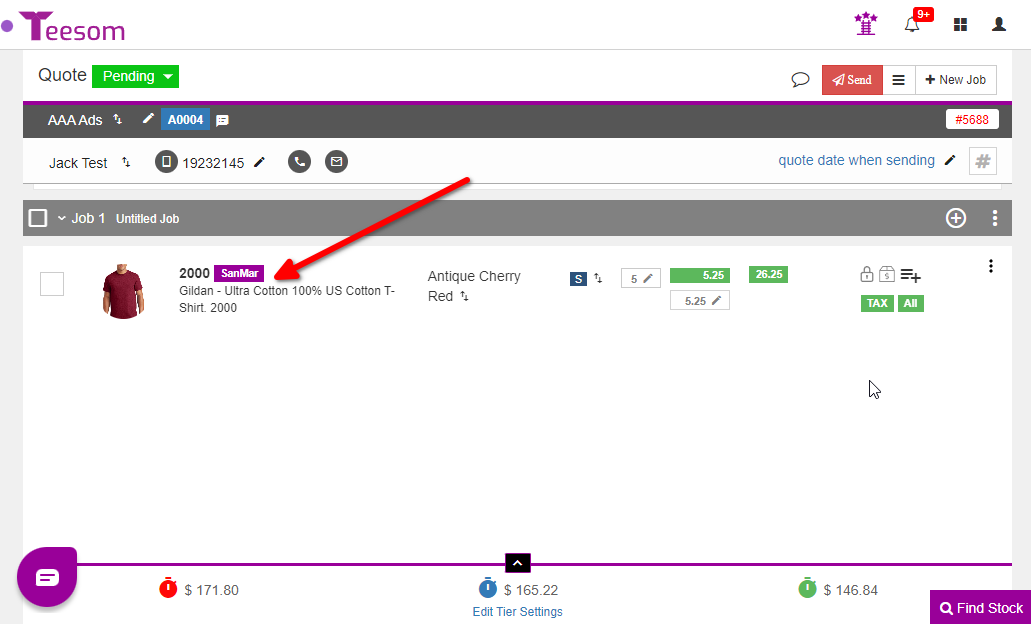
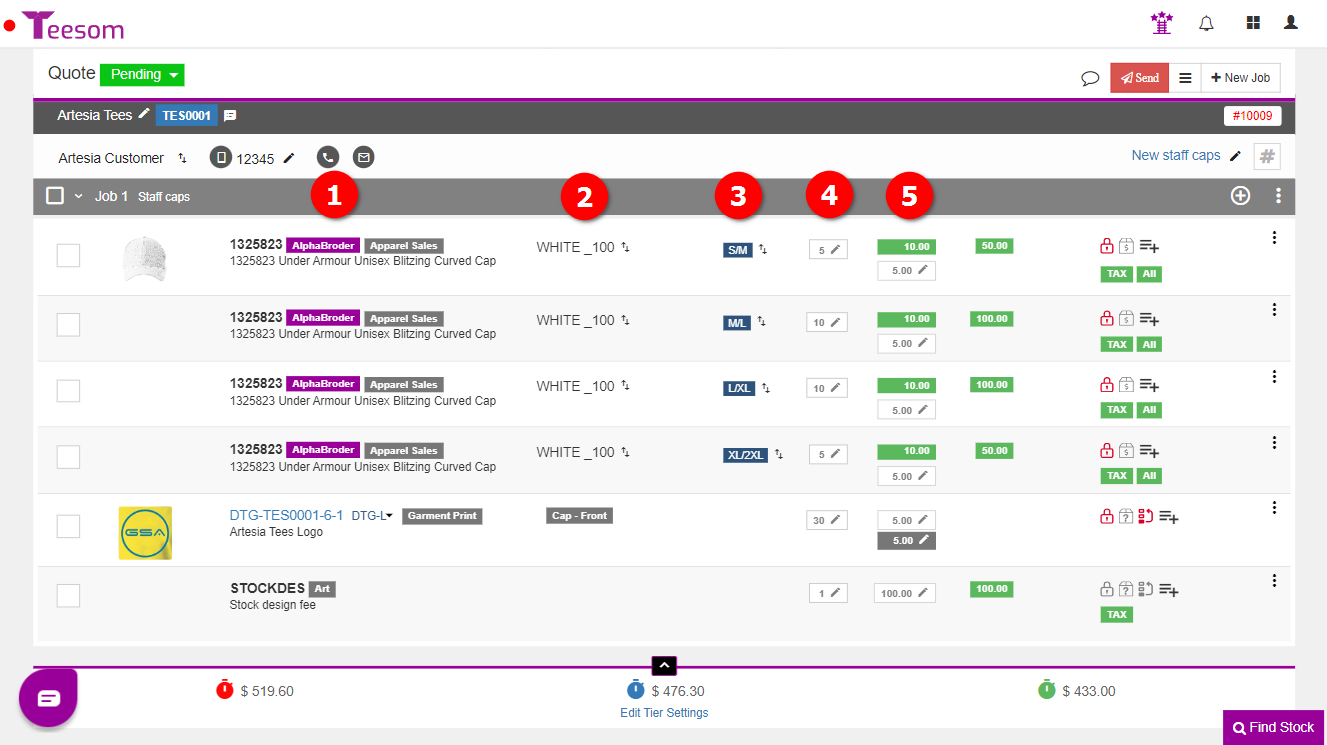
You should now see the product on the order, under Job 1.
Adding an Imprint
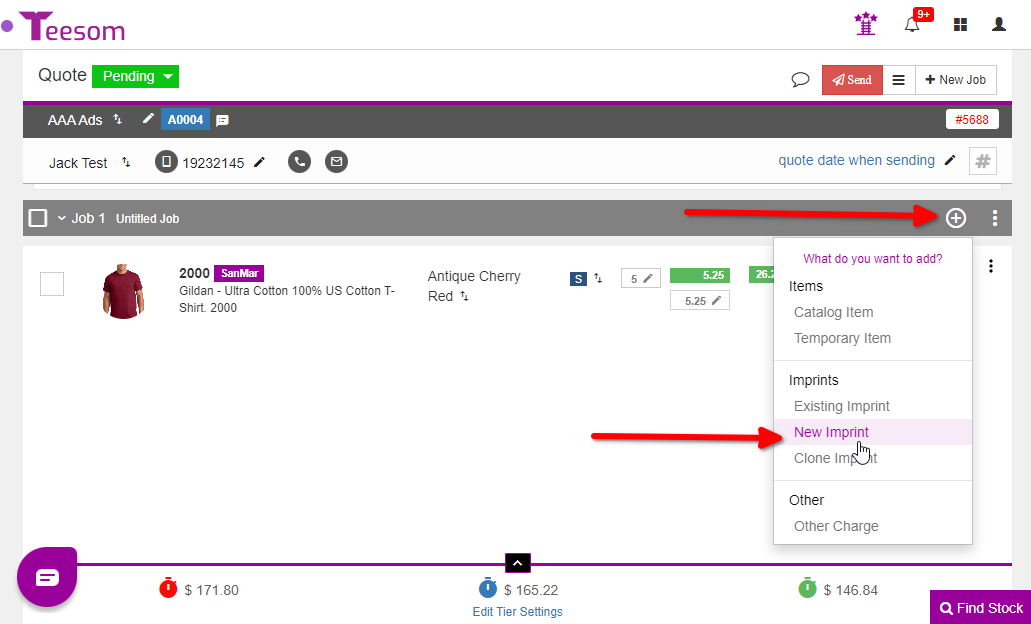
Next we need to add the Imprint(s) that will be going onto the blank goods:
Click on the (+) button.
Select “New Imprint“.
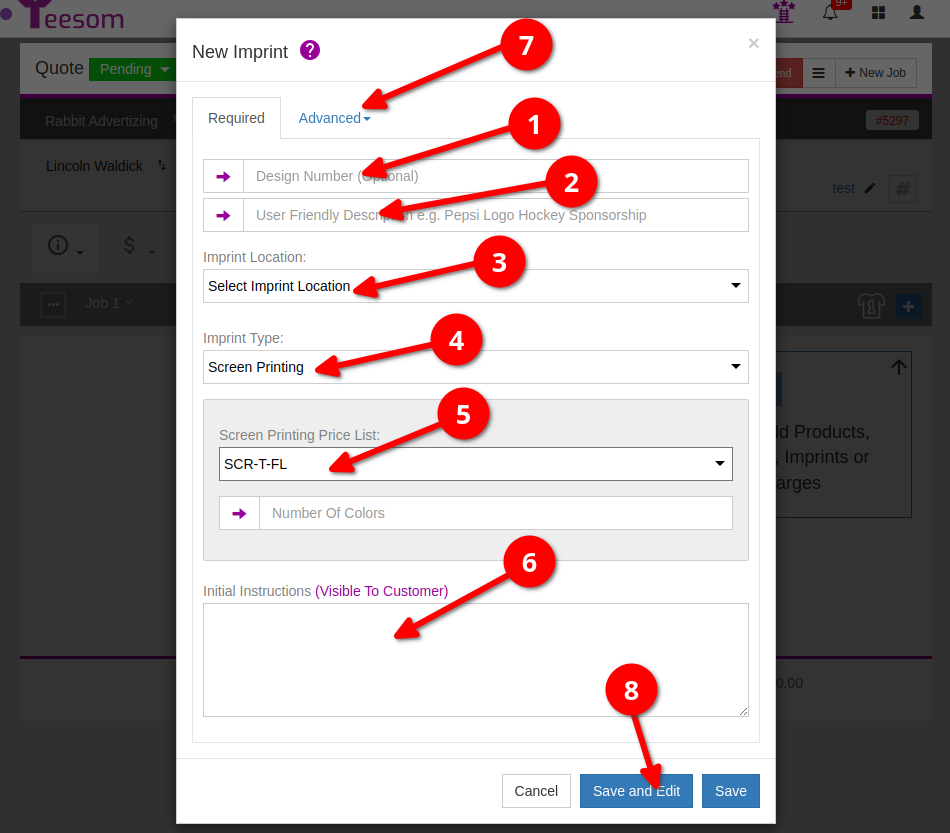
On the “New Imprint” screen:
Enter a design number. (Optional: if you don’t enter your own Design Number Teesom will generate one for you.)
Enter a description.
Select the imprint location.
Select an imprint type.
Select which imprint pricelist to use.
Enter initial instructions for the artist. (This will be visible to the customer.)
You can upload an image from the advanced dropdown. (Can be done later.)
Click on “Save and Edit” if you want to add more details to the imprint, or click on “Save” to just add the imprint. (You can always edit later.)
The Design Number is very important
Every design number in Teesom is unique and belongs to only one specific piece of artwork.
The artwork "belongs" to the customer for whom it was first created.
If you reuse it and make changes to the design, those changes will reflect on every order where this design is in use.