In this example article we will be taking you through the order entry process from creating your order to Sending the Invoice.
NoteThis article is an overview of the entire order entry process. Each step will be covered in more detail in later Quickstart articles.
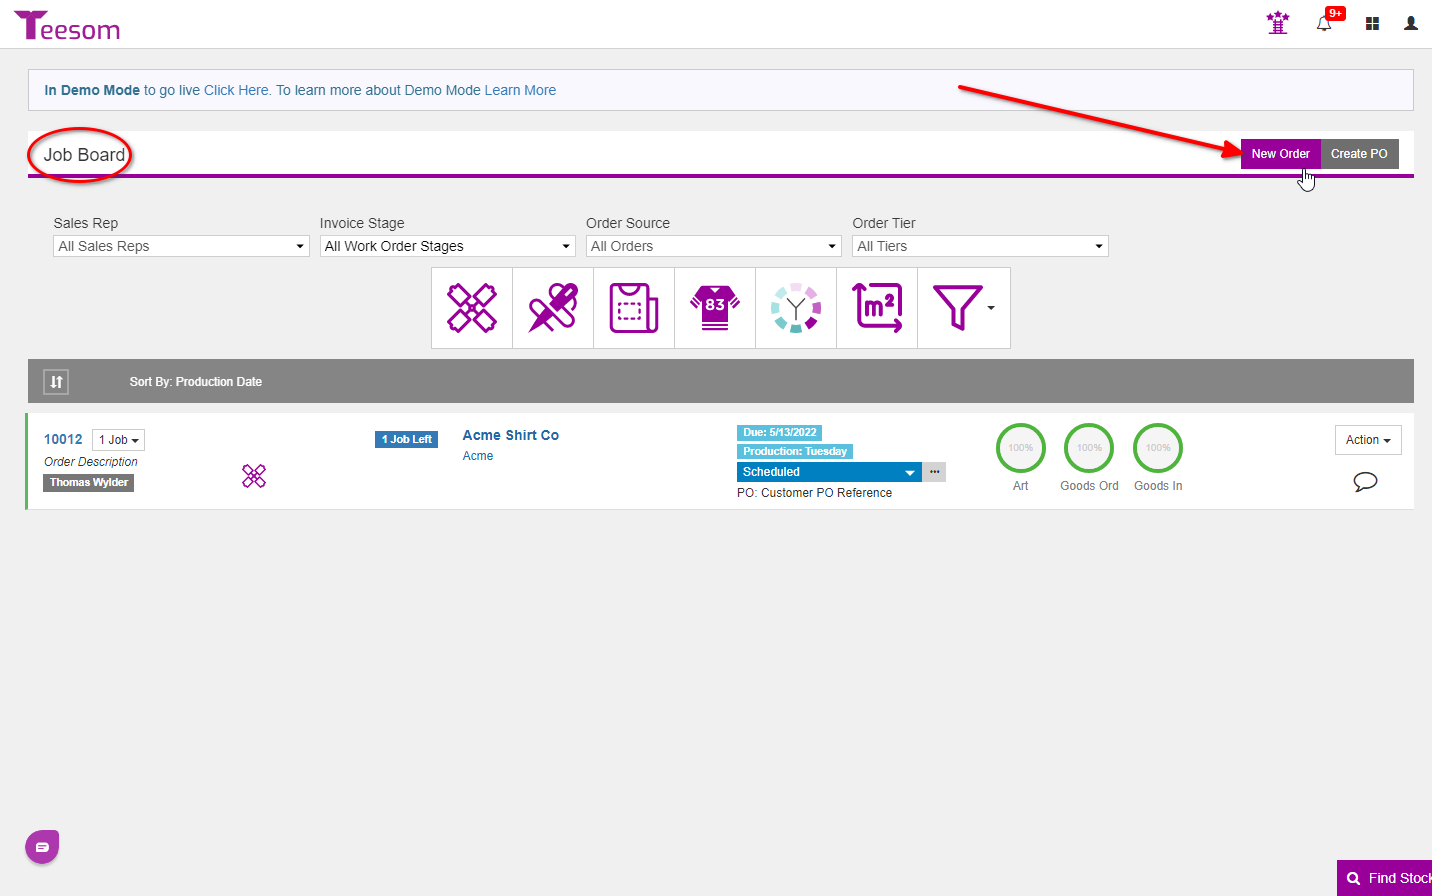
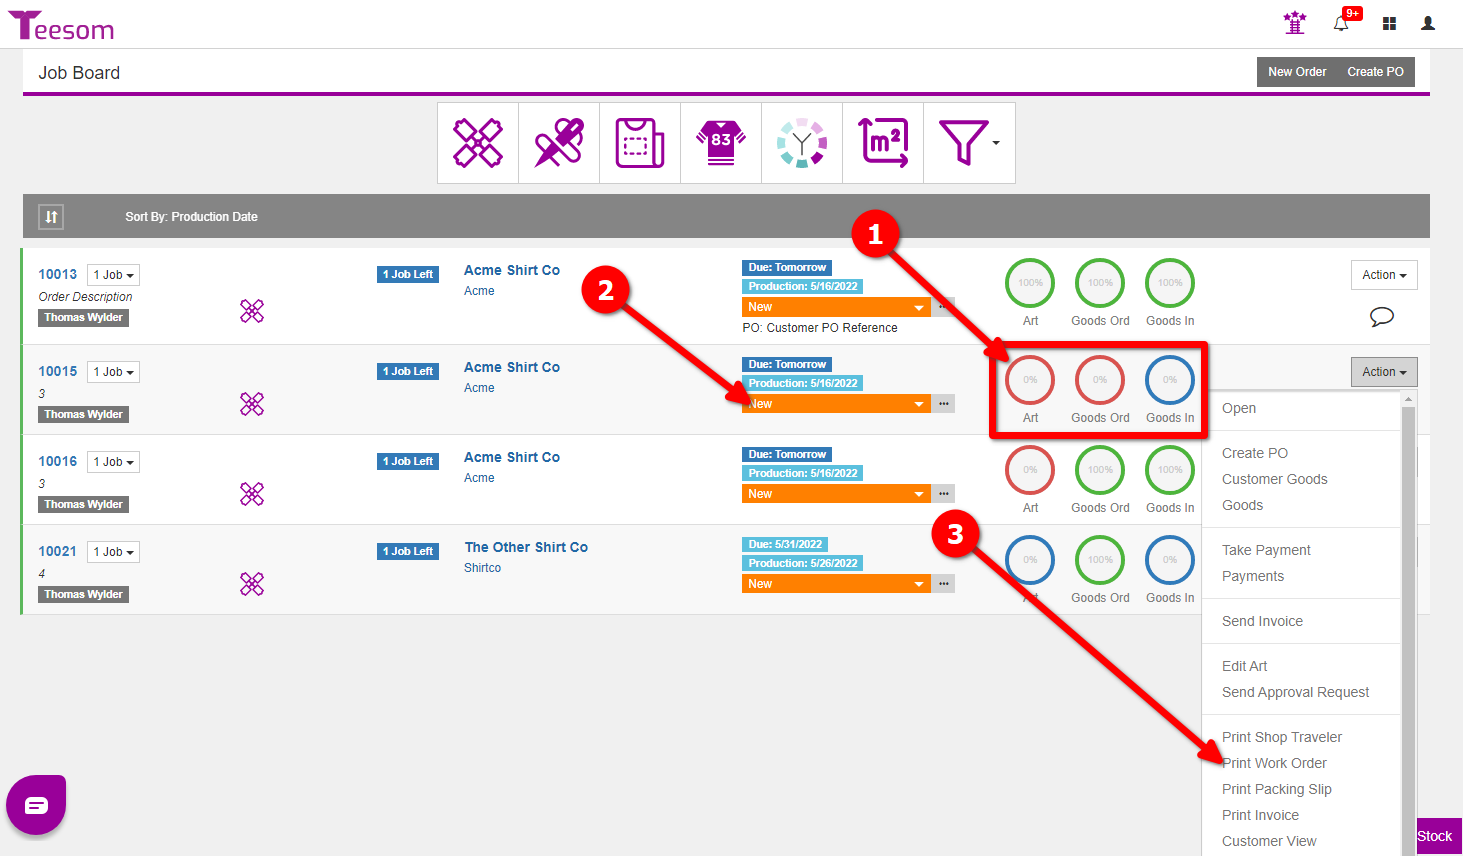
Job Board -> New Order
Go to the Job Board then click on “New Order“
TIP: The easiest way to get to the 'Job Board' is to click on the Teesom logo at the top left.
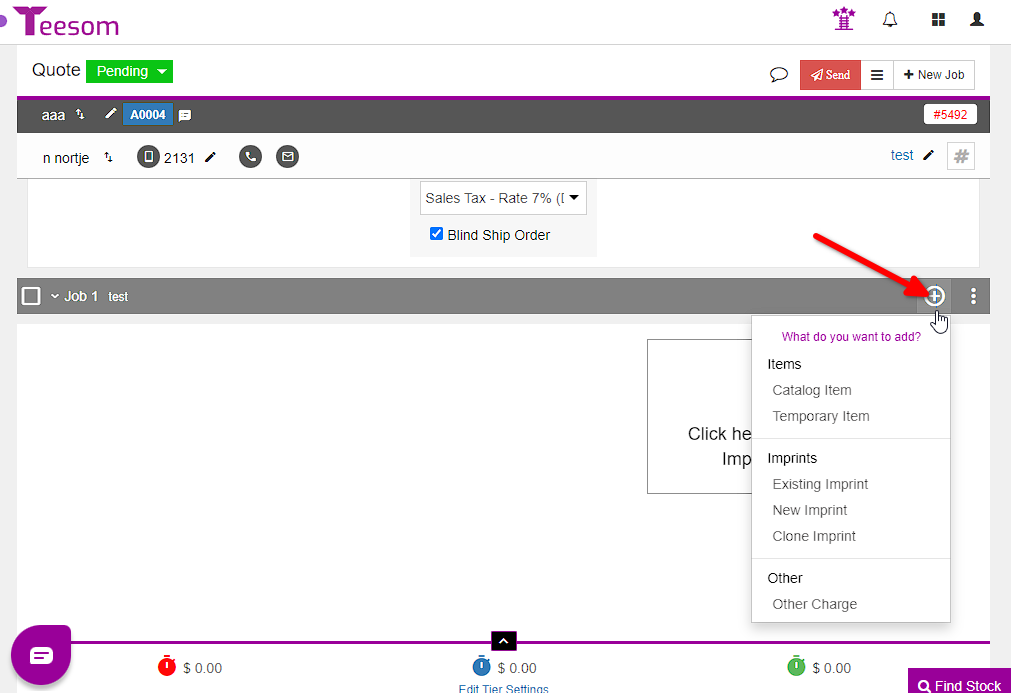
After creating the new order you will add on, some products and imprints:
Click on the ( + ) icon to bring up the menu to add your products, imprints and charges:
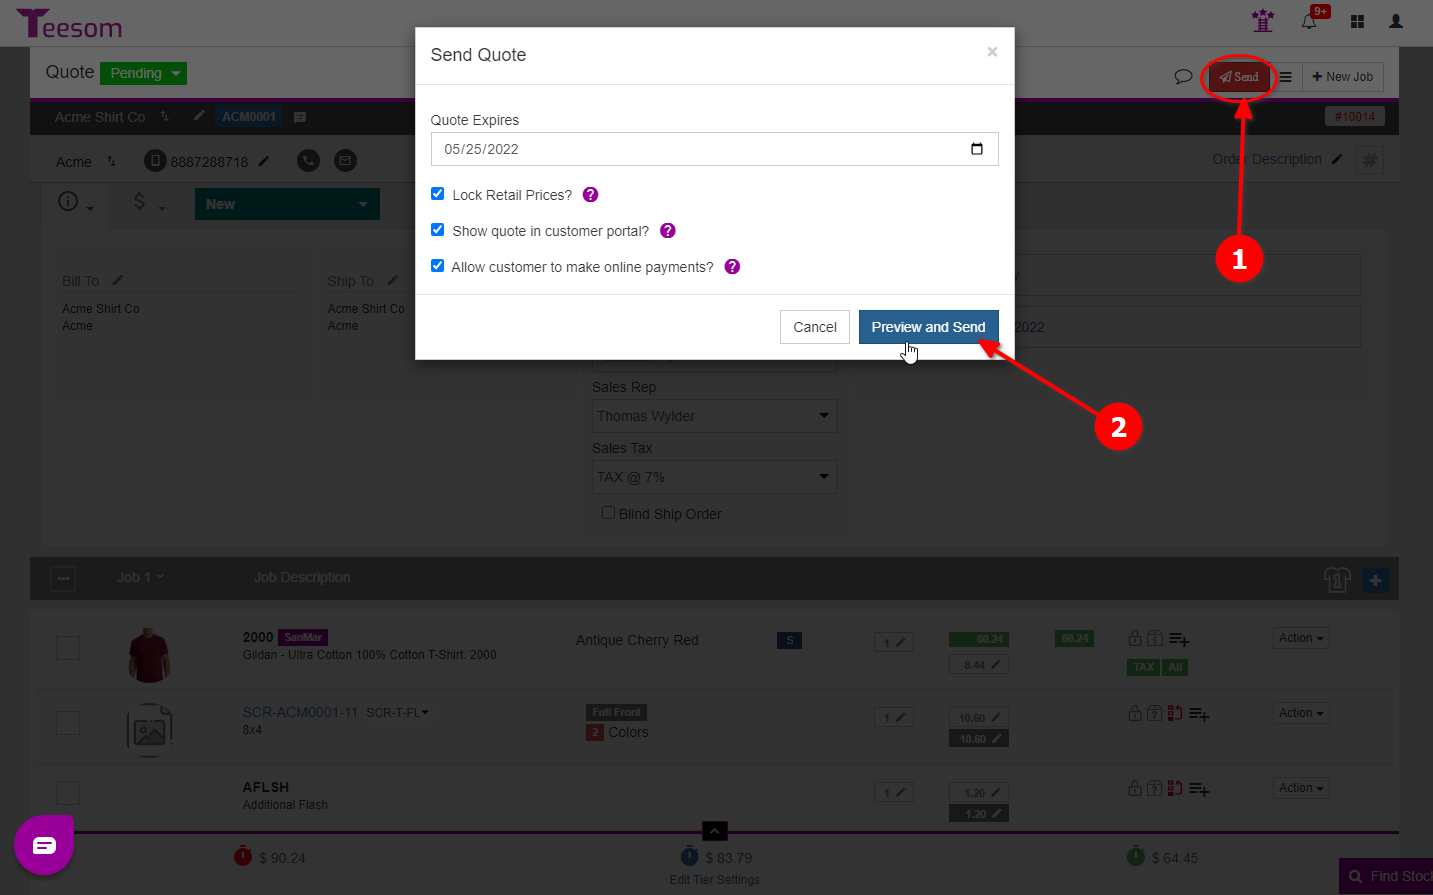
Send Quote
After adding your products and imprints click on the Red “Send” button. This will open up the Send Quote Screen where you can check additional information. When you are ready click on “Preview and Send“:
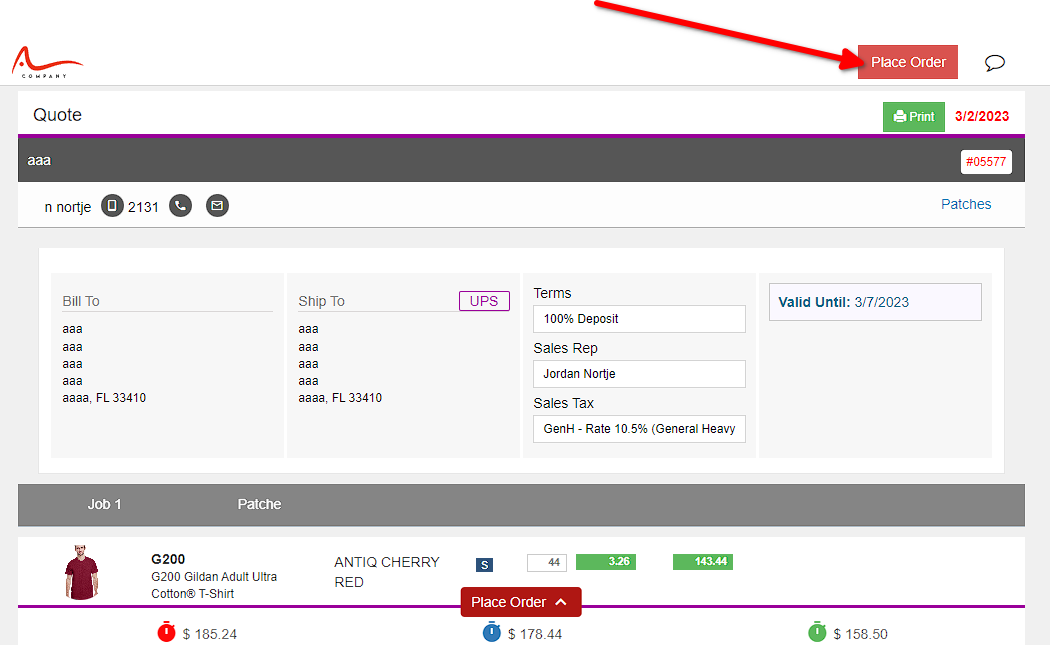
Customer Confirms Quote
Your Customer will open the quote in the email you sent them and if they are happy will confirm the quote by clicking on “Place Order“:
Quote Converts To (WIP) Invoice
When your customer clicks on “Place Order“, to confirm the quote, it will automatically convert to a WIP (work-in-progress) invoice in Teesom:
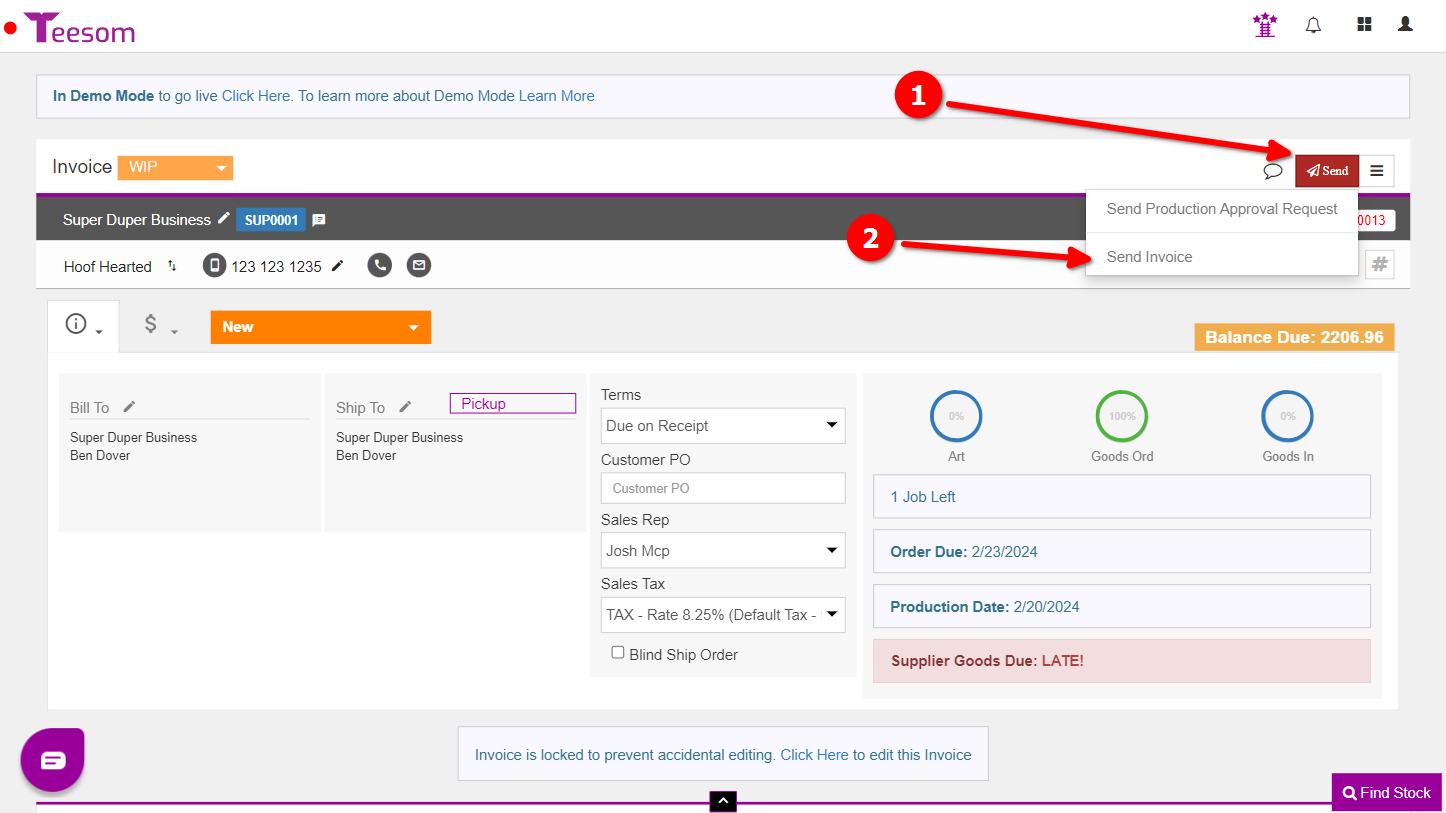
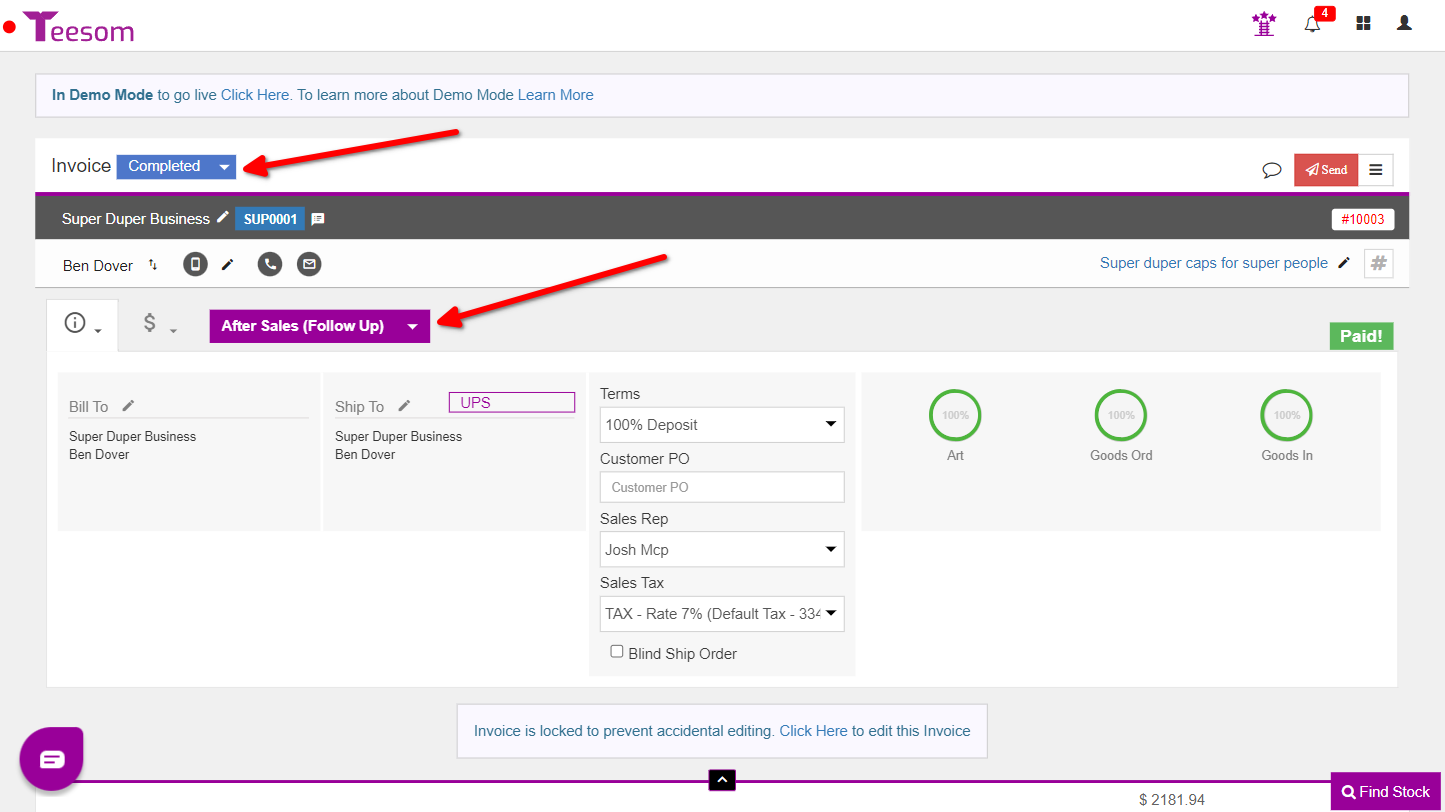
Once all the jobs on the Order are complete you can then send the Invoice to your customer by, clicking on the “Send” button at the top right and then select “Send Invoice“:
Customer Pays Balance
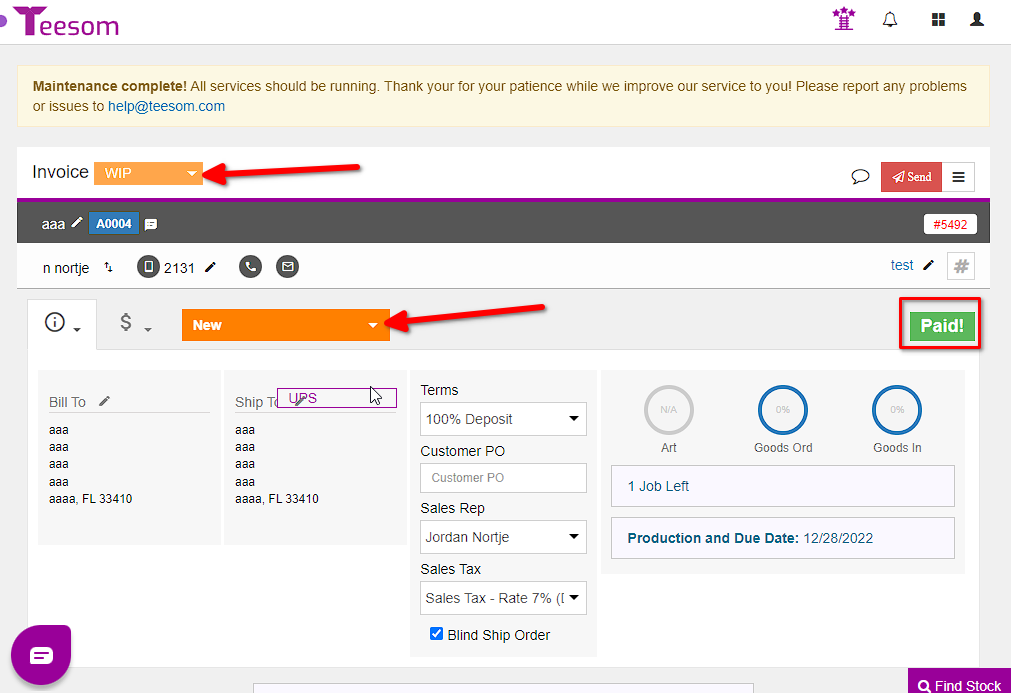
Once the Customer has paid the invoice change the status and or the stage as needed:
NOTE: How there is now a green "PAID" square on the right to indicate that this invoice has been paid
TIP: Click on the "$" icon and select payments to view the payment history for this invoice
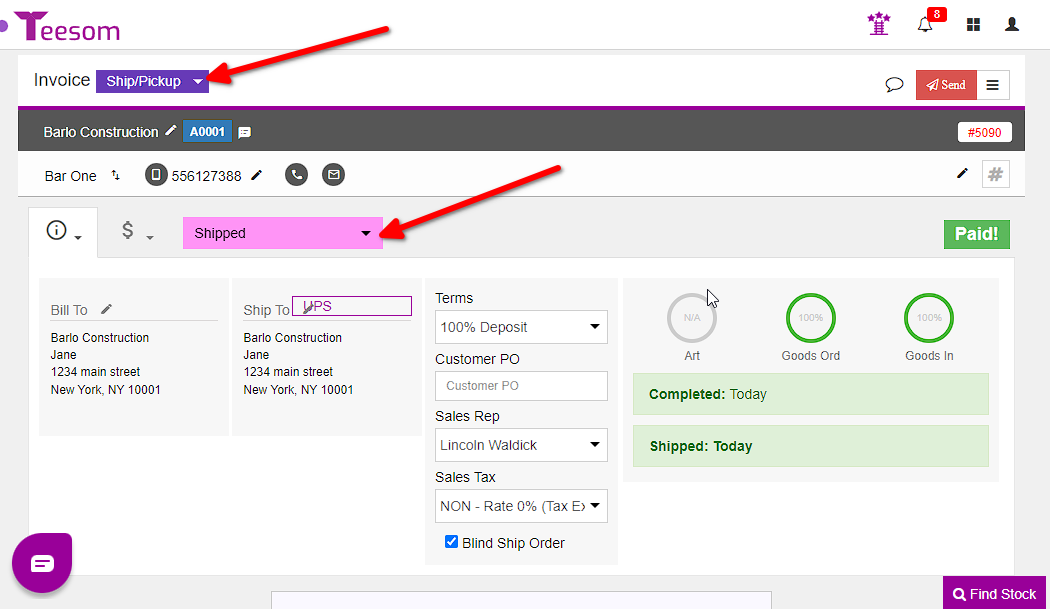
Ship/pickup -> Change Invoice Complete
Once the Order has been shipped change the invoice status and stage respectively: