Non-Integrated Vendors refer to Vendors that are not Integrated with Teesom through an API.
There are two types of “Non-Integrated” Vendors in Teesom:
Teesom Catalogs: These are Catalogs (Suppliers) that are “Officially” supported by Teesom.
Custom Catalogs: These are Catalogs (Suppliers) that are not supported by Teesom and are added and upheld by you, the User.
Working With Teesom's Catalogs
Before you are able to use a “Teesom Catalog” on an order you will have to turn it “On”:
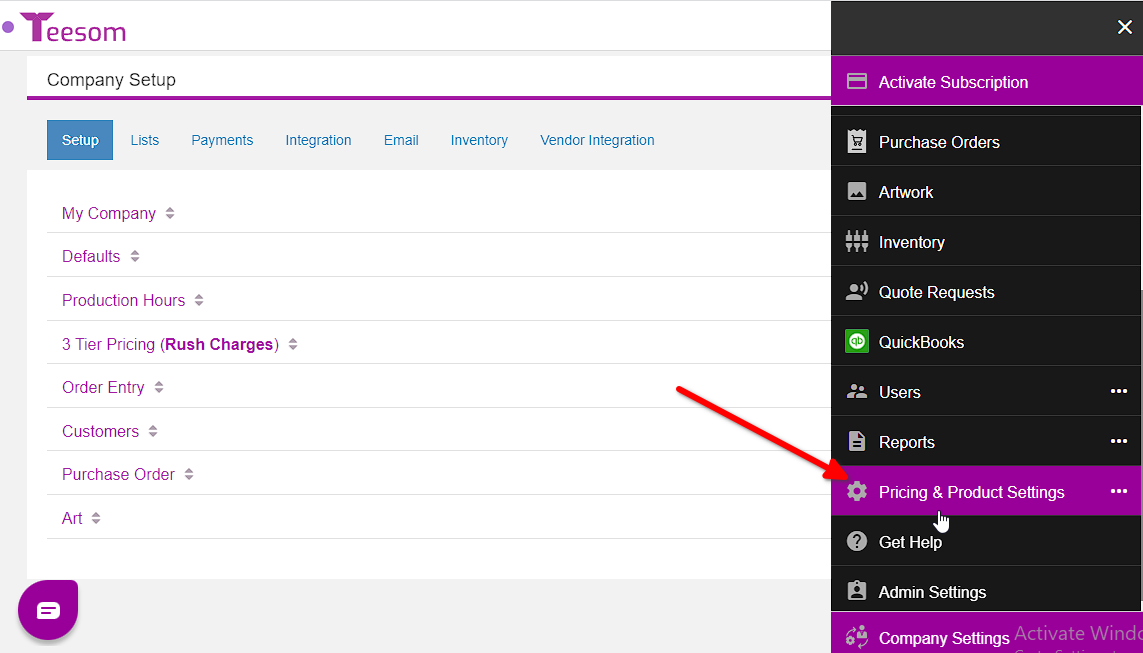
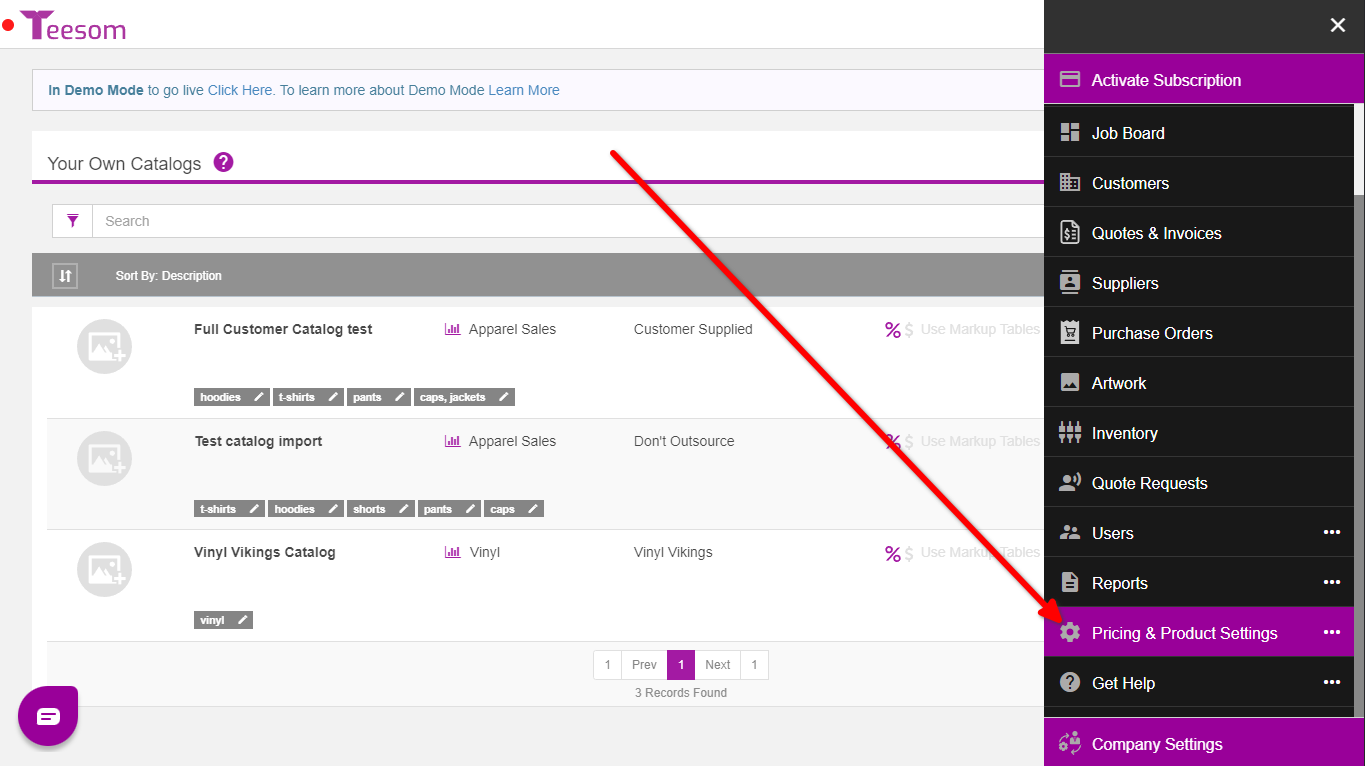
Go to the “Main Menu” -> “Pricing & Products Settings”.
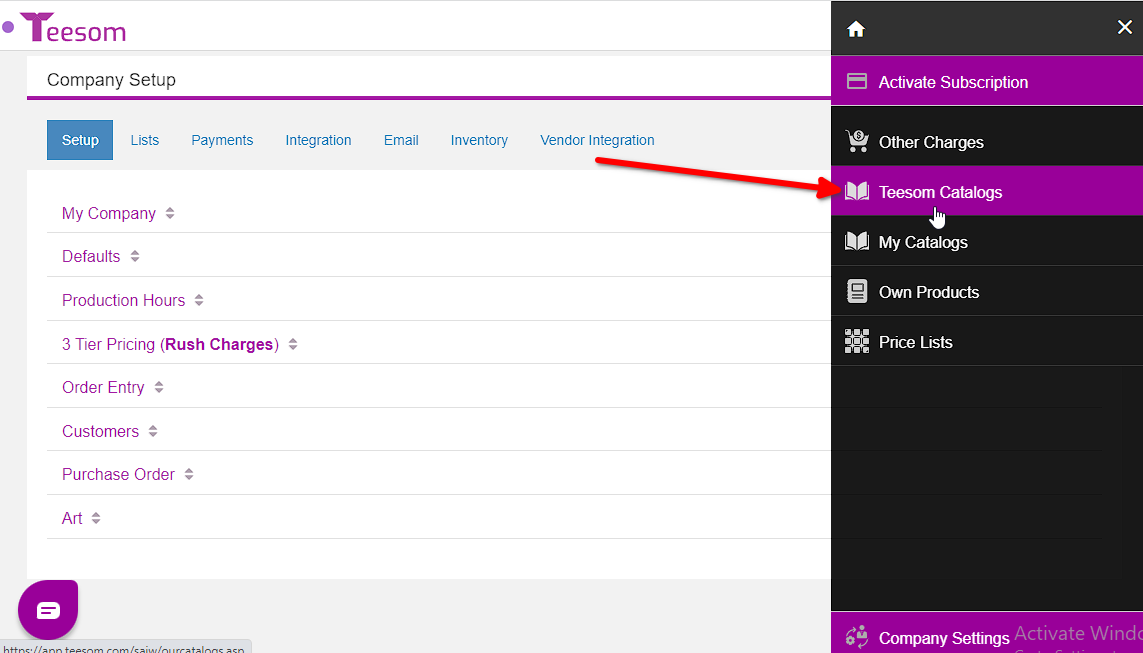
Select “Teesom Catalogs”.
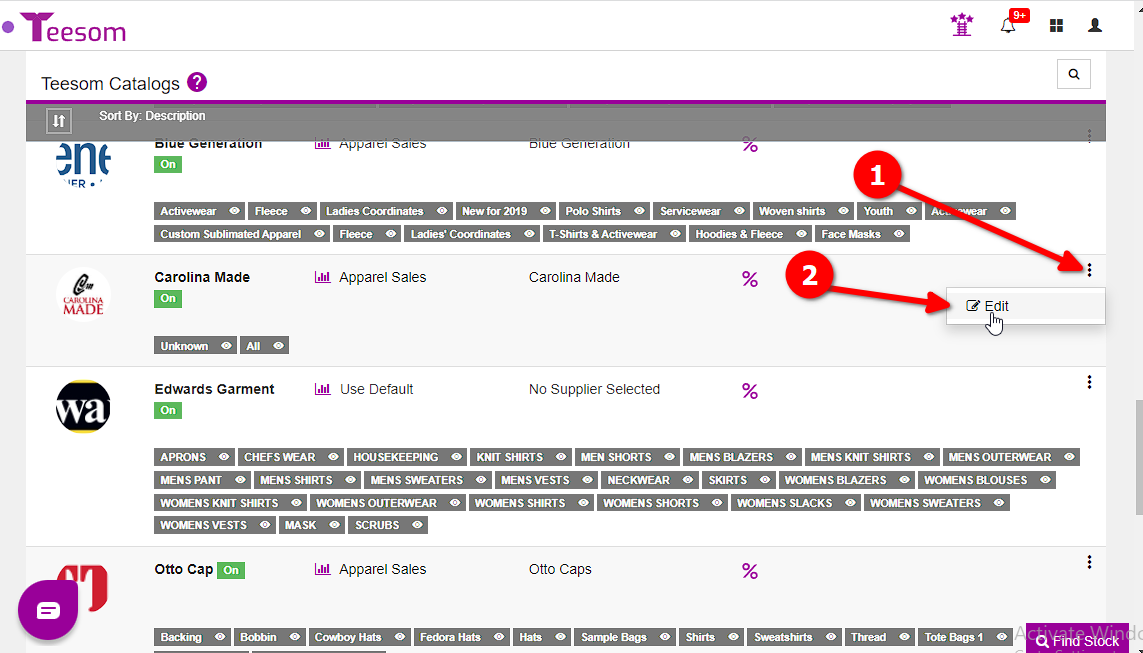
On the “Teesom Catalogs” screen:
Click on the “3 Dots” menu.
Select “Edit“.
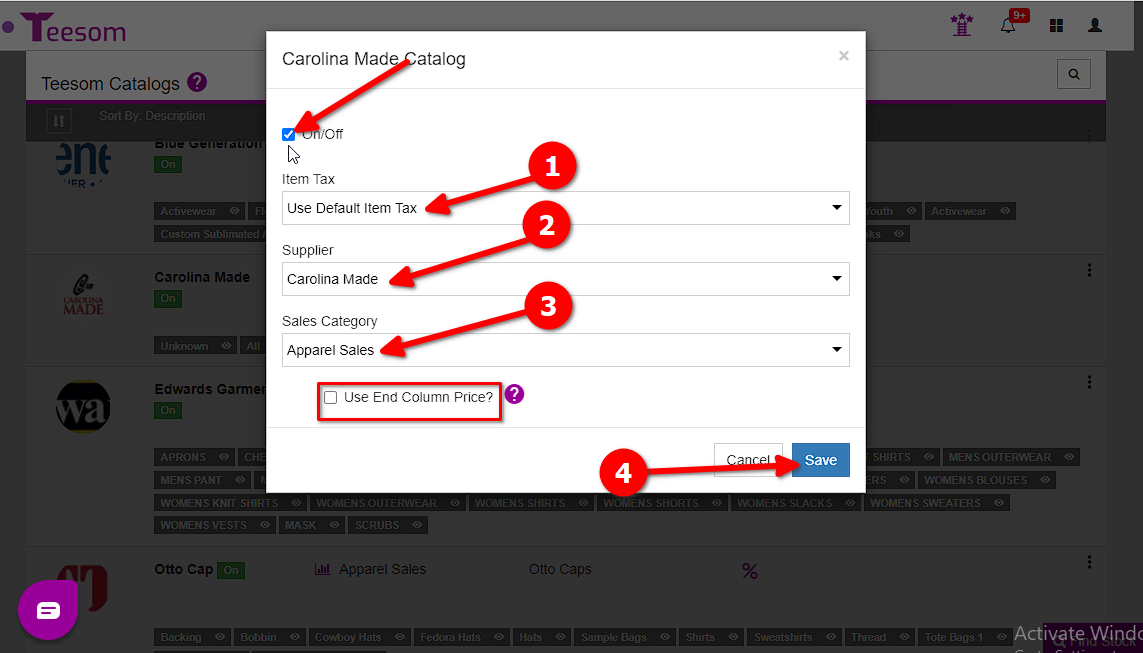
On the catalog edit screen:
Toggle the Catalog On.
Select the Item Tax the catalog will use. (If “Use Default Item Tax” is selected then it will use the Company default.)
Select the “Supplier”, by default it should already be set to the correct one.
Select a Sales Category.
Click “Save”.
If you check "Use End Column Price" Teesom will add up the total price based off a preset pricing table.
Adding The Products To An Order
After turning the Catalog on you can now add the products from it to an Order:
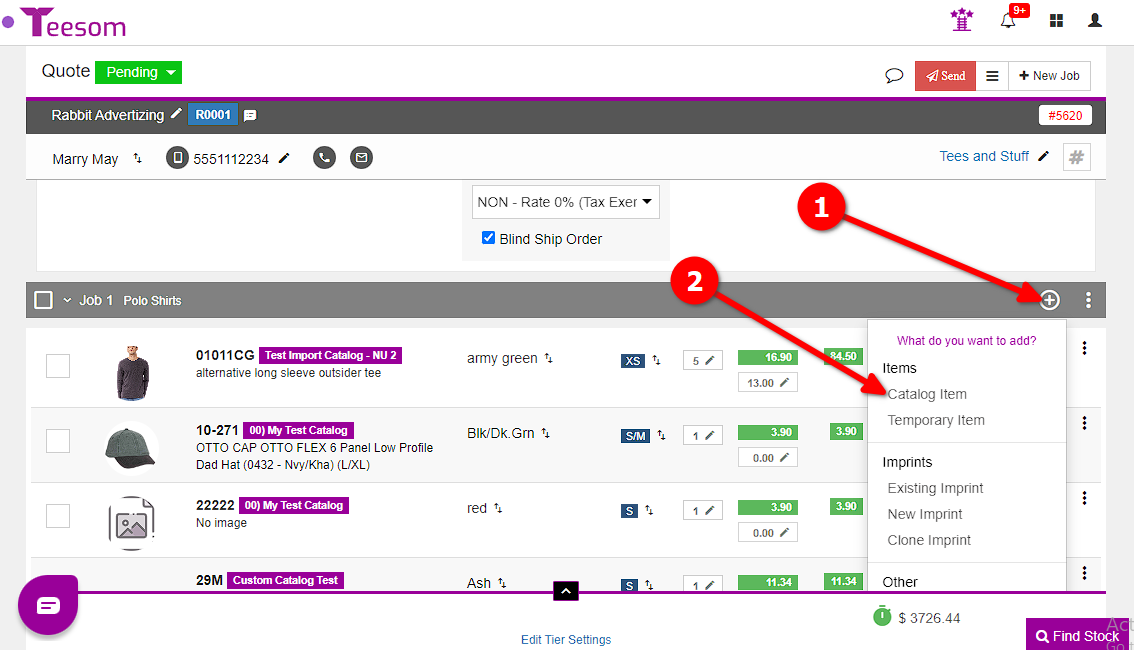
Click on the (+) on a Job in the order.
Select “Catalog Item”.
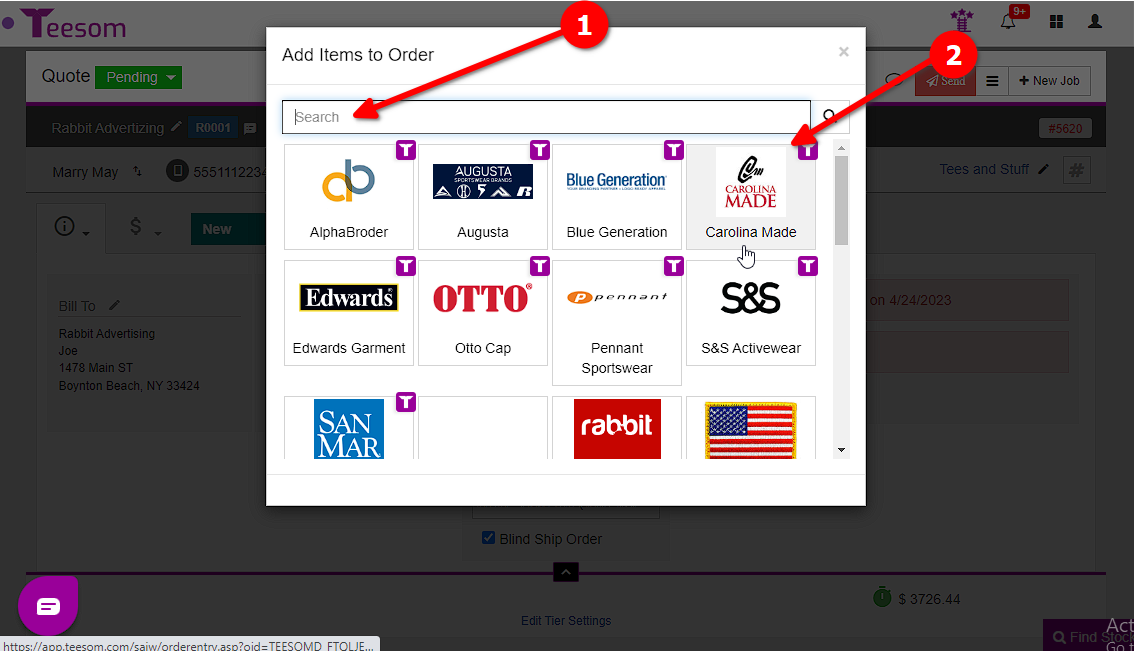
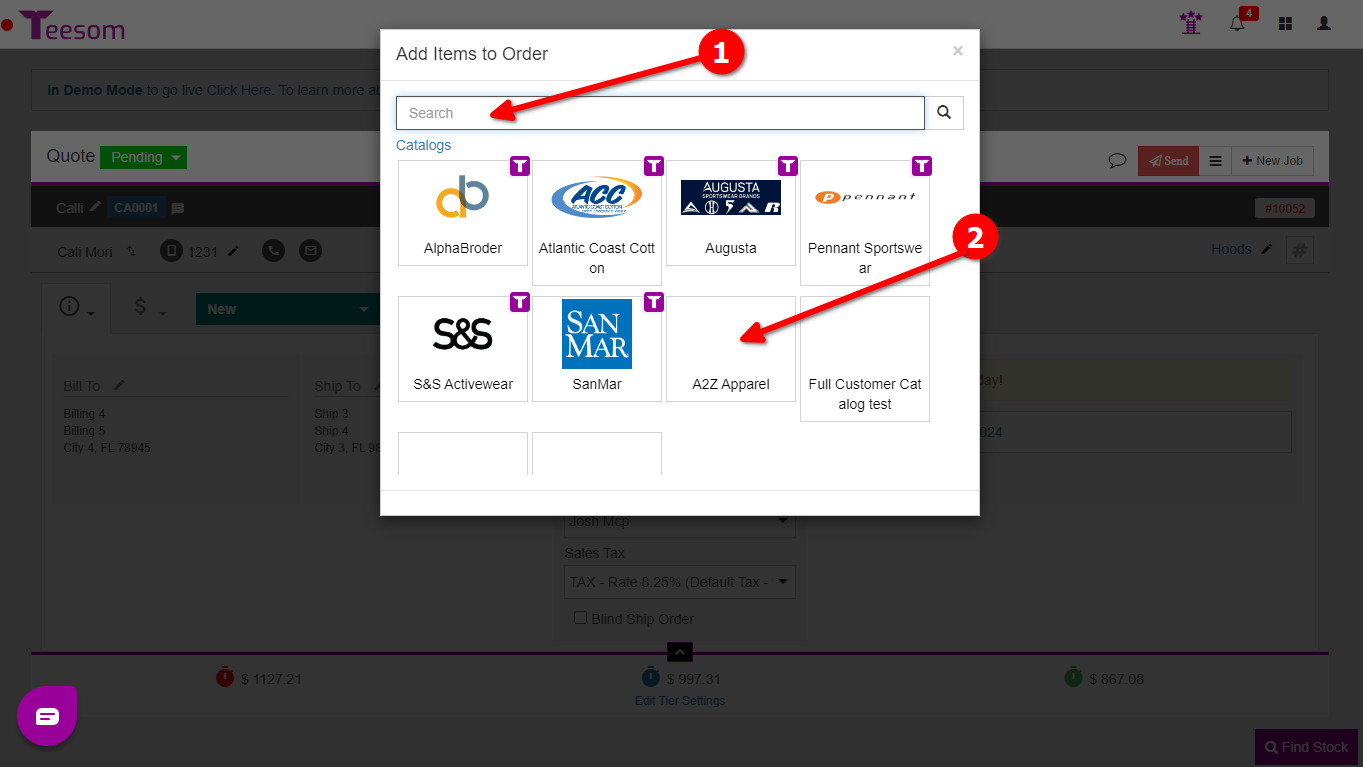
Then you can search for the Style code of the product or select the Catalog and browse it:
Purchasing The Goods
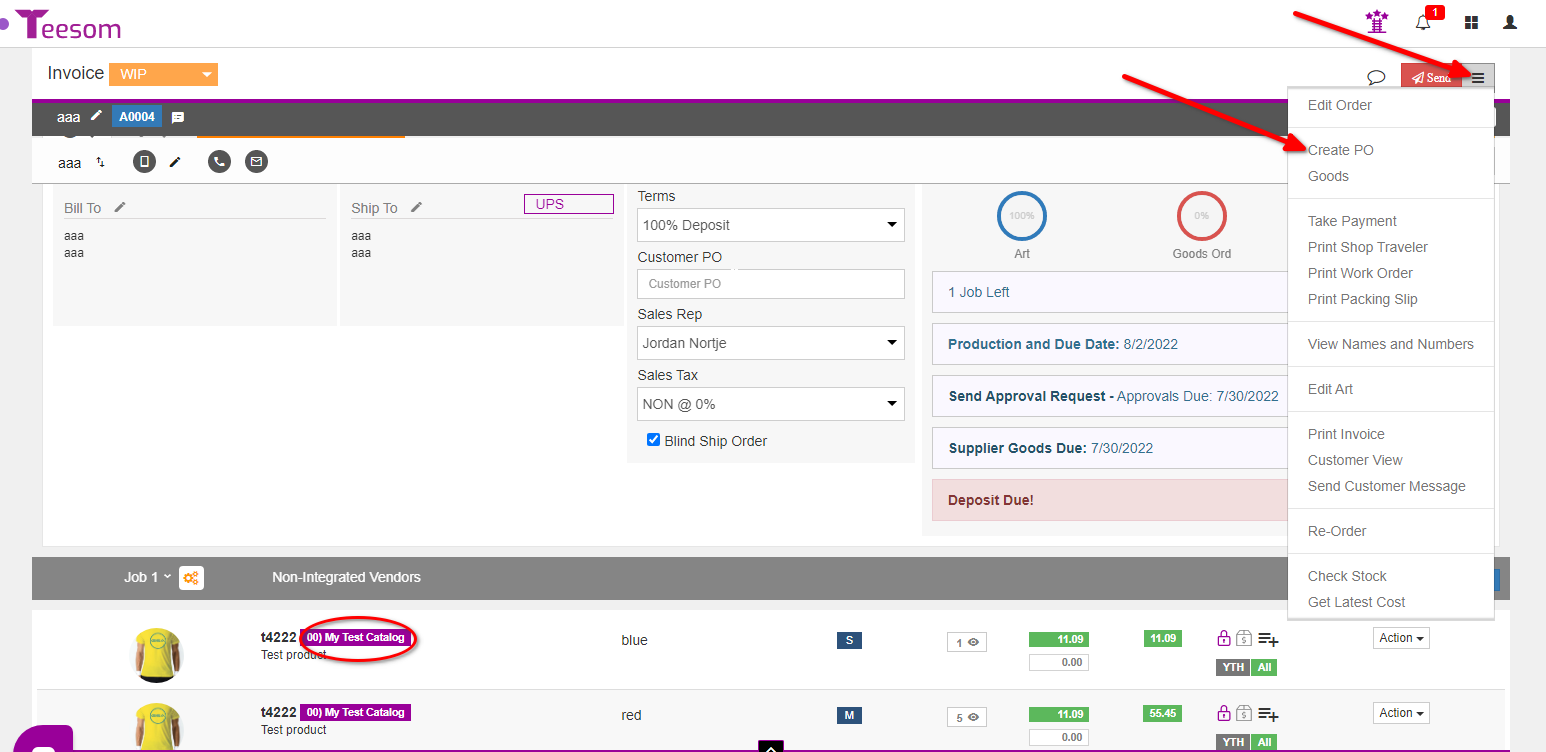
Go to the order you want to purchase the goods for and click on the hamburger menu and select “Create PO“:
The product you are purchasing has to be from the same catalog that the supplier is linked to.
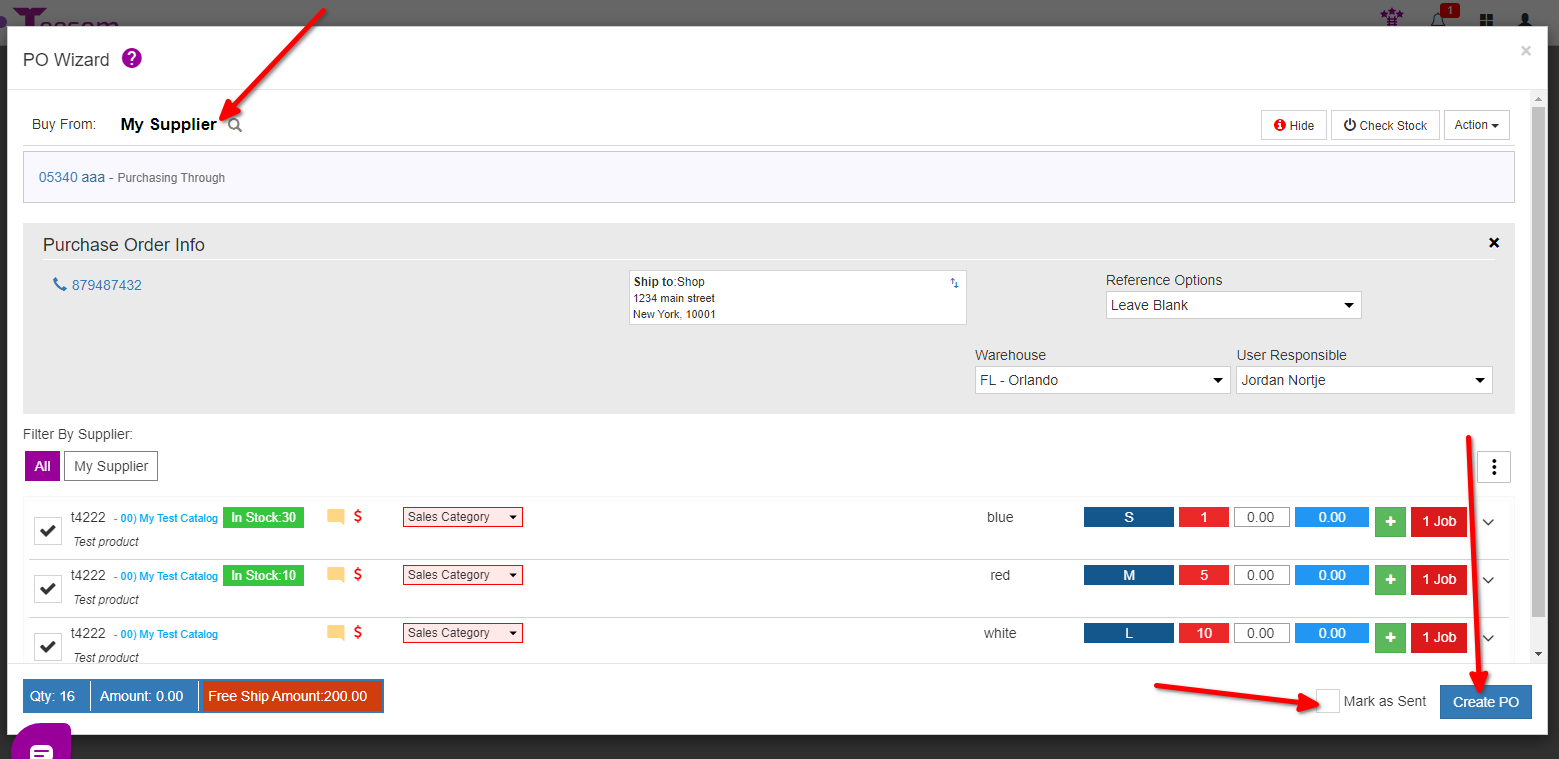
Select your supplier from the search menu then click on “Create PO” if you don’t want to send the PO you can mark it as sent by checking the box next to the “Create PO” button:
Check The Goods In
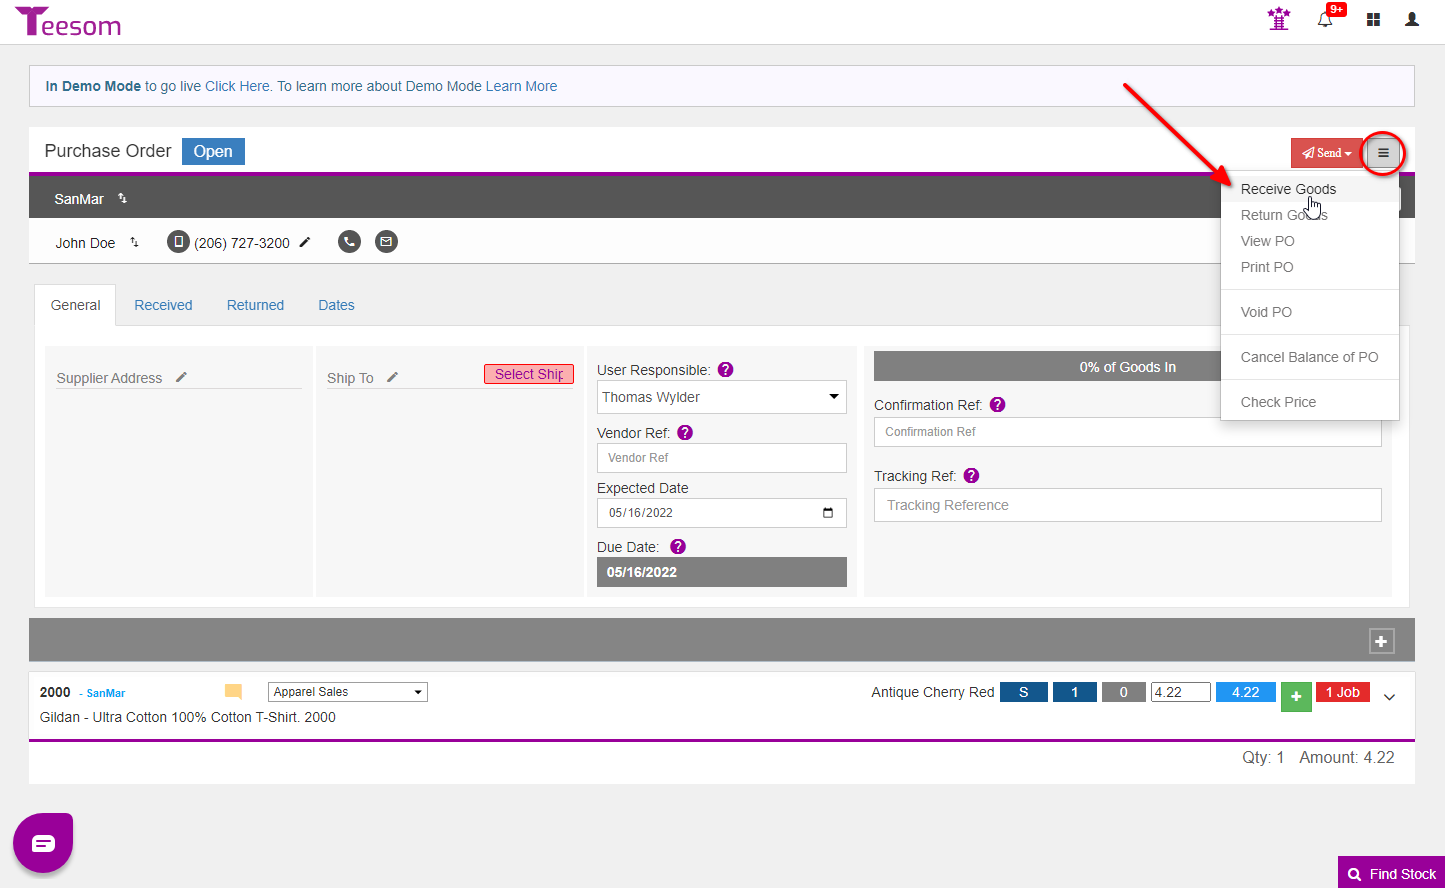
On the purchase order click on the Hamburger Menu then select “Receive Goods“, this will open the Receive Goods screen.
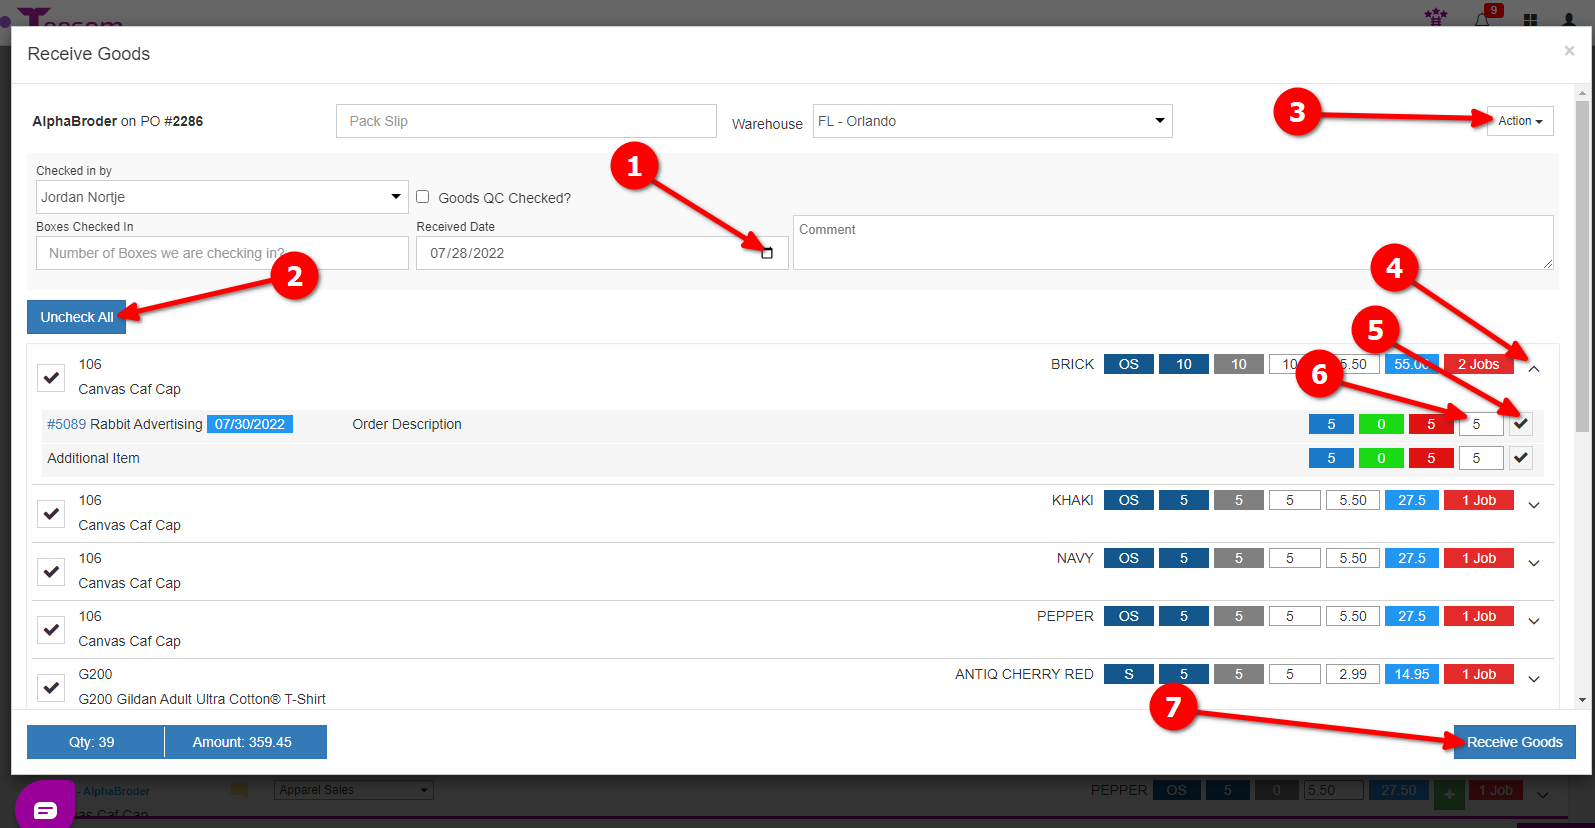
On the received goods screen there are a few things to take note of:
You can edit the received date by clicking on the calendar icon.
Uncheck all the goods.
Click on the “Action” dropdown to refresh.
You can adjust the quantity, and select which item you want to check in, by clicking on the dropdown arrow.
When you are done click on “Receive Goods“.
Working With Custom Catalogs
You can add Custom Catalogs to Teesom, but will first need to create the supplier. Once these details are added you can then add those items to orders and create purchase orders for those suppliers in Teesom.
We'll briefly discuss the steps to working with custom catalogs below.
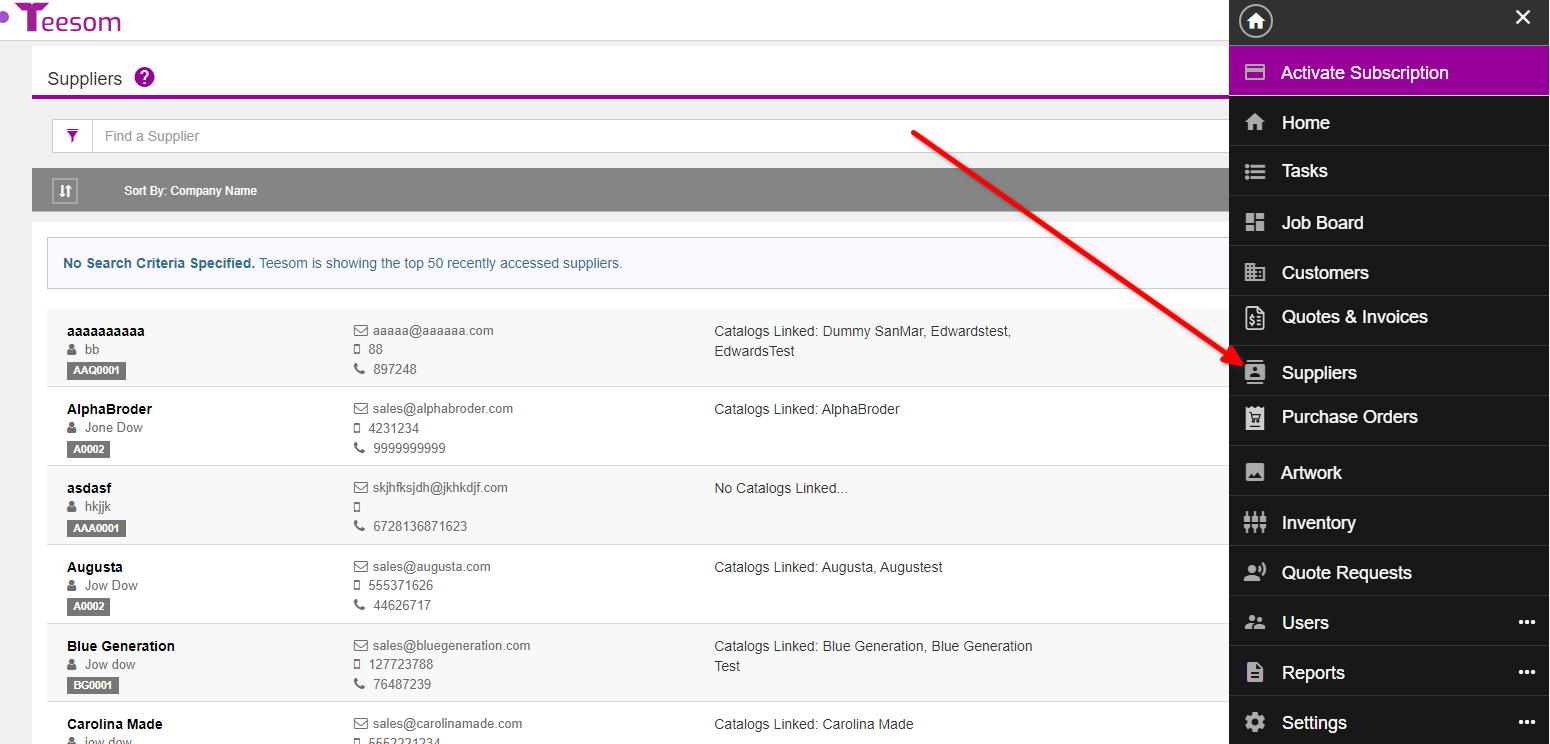
First we will create the supplier, you can do so on the “Suppliers” screen.
To get there go to the “Main Menu” then select “Suppliers“:
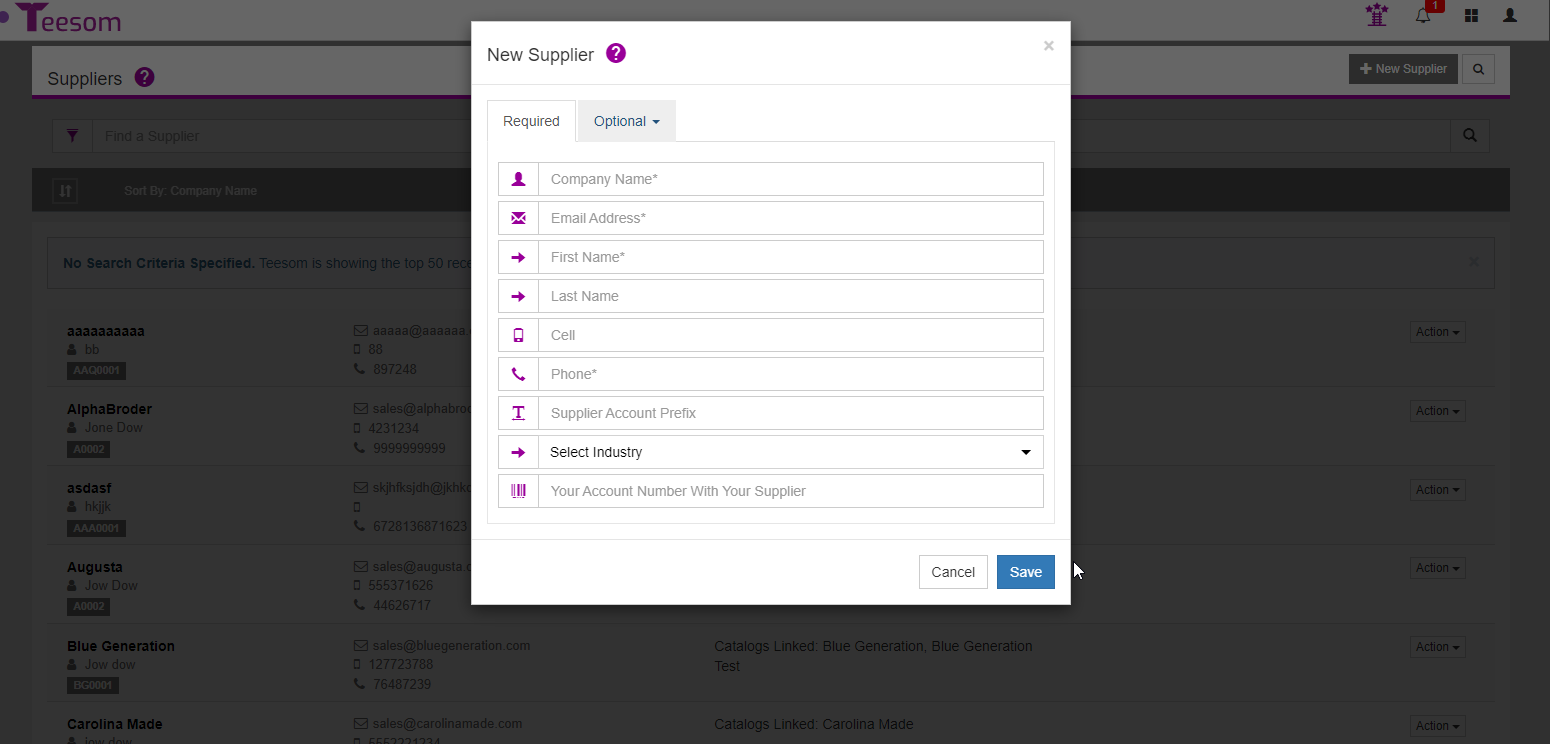
Enter the required information for your supplier:
Create and Link a Catalog
Now we need to link the supplier to a catalog.
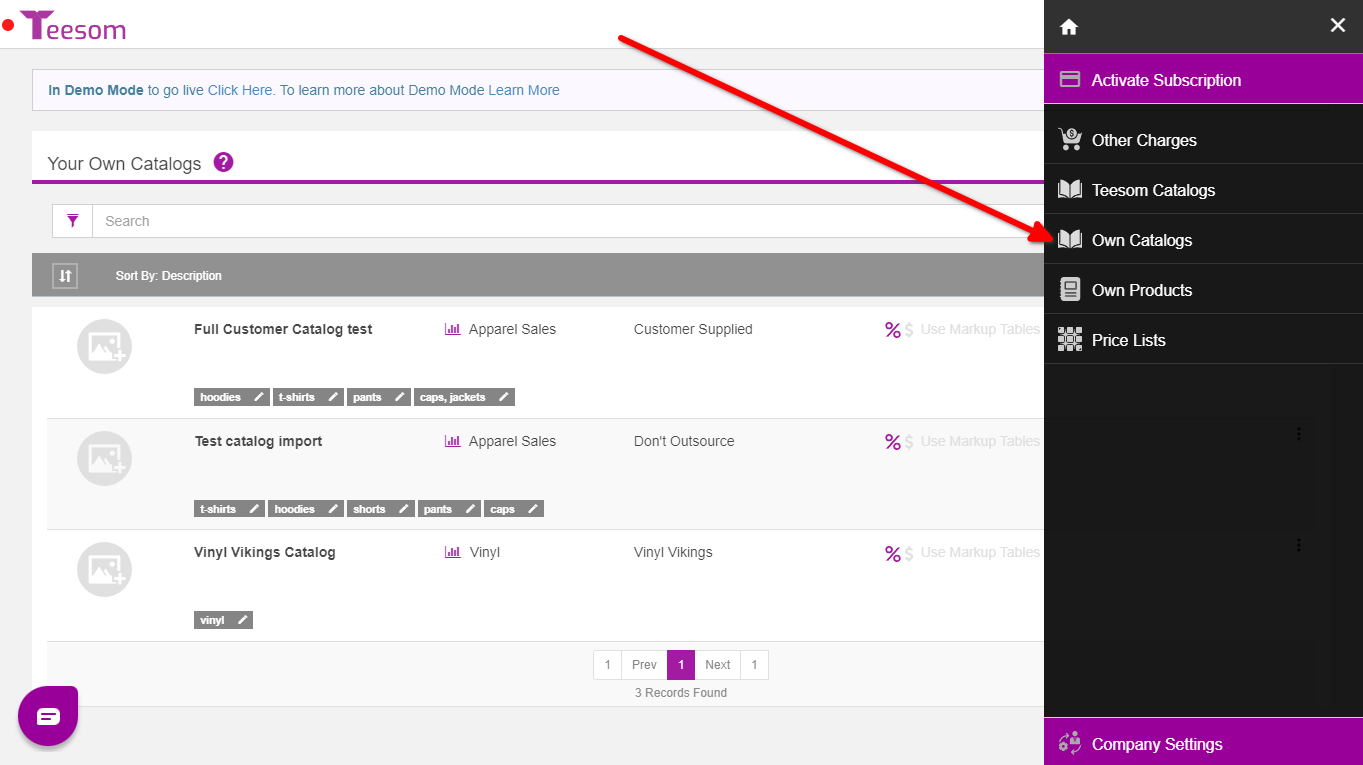
Go to the “Main Menu” -> “Pricing & Product Settings” then select “Own Catalogs“:
Add New Catalog
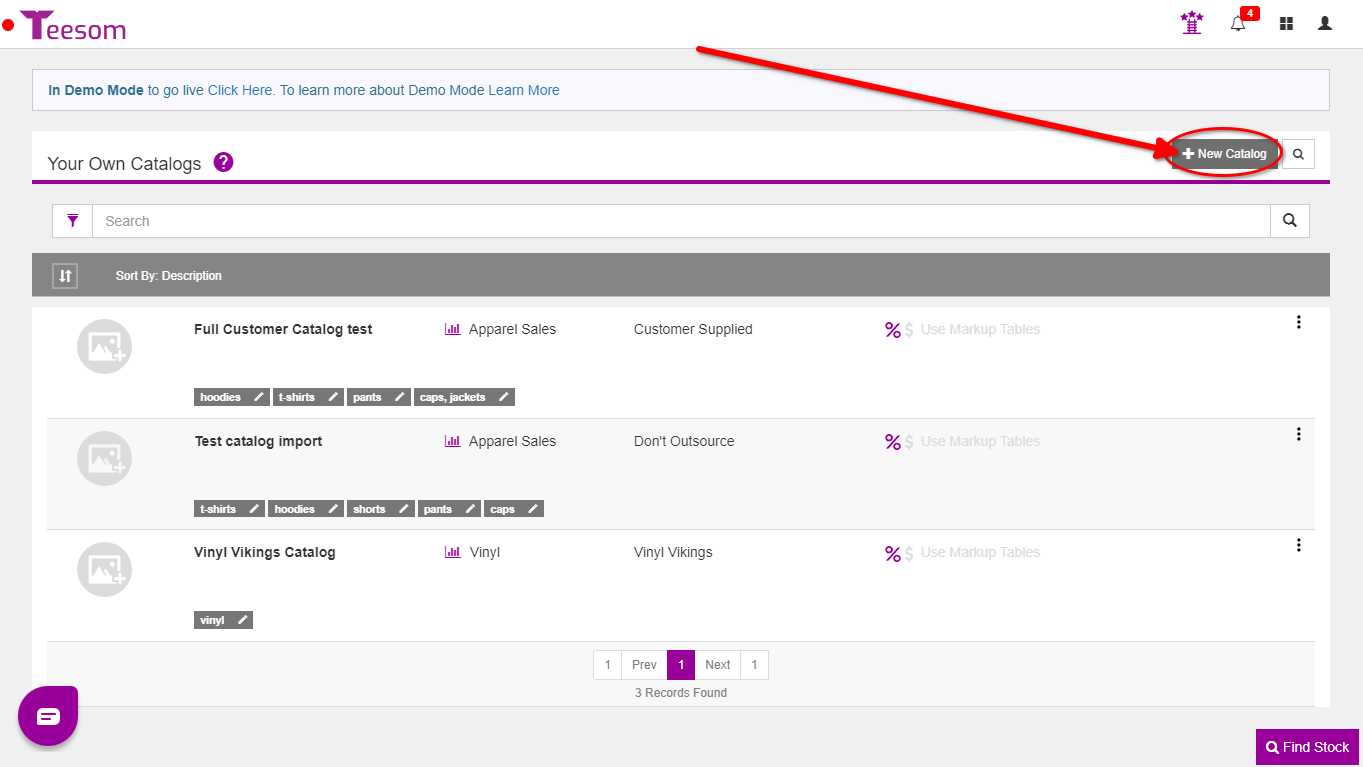
On the “Your Own Catalogs” screen click on “+ New Catalog“:
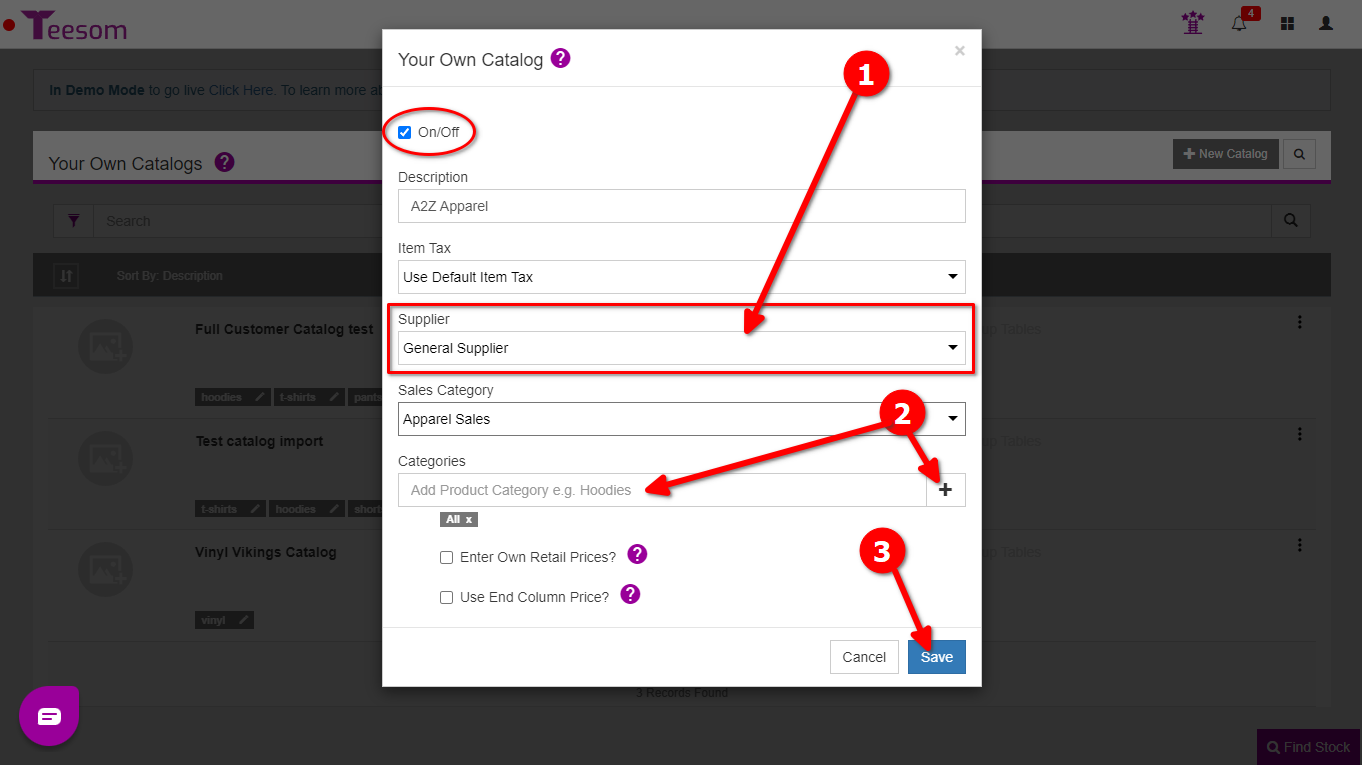
Select the supplier of these goods.
Add at least one category. (Type in the category and then click the + or hit enter.)
Save when you have completed the required information.
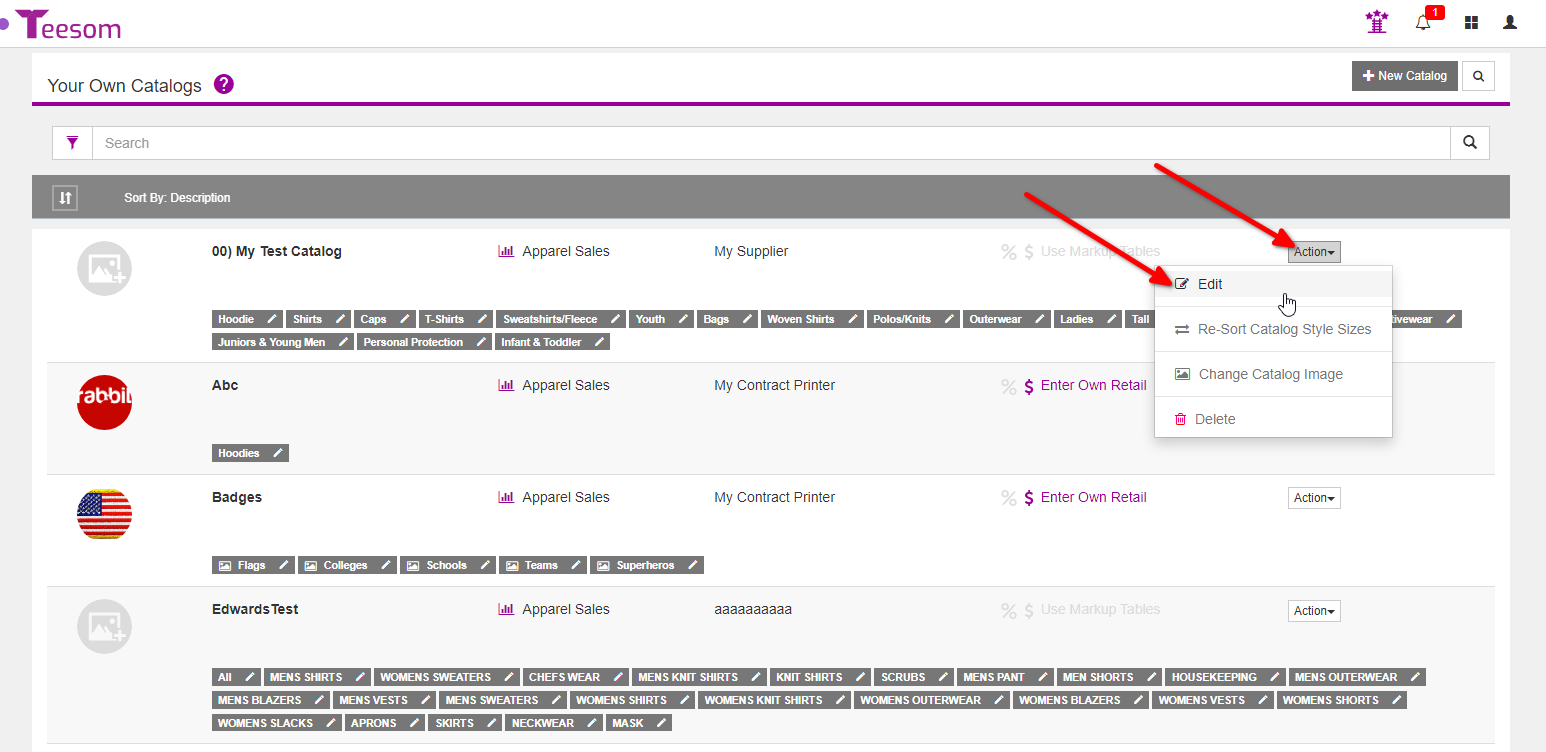
Link an Existing Catalog
On the “Your Own Catalogs” screen click on the “3 Dot” menu then select “Edit” on the catalog you want to link the supplier to:
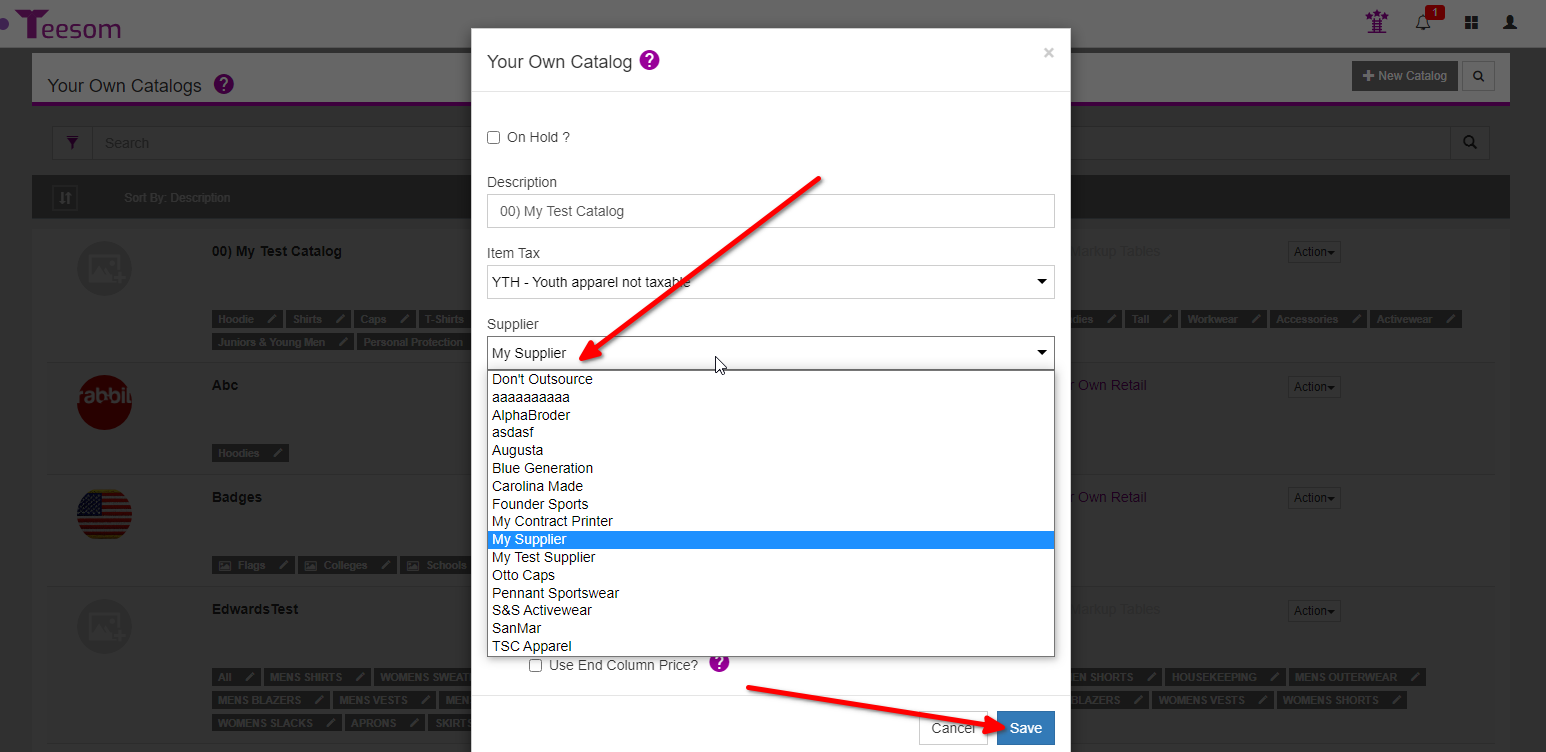
Select your supplier from the dropdown then click on “Save“:
Adding The Products To An Order
After turning the Catalog on you can now add the products from it to an Order:
Click on the (+) on a Job in the order.
Select “Catalog Item”.
Then you can search for the Style code of the product or select the Catalog and browse it:
Purchasing The Goods
Go to the order you want to purchase the goods for and click on the hamburger menu and select “Create PO“:
The product you are purchasing has to be from the same catalog that the supplier is linked to.
Select your supplier from the search menu then click on “Create PO” if you don’t want to send the PO you can mark it as sent by checking the box next to the “Create PO” button:
Check The Goods In
On the purchase order click on the Hamburger Menu then select “Receive Goods“, this will open the Receive Goods screen.
On the received goods screen there are a few things to take note of:
You can edit the received date by clicking on the calendar icon
Uncheck all the goods.
Click on the “Action” dropdown to refresh.
You can adjust the quantity, and select which item you want to check in, by clicking on the dropdown arrow.