Looking for help?

< Back
You are here:
Print

Quantity Based Markup

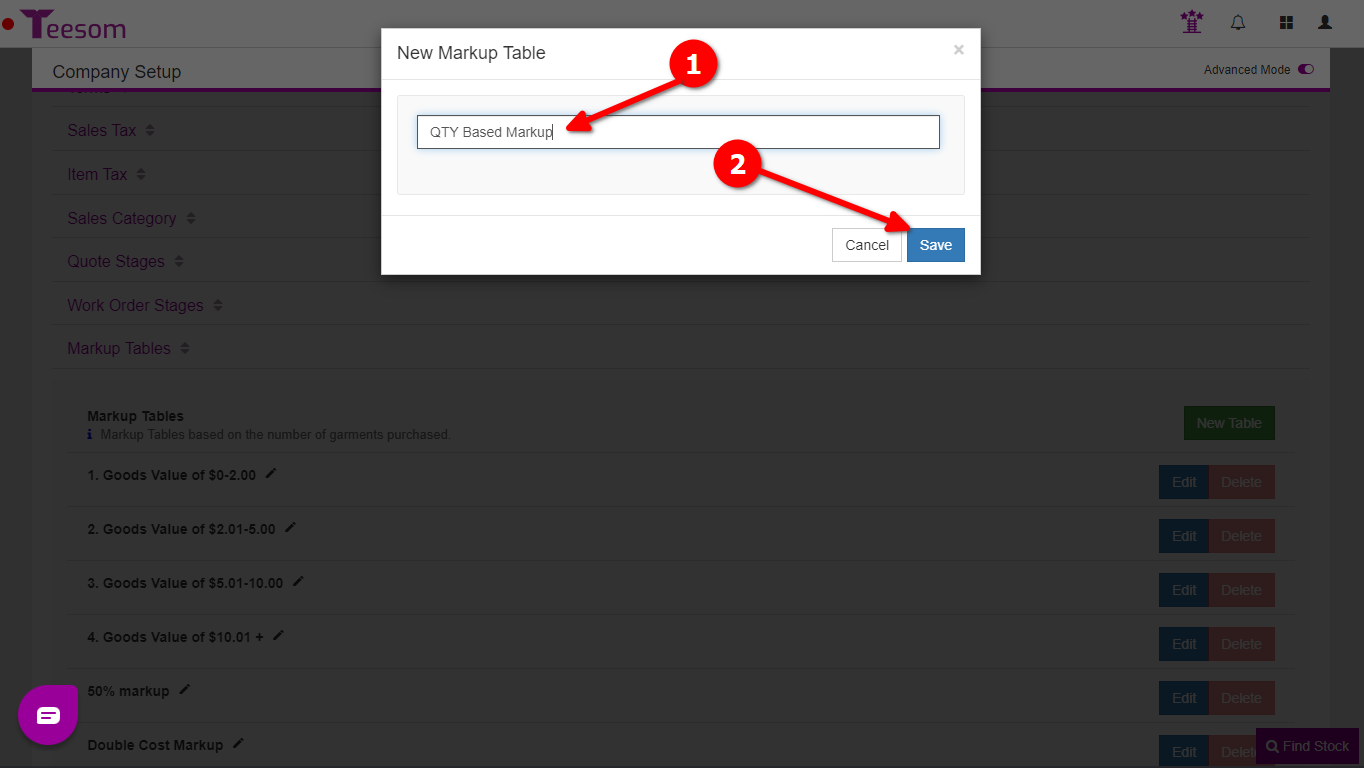
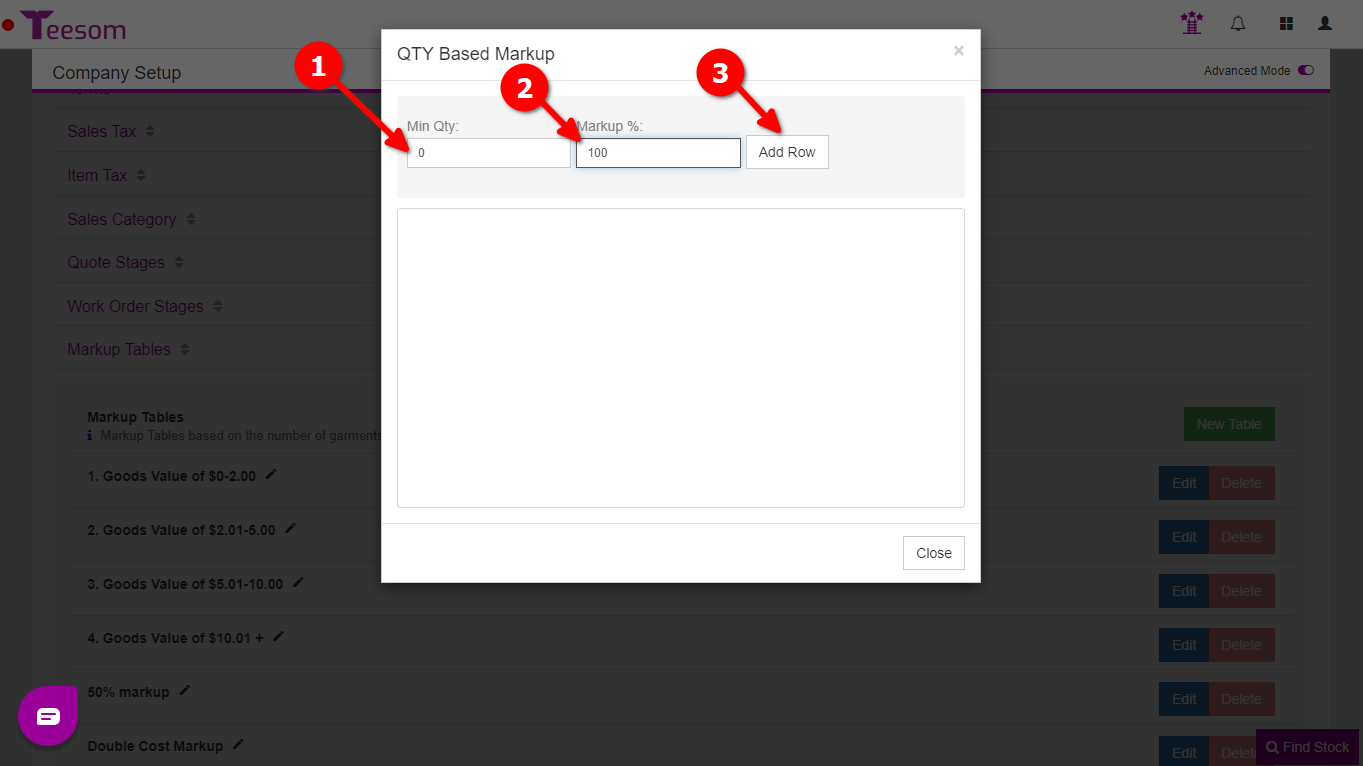
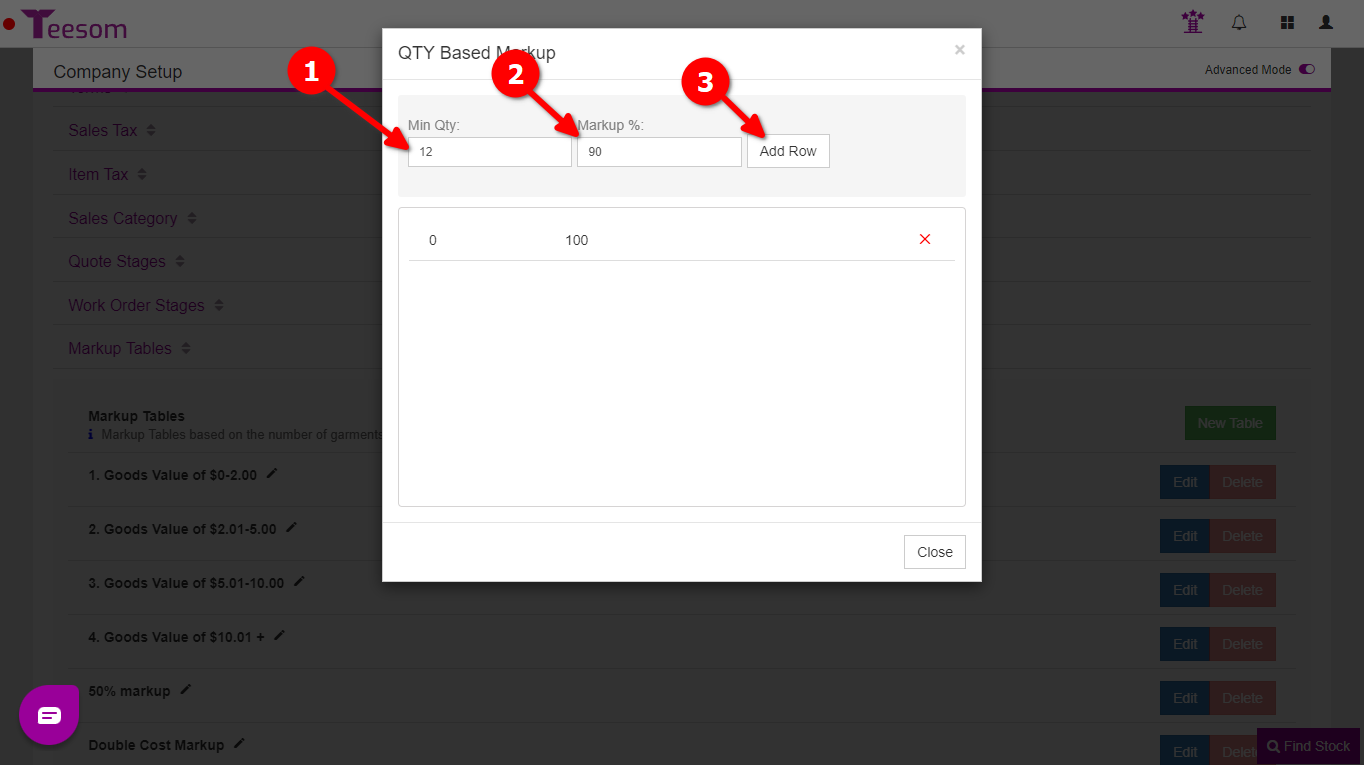
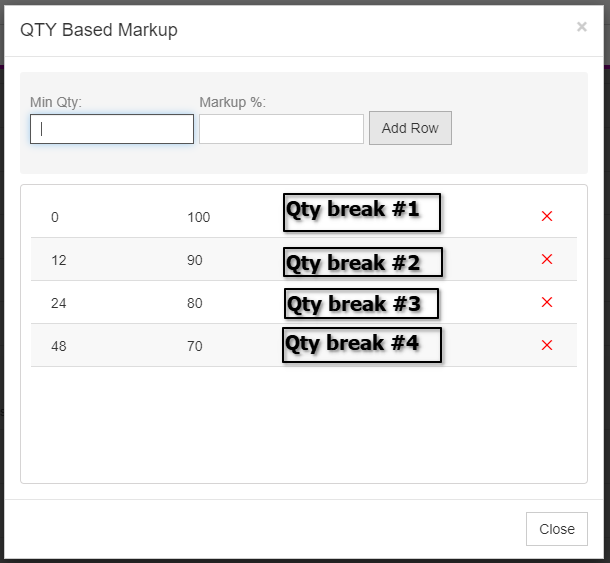
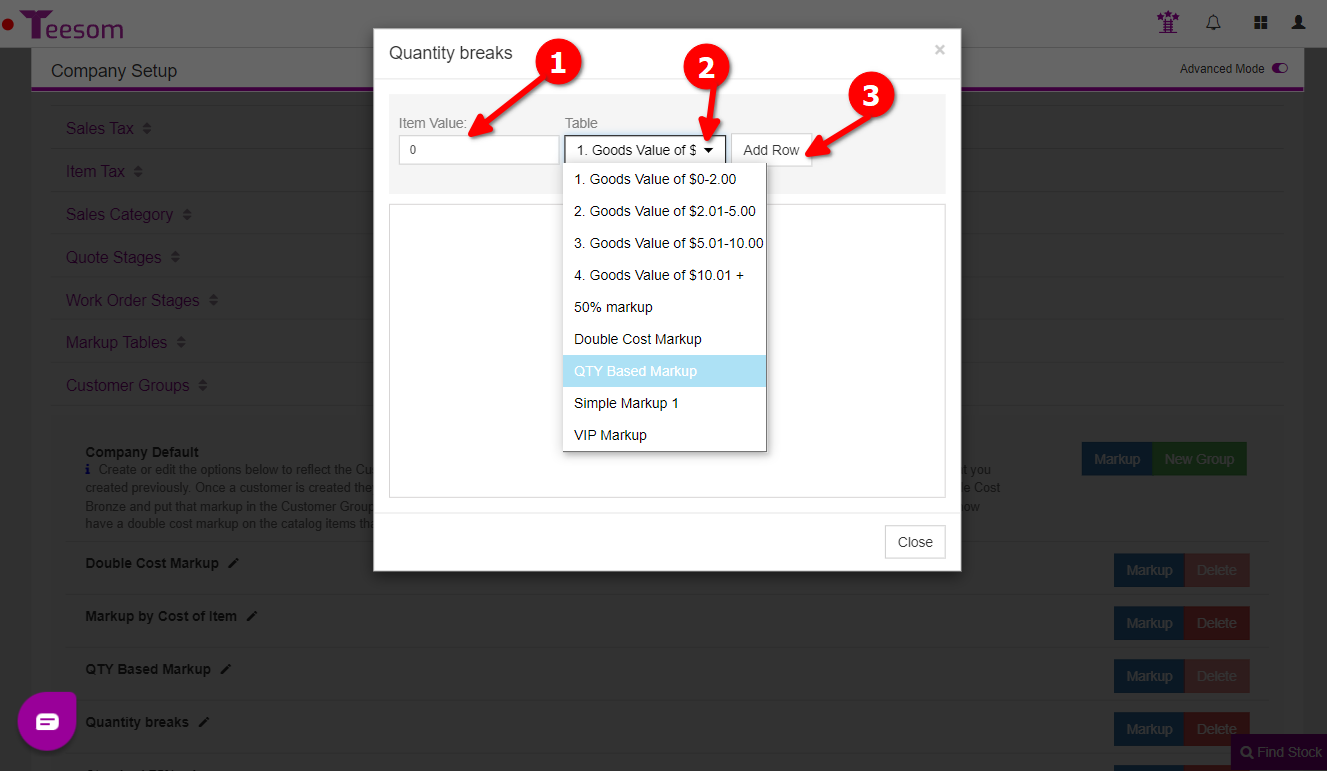
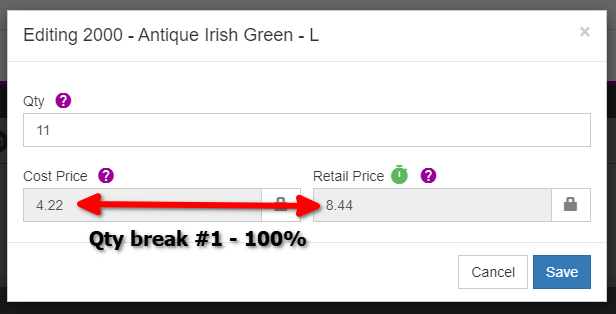
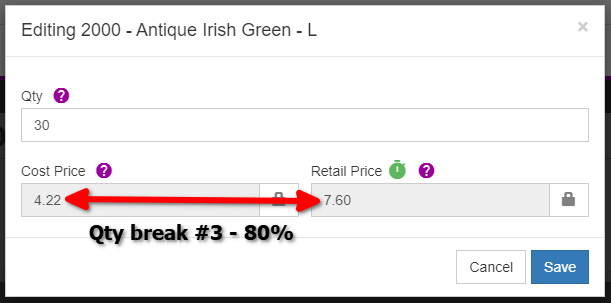
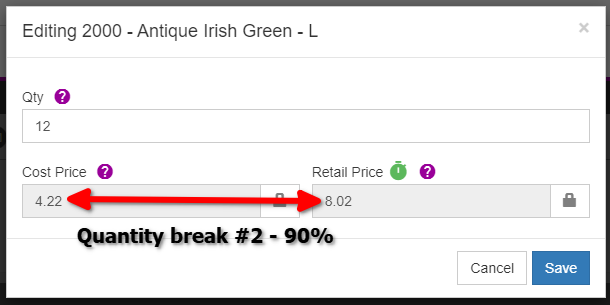
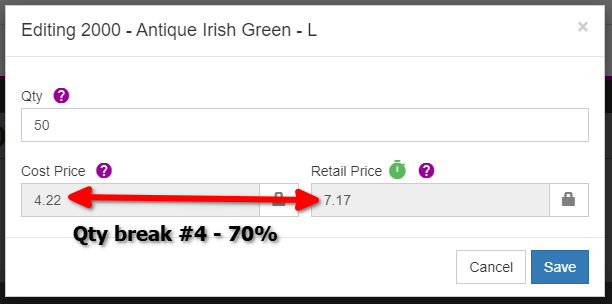
A Quantity Based Markup table is a markup table that works off of using quantity breaks to determine what % markup to use. Use quantity breaks in your markup pricing to incentivize and reward customers for purchasing higher quantities of goods.

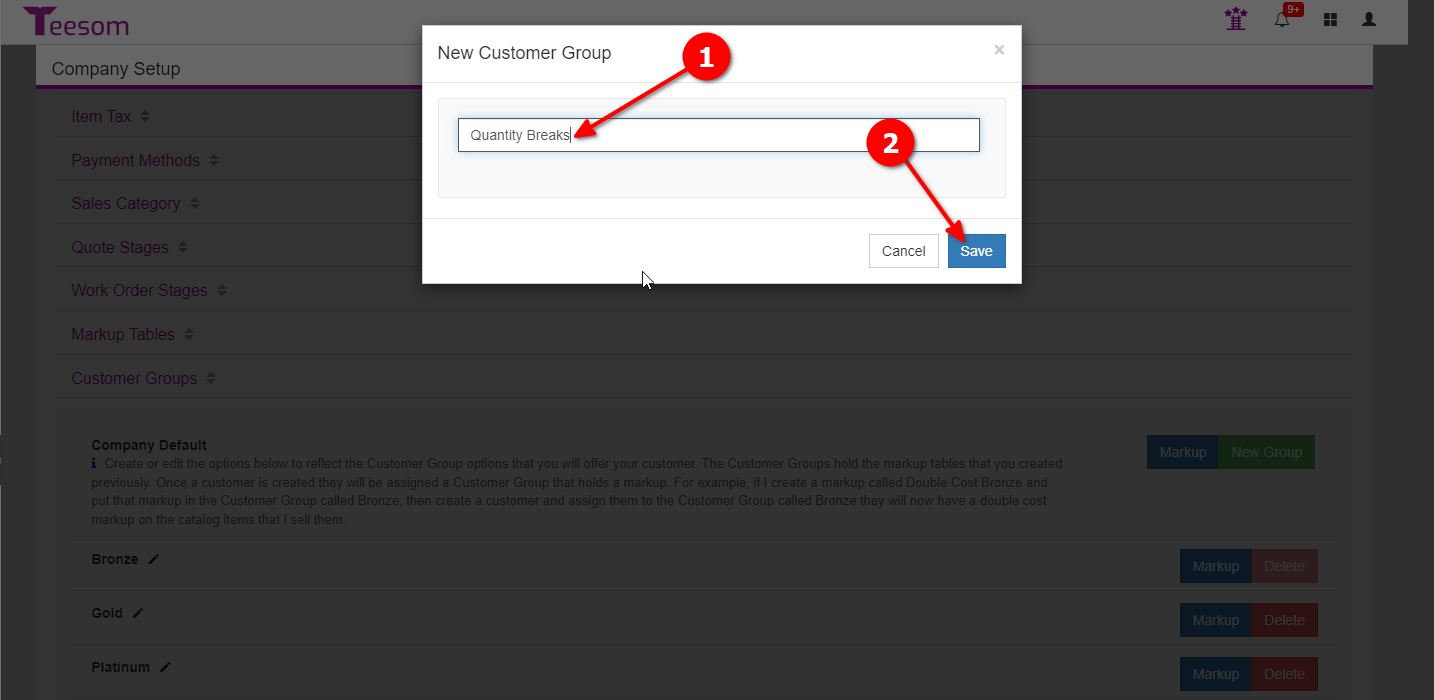
Creating A Quantity Based Markup Table
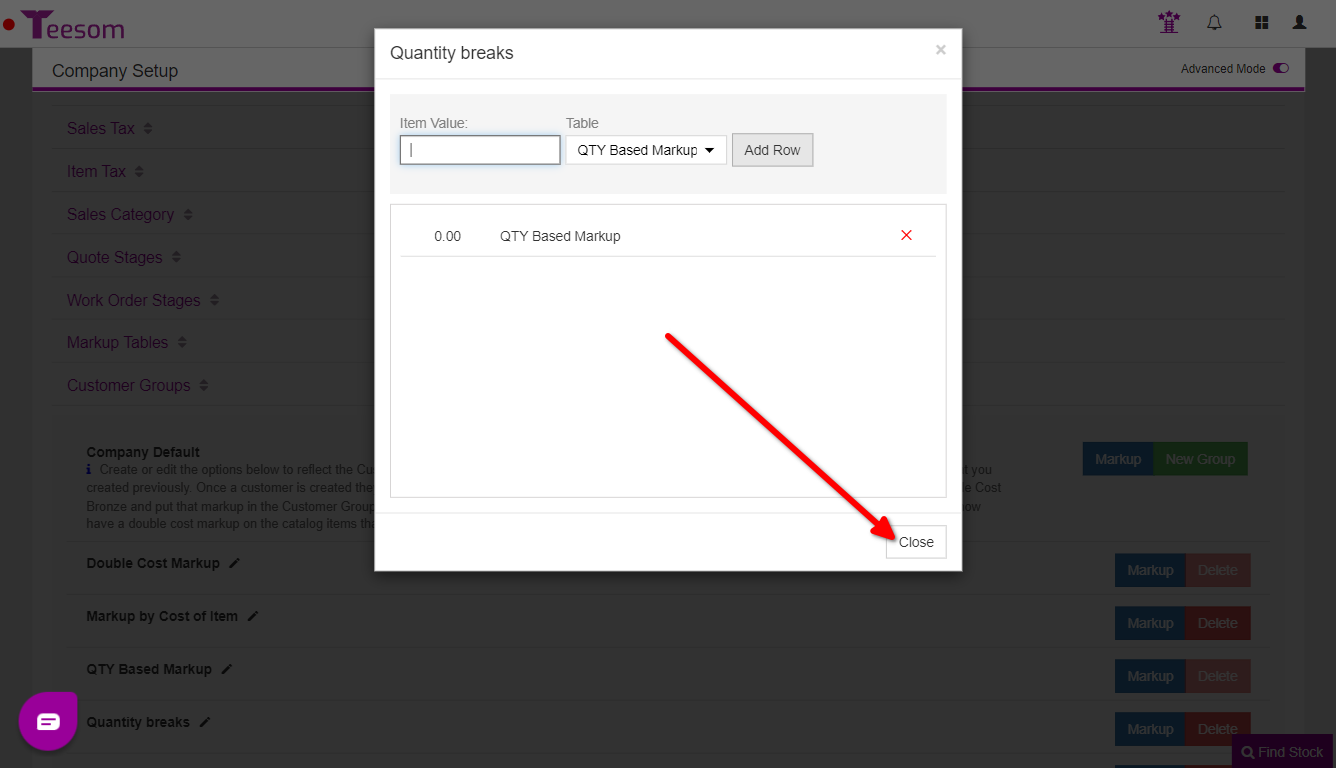
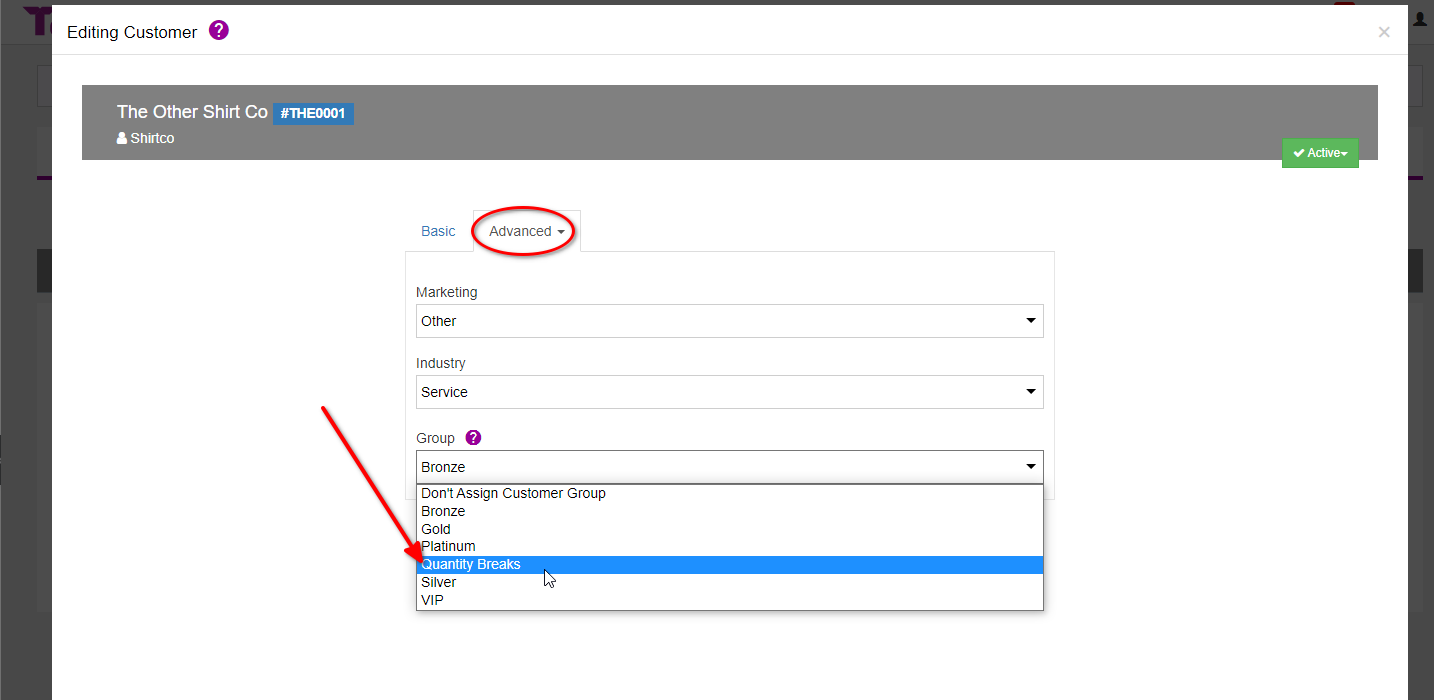
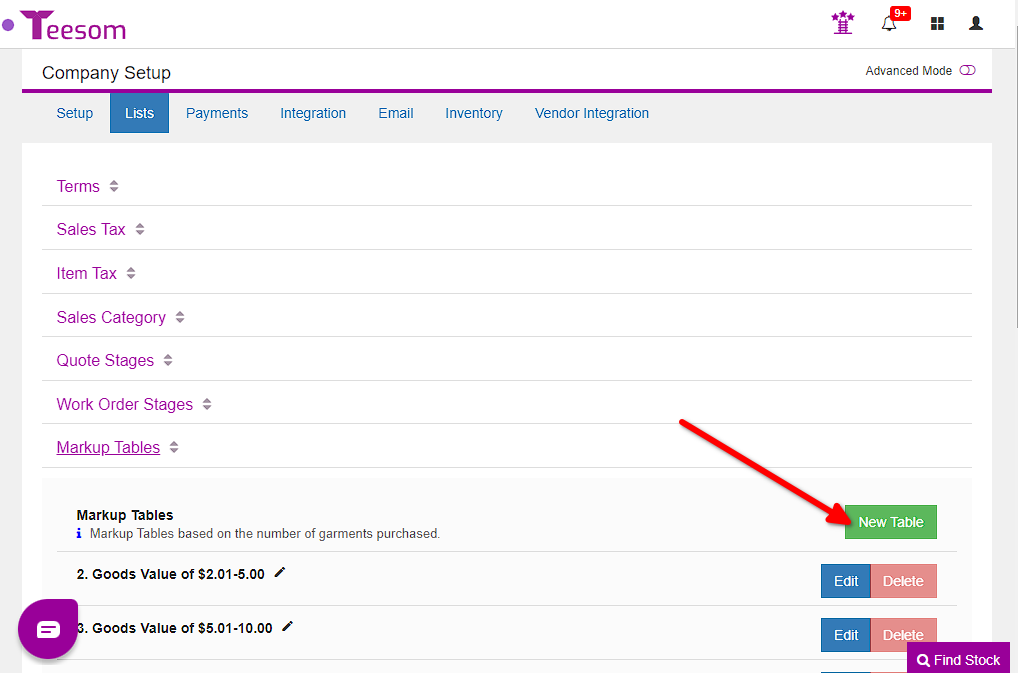
In this example we are going to create a simple markup table, but with different % markups for a number of “quantity breaks” and then assign it to a customer group.

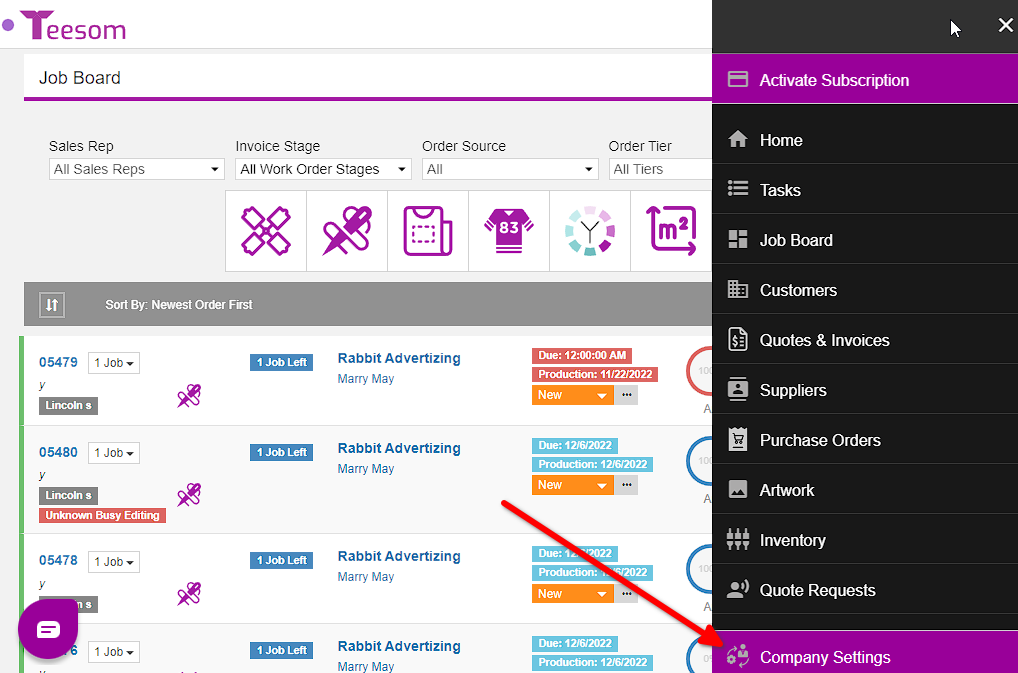
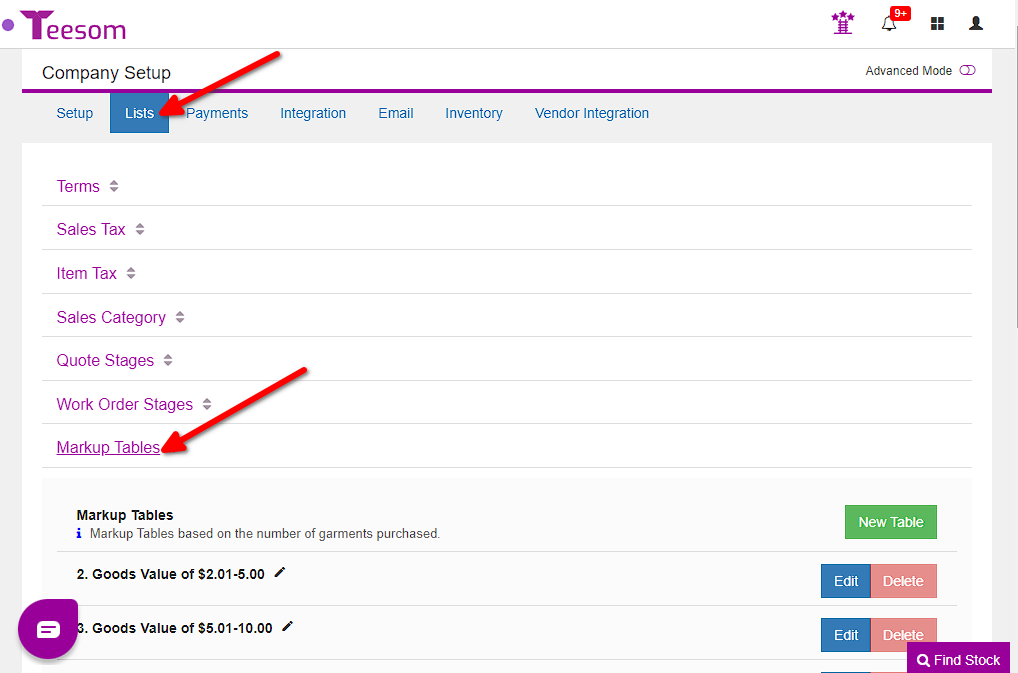
From the Main Menu, go to ‘Company Settings’ -> ‘Lists‘ and expand ‘Markup Tables‘ section:

Then click on ‘New Table’:

Let’s call this table “QTY Based Markup“:

Now we will enter multiple rows each with a different quantity and percent.

Enter the ‘Min Qty‘, enter the ‘Markup %‘, and then click “Add Row“.

For this article we will be using the quantities: 0, 12, 24, and 48 each with their own descending percentage markup:

Now add another row with quantity 12 and markup 90%:

Keep going until you have all the quantity breaks you want.

In this example the markup table that we have created works in the following way:

  • Qty Break #1: An order with a quantity of less than 12 items will receive a markup of 100% on goods.
  • Qty Break #2: An order with 12 to 23 items will have a markup of 90%.
  • Qty Break #3: An order with 24 to 47 items will have a markup of 80%.
  • Qty Break #4: Any order with 48 items or higher will have a markup of 70%.

Assign Markup Table To Customer Group

Now let’s go and assign this markup table to a Customer Group.

Go to ‘Company Settings‘ => ‘Lists‘.

Expand ‘Customer Groups’ and click on ‘New Group‘:

We’ll call this group “Quantity Breaks”.

  1. Enter the item value as 0.
  2. Select the new Markup Table we just created.
  3. Click on “Add Row“.
  4. Click on “Close“.

Assign Customer To Customer Group

Great.

Now we want to make sure our customer is assigned to this group.

On the Main Menu, go to Customers‘:

On the ‘Customers’ page click on the “3 Dot” menu next to the relevant customer, then click edit:

Under ‘Advanced’ go to “Categorize”:

Under ‘Group’ click the dropdown and select the group we just created (“Quantity Breaks”).

Remember to “Save”! (then you can close that window)

Example Order

Now we will create a new order for this customer and see how our markup works out.

Go to the Job Board and then click on New Order:

Enter the required details and create the order:

Add any existing catalog item to the Job:

Click on the “pencil” icon next to the price to see the cost.

From there you can see how the price changes, based on the quantity, using the percentages we entered when creating the markup table:

Quantity Break #1 – 100% Markup

Quantity Break #3 – 80% Markup

Quantity Break #2 – 90% Markup

Quantity Break #4 – 70% Markup

Pricing Tutorial Next: Imprints And Design Pricelists

Table of Contents