How to Use Your Own Email Account for Sending Emails From Teesom
Although Teesom is able to send all email on your behalf, you may prefer to use your own outgoing (“SMTP”) mail server for sending email. This article will help you to set that up.
However, you can send email from your own email address instead, you just need to add the account to Teesom.
By default Teesom will send all outgoing emails via noreply@teesom.com
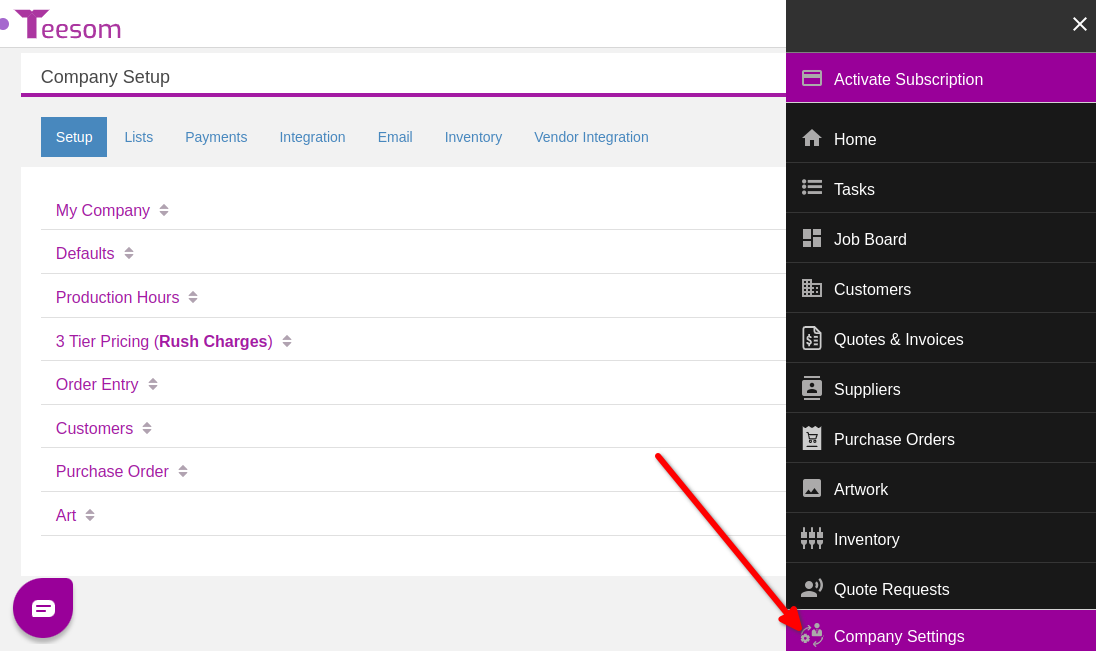
To add a new email account, go to the “Main Menu” (the 4 small squares at the top right corner) and click on: “Company Settings“
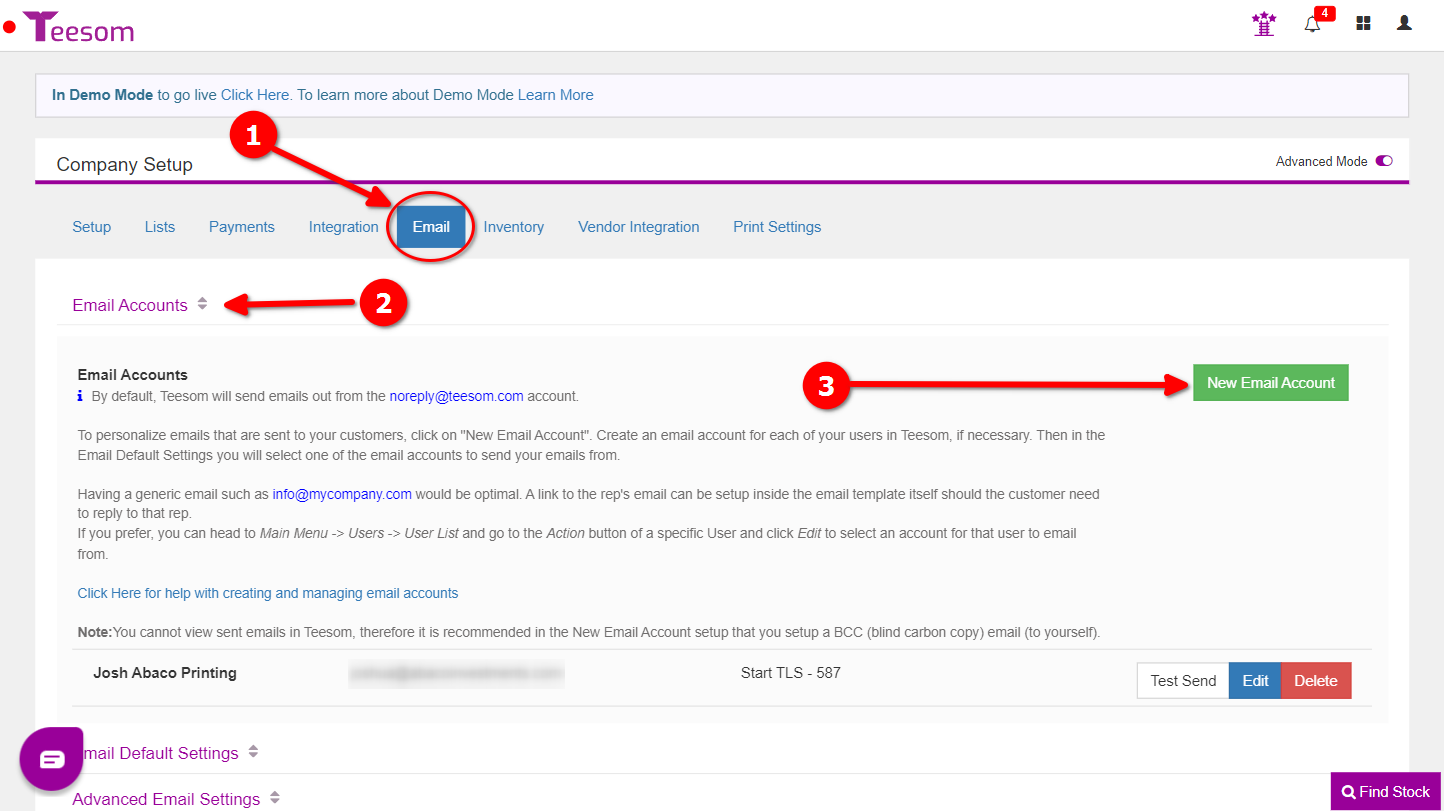
In Company Setup go to the “Email” tab then expand “Email Accounts“.
Then click on “New Email Account“:
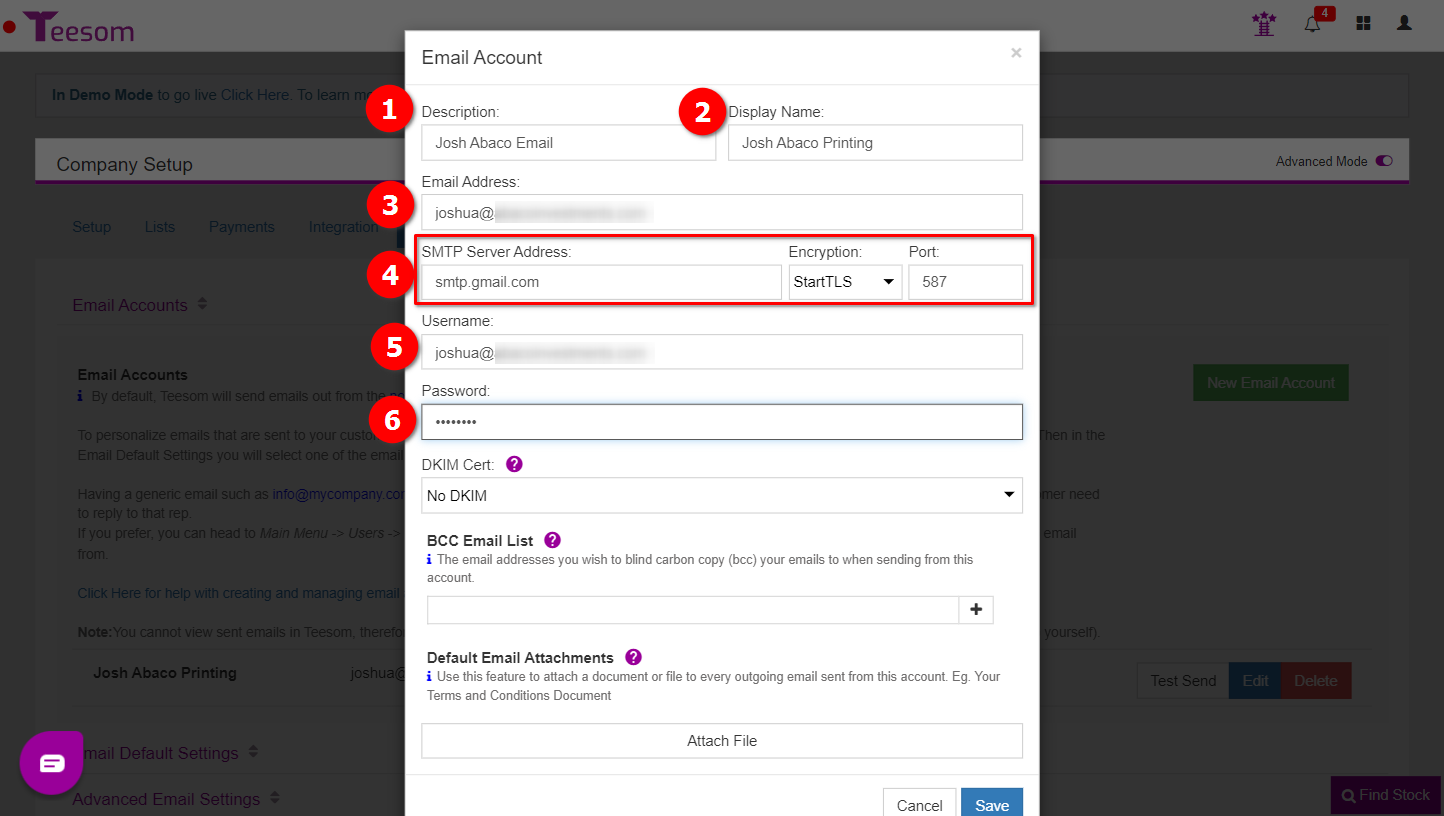
Below is an example of a completed Email Account:
Description: Used to identify which email account this is.
Display Name: The name recipients see when sending emails using Teesom.
Email Address.
Depending on the email service you want to use, these details will vary.
Username: Usually the same as the email address.
Password: This field is not for your email password but rather an ‘App Password‘ or similar code depending on the email service being used.
You cannot view sent emails in Teesom, therefore it is recommended in the New Email Account setup that you setup a BCC (blind carbon copy) email (to yourself).
For specific setup details and tips including Office 365 and Gmail Setups continue down this article or use the table of contents to the right.
General Setup Advice
After you have entered all the settings, click on Save and then click on ‘Test Send’.
You will see a green "Success" message appear at the top of the screen if the test is successful.
If the test fails: Double check your Email Account details that you entered into Teesom.
If you need assistance we are available to help in the Live Chat. (Bottom right of this page.)
You may need to enquire with your network administrator, office manager or email service provider about the correct SMTP settings for your email address.
TIP
If the port number is 587, then the encryption method is TLS or StartTLS
If the port number is 465, then the encryption method is SSL
If the port number is 25 then there is no encryption
Note: Other port/encryption configurations than this are possible – check with your Network Admin, Office Manager or email service provider
Office 365
Please Note: Office-365 has some special requirements. If you're using Office-365 (outlook.com) for sending email, please see: Office 365 Setup
GoDaddy
If your Office-365 product is managed through GoDaddy, please click here
Gmail Setup
If you're using Gmail for sending email, please see: Gmail Setup
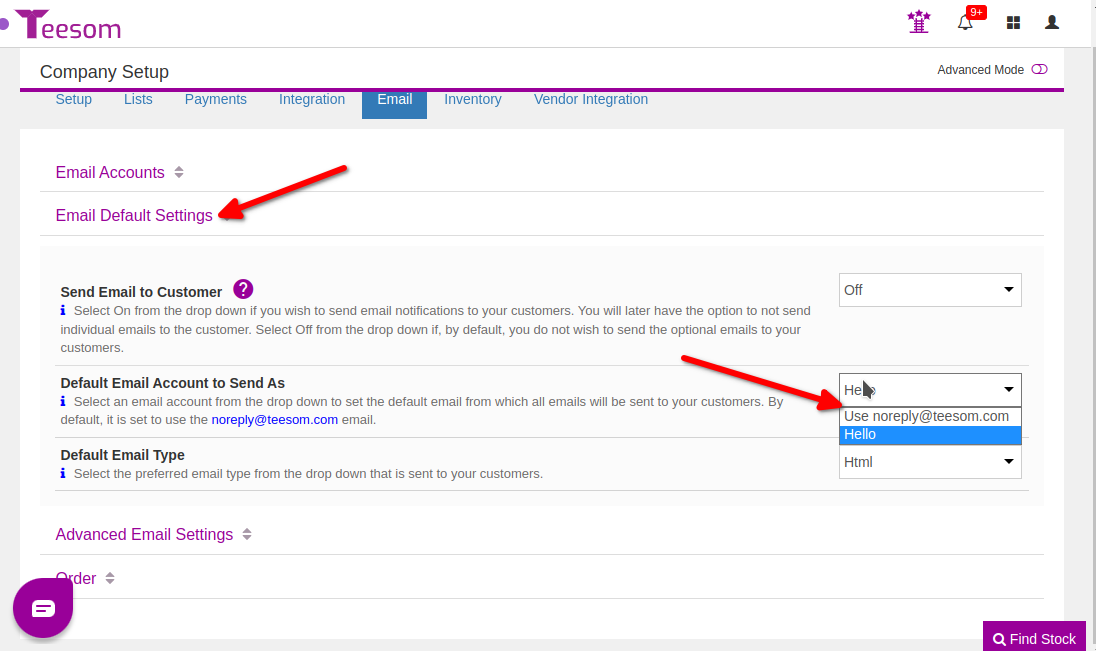
Change the Default Email
After Setting up the email remember to go to “Email Default Settings” and change the default email from noreply@teesom.com to your own email account:
NOTE: As long as your company is in Demo Mode, all emails will be sent only to you and not to your actual customers. When you are ready to go live go to: Main Menu -> Settings -> Company Setup -> Setup -> “My Company” and toggle Demo Mode to OFF
You can configure multiple email accounts to send through, for example: one for each user or one for each Department. Then each user can set the account they wish to send through. They do this through their User Profile:
DKIM (optional)
DKIM, or “DomainKeys Identified Mail” is a system for ensuring that the recipient can verify that your email really does come from you, and not from a rogue account pretending to be you.
You can safely *ignore* this option unless otherwise instructed by our Tech Support staff.
If you would like to learn more about DKIM in Teesom, Click Here
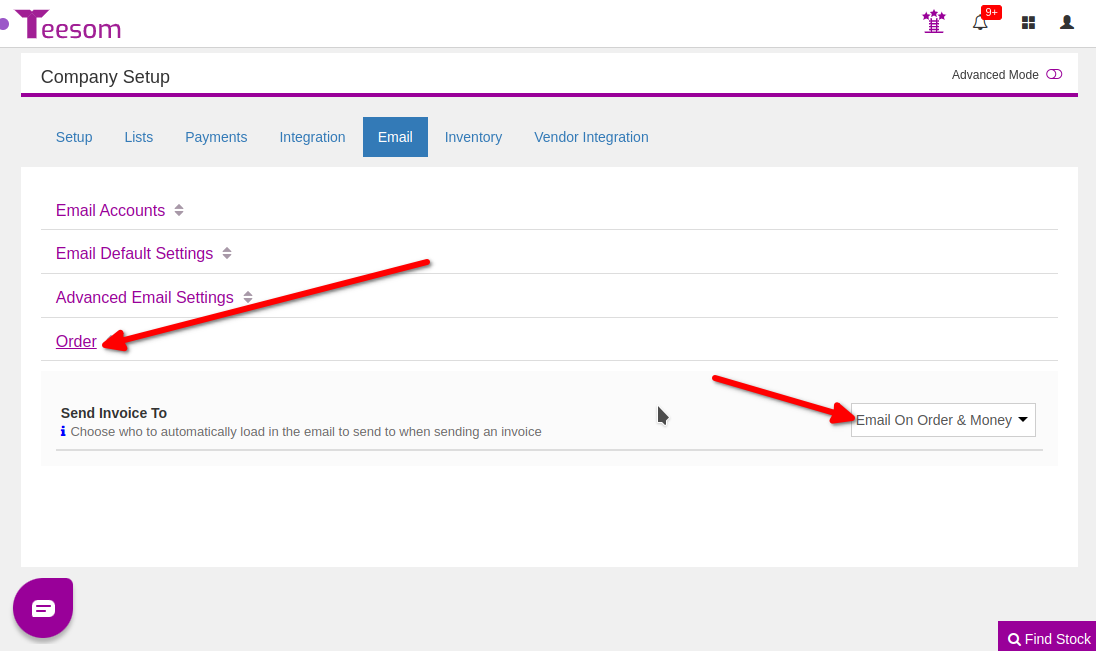
Order Options
Under “Order” you can choose which email address to send invoices to by default: