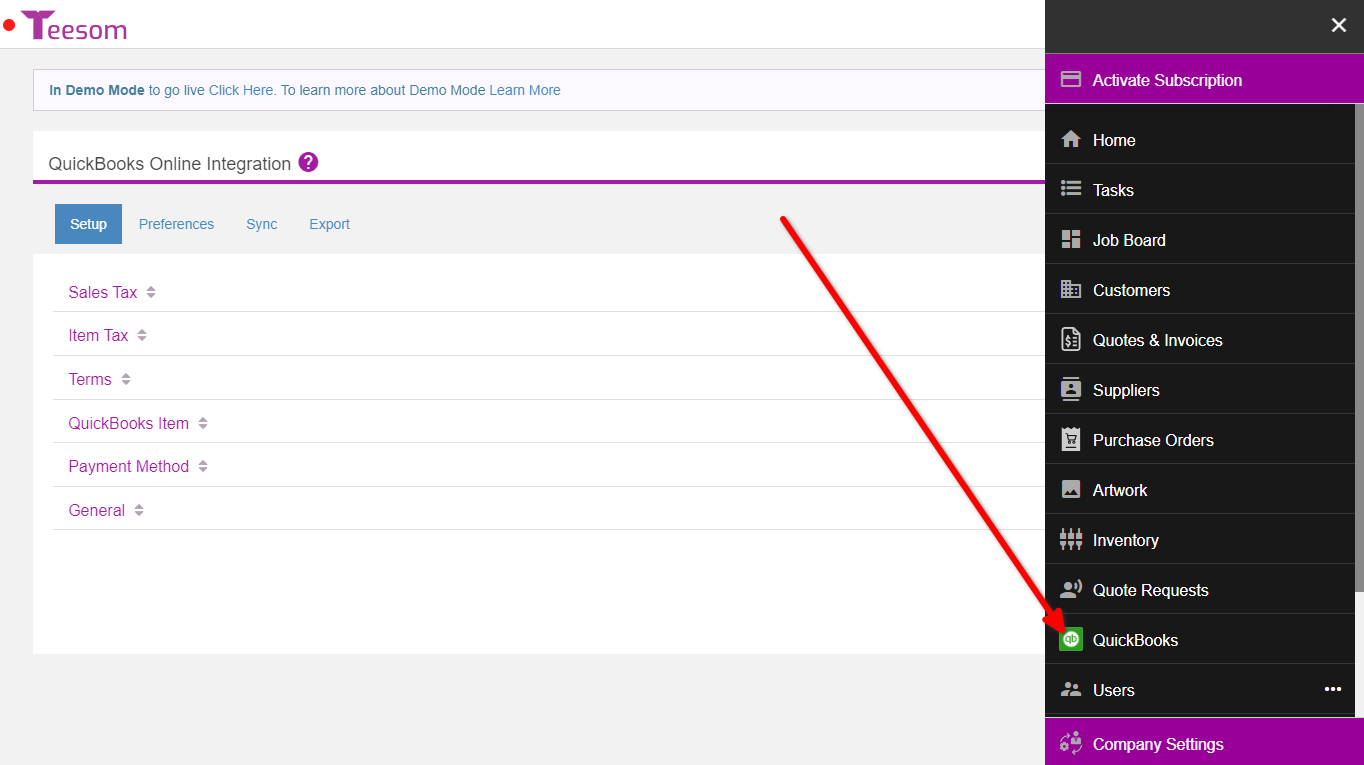
After connecting your QuickBooks Online you can access the integrator via the main menu:
This will take you to the integrator where you will do all your linking, exporting, and importing.
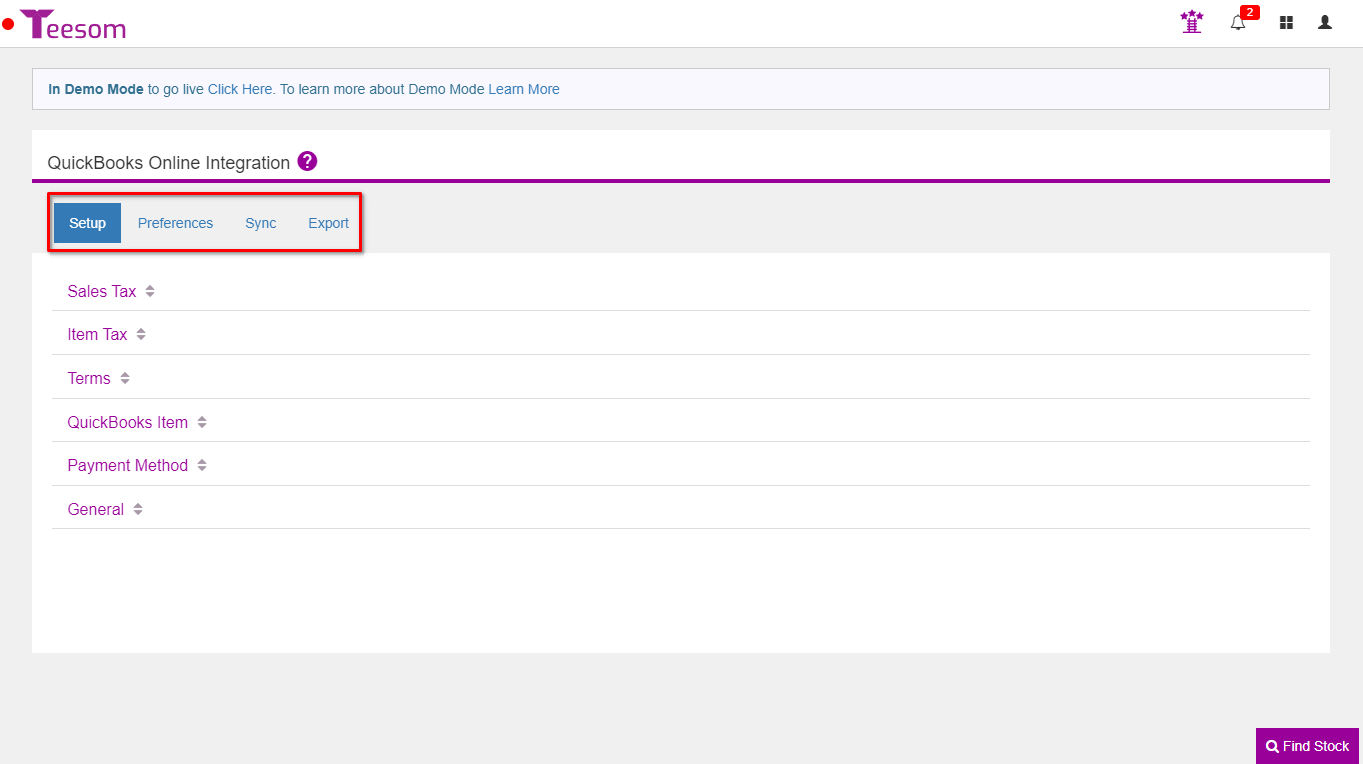
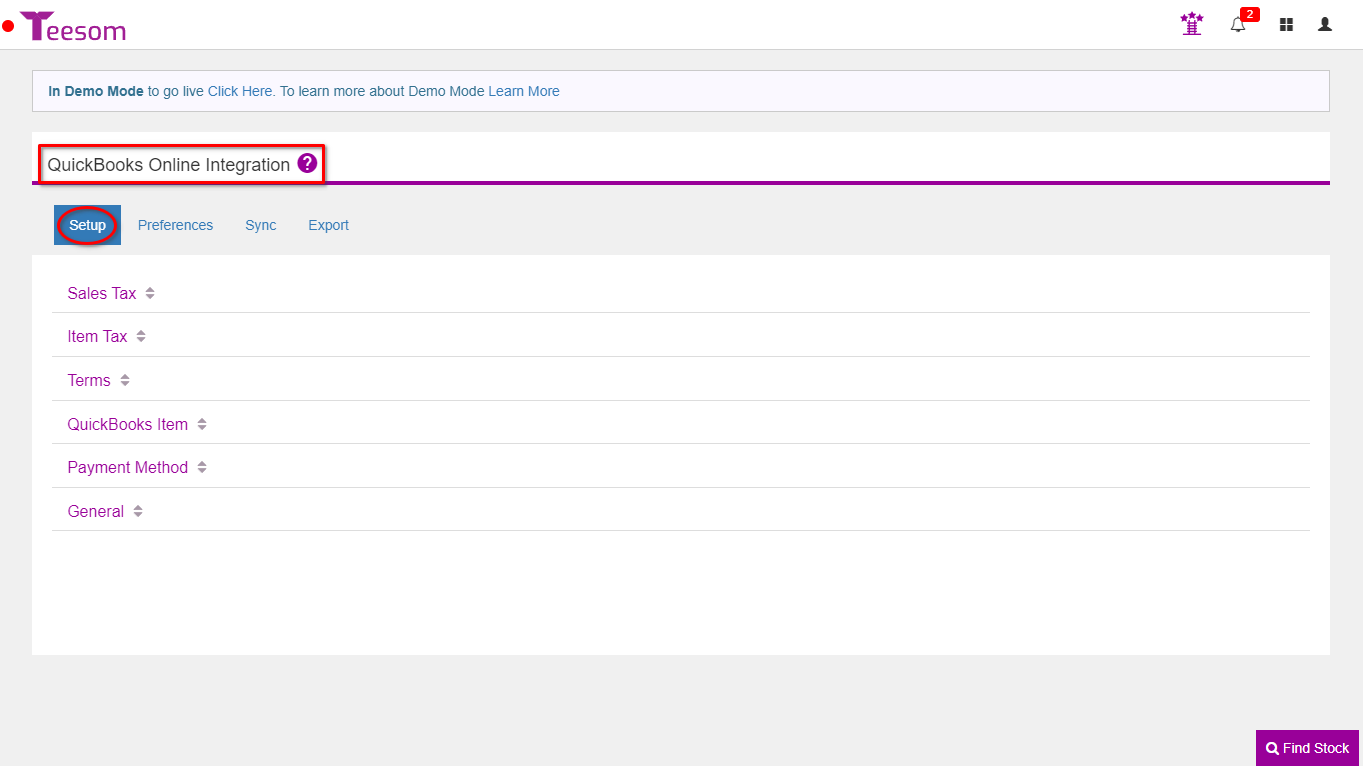
There are four tabs on the integrator, we will give you a description of what each of them are for:
IMPORTANT: Before linking your QuickBooks items you should first have your Teesom Company Setup fully completed and matching your QuickBooks! i.e. Sales Tax Rates, Sales Categories, Payment Methods, and Terms setup exactly as they are in QuickBooks!
You must link every tax rate! Including all the single tax rates that make up a combined tax, even those that are exempt/0%.
If you do not have the tax rates broken out in QuickBooks then you will need to set it up in the same way in Teesom first, i.e. Go to Company Settings -> Lists -> Tax Rates, and remove the tax rates that don’t exist in QuickBooks. Alternatively you can add the missing tax rates to QuickBooks.
The key thing is that all tax rates are linked!
Note: When linking taxes the rate of the Tax Code in Teesom must be exactly the same as the rate of the corresponding Tax Item in QuickBooks.
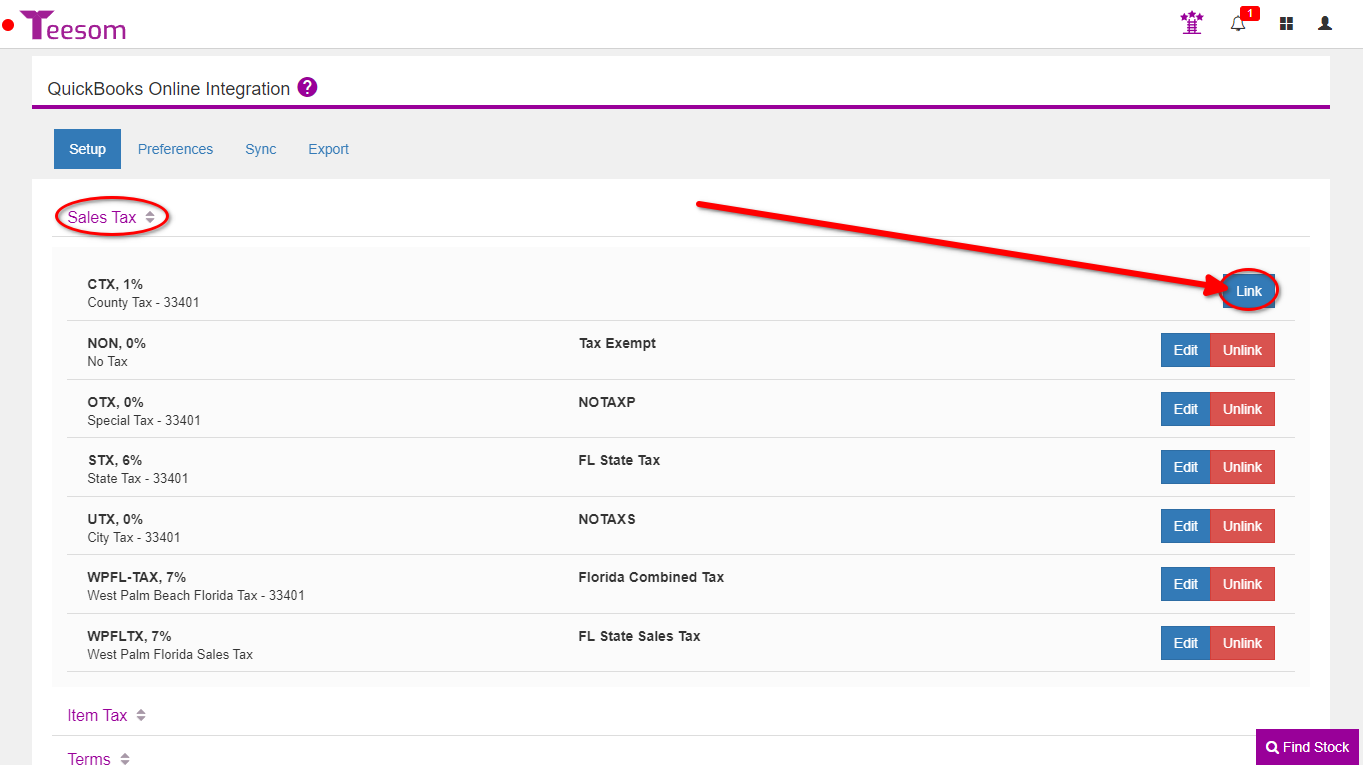
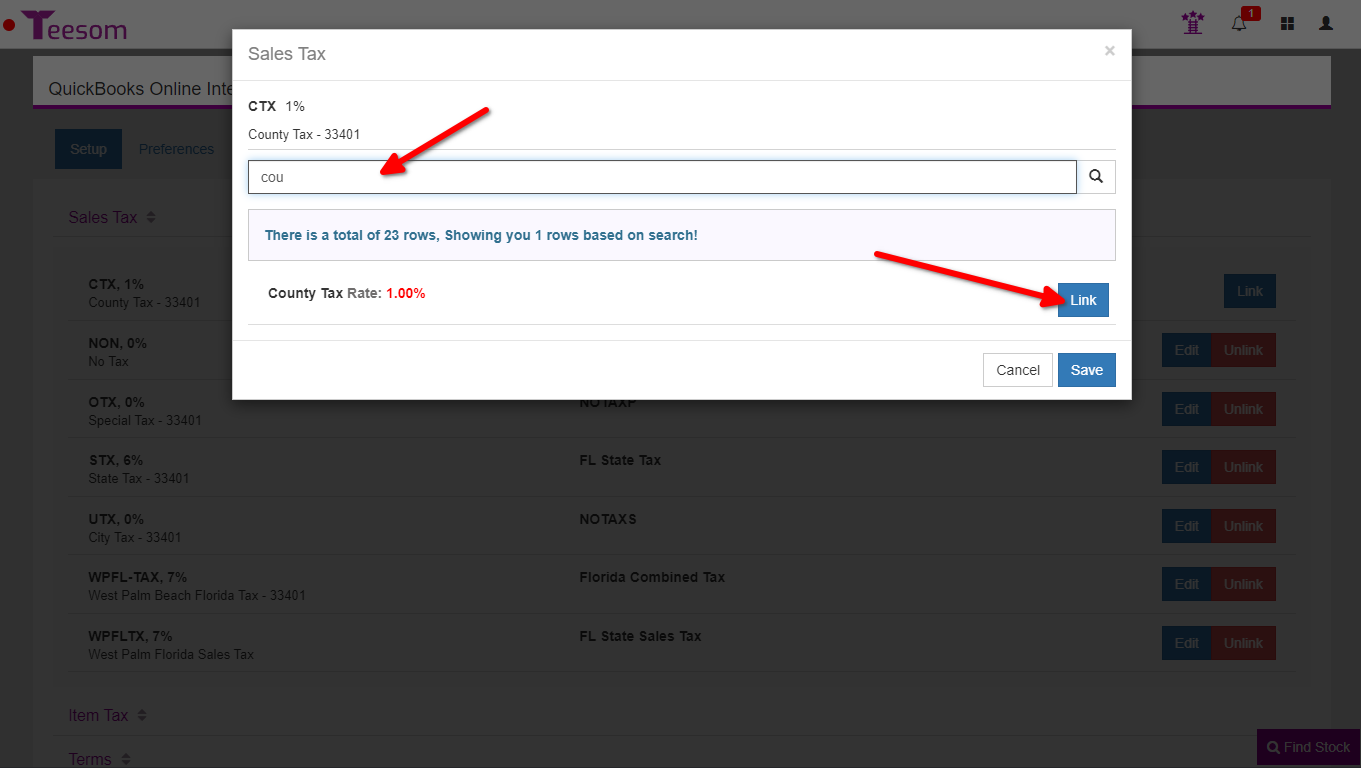
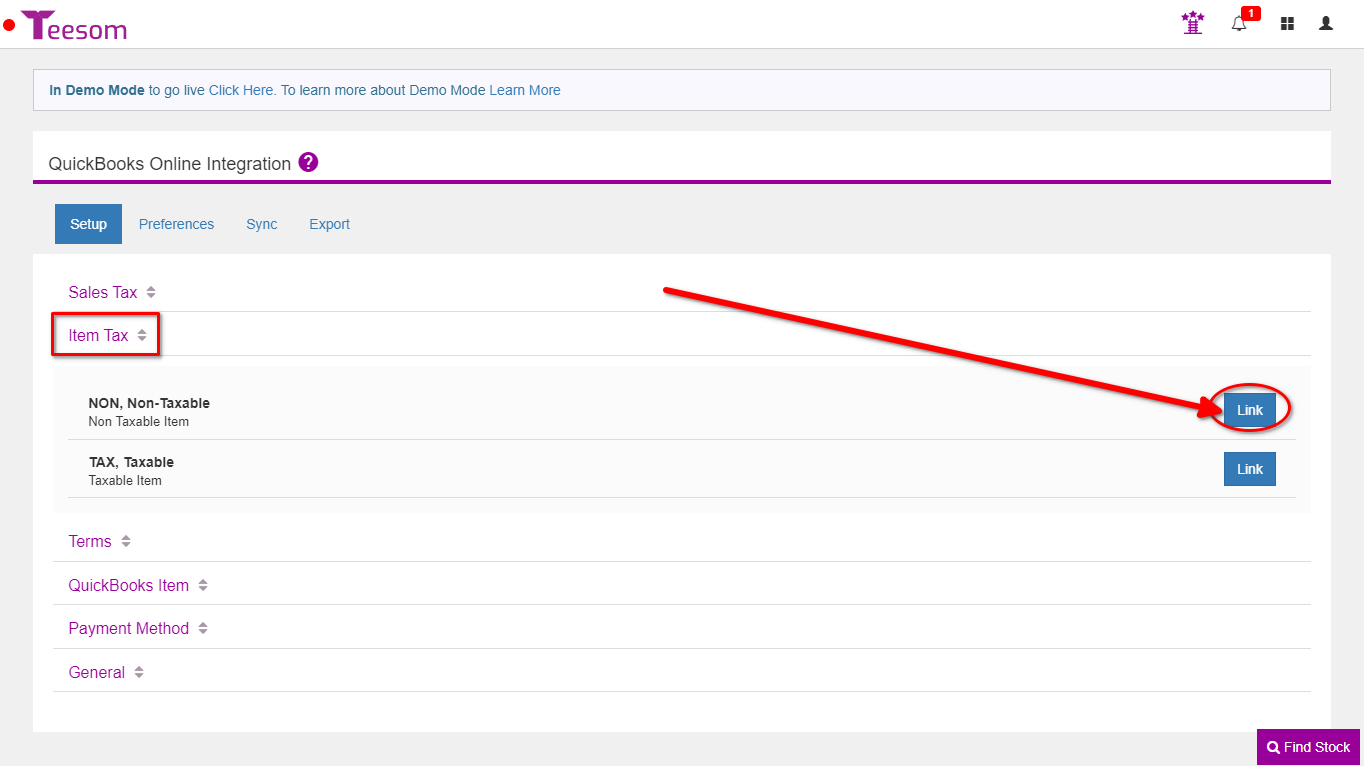
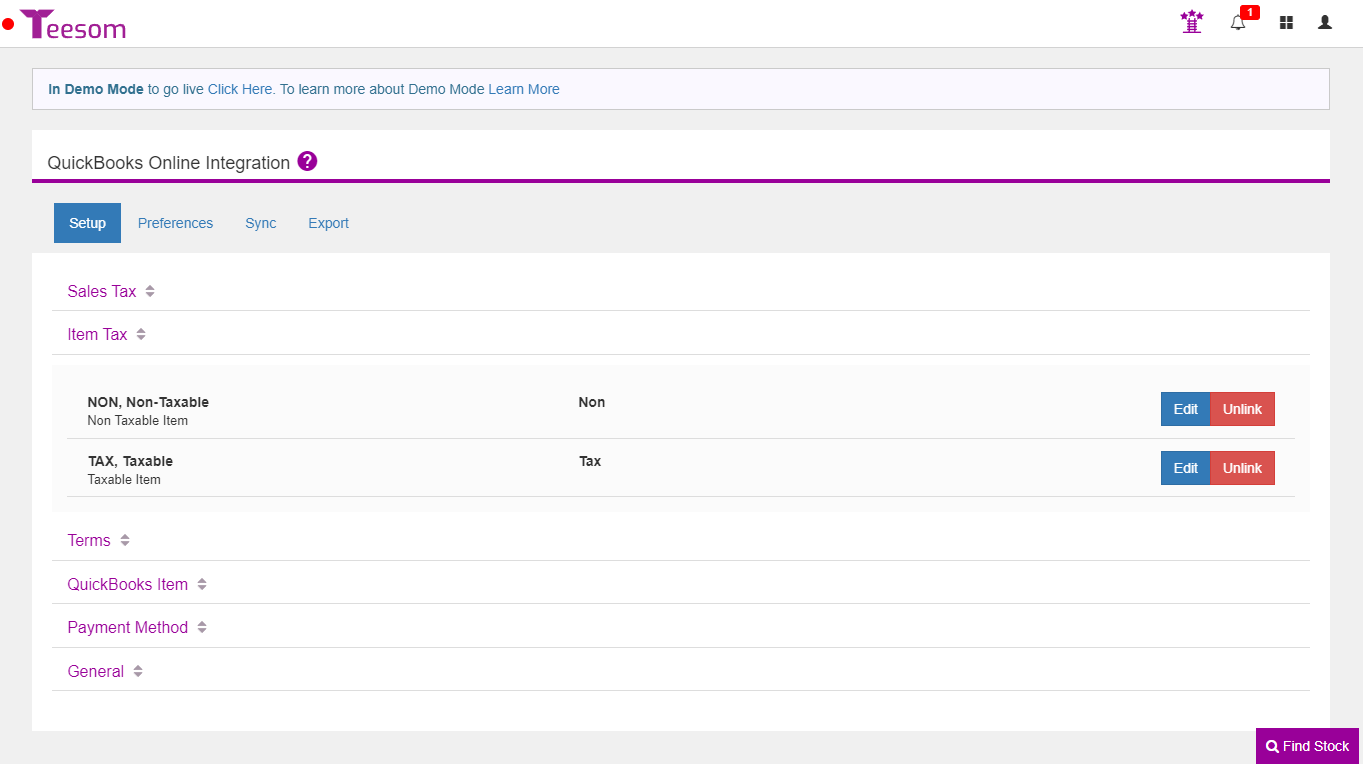
To link your Sales Tax on Teesom to QuickBooks Online:
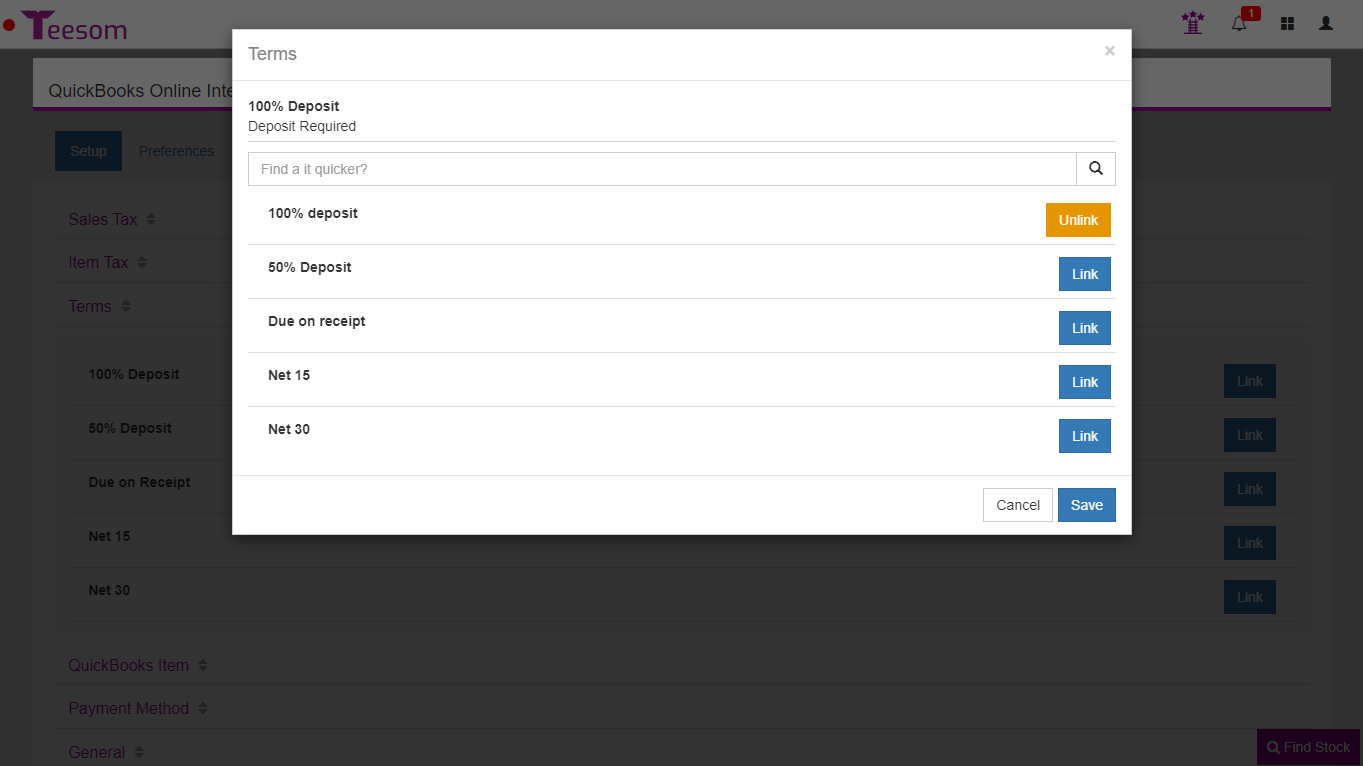
Click Link.
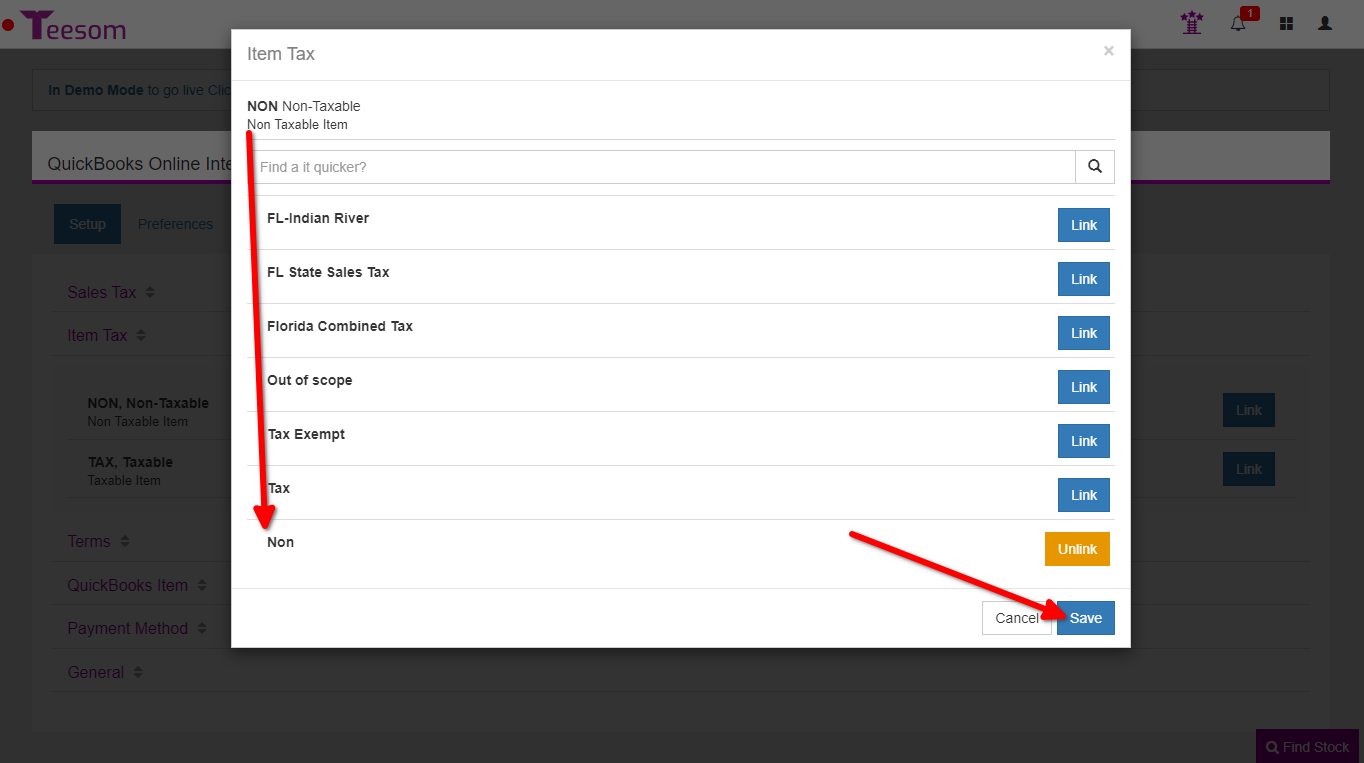
Find the matching tax code in QuickBooks and then click Link and Save.
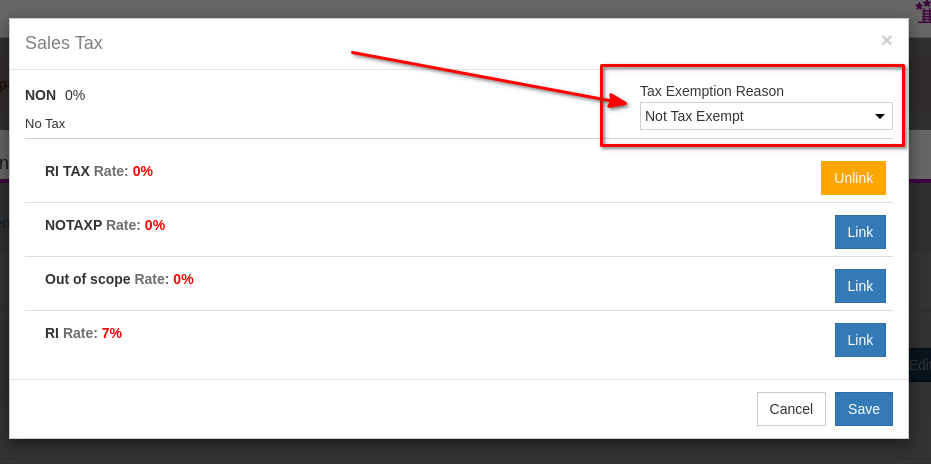
NOTE: When linking a 0% tax code, it is required (by Quickbooks) that you also specify the "Tax Exemption Reason" at the upper right:
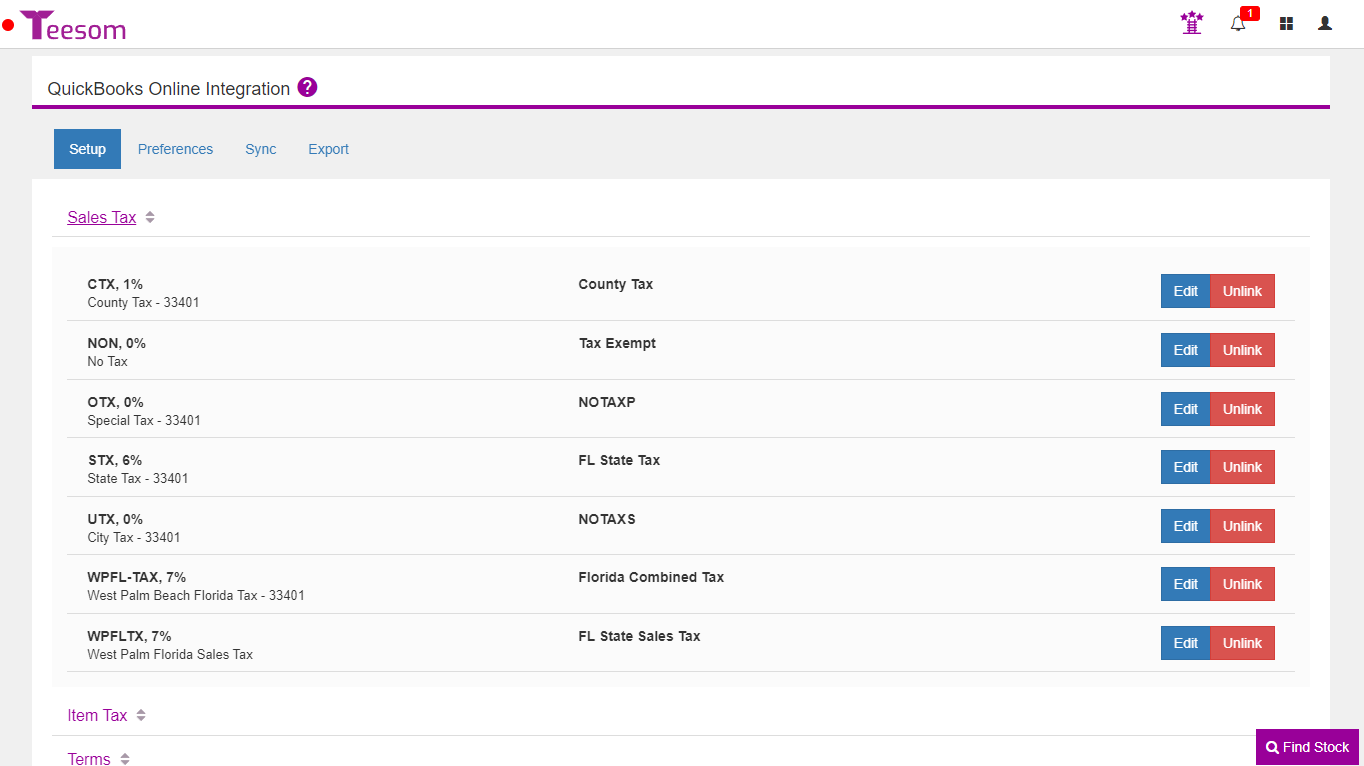
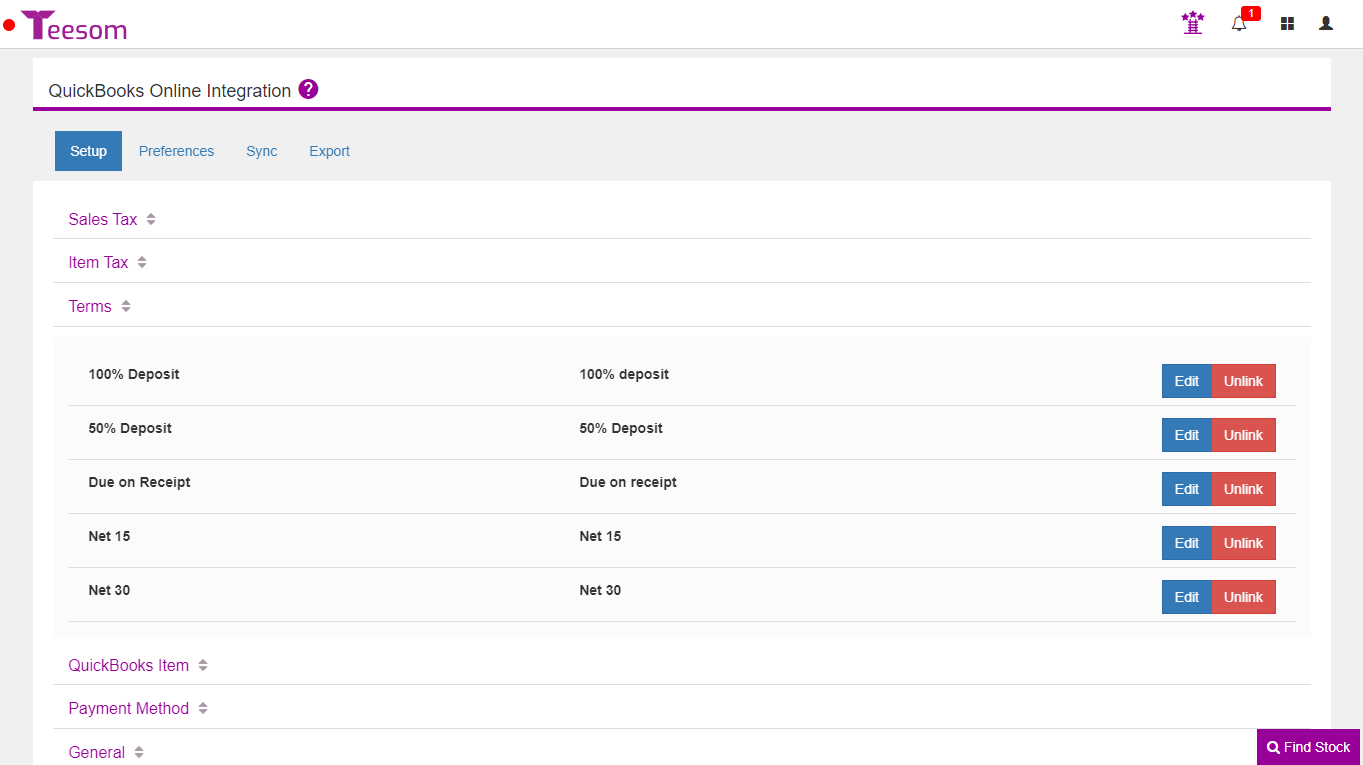
Repeat until all your Sales Tax Rates/Codes are linked:
To edit your Sales Tax rates in QuickBooks:
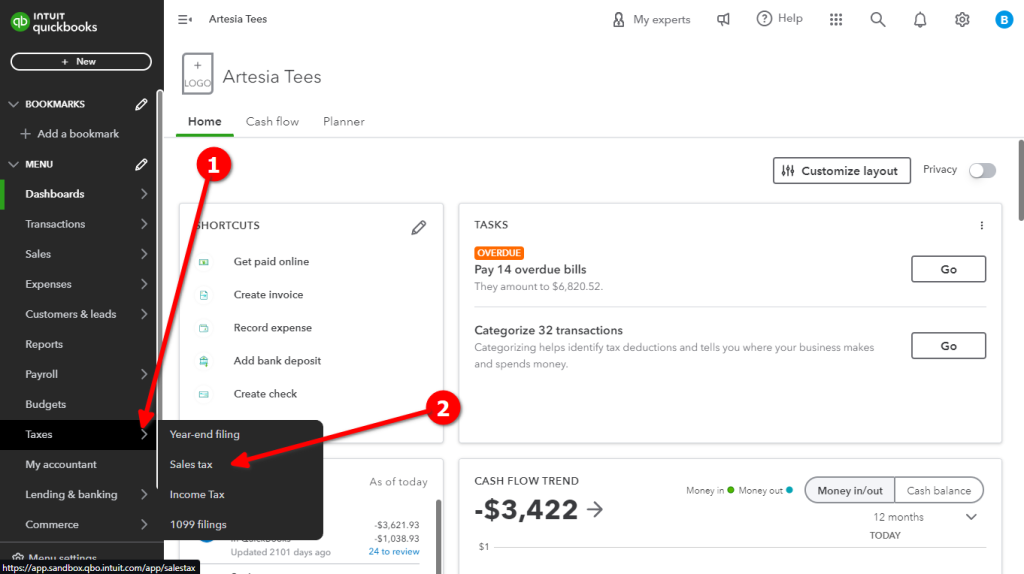
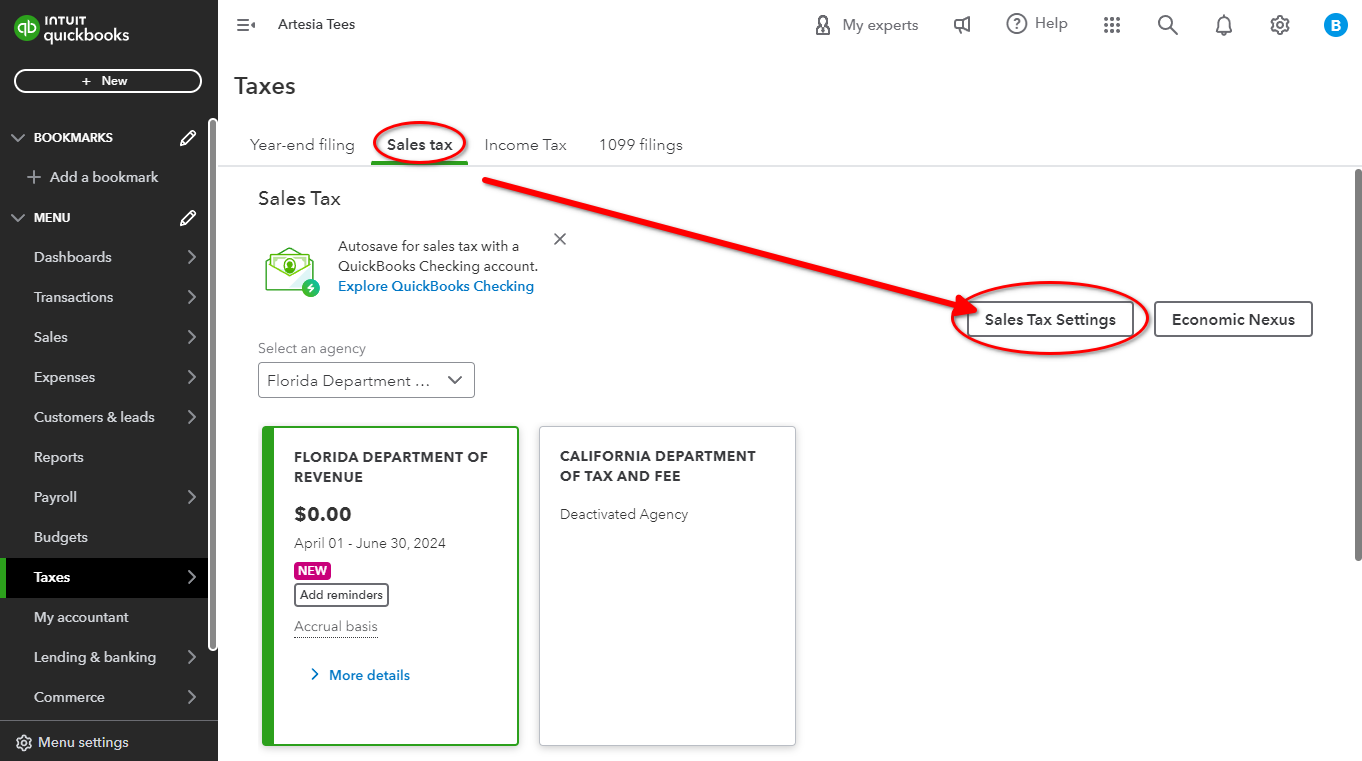
Login to your QuickBooks and then mouse over “Taxes” on the left-side menu.
Select “Sales Tax“.
Then select “Sales Tax Settings“.
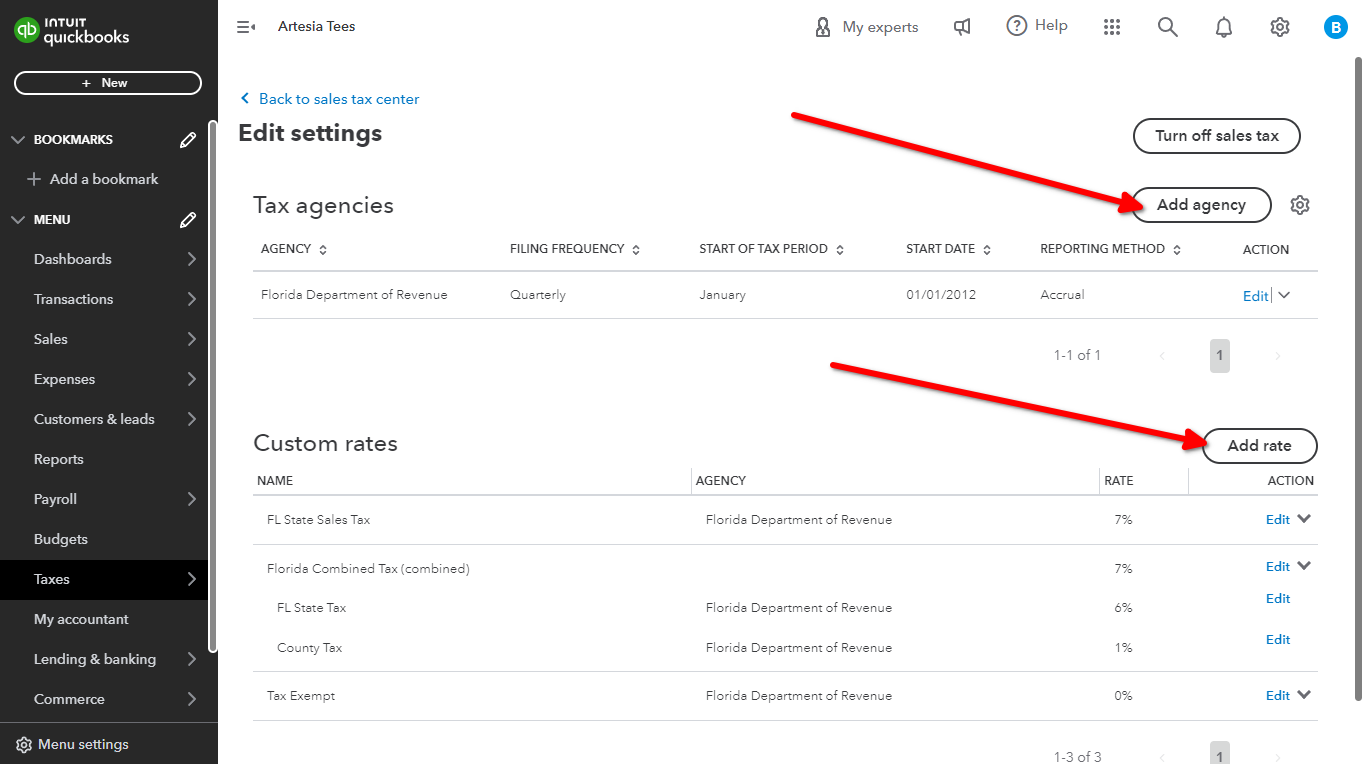
Here you can add/edit/remove tax agencies and tax rates in QuickBooks:
Click link and then link the relevant item from QuickBooks and Save:
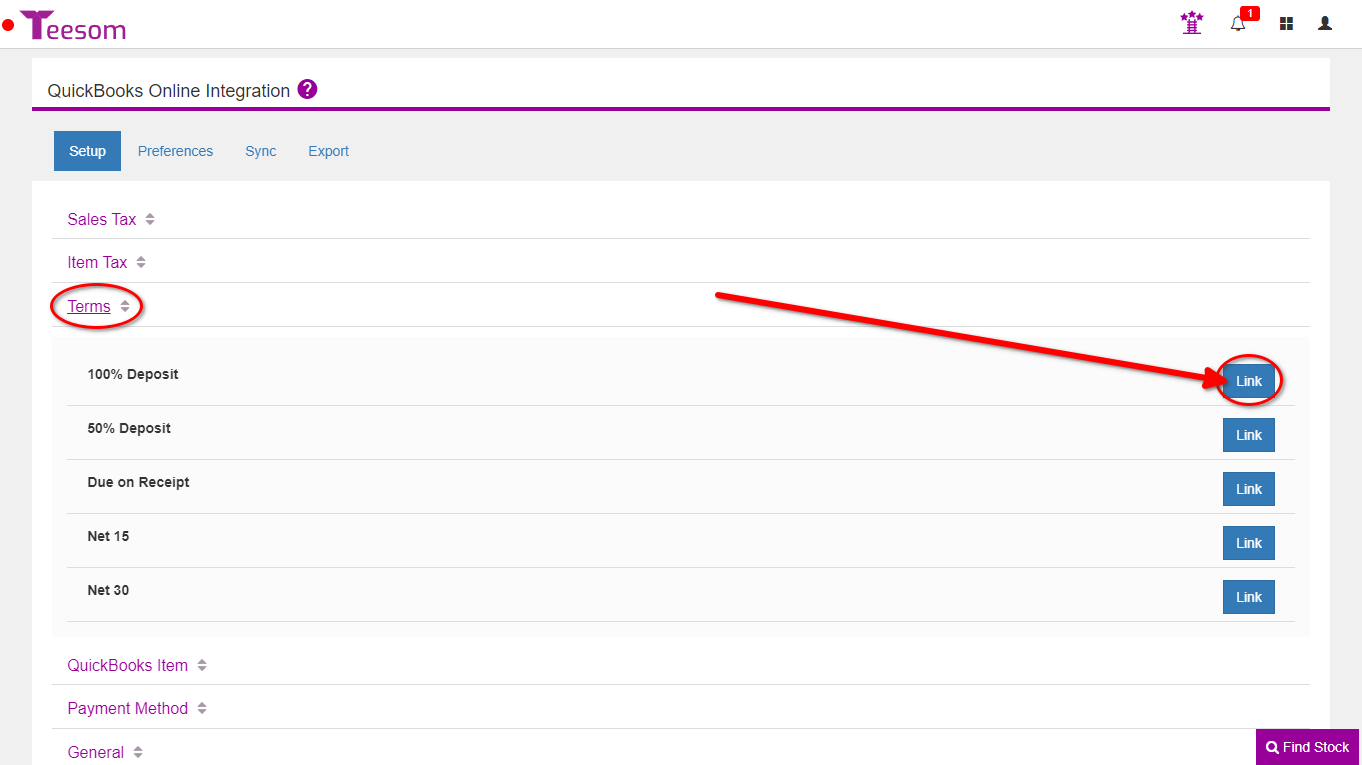
Link Terms
Link/unlink your Terms. You must have this setup in Teesom exactly as you have it in QuickBooks!
Make sure to link all your Terms before proceeding:
To update your terms in Quickbooks:
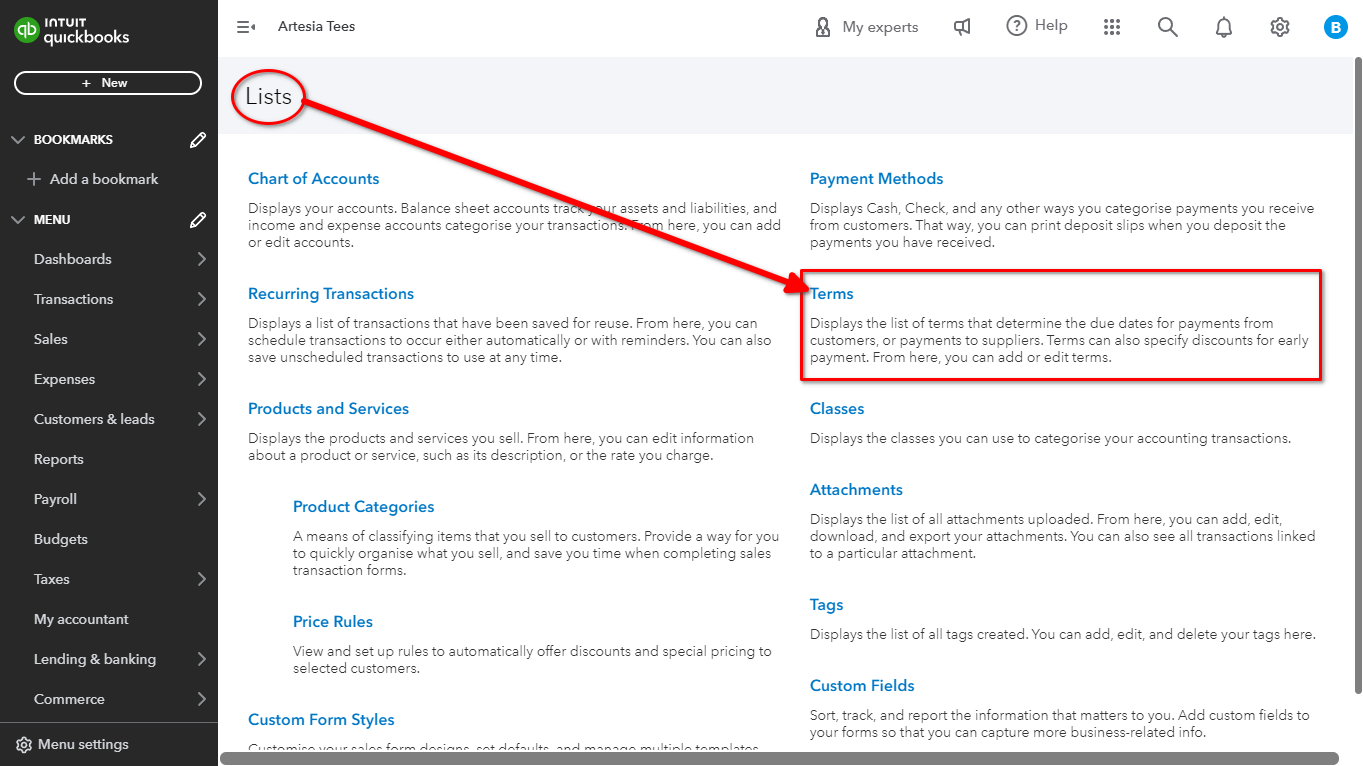
Click on the Settings cog wheel icon.
Select “All Lists“.
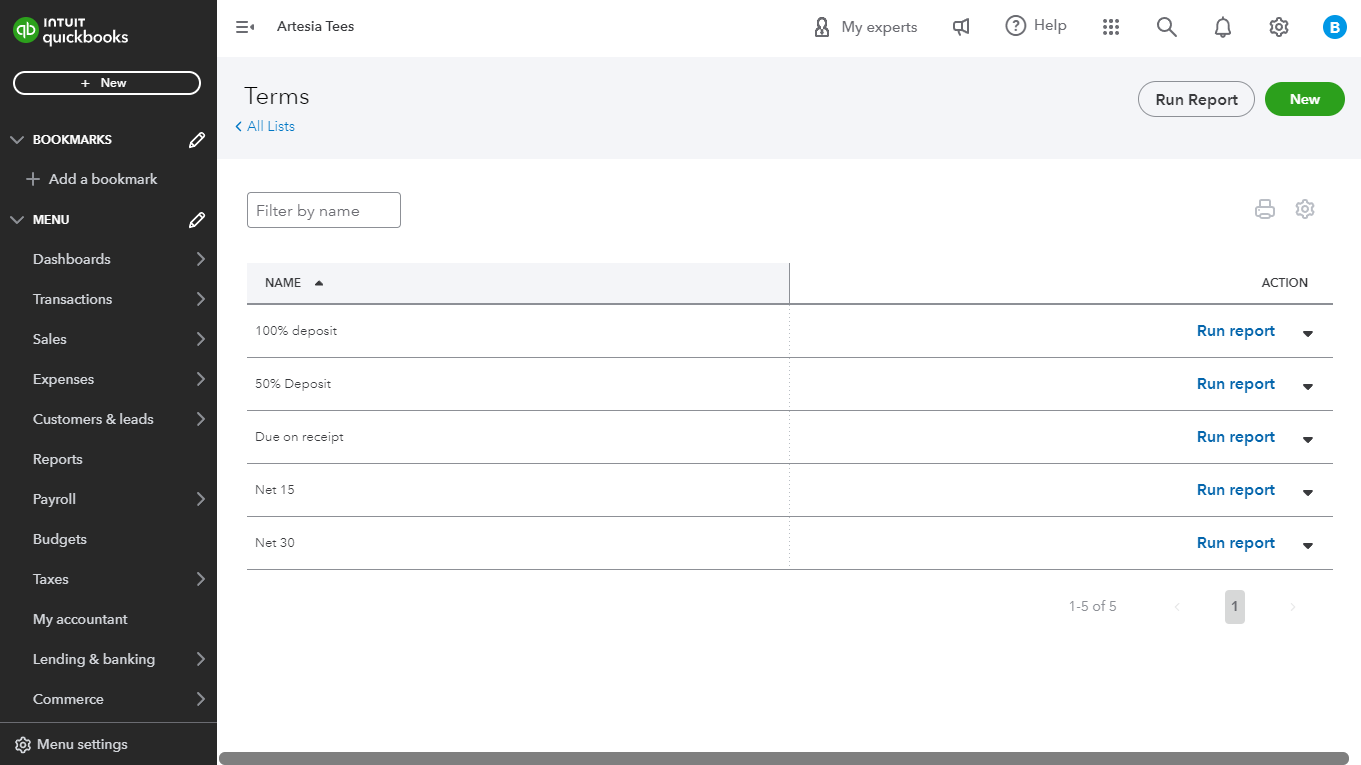
From the Lists page click “Terms”.
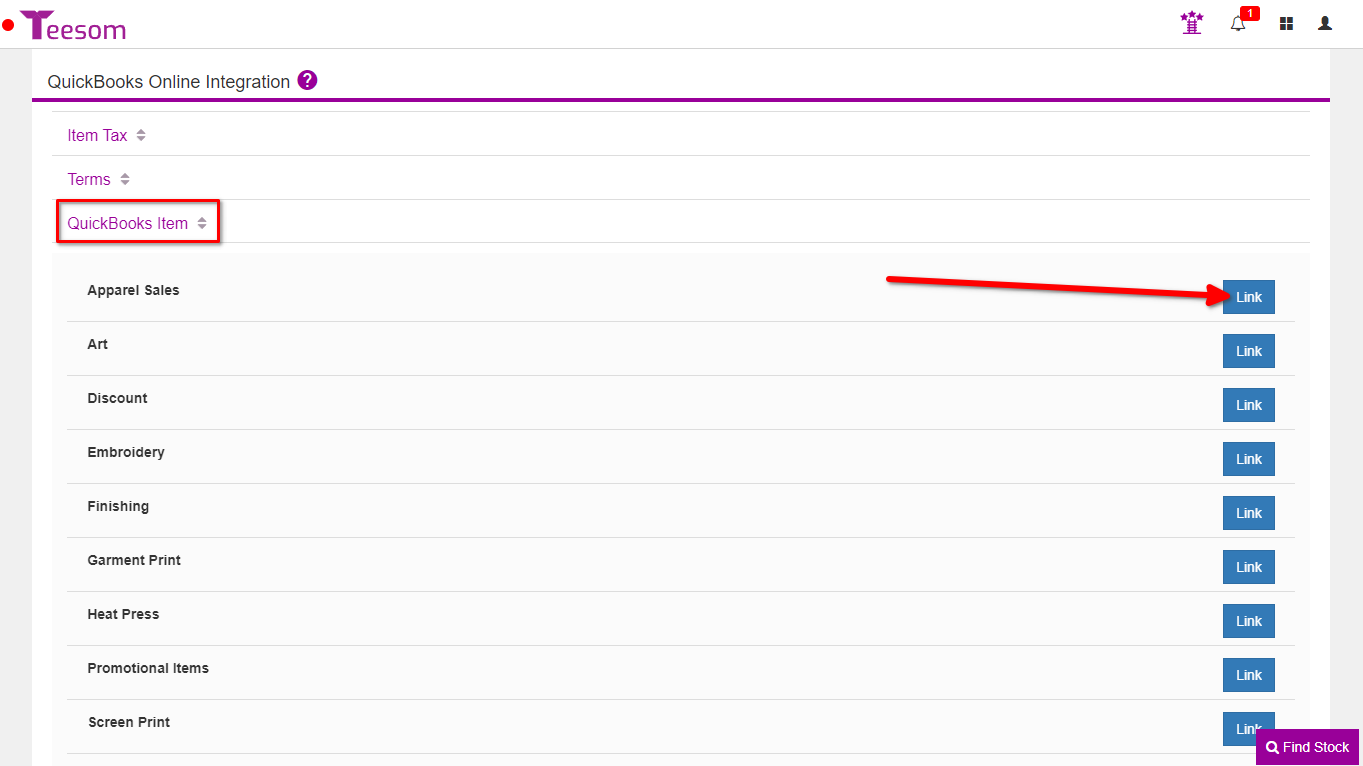
Link QuickBooks Item
Link the “Sales Categories” from Teesom with corresponding “Product & Services” in QB Online. All the Sales Categories you want need to be created on Teesom and have a mirror match on QuickBooks. Delete any Sales Categories you don’t plan to use in Teesom.
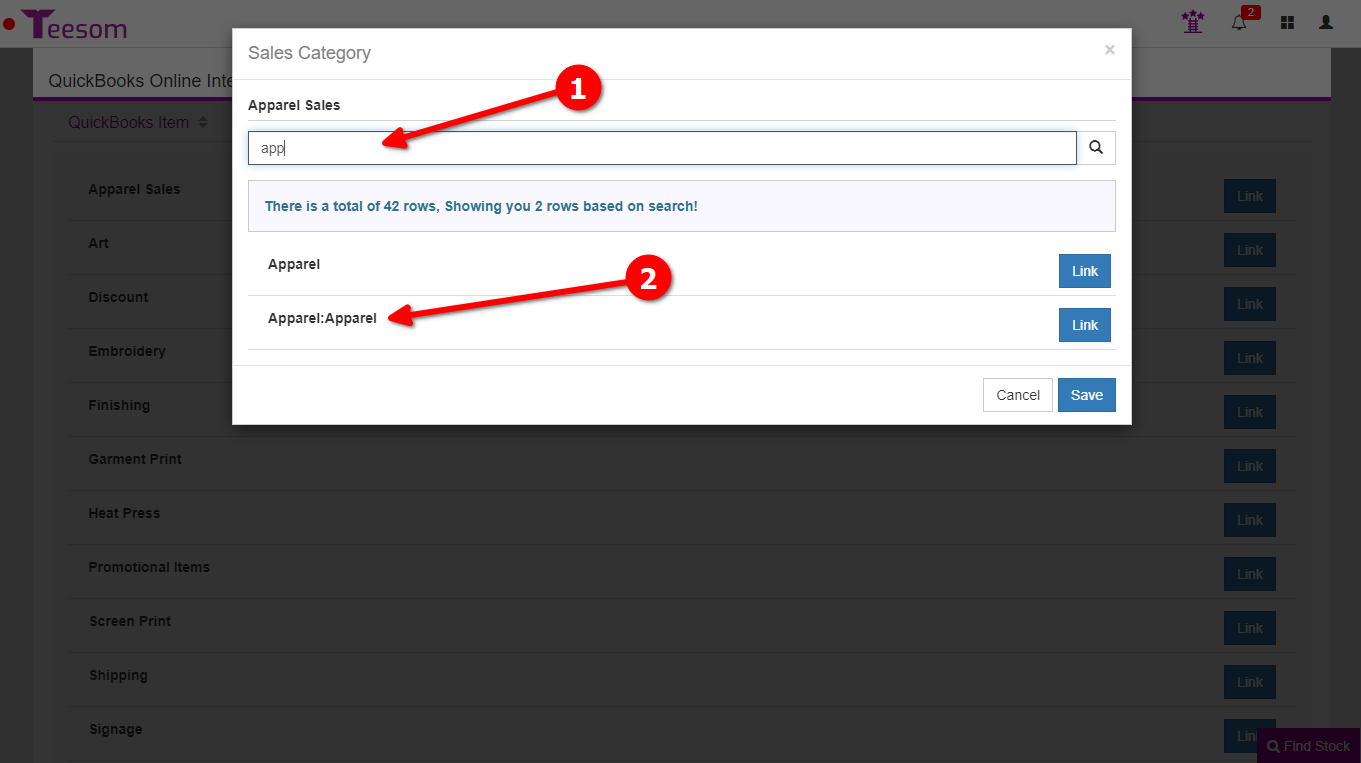
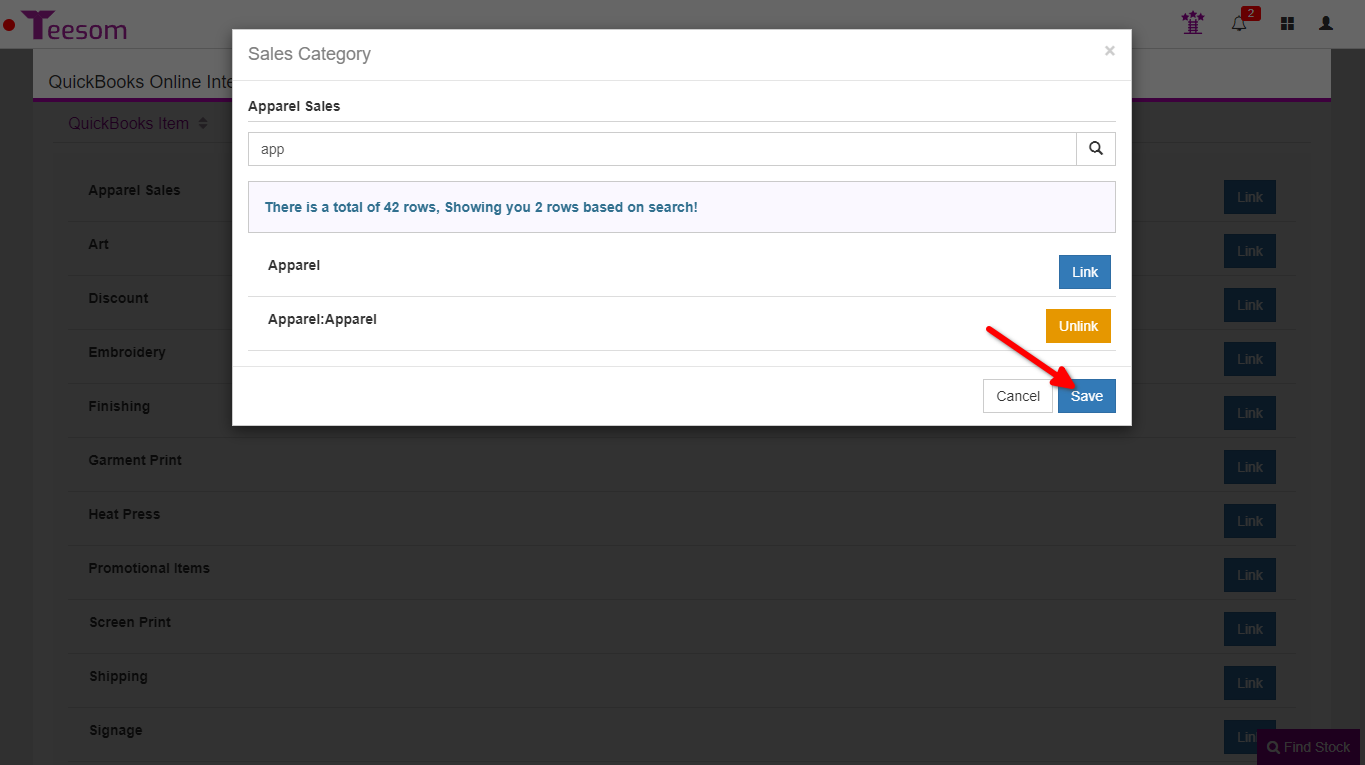
If your Product/Service code is under a category in QuickBooks, when you go to link it in the Integrator it will be displayed as follows Category:Code. You will want to make sure that when linking your Sales Category (Quickbooks Item) in the Integrator you link to the Product/Service Code (when one exists):
Search for the relevant product/service.
Click link on the relevant item. (In the example below “Apparel:Apparel” represents the service code, always use the service code when available.)
Click save after linking the service code and it will now be linked.
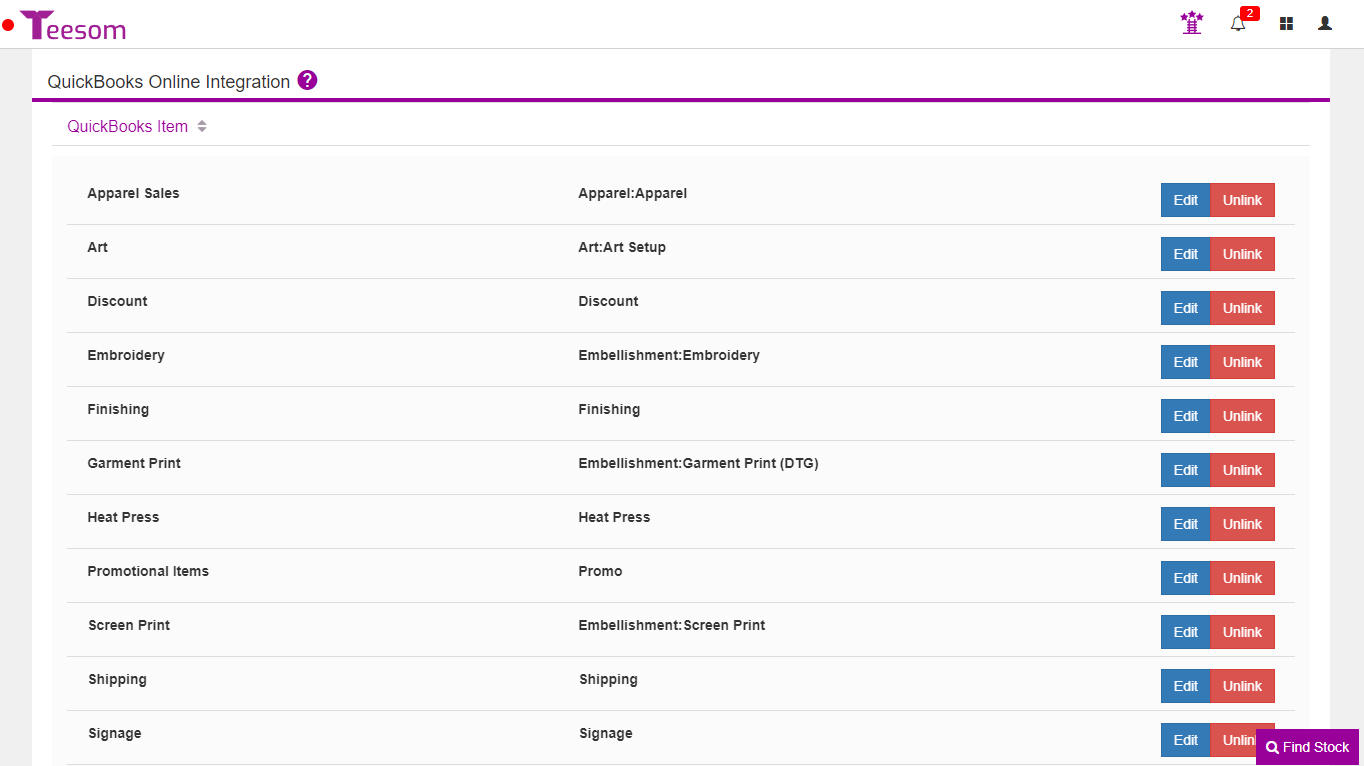
Continue until all your QuickBooks Items are linked:
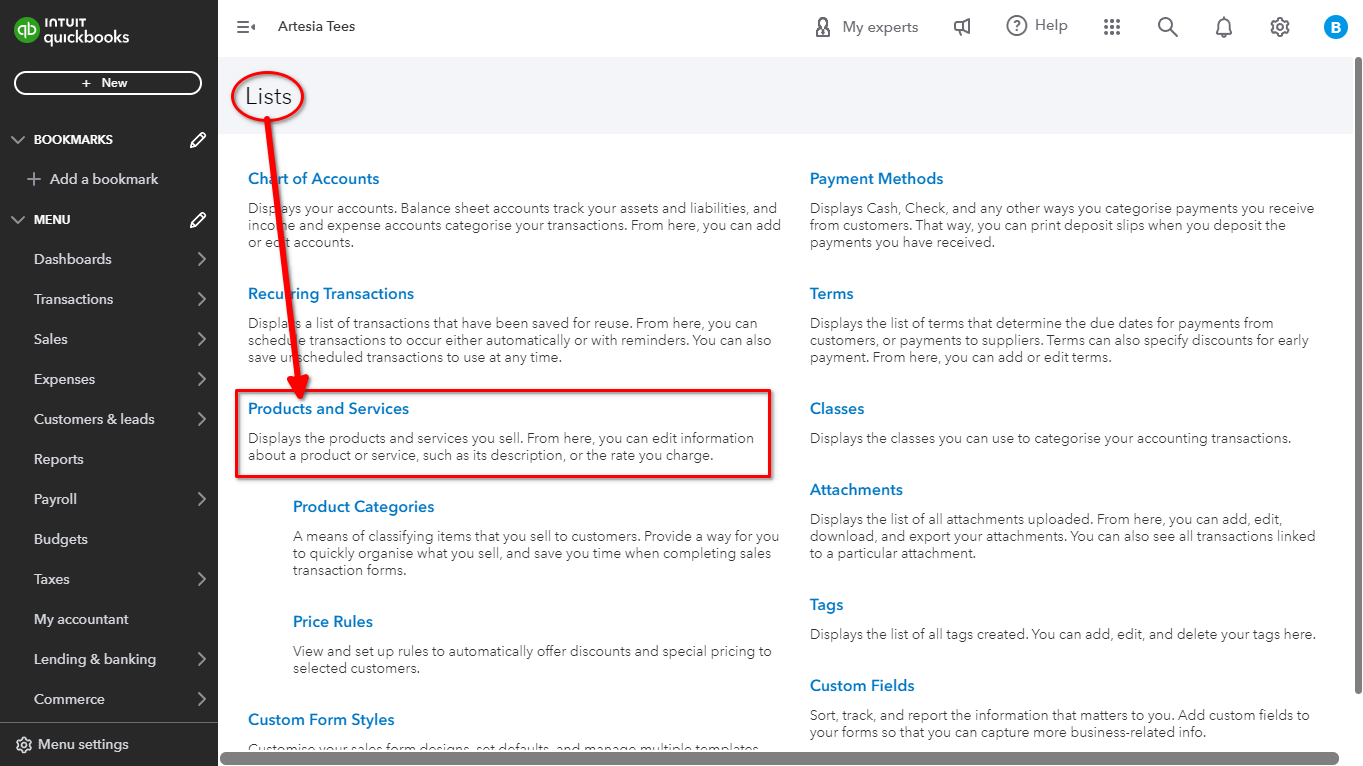
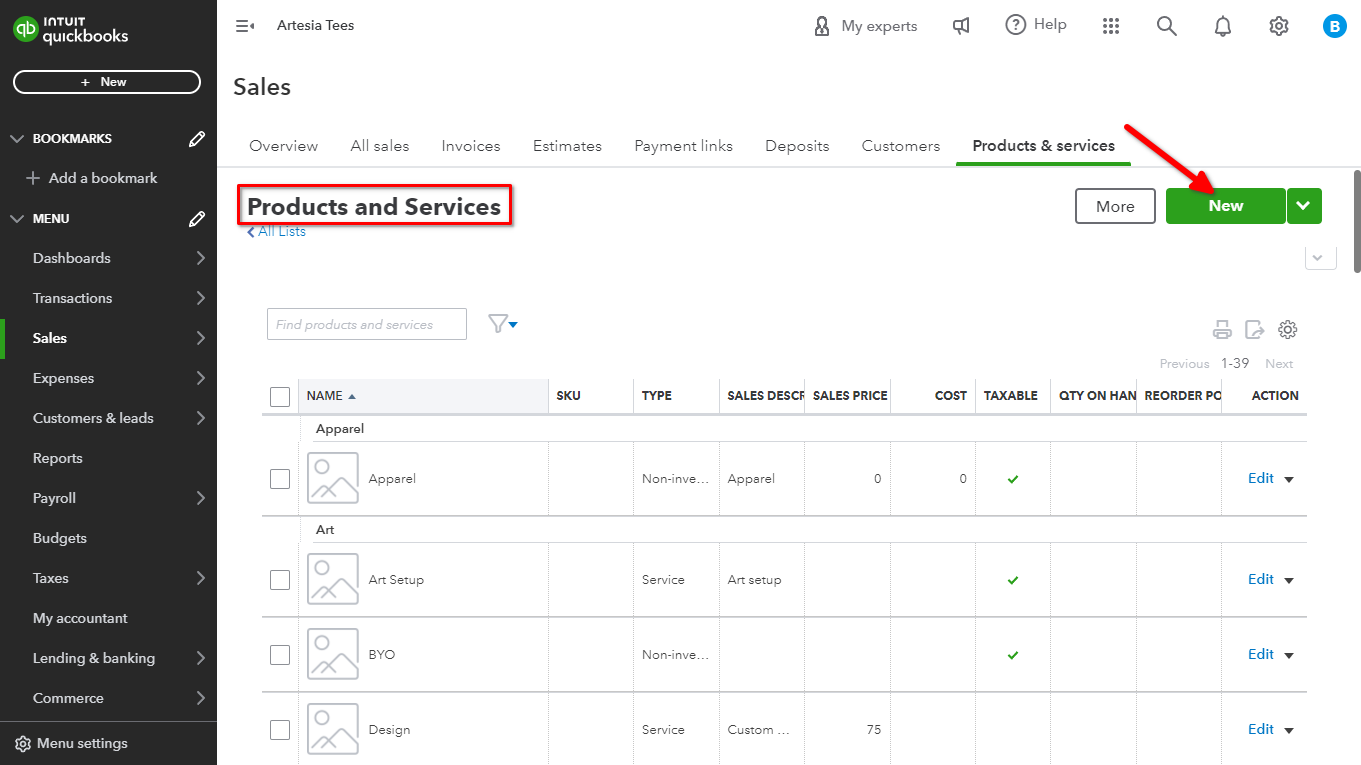
To update your Sales Categories/Products and Services in Quickbooks:
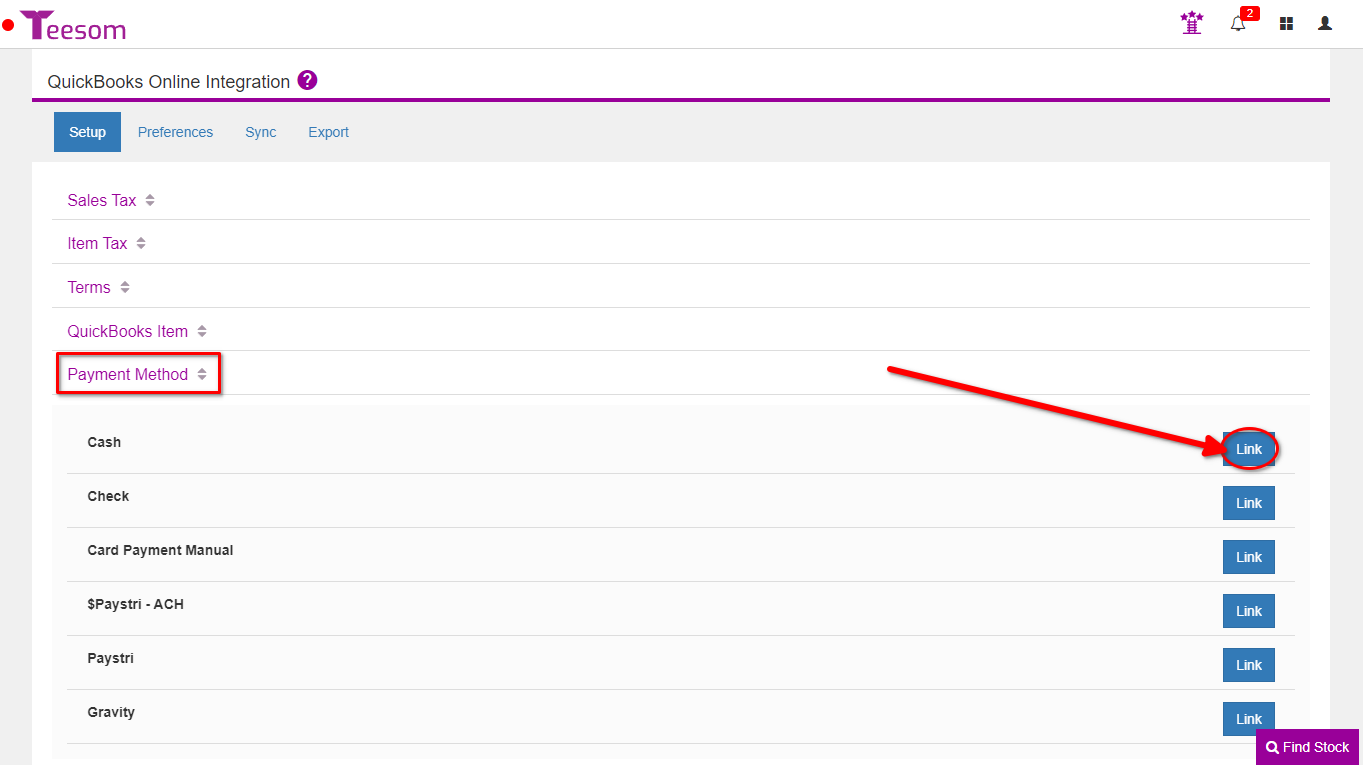
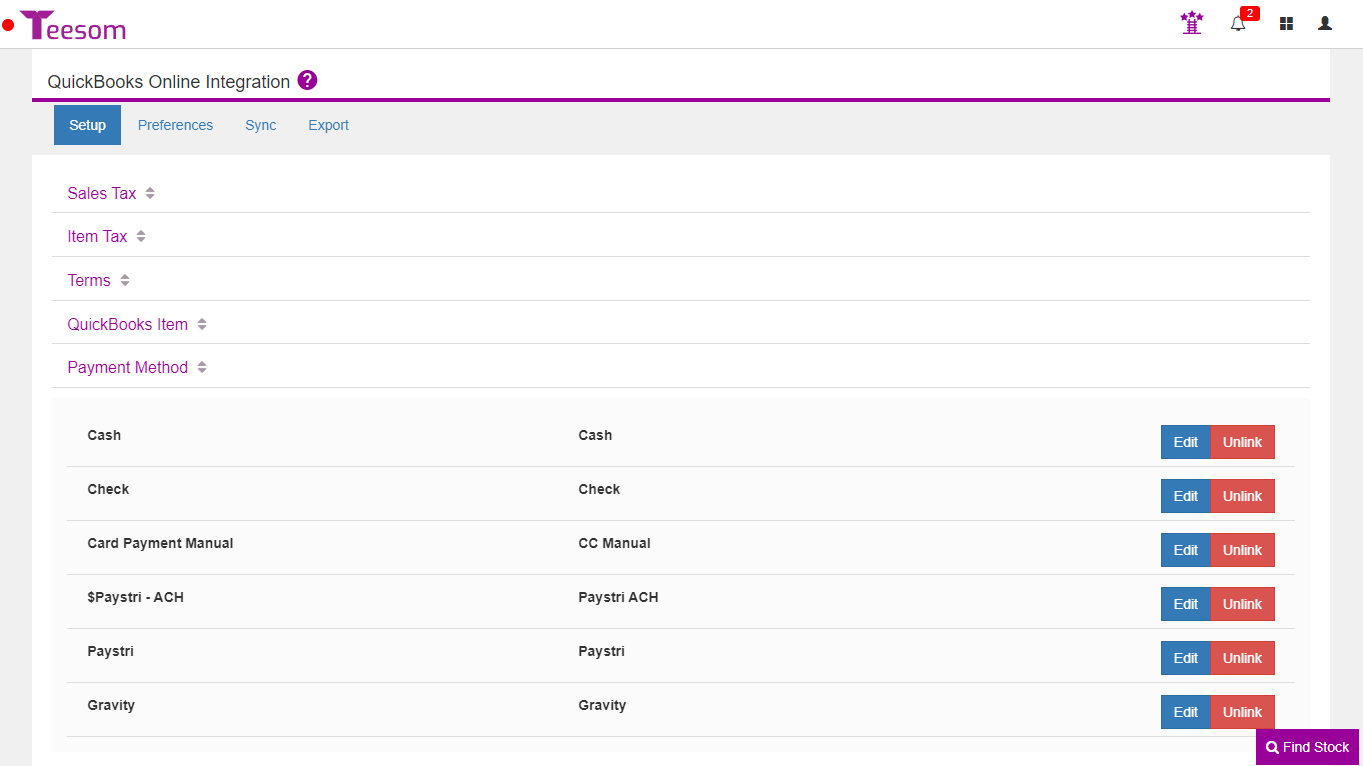
Link up your Payment Methods to the corresponding ones in QB.
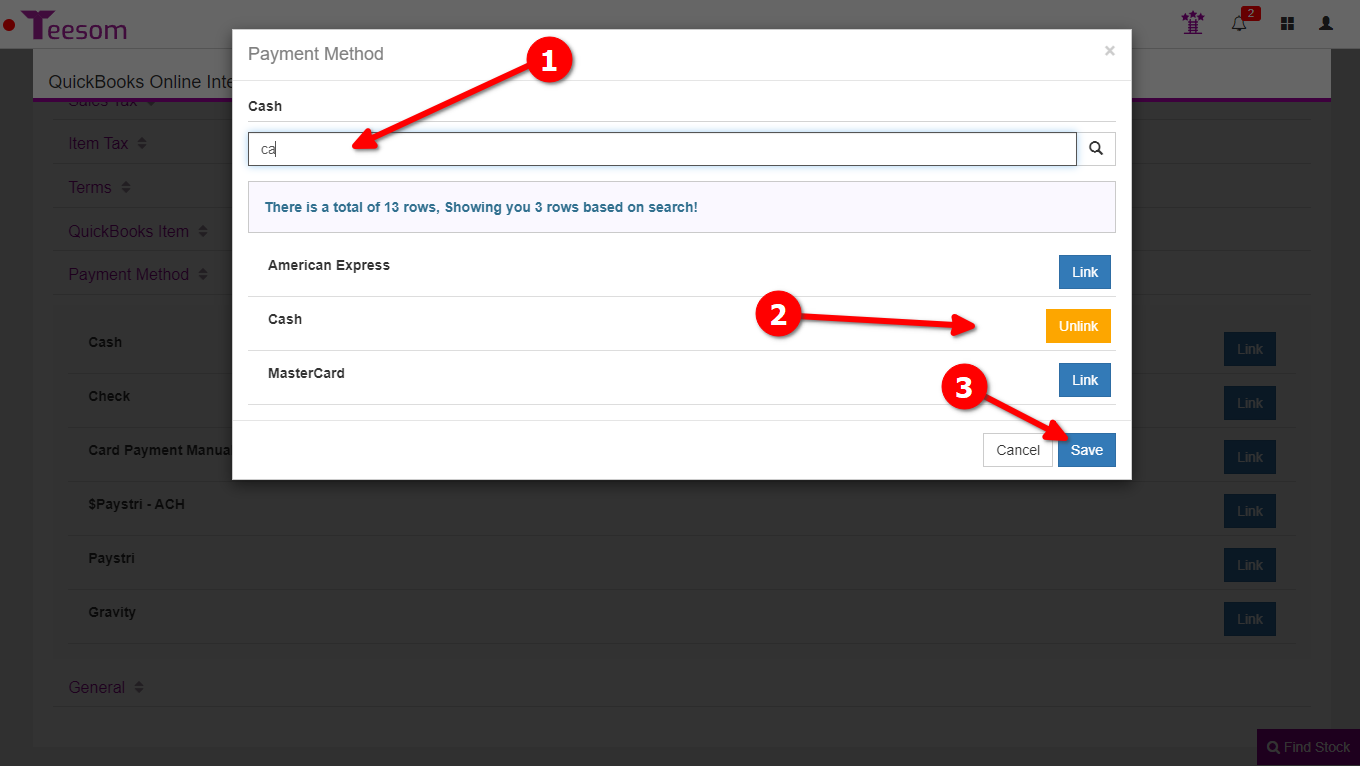
Search for the payment method in QuickBooks to link to.
Click Link on the relevant payment method.
Save.
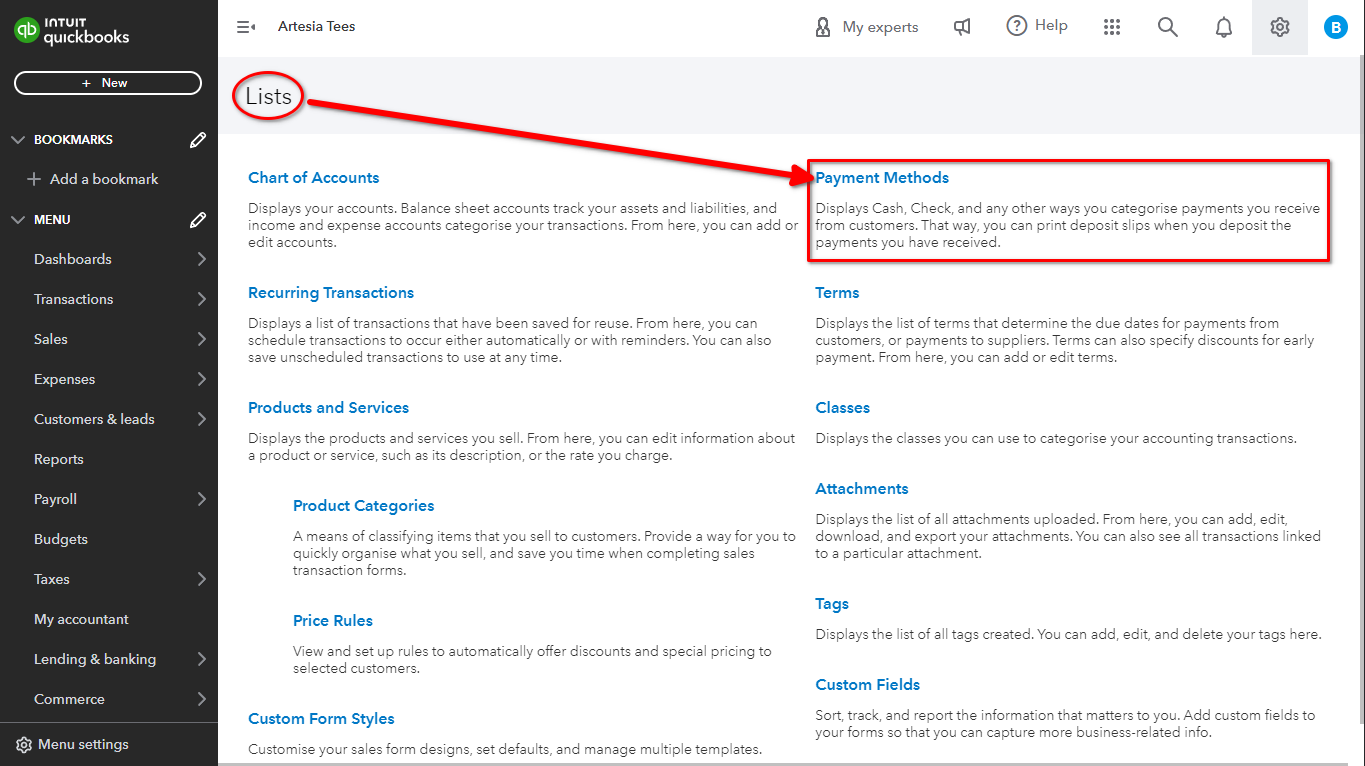
To edit your Payment Methods in QuickBooks:
Click on the Settings cog wheel icon.
Select “All Lists“.
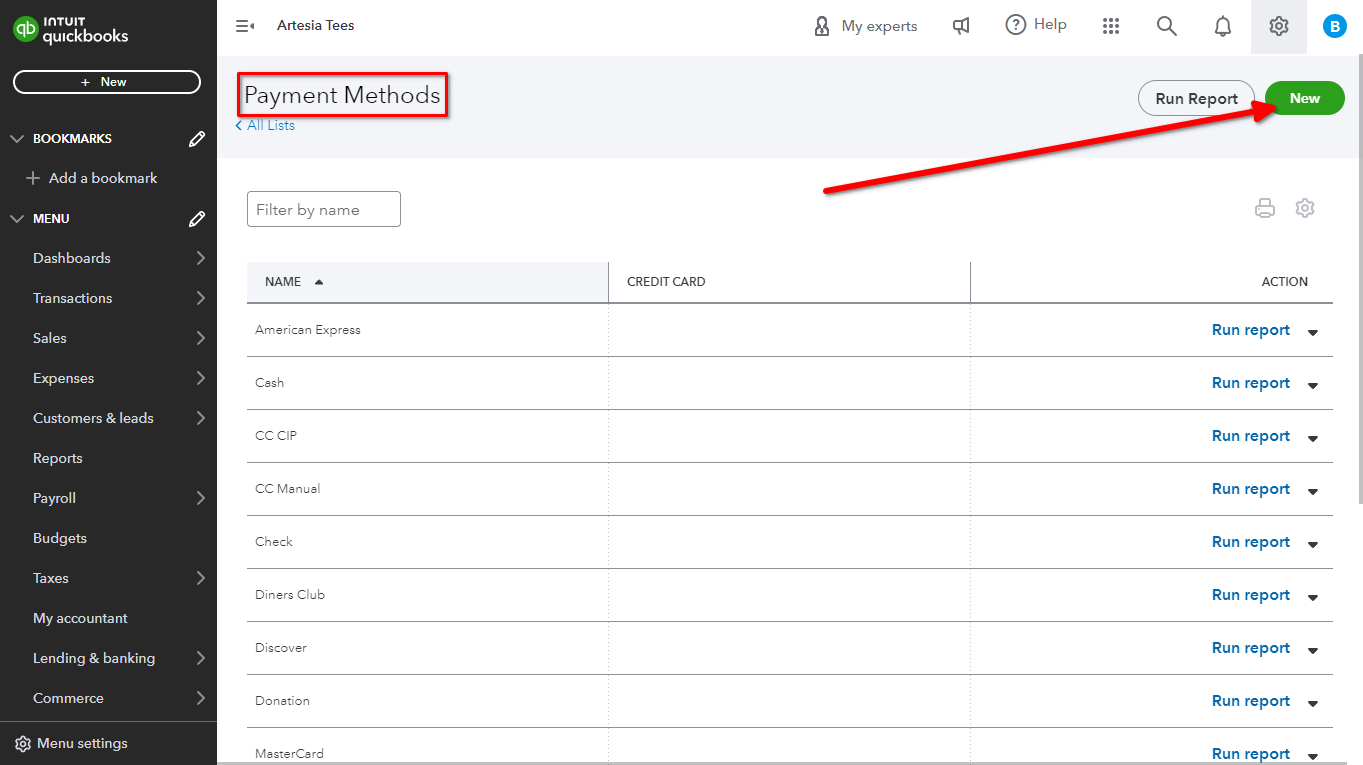
Click “Payment Methods”.
To add a Payment Method, click new:
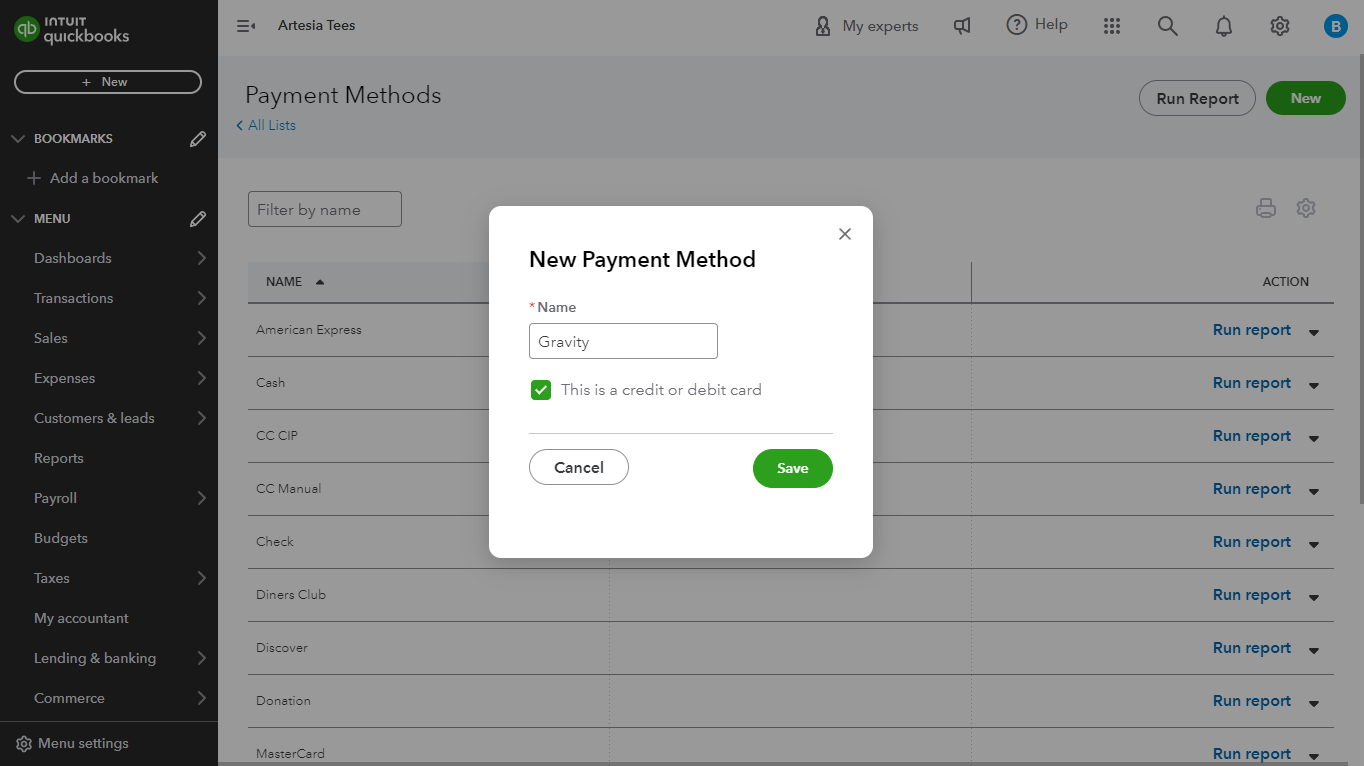
Enter the Payment Method name, check the box if it is a card payment, and then click save.
After adding the Payment Method on QB, refresh or open the QB Online Integrator in Teesom to then see and link the Payment Method.
General - Import Customers
Import your customer list from Quickbooks into Teesom. (*** Importing Customers from QuickBooks to Teesom is THE ONLY thing that happens from QuickBooks to Teesom. Everything else is Teesom to QuickBooks, export.)
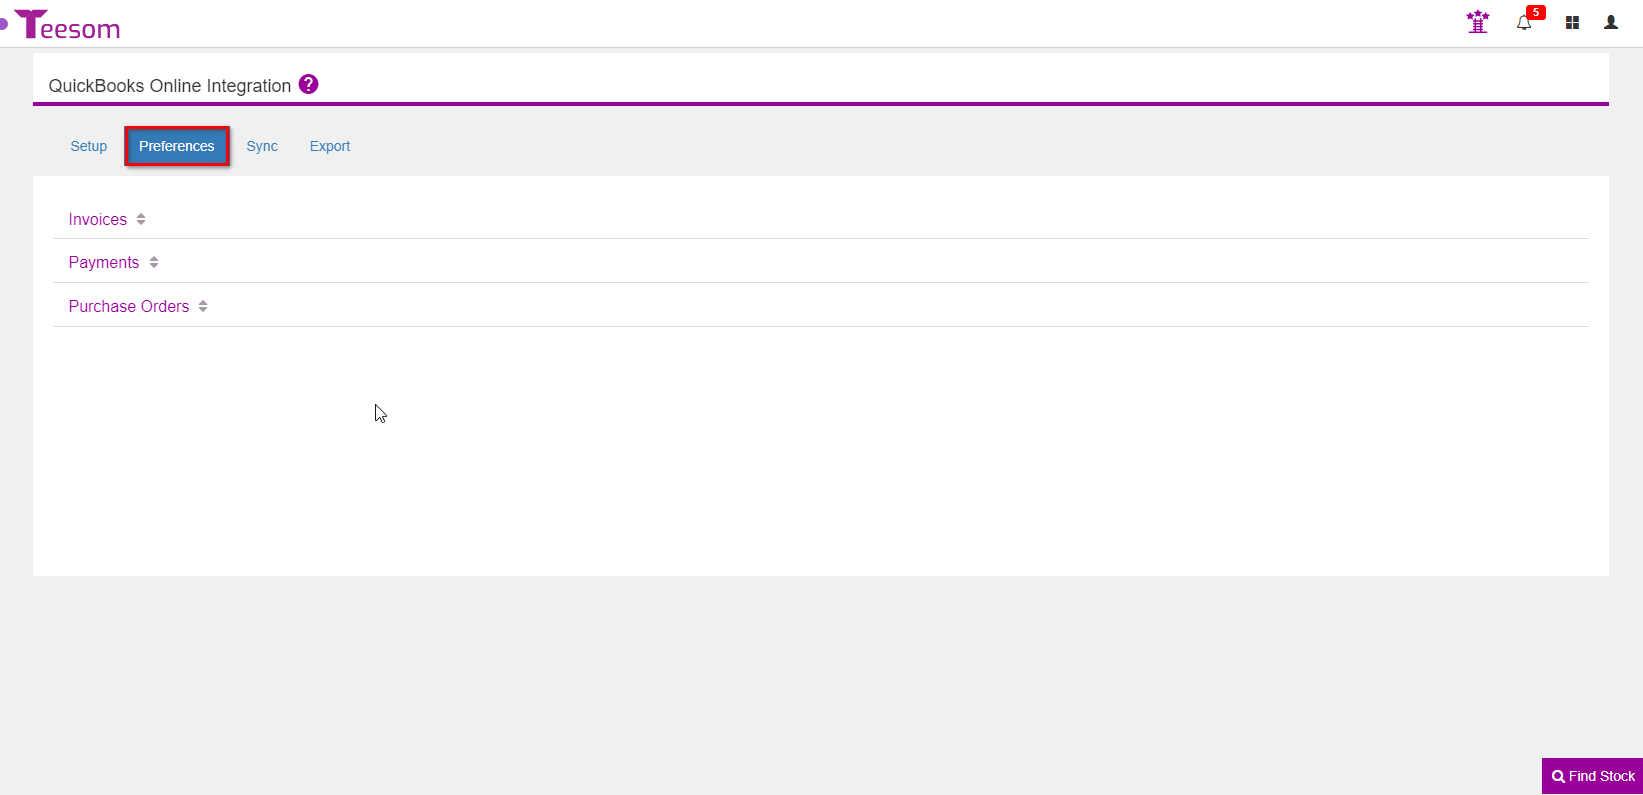
On the “Preferences” tab you can set up your preferences for when you export to QuickBooks Online:
Invoices: Expand to view all the different preferences you can set for when you export invoices.
Payments: Expand to view all the different preferences you can set for when you export payments.
Purchase Orders: Expand to view all the preferences you can set for when you export purchase orders.
We will go over this in more depth later in this tutorial series.
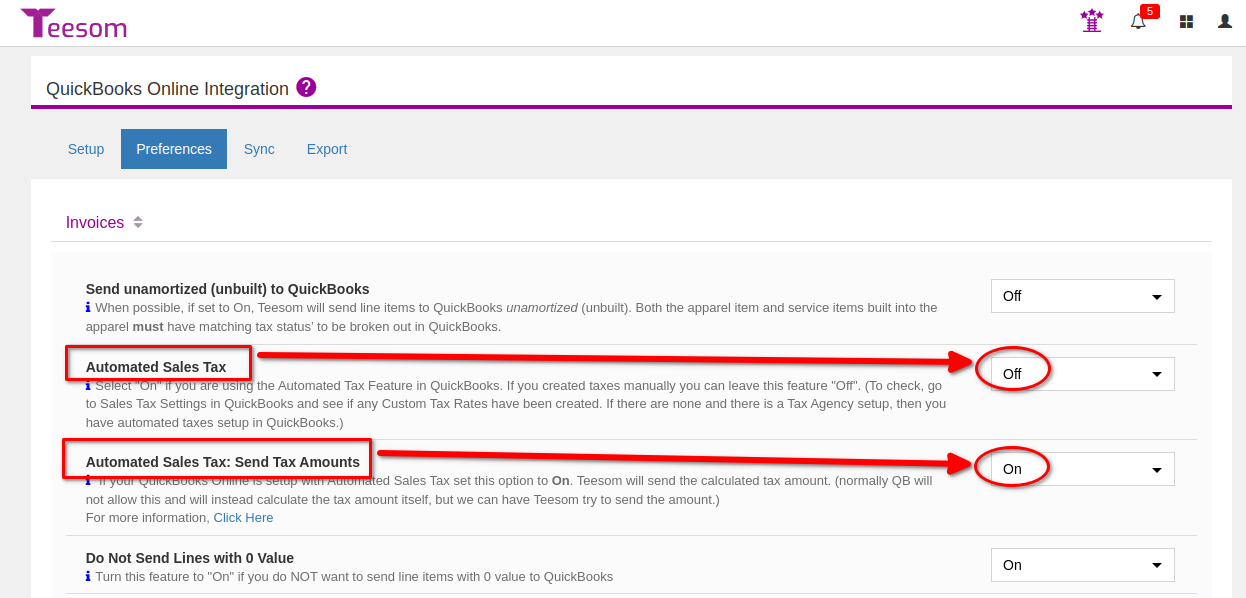
NOTE: If your QuickBooks Online has "Location Based Tax" enabled, you should turn "Automated Sales Tax" to OFF and "Automated Sales Tax: Send Tax Amounts" to ON in the integrator =>
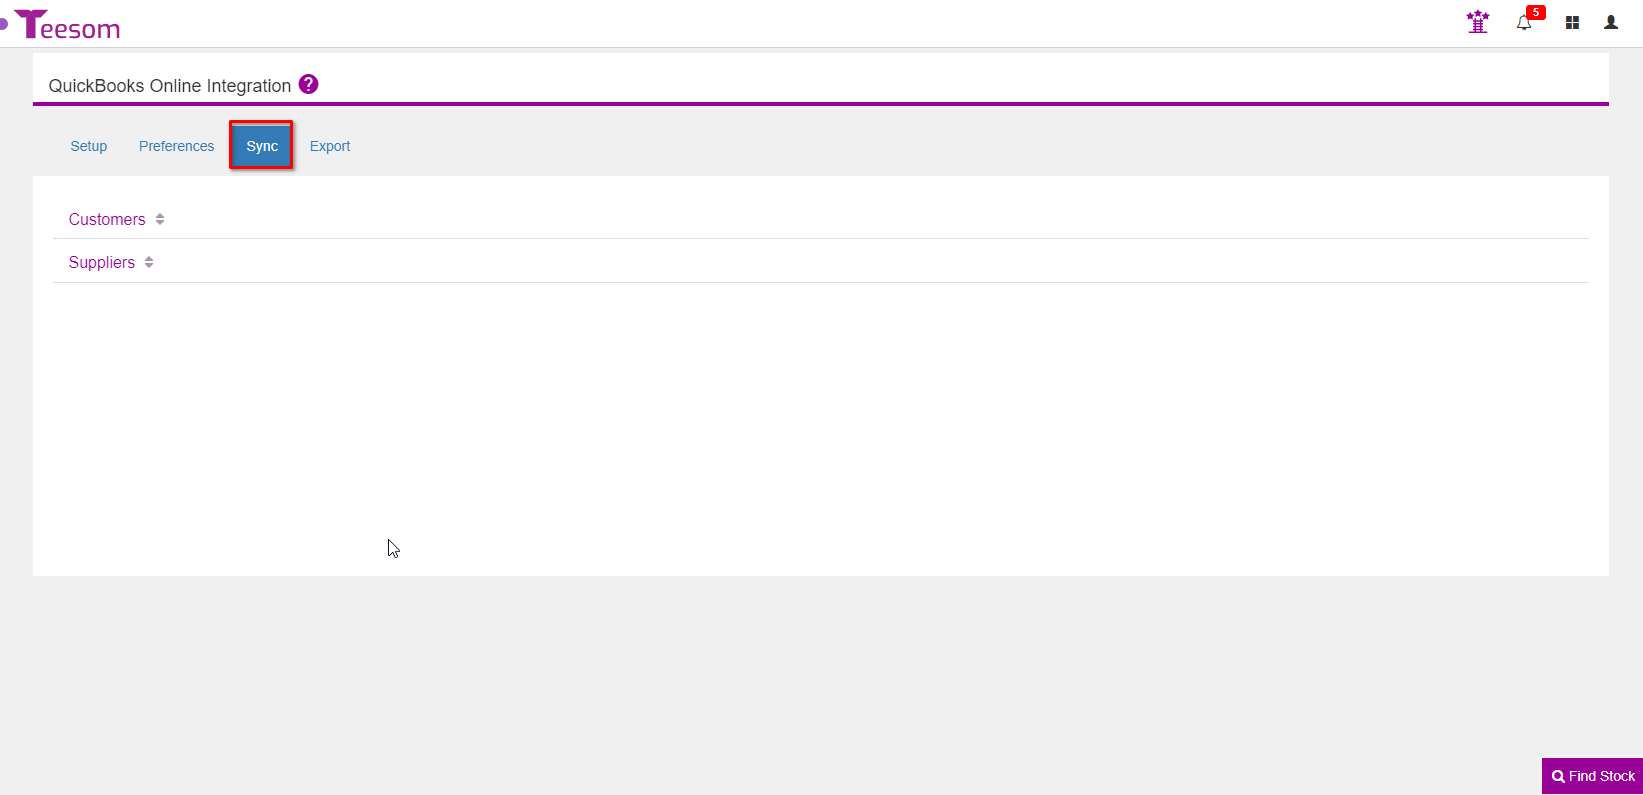
Sync
On the “Sync” tab you can link up your:
Customers: Expand to view a list of all your customers in Teesom.
Suppliers: Expand to view a list of all your suppliers in Teesom.
In QuickBooks Online, we will go over this in more depth later in the tutorial series.
Export
The “Export” tab is where you will export your:
Invoices: Expand to see a list of all your invoices that you can export and those that have already been exported
Payments: Expand to see a list of all your payments you can export and those that have already been exported
Purchase Orders: Expand to see a list of all your purchase orders you can export and those that have already been exported
To QuickBooks online, we will go over this process in more depth later in the tutorial series.